Gels for modeling. Types, functions, purpose
The most commonly used materials for three-dimensional design modeling are 3D, 4D gels, as well as sculptural ones. They have the following nuances:
- 3D
: differs from classic gel in a denser and more flexible structure. This is what is chosen for baguette (frame) modeling. - 4D
: has a dense texture similar to hard plasticine. Modeling with it is done in conjunction with a cleanser (liquid for cleaning brushes) to treat the brush (dotsa), since the gel sticks to the tool and hands. - Sculpted
: used to create artificial nails. These materials are viscous and not self-leveling. They require sanding to level the surface, but do not require a topcoat.
At the moment, the development of manicure techniques is aimed at simplifying work with any material. And it is 4D gels that are the type of decor that is as simple and clear as possible to work with even for self-taught craftsmen. The technique of working with this dense mass that holds its shape perfectly is developed quickly. And the finished figures amaze with their stylish and spectacular execution, no worse than in an expensive salon. In order to create luxurious designs at home yourself, you need to know all the intricacies of gel plasticine. Namely…
Acrylic sculpting on nails: features of manicure
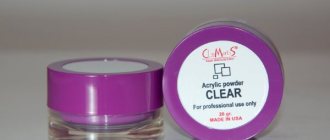
Acrylic modeling has been pleasing women with its unusual design for decades. The acrylic extension system consists of powder and liquid (monomer).
The combination of these two materials occurs directly at the moment of building up or creating a three-dimensional design.
Acrylic powder can be colored, transparent, translucent, or contain glitter. A wide range of powder colors allows you to create bright designs to suit every taste.
Types of acrylic modeling:
- Aquarium sculpting involves the presence of a three-dimensional design inside an artificial nail. First, decorative acrylic elements are placed on the nail, and then the design is filled with a transparent acrylic layer. The advantage of this type of sculpting is that the nails do not cling to clothing; the disadvantage is that the nail plate is too thick.
- Volumetric acrylic sculpting on nails is a more popular option. Nails look as natural as possible, and the volume of the design is perceived very clearly. The disadvantage can be considered inconvenience in everyday life due to protruding elements that cling to fabrics.
We recommend: Fashionable manicure 2016: current length, color and nail design
What you will need for acrylic sculpting:
- flat brushes for modeling;
- liquid;
- acrylic powder of different colors;
- napkins;
- decorative elements, glue.
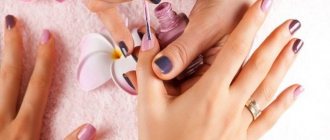
How to prepare your nail?
Similar to gel, acrylic modeling is performed on extended nails (gel, acrylic) or coated with gel polish.
Step by step technique:
| Step 1 Prepare your nails for creating a composition with acrylic (extension or cover with a layer of gel polish). |
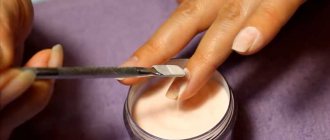
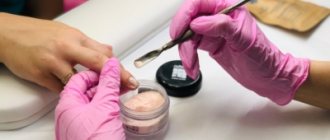
| Step 2 Dip a thin brush in liquid and dip it into a container of acrylic powder. Twist the brush so that a small lump forms on it. |
| Step 3 Place the lump on the nail plate in the place where the design element will be formed. Use a brush to straighten the lump, creating a three-dimensional fragment of the composition. If it dries out, soak the brush in liquid and continue working. |
| Step 4 Repeat for the rest of the drawing. |
| Step 5 If desired, glue decorative elements: beads, rhinestones. |
| Step 6 Acrylic sculpting is usually not given a topcoat unless it is an aquarium design. But some masters cover the nail plate with a top gel layer and dry it in a UV lamp. Thus, the volumetric pattern acquires a glossy shine. |
Volumetric design: advantages of using 4D gel
The new generation of gels for nail design, as an alternative to classic acrylic sculpting, has many advantages in operation.
- They allow you to create any shape without rushing to work out the details. This material does not dry instantly in the air and does not spread over the nail like water. That is why this is the best “training” product for those learning the basics of nail art.
- Since the creation process is quite time-consuming, the master doing the modeling will certainly appreciate such a bonus as the absence of a pungent odor. If you need to sculpt fragile elements, it is also convenient that you can make the thinnest details without spoiling the material. With this approach, the illusion of glass decor, as if glowing from within, is achieved.
3. The newest gels allow you to create jewelry that does not cling to clothing or hair with sharp tips and edges. 4D decor is stronger and more durable, resistant to external influences, and is not susceptible to chipping or color fading. The other side of the coin is the need to carefully and accurately file away a dense pattern without damaging your nails.
We create beauty
Nail sculpting must be done with high quality. You should not skimp on materials, otherwise it will be impossible to process small parts.
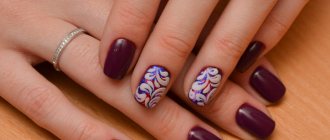
Petals using 3D gel plasticine
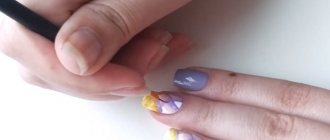
Sculpting must be done on a finished nail, which is completely covered with topcoat and the sticky layer has been removed from it. When working with plasticine, you must wear medical gloves.
- Use a dot to collect 3D gel and roll it into a ball. Place it in the place where the first petal (or any other element) will be.
- Use a thin synthetic brush to distribute the material, carefully pressing the petal from the middle to the edges.
- Make one petal at a time and immediately put it in a lamp to dry so as not to spoil the entire composition.
- Now pick up the second ball in the same way. Start flattening it with a brush from the center.
- Now you need to decorate the resulting composition. Apply gel polish to the palette to match the base or darker and carefully darken the middle of the petals, painting them a little.
- Mix regular micro-gloss with topcoat and apply to the middle of the element.
Roses with plasticine
- Buff a little in the place where the roses will be.
- Scoop up the gel plasticine with a pusher or a bamboo stick and place the required amount on the nail.
- Dip a straight brush in liquid for a sticky layer, remove excess on a wet napkin.
- Distribute the gel plasticine, making a circle, not pressing too hard.
- Dip the dots in clinser. And squeeze out the rose in a spiral shape in a circle. When the gel begins to stick to the dots, moisten it in a cleanser. Moving in a spiral, you need to end in the center.
- Using a flat gel brush No. 4, press down a little on the petals, starting at the edge and then moving in a circle. Try to do this unevenly to create volume.
- Decorate the finished composition with rhinestones and broths.
Acrylic flowers
Sculpting acrylic nails is done using a monomer and a brush.
- Dip the brush into the monomer. For a large acrylic ball, you need to wet the brush well; for a small one, you need to squeeze it out so that it has a sharp nose.
- Place the brush in acrylic powder.
- Place the ball on the nail and wait until the acrylic becomes matte.
- After this, mold any shape from the ball. If it is a rose, then with light slapping movements we make the layer thinner and go in a spiral.
- Use the nose of the brush to lift the petals so that the material is more vibrant and looks more voluminous.
- For the rose, take another smaller ball, place it on top and repeat the same.
- It is recommended to flatten the material a little so that the modeling is not thick.
- Apply top coat on top and inlay with rhinestones.
Acrylic sculpture.
Acrigel
Elastic mixture of acrylic and gel. This type of nail sculpting is quite easy to wear and small in height. If you don't have a special brush at hand, take a regular ballpoint pen that doesn't write. Wrap it with regular cling film. The cone in the handles will allow you to make competent petals.
- Distribute the acrygel onto the prepared nail.
- Use a brush to “cut off” each layer of the petal with smooth movements. Smooth, creating volume.
- Place the resulting composition in a lamp and decorate it to your liking with patterns or rhinestones.
Gel plasticine: features of performing and wearing volumetric manicure
In order to remain completely satisfied with this product, during the design process you need to remember and follow a few simple rules.
- Depending on the thickness of the figure, each created element of the composition must be dried separately for at least three to four minutes. In this case, during the laying out process, extreme care must be taken so that individual parts of the pattern do not merge with each other during polymerization.
- A degreaser will serve as an eraser to correct unevenness of a particular element. The alcohols in its composition will make the gel more plastic. However, you are not limited in the number of correction attempts. Because without baking (even in direct sunlight or a bright lamp on the table), the 4-D gel will not harden.
- Maintaining hygiene during the sculpting process will allow you to achieve an ideal result. Wash your hands thoroughly before creating decor. And treat the fingertips that you will use to knead and form the gel with a cleanser. Any foreign particles and dust can spoil the color of the sticky 4-D gel.
- When choosing a tool for work, give preference to a hard silicone brush, plastic stick or dotsu, as a soft brush will not provide enough pressure for sculpting.
- If your painting consists of gels of different shades, then they should be polymerized one by one. And before drying, do not forget to check whether you have painted the ends of the free edge. Otherwise, your manicure, when examined closely, will not look as perfect as you want.
- A pleasant surprise of the new generation of gels is that they are absolutely not capricious when drying. Even the high density of the product and the hiding power of the color do not affect the quality of drying in the lamp. Manicurists did not report cases of incomplete baking or other problems.
- When resorting to modeling as decoration, observe moderation. An abundance of decor will not decorate your manicure. For a particularly important event, it is more appropriate to resort to such decor as an accent, for 1-2 fingers.
- Volumetric modeling is not the best companion for a beach holiday or everyday manicure, even despite its strength. If you still really want to decorate your nails in this way, place the sculpt on the nail according to safety rules.
Gel modeling
Gel modeling appeared much later than acrylic. This was due to the liquid consistency of the composition. Today, special 3D gels for modeling have been created. Nail designs have become more diverse. Thanks to the flexible structure of the gel, you can create incredible compositions. Nail sculpting has become more comfortable. In addition, unlike acrylic, the gel has no odor, which makes the procedure more pleasant .
Design elements are applied to the prepared nail plate immediately in the form in which they will be fixed. Each part of the composition of a certain color must be polymerized in a UV lamp for 2-3 minutes. If the design elements do not harden sufficiently, a mixture of tones may occur.
To consolidate the knowledge gained, we suggest watching an interesting video lesson from which you will learn how to build and sculpt nails using a gel composition.
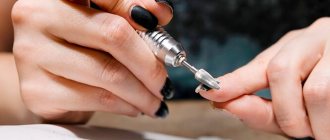
Performance
The sculpting process is very difficult for a non-professional. Its main difficulty is precisely that all work must be completed at maximum speed, before the acrylic dries. Below we describe how acrylic sculpting is done on finished extended nails step by step.
[yandex3] [google3]
- Dip the brush into the monomer;
- Dip a damp brush into the powder. You will see that a ball has formed on it, from which you will form one of the elements of future modeling. You can vary its size using the depth of lowering the brush into the monomer. If you wet only the very tip, the ball will turn out tiny;
- Place the ball on the nail and form the desired shape of the element as quickly as possible. Repeat this element on all nails, according to your idea;
- Move on to the next element. Move from large to small and from the base of the figure to the top;
- Wait for the acrylic to dry. After this, you can try to paint the figurine using acrylic paints. But you need to take into account that they can soften acrylic, so you should act carefully.
After the molding has dried, you need to give the final shape to the free edge. After this, you can cover the nail with a top coat of acrylic fixer. Video lessons show more about how to sculpt nails with acrylic.