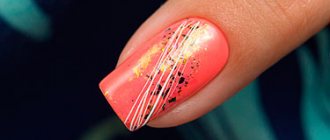
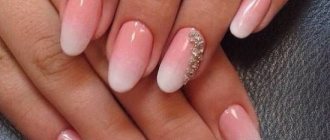
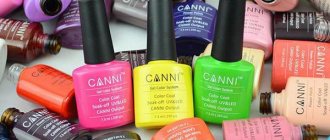
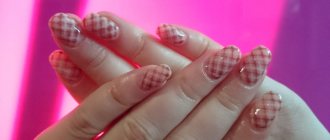
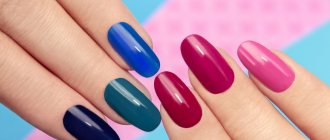
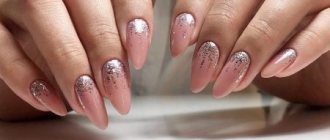
Gel nail paint is an innovative product that recently appeared at the disposal of nail art masters, but very quickly gained universal recognition. Women's hands should always be beautiful and well-groomed; they attract the close attention of men, which means they constantly need new jewelry. And today there are a lot of ways to decorate your nails: with rhinestones, sparkles, “water drops”, fantastic paintings, and now a new tool has been added - gel paint, with which you can make a luxurious design yourself.
Varieties
Gel nail paint (a design master will tell you how to use it correctly) comes in two varieties:
- with a sticky layer;
- no sticky layer.
The first type is used to create a casting effect. The second one is used for various types of artistic painting and as the main coating.
Advantages and disadvantages
| Advantages | Flaws |
| One of the main disadvantages is damage to the nail plate when removing the coating, so after this procedure the nails should be given some time to recover |
Colored nails: gel polish
Initially, the gel was created to strengthen and lengthen nails. Then it was completely transparent. Technology has moved forward and now there are colored nail gels. The product lasts for three weeks, is protected from peeling, is environmentally friendly, and does not cause allergies. At the moment this is the most popular nail coating. Let's talk about it in more detail.
Colored gel and gel paint: which is better?
Gel nail paint (you can learn how to use it from special video tutorials for those involved in nail art) appeared in the nail design industry relatively recently, but quickly gained popularity. Comparing the product with gel polish, it can be noted that they have a similar composition, only the paint is more liquid in consistency.
The first product is ideal for creating a small pattern, and the second is suitable for backing and laid-out jackets.
For a bright shade, it is enough to apply the paint in one layer, unlike gel , which requires multiple applications. Another big disadvantage of the gel is that it needs to be constantly stirred to obtain a uniform color. Creating a painting using shellac requires quick application, because it tends to harden in the air, which is a big disadvantage for beginners.
The use of gel paint is more suitable for manicure beginners, since it dries completely only under the influence of ultraviolet light.
Advantages and disadvantages
The clear advantage of this product is its resistance to drying out while work on the nail design is still in full swing. Also, the ease of use is also captivating. And many more “positives”:
- when covering the entire surface of the nail with several layers of gel paint, a minimal layer is formed that does not thicken the nail;
- the ability of the nail to “breathe” under a layer of such coating;
- optimally used for various design techniques: Chinese painting, aquarium design, for a “smile” or “moon” in French and lunar manicure, casting technique, etc. Ideal for use in a unique planar design;
- no need to intensively file the nail (remove its shiny layer);
- While the gel paint is drying, you can adjust the design;
- It is possible to mix different colors to obtain a unique shade, just like real artists do.
But besides all the positive qualities of the product, there are also minor disadvantages:
- It will not be possible to remove gel paint with special liquids; you need a mechanical solution to the problem: files, a router;
- It is inconvenient to use on thin nails, since gel paint does not provide them with additional strength.
Once you get the hang of using gel pigment to design your nails, you can create real masterpieces. And your inner sense of style will only help you create an organic tandem of gel paint and other auxiliary accessories: foil, mica, rhinestones, stones, etc.
How to choose?
Professional craftsmen recommend following some rules when choosing high-quality gel paint.
Gel nail paint: how to use and choose a color coating can be suggested by your own observation of the work of a master in a salon or on YouTube
- First of all, you need to pay attention to the composition of the coating; it must be hypoallergenic and have an acceptable odor.
- It’s worth choosing trusted manufacturers with good reviews.
- Don't forget about the high-quality base coat, because it is the one that comes into direct contact with the nail plate.
- An important factor is the durability of the coating; it should not peel off, become cloudy or form chips and cracks. The manicure should be worn unchanged for 2-3 weeks.
How to store it correctly
To ensure a uniform, safe coating, it is necessary to ensure the correct conditions for storing gel polish:
- Store the product in a closed drawer/cabinet/box out of direct sunlight and the total air temperature does not exceed +26 degrees. Ultraviolet radiation negatively affects the quality of the fresh composition and leads to its gradual thickening, as does high air temperature;
- Close the lid tightly before putting the mixture back into place. This will prevent the gel from oxidizing when air gets inside the bottle;
- When working with the compound, place it away from the UV lamp, as the increased temperature helps the compound harden faster. After completing the procedure, it is recommended to remove the bottle from the desktop;
- Do not shake the jar before application, just “roll” it with your fingers or between your palms to mix the composition for homogeneity;
- the expiration date of the varnish on the packaging, and there may be two dates. The first number indicates the shelf life of the composition before opening (usually 3-4 years), the second number indicates how long the gel polish can be used after opening the package (1-2 years). Craftsmen know that if the rules are followed, it will be possible to store it much longer, although popular colors do not last long even at home.
Simple rules allow you to maintain the functionality of gel polish for a long time and prevent it from hardening.
Despite the fact that today you can simply dilute gel polish, professional artists still recommend not to allow this.
Manufacturers
| Name | Peculiarities | average cost |
| 1. Kodi Professional (Kodi) | The brand has existed since 2005 and is in great demand among craftsmen throughout Europe. Products of the Ukrainian brand comply with all International quality certificates. The product is produced in 4 ml jars. It does not create stickiness and covers the nail evenly, used for voluminous and flat designs. | 250 rub. |
| 2. E.Mi (Amy) | The paint from a German manufacturer is available in 5 ml tubes. The composition does not cause allergic reactions and fits tightly onto the nail. The color range is quite varied. Gel nail paint is available in both gold and silver tones. It is very convenient to use the products, because they can be purchased in the form of ready-made sets or individually. | Price for 1 piece. — 500 – 700 rub. The price of the finished set is 1500 – 2000 rubles. |
| 3. RuNail (Runail) | The product has a liquid composition that is easy to apply without leaving any unevenness behind. Suitable for various types of design: Chinese painting, French, flat pattern. The palette contains 15 shades, 8 ml each. Made in China. | 250 rub. |
How to choose a lamp for drying gel polishes: a review of manufacturers
What kind of lamp should be so that when using it you can experience only pleasure? Not only are the characteristics of each specimen different, but the companies are also incomprehensible.
Manicure lamps must meet the requirements: design, power, weight, price, additional features. By combining these qualities, you can get the optimal device for the job. The shape can be round, rectangular, square.
The following brands are popular in the nail industry market that offer drying lamps: polaris, planet nails, gelish, sunuv, sunone, beauty nail lamp, runail, irisk, professional nail, jessnail, valori, san. They produce lamps of different types with different technical data. Here are the most popular ones.
| UV | LED | CCFL | hybrid | |
| Resource, hours | up to 10 thousand | up to 100 thousand | up to 80 thousand | up to 80 thousand |
| Service | Lamps need to be replaced every 3 months. (with regular use) | — | — | — |
| Power (optimal indicator), W | 36-54 | 9-12 | 12-18 | 24-36(48) |
| Polymerization time (for example, gel polish) | up to 3 min. | up to 1 min. | up to 3 min. | up to 1 min. |
| Material with which it acts | everything except with the LED icon on the bottle | Gels marked LED on the bottle | everything except with the LED icon on the bottle | Any material for polymerization |
Lamps from leading companies interact well with equally popular gels that are at the top of the rating - Cody, toffee, quick gel, Amy, harmony, posh, crystal, diamond, cnd, opi, bluesky, Vivienne sabot, dnl, heart, dryer. Such gels are called popular not only because they look impressive and are accessible to any master, but also because of their quality (easy to apply, no need to paint in many layers to get a rich color, they can be decorated with additional accessories, etc.) .d.).
High-quality coating result
Most manufacturers have their own line of manicure tools (including lamps), as well as consumables - biogels, shellacs or simply gels for extensions. These are tnl, irisk, kodi, essie, which provide craftsmen with all the necessary tools for work.
The description on the box of a new lamp cannot always give a complete picture of the device. Why are some buttons needed, is there a guarantee, can this lamp be repaired (there are disposable options that, after failure, cannot be repaired).
It is easier for the manufacturer to abdicate responsibility than to repair it. Here is a mini-rating of those brands that nail technicians love (they have won trust due to their service life and ease of repair):
- Runail;
- Irisk;
- Sunuv;
- Gelish;
- Polaris.
Having decided on the technical characteristics and the company, you can safely start making your choice. There are also life hacks for drying gel at home, without a manicure lamp. Take an ordinary lamp, screw in an LED or UV lamp, and thus create a coating with drying. But a homemade system is often unable to provide the expected result.
But, in addition to the fact that your nails need to be painted (extended), you will need to get a manicure. For the hardware you will need a machine - a milling machine.
The necessary goods can be found on alkh in both new and used condition. When buying a used item, you need to remember that the lamp for drying gel polish may already be close to the end of its life and fail immediately after purchase.
Preparing for work
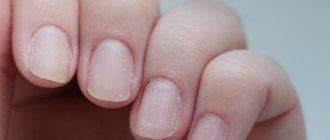
Before applying gel paint, you should do a classic manicure.
If the procedure is carried out at home, then you need to purchase the following tools:
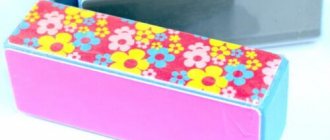
- a special sponge that will remove excess gloss from the nail;
- degreaser;
- acid-free primer (to improve the durability of manicure);
- basic and top product;
- a set of thin brushes for painting.
A classic manicure will include several stages:
- steaming nails in water;
- treatment of overgrown cuticle;
- filing the nail plate;
- cleaning the natural plate;
- use of a degreaser and a leveling layer;
- application of modeling gel;
- drying in a special lamp (each layer separately).
Gel polish and gel paint: are there any differences?
Beginners in the art of manicure often confuse these means. However, despite the apparent identity, the results of these means are different. What are their differences?
- Structure. The consistency of gel paint is thinner than that of its “colleague”. In other respects, for example, the content of dyes and density, they are similar.
- Again, saturation with a single coat - gel paint, as mentioned above, can give saturation even when applied in one layer, while varnish requires at least two layers.
- Economical. Paint is consumed very slowly, unlike varnish. A small tube will last quite a long time.
With all this, the paint can perform a substitute function for varnish: the product fits perfectly on the nail plate.
How to apply?
After preparing the nail plate, you can proceed to the design:
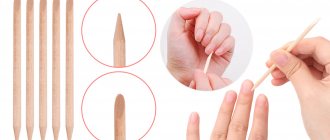
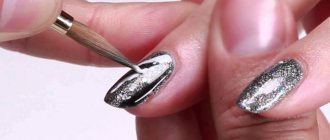
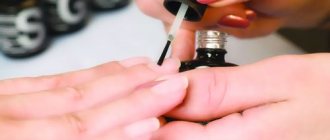
- A design is applied to the treated surface with a fine-bristled brush. If there are any imperfections, they are corrected with an orange stick before drying.
- Then the paint is polymerized in an LED lamp for 30 seconds, in a UV lamp for 2 minutes.
- If there is stickiness on the surface, it must be removed with a cleaner.
- Depending on the desired design, you can add other decor to it: stones, rhinestones or glitter.
At the end of the work, the surface of the manicure is secured with a finishing agent.
Acrylic painting technique
Acrylic-based paints help create many original designs, which is why their techniques differ significantly. Depending on the final task, the composition can be made translucent, completely transparent, or pasty. This allows you to create a unique painting, since the paints are easily diluted with ordinary water, due to which it becomes possible to instantly jump from one technique to another.
Oil technology
The most popular and easy-to-implement design is achieved using this method. The finished result will resemble strokes of oil paints, repeating the patterns of the brush. In this case, acrylic is not diluted, so a unique painting effect is created. The composition should be applied to the plate with a thin small brush, creating strokes of different sizes, shapes and textures. To improve the effect, just distribute several colors at different edges of the brush and stretch them over the surface of the plate.
Pastose technique
To paint using this technique, paints do not need to be diluted. The technique is similar to gouache paintings, where the strokes maintain the same shape, size and texture. As in the oil technique, impasto painting allows the use of 2-3 shades, collected on a brush and practically not touching each other.
Watercolor technique
Obtaining the final pattern using this technique is translucent or transparent. As you already understood, acrylic is diluted with water and resembles watercolor painting. The composition is used both for drawing the main background and for removing small particles inside the contour of the painting. For example, if you need to create streaks between two shades, you should use the acrylic technique. If you need to paint beautiful lilies, roses, peonies and other flowers on the plate, create them in delicate colors with diluted paint
It is important to understand that acrylic immediately hardens when it comes into contact with air. Water slows down this process a little, but in comparison with watercolor paints, diluted acrylic dries many times faster
Removing gel paint
You can remove the product in several ways:
- remover with foil;
- using a nail file with an abrasiveness of 100-180;
- machine cutters.
If you remove paint using a remover, it is important to know that the coating is poorly exposed to solvents, and you need to choose a product specifically designed for the gel composition. At the end of the procedure, the plate is treated with a buffer and degreased.
Adviсe
Do not forget that the reanimated composition is worse than its fresh counterpart, even if the latter is stored on a closed shelf for several months. To prevent the composition from hardening, follow these simple rules:
- Before purchasing, check the expiration date of the varnish: it is usually indicated on the packaging. Do not buy expired varnish or one whose expiration date is about to expire;
- In professional stores, this situation often occurs: sellers and clients open coated bottles before purchasing in order to see the real shade, and often these jars remain waiting for their buyer. Before purchasing a product, make sure that it has not been opened before you - this will avoid purchasing varnish that has already thickened;
- Take care of the correct use of the gel at home: after completing its application, close the lid tightly, first remove any remaining product from the neck, place it away from the warm UV lamp;
- Store varnishes in a dark place with a low air temperature - no more than +26 degrees;
- If the thick gel is applied poorly and unevenly, purchase a special liquid for dilution: it will not make the coating worse, and it is also inexpensive. As a last resort, dissolve a few drops of a good liquid topcoat in a bottle of pigment.
You can dilute gel polish at home. It is recommended to do this once - avoid regular use of thinners, otherwise the quality of the coating can be safely questioned. Despite the fact that the gel polish itself has a dense texture and it is difficult to imagine the process of its hardening in a bottle, such cases are becoming frequent and only require proper handling of the beauty product.
We recommend following the storage rules for the composition and monitoring its expiration date.
For example, the well-known manufacturer of professional gels CND mentions a shelf life after opening the bottle of 2 years, the more budget Bluesky - 3 years.
Before purchasing, make sure that the gel has an acceptable expiration date. After opening the bottle at home, evaluate the aroma - too strong and sour may indicate improper storage of the product.
Source of the article: https://wlooks.ru/lak/dlya-nogtej/chem-razbavit-gel/
Manicure options with gel paint
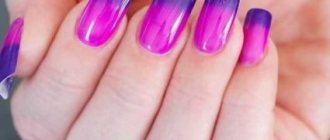
Gel paint is used to create original manicure options.
With glitter
Step-by-step instruction:
- a base is applied to the prepared plate and dried under ultraviolet light;
- then apply colored gel polish in 2 layers and dry according to the instructions indicated on the coating packaging;
- the remaining nails are covered with paint with glitter in 2 layers and dried separately in a lamp;
- then a thin brush is used to apply a shiny coating and apply a pattern;
- After applying the design, it is polymerized.
At the end of the procedure, the manicure is secured with a special product.
Easy manicure with white tulips
Execution steps:
- the treated nail is coated with primer and dried in an LED lamp;
- then any dark-colored shellac is applied in 2-3 layers and also exposed to ultraviolet radiation;
- Flowers are drawn with a thin brush and white gel paint and dried for a few minutes.
The finished design is covered with a top coat and the end is sealed.
With monograms
Gel nail paint (how to use it in design and how to draw monograms correctly is shown in detail in the photo) will help you create beautiful patterns.
Stages of work:
- after standard preparation of the nail and covering it with a base layer, colored shellac is applied and dried;
- monograms or any other pattern are drawn using stretching movements with black paint;
- the pattern is polymerized and a fixative is applied;
- If desired, you can add decorative elements (stones, rhinestones).
With white roses in the wet
- after applying the primer, the plate is covered with gel polish in 3 layers;
- in this embodiment, the “hole” at the base of the nail remains open, but it can also be filled with colored gel paint, for example, white;
- The 3rd layer of color coating does not need to be dried;
- After that, the rose petals are drawn with a thin brush; you need to start from the middle, giving the shape of a crescent or comma to each petal. The result should be a twisted spiral, which will gradually turn into a rose.
At the end of the procedure, the resulting manicure is secured with a finish.
Geometry on nails
- shellac is applied to the cleaned plate in 2 layers and dried in a lamp;
- to create a geometric pattern you will need a brush with long bristles or a regular toothpick;
- before creating such a drawing, you need to practice, it is quite complex and requires a “steady” hand;
- the drawing is created according to the scheme shown in the photo.
At the end, the nail is covered with a fixative and cuticle oil is rubbed in.
With casting
Before you start using this technique for the first time, it is important to remember that:
- the drawing will directly depend on the quality of the material;
- to perform the effect, it is necessary that the paint used for the drawing matches the color of the foil;
- You don’t need to press too hard on the foil;
- the foil should not be imprinted on the end of the nail.
Step-by-step instruction:
- It is necessary to prepare the surface for applying gel polish. If you do a manicure yourself, then before starting work you should degrease your fingertips and the skin around the cuticle.
- Then the base and shellac of the desired shade are applied and polymerized until completely dry.
- The pattern is applied to the matte coating using gel paints with a sticky layer and dried.
- The foil is applied to the wrong side for a few seconds and torn off with a quick movement.
- The pattern is dried in the lamp for about 20 seconds.
- Excess paint is removed with a buff, and then the nail is sealed with a finish.
Gel nail paint is a high-quality and highly durable coating for creating various nail design effects. This tool is convenient to use for both professionals and beginners. All that is required is a great desire and an unlimited flight of imagination.
Article design: E. Chaikina
Studying coating techniques
Let's move on from theory to practice. How is nail coating done with gel paint?
As they say, the devil is not as scary as he is painted. The properties of this product allow the work to be done accurately even for those who have just set out on the path of learning the art of nail design. So, let's learn how to work with gel paint.
Technique for performing manicure with gel paint
Step one: apply a base coat to the prepared nail plate and dry it under a UV lamp for a couple of minutes.
Step two: decide on the gel paint for the manicure, and while you’re thinking about the design, apply the next layer of gel polish.
Step three: cover the nail with top coat and polymerize it.
That's it, the field for creativity is prepared. Let's move on to the most interesting part - art.
Gel polish painting technique
This exciting activity is nail design with gel paint! Create - I don’t want to. So, the sketch was chosen. Next, prepare the brushes. They are known to be special:
- flat, wide: designed for Chinese painting. The paint lies evenly on the pile;
- fan brush: will help in working with glitter and creating a gradient design;
- a thin brush: it can perfectly draw openwork, waves, small details;
- dots - dot brush: draw dots, microscopic elements, transfer rhinestones and sparkles onto the nail.
Let's start drawing. Today's gel paint in nail tubes is available in a large palette, so it is possible to create truly masterpieces. If the design is complex, then it is advisable to dry each element under a UV lamp.
