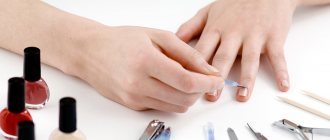
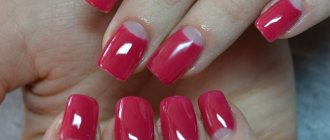
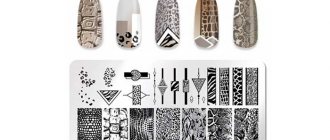
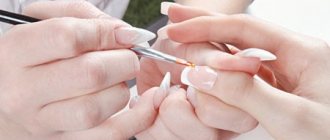
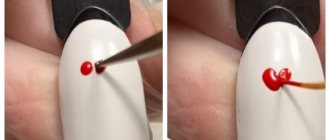
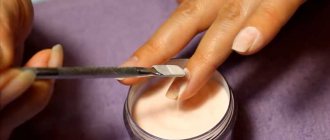
Today the most popular trend is designer painting on the surface of the nails. It can be made in the form of intricate designs and ornaments containing geometric elements and any fragments of painting. To carry out such painting, special acrylic paints are widely used. They have long been used by professional artists and those who like to draw in their work.
In addition, acrylic painting of ceramic products, fabrics, glass and wooden surfaces is widely used. The versatility of using acrylic materials has led to their use for painting nails.
Advantages of acrylic paints
- Even an amateur can use it.
- Varied color palette.
- The ability to mix colors to achieve unique shades.
- Plasticity of paint and ease of application.
- You can paint on natural nails, extensions, and those coated with gel polish.
- The paint is diluted with ordinary water.
- Drawings can be easily removed with nail polish remover.
- The applied designs dry on the nail in a matter of minutes.
- Low consumption, which allows you to use paints for a long time.
How to remove acrylic paint from nails, clothes and hand skin?
There are a few things to consider when working with acrylic paints. Paints that are easily diluted with water before drying are no longer afraid of water after drying. Therefore, if they get on clothes during work, it is easier to wash them right away. If this is not done, the paint will only be removed with a solvent. How to dissolve acrylic paints? Any solvent that you consider safe for your hands and nails will be suitable for this purpose. There are no special tricks or recommendations here. Therefore, let's move on... Acrylic paint can be easily removed from leather with water and soap. True, this process will take a little more time than simply washing your hands. As for cleaning the palette, it does not cause any problems, because the dried paint can be easily removed with a knife or spatula. Well, the acrylic coating is removed from nails with ordinary nail polish remover. Moreover, the entire composition is removed at once - along with the base and top layers. In conclusion Now you know how to use acrylic nail paints and understand what capabilities nail art masters have. Do you want to master the art of creating nail designs? Stock up on a few “magic jars” and get creative!
How to use acrylic paints?
To create designs on nails with acrylic paints you need: a set of paints, a small container with water, a palette for mixing.
- We prepare the surface of a natural or artificial nail.
- We select a design to draw on the nails in advance.
- Squeeze out a small amount of paint of the desired color onto the palette, carefully apply it to the brush and begin painting your nails.
- Mix the colors until you get the desired shade (if necessary).
- Thicken the thickened paint with a drop of water. You can simply moisten the brush with water.
- We wait until the resulting drawing dries well.
- Apply the finishing coat to the nail (clear varnish, acrylic or gel).
By the way, a thin contour brush with elastic bristles is well suited for drawing small details. And for filling, a flat brush made of natural bristles is ideal.
The drawing can be decorated with rhinestones, etc. Also, drawings with acrylic paints will be a wonderful addition to long nails.
Required tools and materials
To create a high-quality manicure, you should stock up on all the necessary tools in advance.
Colored varnish or acrylic paint. These options are needed in order to give the surface of the nail the desired shade and to realize a creative design. Acrylic paint has richer pigments. It is intended for artistic painting. If you want to make drawings with multi-colored gel polish, then remember that its shades should differ from the main coating by at least a couple of tones. Then the composition will be built consistently and beautifully.
For example, dots can be replaced with invisible pins or sewing pins with different tips.
Before you start making drawings, you should take care of your fingers and the surface of the nail plate. Nail art will be perfect when your hands are perfectly treated. For this you will also need certain quality tools.
First of all, this is a small container of warm water where you will soak your hands, preparing them for processing. Then an orange stick. With its help, you can carefully push back the cuticle without damaging the nail plate. Excess skin is removed with tweezers. Using a file, nails are given the desired shape. And their surface is polished with a buff.
You shouldn’t be careless about the preparatory stage of processing and move quickly to design. After all, the durability and neatness of the manicure will depend on how well the nails are done. Therefore, spend your precious time at this stage so as not to regret the efforts made.
Photo of nail design with acrylic paints
See what beauty you can create using acrylic paints in nail design. Here are photos of several works:
The nail industry does not stand still, however, like all other areas of beauty. Every 2-3 months, craftsmen develop new coating technologies, extension methods, and changing the shape of the plate. In this light, acrylic paints play an important role; not a single design can do without their participation. It doesn't matter if your nails are long or short, acrylic is suitable for everyone. It is for these reasons that representatives of the fair half of humanity love him so much.
Today's lesson talks about how to create flowers on nails with acrylic paint step by step.
Why specifically in this lesson you need acrylic paint, and it cannot be replaced, for example, with ordinary nail polish, we will now tell you. Water-soluble acrylic paints have a convenient property: while they are fresh and not hardened, they can be diluted and washed off without any problems. After drying, they are no longer afraid of water. In this version of nail-art, this property is used. The lesson is aimed at those who do not like or do not know how to draw thin, neat lines, but at the same time really want to get an airy openwork pattern at home.
The author of the manicure is Olga Levchuk (channel “olga levchuk” on YouTube), already familiar to us from her chic floral designs from other tutorials. In her training videos, she talks about the secrets of the most feminine types of claw design. In case you are uncomfortable working with videos, this art is presented on the site in the form of text instructions with pictures.
To work you will need:
- Varnish base;
- Varnish of a natural shade (optional, if the nail has a not very beautiful or uneven color);
- Black acrylic paint;
- Round tip brush;
- Short thin hair brush;
- A glass of water;
- Dots;
- Large sparkles (optional);
- Top coating.
So, let's start painting flowers on nails with acrylic paint step by step.
Step 1
Preparing your nails for a manicure. The design will be very simple, but the preparatory stage remains the same as always: first, we shape the tips of the nails using a file, the next step is to deal with the cuticle using any convenient method, and finally we degrease the surface of the nail plates with any suitable liquid. It’s better to take a specialized one, now such products are quite inexpensive.
Apply a thick layer of protective base to the nails and dry. In the example, it will serve as the basis of the design, but if desired, you can use a natural-colored varnish (nude) as a basis.
Advantages of acrylic paints
- Acrylic is a water-based product; it is diluted with water in certain quantities, due to which nail treatment is faster and easier.
- Acrylic-based paints have the ability to dry quickly. This property allows you to create multi-layered drawings without fear of blurring the overall picture.
- Once acrylic dries, it will not crack like other types of painting materials. The integrity of the surface is maintained for up to 1.5 months.
- There are many technologies for painting nails using acrylic. Some are more complex, intended for professional craftsmen with advanced qualifications. Others are easier, they are suitable for girls with no experience.
- Acrylic does not fade in the sun or under ultraviolet radiation, which is especially important in the summer.
- The varied color palette includes more than 700 shades, and if you have minimal knowledge of color, you can increase the number to 2,500.
- It is with the help of acrylic paints that everyone’s favorite 3D, 4D and 6D designs are created. Acrylic allows you to not only paint in volume, but also make it translucent and more natural.
- Acrylic painting can be easily adjusted. To do this, it is enough not to apply the finish until you are sure that the drawing is perfect.
- The composition is non-toxic, it does not contain harmful impurities that require the mandatory use of a mini-respirator. Another important criterion is that you do not need to use a solvent to remove acrylic.
- Modern dyes do not spoil the original plate; on the contrary, they contain additional beneficial substances that strengthen the nail.
- Acrylic can be used on both extended nails and natural ones.
- Acrylic consumption is minimal; one package of tubes with primary colors lasts for more than a year when used 1-2 times a week.
The following will be useful information for allergy sufferers: acrylic paints are developed and produced in accordance with GOST. The composition is non-toxic, it has no foreign odor, and the product is completely environmentally safe.
According to the degree of consistency, thick and liquid acrylic are distinguished. The first type requires additional dilution with plain water and is available in jars. To dilute correctly, only one manufacturer should be used. Otherwise, you will get a marbled effect where the base tone is covered with white coils.
As for liquid acrylic paints, they are available in tubes, either individually or in one package. To obtain additional shades with their help, simply mix the primary colors using the Oswald circle (color wheel).
Benefits of acrylic
Acrylic art paints have appeared on the market recently, but are already loved by professional and novice manicure lovers due to their positive properties:
- long-term preservation on nails due to weather resistance and flexibility (do not chip, do not crack),
- a wide variety of colors, while the brightness and shine are maintained throughout the entire time they are on the nails, and the possibility of mixing provides additional shades and scope for design ideas,
- acceptable, quite affordable price,
- long shelf life,
- economical material - one tube is enough for several applications,
- quick drying, allowing quick application of the next layer and preventing smearing of the previous layer,
- harmlessness – during operation there is no evaporation of substances harmful to the human body,
- resistance to UV rays, which is why the painting is not susceptible to fading from exposure to sunlight,
- easy solubility in water allows you to adjust patterns during application,
- Acrylic nail paints are very convenient for beginners because of the ease of application.
Information: the only disadvantage of acrylic art paints is the poor tolerance of very low temperatures, at which the coating loses some of its properties.
Flower manicure
Popular manufacturers of acrylic paints
When choosing paints, pay attention to (“Lady Victory”). She has proven herself well in the nail industry because she sets the best prices for her products and is not limited to the same type of colors. Their palette is much wider than similar brands, and the shades are many times richer, which is extremely important in spring and summer. The main advantage of the composition can be considered the gloss included in the paint. After drying, the surface does not remain matte, it shines radiantly and reflects light.
An equally popular manufacturer can be considered “Qumaxi”. This is one of the most reputable and sought-after companies in the field of nail design. The main feature of their products is the presence of luminescent paints and extraordinary tones that do not require mixing. It is this manufacturer that you need to contact if you want to make the surface bronze, gold, metal or silver.
Acrylic painting technique
Acrylic-based paints help create many original designs, which is why their techniques differ significantly. Depending on the final task, the composition can be made translucent, completely transparent, or pasty. This allows you to create a unique painting, since the paints are easily diluted with ordinary water, due to which it becomes possible to instantly jump from one technique to another.
Oil technology
The most popular and easy-to-implement design is achieved using this method. The finished result will resemble strokes of oil paints, repeating the patterns of the brush. In this case, acrylic is not diluted, so a unique painting effect is created. The composition should be applied to the plate with a thin small brush, creating strokes of different sizes, shapes and textures. To improve the effect, just distribute several colors at different edges of the brush and stretch them over the surface of the plate.
Pastose technique
To paint using this technique, paints do not need to be diluted. The technique is similar to gouache paintings, where the strokes maintain the same shape, size and texture. As in the oil technique, impasto painting allows the use of 2-3 shades, collected on a brush and practically not touching each other.
Watercolor technique
Obtaining the final pattern using this technique is translucent or transparent. As you already understood, acrylic is diluted with water and resembles watercolor painting. The composition is used both for drawing the main background and for removing small particles inside the contour of the painting. For example, if you need to create streaks between two shades, you should use the acrylic technique. If you need to paint beautiful lilies, roses, peonies and other flowers on the plate, create them in delicate colors with diluted paint. It is important to understand that acrylic immediately hardens when it comes into contact with air. Water slows down this process a little, but in comparison with watercolor paints, diluted acrylic dries many times faster.
Application technique
Any technique for applying acrylic materials to the surface of nails requires compliance with general rules:
- before starting acrylic painting, it is necessary to carry out the usual manicure treatment of nails;
- It is better to degrease the surface of the nails, because without this the acrylic will not fit well on the nail plate;
- preliminary application of cosmetic varnish is allowed, with which the nail surface must be covered in two layers. The design is applied after the varnish has completely dried;
- when using several colors, you should provide different brushes or ensure good rinsing of one brush;
- The applied design must be protected by covering it with a fixative.
Nail design using acrylic materials is distinguished by a wide variety of artistic techniques. They can use paintings reminiscent of watercolor, oil, gouache drawings and other techniques for decorating nail surfaces.
Common drawing techniques are:
- oil;
- pasty (gouache);
- watercolor;
- sliding - technique;
- glaze.
Oil painting
Oil painting of nails with acrylic paint
The most commonly used method is to depict a design in the form of voluminous relief strokes applied with a brush. Paints are not diluted with water to create a three-dimensional design, so their consistency resembles oil-based paints.
To make the design neat, use a small brush with a flat shape.
Sometimes, to apply a complex stroke, two different unmixed colors are drawn onto the brush.
Gouache painting
The impasto technique, reminiscent of gouache painting, is also carried out with paints not diluted with water. Unlike the oil technique, the nature of the applied acrylic strokes is uniform in color and texture.
Watercolor painting
The watercolor technique is carried out using diluted paints of translucent tones.
It is used both for applying a background coating and for creating some details of the main design, for example, images of delicate flower petals or smooth transitions of patterns. Unlike watercolors, acrylic diluted with water takes much longer to dry.
Sliding
The sliding style technique is the most complex, performed by professional craftsmen. A structural gel is added to acrylic paint. After this, the color of the acrylic acquires a whitish tint due to the gel, which becomes transparent after the paint dries. The color of acrylic acquires rich brightness and depth.
Glaze
Glazing on nails
The glazing technique is as follows: paints diluted with water are applied to the nail surface in layers, one layer on top of the other. The previous layer must dry well before this.
The color after dilution can be translucent, and the overlapping layers, when translucent, give complex, beautiful shades.
Depending on the degree of dilution of paints with water, a drawing created using this technique may resemble work done in gouache, oil or watercolor.
How to work with acrylic paints
Step-by-step instructions will give you the opportunity to coordinate actions and maintain coating technology.
- Sand the nail plate with a glass file and shape it. Prepare a hand bath, steam the skin and remove the cuticle.
- Degrease your nails with an antiseptic, any disinfectant, special liquid, nail polish remover or vodka.
- Cover the plate with a transparent base, which will allow the paint to adhere correctly and not be absorbed in parts into the surface layer of the nail.
- Paint the desired background with acrylic paint and leave for 2-3 minutes until completely dry.
- Take a thin brush and draw the outline of the future pattern with it. Wait for it to dry.
- Paint the design cavity with the appropriate shade/shades, again wait until completely dry.
- Now repeat the movements with the brush, tracing the outline. Adjust the pattern with short strokes, giving it a natural look.
- After the composition has set, apply a clear finishing varnish in 1-2 layers.
- Draw the future drawing step by step on a sheet of paper in advance.
- Buy synthetic brushes rather than natural ones; they are easier to work with.
- For the first time, purchase a pack of 6-8 colors, this will be enough for you to learn the basics of color.
- Before starting work, mix paints with water in different proportions to determine the technique and consistency.
- Decorate your nails with sparkles, rhinestones, sequins, foil or lace. In combination with acrylic painting they will look perfect.
For beginners, it is better to start with oil or watercolor techniques. They do not require special skills and forgive blunders. After completing the procedure, soak your brushes in hot water, otherwise you will have to throw away the tools. For the first painting, give preference to abstraction; it is easier to translate into reality.
Video: lace nail design using acrylic paints
Hello to all my readers, today I will talk about acrylic paints. Or more precisely, what acrylic paint is suitable for manicure, and how to draw patterns with it. So, let's start with the main thing.
As always, before you start painting the nail plates, you need to prepare them. Preparatory procedures include: removing cuticles, hangnails, shaping nails, and necessarily polishing.
Now you need to choose the image that you would like to see on your nails. You can choose from samples or come up with something of your own if you want to show your imagination.
But do not forget that the image must fit on the nails so that the length and width are suitable.
To create the drawing itself, you will need some tools. These are water, acrylic paints, brushes, napkins; for convenient mixing of paints you can use a panel and.
Also a colorless fixative varnish. If you want, you can use regular varnish for the background. For decoration you can use sparkles, rhinestones, etc.
How to draw a flower on nails for beginners?
In order for a beautiful flower to bloom on your nails, you don’t have to go to the salon . You can make this beauty at home yourself. Even a beginner can handle this job. It will take a little patience and diligence, but believe me, the result is worth it!
It’s very easy to create a whole greenhouse on your nails
You will need regular nail polish and a toothpick. The process includes several stages. First, prepare your nails thoroughly. Remove the polish from your nails, clean them well and file them. After this, use a base coat.
When the coating is dry, you can begin to apply the design. Dip the tip of a toothpick into your chosen polish and place a dot on your nail. This way you will mark the middle of the future flower . Then, also using a toothpick, apply several circles or ovals around this point. A simple flower is ready.
You can paint several colors on one nail this way. If you want to add a stem, you will have to work a little more. Draw a thin curved line from the flower with varnish using a toothpick and add the petals to the stem. Now let the varnish dry well and you can apply a layer of fixing varnish.
How to use paint
The first step is to squeeze the paint onto the panel.
But a small amount is better, as it dries quickly. If you think the color is too bright, you can check it on a piece of paper. Need a lighter shade? Just dilute with water and stir with a stick. Also, if you don’t have the desired shade, for example, you need pink, but you only have red and white, just squeeze out a couple of drops of red and white paint and mix. They should not be placed on top of each other, but side by side. This makes it easier to make the color you want.
How to create a design
Three main types of design creation:
We use colored varnish as a base. Any varnish is applied to the nail plates (are you planning dark patterns? Then you need a light varnish, and vice versa).
We wait for it to dry completely and start creating the image itself with acrylic paint, there are a lot of options - flowers, stars, leaves and so on. When the drawing is dry, coat it with a protective clear varnish to secure it.
Now we use acrylic paint itself as a base. Using a wide flat brush, apply paint to the entire surface of the nails.
Simply dip the tip of the brush into the paint and spread. Before adding more paint, dip the brush in water and wipe off the excess with a napkin. Next you can draw patterns. Finally, coat with varnish.
Without applying the base layer, you can achieve an unusual naturalness of the pattern. It is without a colored base that they look very natural. By the way, acrylic paint dries in only 10 seconds to a minute.
How to choose paint
You can buy it at any cosmetic store, the choice is very large, but you need to choose the one that’s right for you. It should be dense and fit well on the nails, but this does not depend on the price.
They are sold in sets or individually. But don’t rush to buy a whole set at once; it’s better to buy one and try it.
Only after trying several options for acrylic paint, you will be able to choose one that you like and that is really good for yourself. I wish you good luck with this! Subscribe to my blog. Bye! Bye!
Acrylic paints are universal, they are used for almost any surface: they are easy to apply, dry quickly, and after drying do not mix with the top layers, allowing you to create complex designs. Therefore, acrylic paints quickly gained popularity among lovers of original nail designs.
Why acrylic?
Traditionally, acrylic paints are used in many areas - from art to renovation. Acrylic provides a coating that is resistant to many environmental factors and durable. And at the same time, acrylic paints can also be used by a non-professional; they are quite easy to work with.
Here is the main list of benefits:
- acrylic is UV resistant and does not fade in the sun;
- water resistance;
- resistance to external influences;
- saturated color;
- there is a lot of scope for creativity: they are easy to mix, dilute to the desired consistency, and work in different techniques;
- inexpensive price - from 25 rubles for a small tube, usually sold in sets;
- no unpleasant odor.
Even an amateur can master the technique of working with acrylics. There are several types of acrylic paints, you need to learn how to use them correctly:
- transparent;
- translucent;
- pasty (have a very dense, pasty consistency);
- opaque (overlap the previous layer).
Acrylic paints can also be made with water or acetone base.
It is more convenient to use water-based paints, they are easier to dilute and mix, but acetone paints last much longer.
What can you draw with?
Many novice nail artists wonder what they can use to paint on nails coated with gel polish.
It turns out there are many options for this.
Patterns can be applied:
- regular varnish;
- acrylic paints;
- watercolor;
- acrylic powder-sand;
- Shallak;
- gel polish
The most common product is varnish. It is accessible, varied, and easy to use. To create the simplest design you will need only two shades - for the background and for the pattern. The downside is the thick texture of the gel polish, which makes it difficult for beginners to reproduce thin and small designs. But in fact, this is a matter of technology, it needs to be developed.
Another recognized material for manicure is acrylic paints. They are easy to use, adhere better to the surface, have a wide color palette, do not crack, do not spread, and dry quickly. They are very easy to work with and do not need to be diluted with water. The only drawback is that they wash off quickly, so they must be covered with a fixing layer of top.
Is it difficult to paint your nails?
To begin, you will need a set of paints and brushes. The kit should include paints (the more colors in the set, the better) and at least three brushes (from No. 0 to “3); you should also keep toothpicks on hand for thin and even lines and acetone, which can be used to quickly erase bad strokes. You will also need water for rinsing and a cloth to wipe the brushes.
The paints themselves can be purchased at a specialized nail design store, but many prefer those sold in stationery and art stores. They are often of higher quality and cheaper, and in composition they are no different from those labeled as nail paints.
Acrylic paints are easy to thin, so there is a wide choice of painting techniques: from painting, similar to gouache, to watercolor drawings.
The first designs on nails should not be complicated; it is better to start with simple elements: flowers, geometric shapes and lines. Samples are easy to find on the Internet; practice on paper before you start drawing.
So, we bring to your attention step-by-step instructions:
- The first stage is preparation. Think through everything you need for the design and put it within reach;
- Apply the base - 1-2 layers of varnish;
- Next, you can squeeze the paint out of the tubes and, if necessary, dilute it. If the design involves smooth lines, different colors should be applied immediately one after another; if you need clear lines, you should wait a little until the bottom layer dries. It is better to draw one element in turn on all nails, after completion - move on to another, gradually creating a pattern on all nails at the same time;
- The design is fixed with regular clear varnish or a professional fixative.
When painting, remember that acrylic paints dry quickly, so you should not leave the tube open even for a couple of minutes. Brushes should also be washed immediately with water to prevent any paint remaining on them. It is convenient to use glass or plastic as a palette; they are easily cleaned with water after drawing.
Nail painting techniques
There are several basic techniques for working with acrylic that allow you to create a unique design:
- you can apply impasto paint without diluting it - in this case it will give a gouache effect;
- oil technique involves voluminous strokes, similar to strokes of oil paint.
- diluted paint gives the effect of watercolor, but the technique is very different. Traditional transparency is achieved by working with the background and layers, since acrylic dries very quickly;
- glazing - application in thin layers. Ideal for acrylic, but quite difficult to master;
- sliding - mixing paint and structural gel. This technique is not suitable for beginners; it requires a lot of experience working with acrylic, but it gives an impressive result in terms of color saturation.
But it’s better to start by working with slightly diluted paints, gradually mastering the intricacies of working with acrylic.
Drawing flowers - simple instructions for beginners
Flowers are a universal option both for the first design and as a nail design for a special occasion. You can start with a simple drawing of black and white flowers. The choice of technology depends on your preferences and skills.
- Prepare your nails by applying base;
- Apply black varnish, it will be the background for the drawing. Let the varnish dry completely;
- Using a thin brush, draw the outlines of flowers on each nail;
- Paint the middle of the flowers;
- Add additional elements of the design: thin lines from the petals, dots (they can be done with a dots or a thin brush);
- In the middle of the flower, on the petals and lines, you can add silver or another color, making the contours more noticeable;
- A fixative or clear varnish is applied on top.
In conclusion, we invite you to watch a video dedicated to nail design using acrylic paints.
- Advantages of acrylic paints
- How to apply acrylic paint correctly?
- Paint application technique
Acrylic nail paints have been used in industry for a long time. More recently, nail art professionals have discovered they have a lot of advantages that they have always been famous for. This is primarily due to the fact that acrylic products with an opaque and rather fine texture have appeared on the modern market, which has attracted the interest of specialists.
Nowadays, manicurists simply cannot imagine their work without acrylic paints.
And this is not surprising, because they are used in almost all master classes and individual work, due to their advantages over other means.
Trying to paint with acrylic paints
- We tidy up our nails and do a neat manicure.
- Cover your nails with base polish and wait until it dries.
- While the base is drying, we study the selected pattern and decide on the step-by-step application of individual elements - which ones need to be applied first and which ones next.
- We open the paints and keep them open so that we can quickly dip the brush and paint further. We try to apply the pattern quickly so that the paints do not dry out.
- After completing the work, wait for the entire composition to dry and apply a fixing layer.
If desired, the composition can be supplemented with rhinestones
Now let's try to draw something specific, and for starters, not very complicated.
"White Lily"
- The main varnish is black, it must be applied in two layers so that there are no gaps. We are waiting for it to dry.
- Using white acrylic paint, we draw a flower with five petals in the center of the nail, for which we first draw the contours and then paint over the middle.
- We draw curls at the top and bottom; there can be two or three of them. Then we put several small dots that complement the main curl, and again wait for the paints to dry.
- After the drawing has dried, apply a fixing layer on top.
- Without waiting for the fixative to dry, you can glue rhinestones into the center of the lilies, or decorate our flowers with drops of silver varnish.
- After the drawing has completely dried, you need to apply another layer of fixative; it can be completely replaced by ordinary colorless or transparent varnish.
White lilies on a black background
"French lace"
- To create this drawing we need a base of natural, flesh color. Apply and wait for it to dry.
- We cover the tip of the nail using the French technique, for this we use a bright red varnish. After application, wait until it dries.
- We take white acrylic paint and a thin brush, draw semicircular lines, placing them parallel to the right and left. Then we use short lines to connect the lines to each other to create a Richelieu lace pattern.
- After the design has completely dried, apply the final sealing layer.
Black and white variation of lace manicure
Of course, the designs we offer are simple and uncomplicated in execution, however, by learning simple techniques for painting with acrylic paints on nails, you will be able to create real paintings on your nails. And why not, because every great artist started somewhere!
What can you paint on your nails? Anything - plant and animal patterns, landscapes, fancy geometric patterns and much, much more. It is important to remember the basic principle of drawing on nails - it should complement the creation of your image, because there should always be harmony in our appearance. Whether the pattern on your nails will repeat the pattern in your outfit or complement some accessory in the form of a brooch or clutch is up to you.
Delicate drawing for every day
Remember - nails can either create your own unique style or destroy it. Therefore, choose the design that suits you best right now, for example, do not leave a luxurious evening design for a Sunday party for work in the office, where it will look ridiculous and pretentious. Let your image always be perfect, and you can always look brilliant!
Advantages of acrylic paints
Unlike varnish painting, which appeared a very long time ago, the acrylic technique has clear advantages, such as:
- ease of application of paint;
- brightness and saturation of shades;
- density of the pattern even when applying a thin layer;
- complete absence of odor, unlike other nail care products;
- application is carried out without special equipment;
- instant drying of the product, which, you see, is important in our time.
This is not to mention that modern varnishes cannot be mixed to give uniform color, but acrylic paints are perfectly mixable, so they can be used without any restrictions. Although designers claim that this is not necessary, since the paints have a huge range of colors, so you will certainly find a suitable shade for yourself.
As you may have noticed, acrylic paints have many advantages. This means that it is worth learning how to use them correctly, because, like every product, they have certain application conditions that every woman should know.
Return to contents
Manicure with flowers for short nails
A well-chosen ornament will hide imperfections on the hands and emphasize their advantages. Floral patterns also look interesting on short nails. However, you should listen to a few tips before applying flowers to your nails:
- It is better to place the flowers closer to the free edge of the nail, this will help visually lengthen your fingers
- To make the nail plate appear narrower, several dark accents should prevail in the design.
Short nails can also be decorated with flowers
- When applying a floral pattern to a colored base, leave one millimeter on the sides of the nail unpainted.
- For short square-shaped nails, clean lines are suitable. Smooth and blurred lines will look great on other shapes
Remember that the manicure should not be dissonant with your image. For the rest, use your imagination and act!
Floral manicure for short nails

