A manicure that makes the nail plate stronger and can maintain a neat and new appearance for a long time is the dream of almost every woman. Modern technologies in this area have stepped forward, making it possible to quickly and affordably make a special strengthening coating using acrylic powder.
The material can be used for extensions, or applied to increase the strength of shellac on your natural nails. In the latter case, the manicure will look more natural due to the application of a thinner layer. Read on to learn how to use an acrylic hardener, what materials are needed for the procedure, and what subtleties there are in covering nails.
Features and benefits of acrylic powder
The hardener is a finely ground dry powder based on a polymer, which, when interacting with a special liquid - monomer, makes the nail harder. The powdery composition on the nails looks natural and stylish. The advantages of using it include the following:
- Acrylic powder has a porous, breathable structure, which allows air to flow to the nail plate, which is beneficial for blood circulation.
- The hardened composition provides strong protection, without unsightly bubbles, strengthens them as much as possible, which means the nails will not break or peel. The manicure will not be afraid of frost, ultraviolet rays, or household chemicals during home cleaning.
- A large assortment of colors makes it possible to bring any design you like into reality, or choose a colorless coating.
- It’s easy to work with the material even at home, and it won’t take much time to cover your nails with acrylic.
- Powder can replace extensions, but its layer is not so thick on the nails.
- Correction will be needed only after 2-3 weeks. Removing acrylic is not difficult if you use special tools.
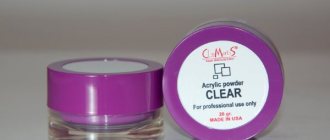
Acrylic Powder
What is needed for the procedure
You may be interested in: Manicure with brown polish: design ideas with photos
Strengthening your nails with acrylic powder itself is not at all difficult to do yourself. That is why many girls prefer to carry out the procedure at home. After all, this way you can significantly save your time and finances. And in the process you will only need a little patience, diligence and, of course, some set of tools and materials.
To carry out the procedure at home you will need:
- liquid - liquid for creating an acrylic ball that will be applied to the nails;
- primer - a solution that ensures reliable adhesion of the material to the plate;
- degreaser - necessary to remove excess fat and disinfection;
- keratolytic - removes dead skin particles;
- actual acrylic powder;
- convenient brush for application;
- nail file - with its help you will remove all the unevenness and give your nails a beautiful shape.
In the room you will be using for your manicure, it is advisable to open the windows, as the chemical aroma may make you dizzy.
How acrylic works: how does it strengthen nails?
Some girls have naturally weak nails that constantly peel and can break at the first opportunity, but this is not a reason to give up a beautiful, fashionable manicure and grow the desired length. Acrylic powder also provides a long-lasting white or colored finish that allows nail plates to be permanently strengthened, unlike regular polish. With its help, you can extend your nails, or you can do additional extensions, or simply strengthen your manicure. The effect is achieved due to the fact that the powder is mixed with liquid; it fills absolutely all micro cracks on the surface, leveling the texture to a smooth, shiny state.
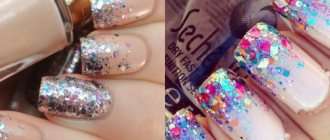
Colored acrylic powder options
As a result, you get a neat and stylish manicure that is resistant to mechanical stress and temperature changes. You can calmly do household chores and allow your hands to come into contact with water for a long time when washing dishes or wet cleaning, your manicure will remain intact and unharmed. Nail service specialists recommend applying a special vitamin coating under the powder to provide additional protection.
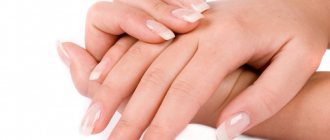
Strong marigolds
Are there any disadvantages to acrylic powder?
Before use, many ladies may have a question: is it harmful or not to apply this coating, which strengthens, under gel polish. If everything is clear about the advantages of acrylic technology and its benefits, consider the existing disadvantages:
- If you suffer from various types of fungal diseases, diabetes mellitus, or herpes infection, you should refuse the procedure, as it is contraindicated in this case.
- Acrylic powder does not treat weak, brittle nails, but only creates a protective barrier to prevent damage.
- “Repair” of nails should be carried out no later than 3 weeks, otherwise the condition of your own nail plate will worsen.
- A manicure will cost more than a simple polish, and you will also need to have special devices and an ultraviolet lamp on hand.
- Acrylic has a specific, pungent odor; you will need to ventilate the room and wear a protective mask.
- Strengthening must be carried out in strict sequence, according to these instructions or the lessons in this article.
Wear a mask before the procedure.
Also, it is important to consider that low-quality, cheap products can lead to disastrous results, for example, to the appearance of tubercles and uneven layers. Therefore, you need to choose trusted manufacturers; which one is better can be found out from customer reviews. Top brands that are popular include acrylic powder kodi, rio pro, formula pro, runeil, pattern, ezflow, powder, carving, colorful.
Cody powder
Strengthening with powder for gel polish
At the end of the standard initial treatment, the marigolds are coated with the base composition and dried. Then another base coat is applied, sprinkled with powder and dried. Next, the surface is sanded, leveled and covered with another layer of base. After drying under the lamp, you can start painting your nails with gel polish.
What set of tools is needed for the procedure at home?
To strengthen your nails with acrylic powder, you will need a set of special items, which are difficult to do without to achieve the desired result. Get to know them better:
- The components for preparing the modeling composition are acrylic powder and a mixing liquid called monomer.
- Degreaser or manicure remover.
- Solution for disinfection and cuticle removal.
- Files for shaping and polishing nails and buff. You should choose different abrasiveness in order to process from all sides.
- Cups for material and brushes, thin and wide, allow you to apply acrylic, mix and dilute the solution, and remove excess dust.
- Primer for better adhesion of components.
- Transparent and rubber base for gel polish and camouflage pink
- Neon lamp for drying powder and subsequent layers of manicure.
Depending on the intended design, you need to choose the appropriate color of varnish; whether it is better to use biogel or gel depends on your preferences. You also need to purchase a variety of decor, for example, powder for velvet flock or pebbles for a fashionable jacket.
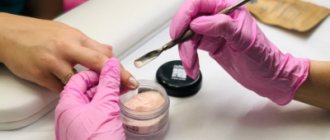
Strengthening Tools
Strengthening with biogel
In addition to acrylic powder, you can also make your nails more durable with biogel, and you can also do this yourself. You need to start by preparing the necessary tools and materials. So, you will need:
- coating used as a base
- biogel (colored or transparent, optional)
- buff for polishing
- top coating
- degreaser
- nail file
- brush with which the biogel will be applied
- UV lamp for drying
If you are doing the procedure for the first time, then it is quite possible that it will take quite a lot of time, as soon as you gain experience, everything will work out much faster.
So, you need to start with a manicure: give your nails the desired shape, move the cuticle and remove it. Do everything very carefully so as not to injure yourself, because when applying the biogel you may experience unpleasant sensations.
When finished, wipe your nails with degreaser and wait for it to dry. Now apply the base, stepping back from the cuticle by about 1 mm and dry it in a UV lamp (how long it will take, you can see in the instructions, about 30 seconds to 2 minutes).
The next step is to cover it with the biogel itself. It is laid out in several stages, starting from the tip and moving towards the cuticle. When finished, dry again. If you are applying colored biogel and want a more saturated shade, then you can apply several layers; for transparent one, one is enough.
Many people add decor in the form of drawings, rhinestone stickers or paintings on top of the biogel. It all depends on your skills and flight of fancy.
The last, final stage will be topcoating.
Preparatory stage before starting work
Proper preparation will contribute to the correct distribution of the powder and maximum bonding of the material to the surface. Why do this? In order for the chosen design to be neat and retain its novelty for a long time.
Initially, we remove from the nails the remnants of previous varnishes, old decorative elements, various applied products or vitamin compositions. It is not recommended to cut cuticles right before application; it is better to do this a day or two before to avoid irritation or allergies. Remove the cuticle with a pusher or a special product.
Next, you need to wash your hands with soap and wipe until dry. It is imperative to treat each nail with an antiseptic. If this is not available, use an alternative - hydrogen peroxide or alcohol.
Then you need to trim the length using a rough file, model the shape, leaving the edge free. Using a soft nail file or pad, we remove the shine, file, sand, and degrease. After all the manipulations, we move directly to the strengthening process.
Preparatory process
How to make acrylic reinforcement correctly: step-by-step instructions
Strengthening nails with acrylic powder must be done quickly and efficiently, making all movements clearly and carefully, so as not to redo it later. For a general overview of the process, you can watch various videos on how to make gel polish and strengthening step by step and get started.
The step-by-step sequence of strengthening with acrylic powder is as follows:
- Ensure the room is well ventilated or, in warm weather, sit on the balcony. This is done in order to prevent allergies, since the material has a rather pungent, unpleasant odor. You can put a regular medical mask on your face to avoid inhaling the released ingredients.
- Place the tool set in front of you.
- Apply primer to your tidied nails and let it dry.
- Coat each nail plate with monomer. Next, using a pusher, sprinkle generously with acrylic powder, holding your fingers over the jar of acrylic for economy. There is no need to be afraid of the appearance of lumpiness; high-quality material does not give such an effect. To apply gel polish you will need transparent powder.
- Place your nails under a lamp to dry for a couple of minutes. Remove excess powder with a wide brush.
- Polish and sand the surface for a smooth finish.
- Apply gel polish of the desired color and decorate with decor.
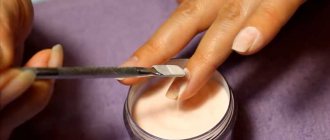
Applying acrylic powder
You can apply two layers of acrylic for increased durability. This is true for very brittle and weak nails. If you already have application experience, instead of sprinkling, you can dip the brush with monomer directly into the powder and apply a thin layer. To correct the shape and length, pour the monomer into a glass and dip a brush into it. We put acrylic on its tip, then form a ball, place it on the nail and level it, then dry it.
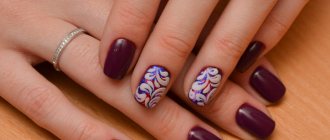
Strengthened marigolds
Features of the material
For different purposes, the master uses different types of powder when performing a manicure. The visual result and quality of nail strengthening depends on this.
There are 4 types of powder:
- Colorless. If simple leveling is being done without additional decoration or preparation for a French coat, transparent acrylic is used, creating an invisible strong layer.
- Camouflage. Adjusts to the shade of the nail, helps eliminate breakages, cracks and other damage to the plate.
- Colored. Used for unusual design of nails, making designs, drawings, and applying 3D decor to manicures.
- Finish. Increases the long-term preservation of gel polish. It can be of three types: matte, glossy or shimmer (with sparkles). Can be applied to any coating.
Regardless of the initial state of the nails and the basic purpose of the product, it always strengthens them, increases the time the effect lasts, and prevents the formation of chips, cracks and detachments while wearing the work.
The gel itself is universal. If you use high quality materials and distribute them correctly, the results of your manicure will last for up to one and a half or two months.
The high shelf life of the powder is associated with its characteristics:
- High thermal strength. The result is not exposed to the aggressive effects of high temperatures, which is why the result of the technology remains unchanged in the summer and with frequent visits to the bathhouse or sauna.
- Creates additional protection for the nail plate and matrix (base) from the use of chemicals or aggressive components. This prevents the surface from being corroded by acids and alkalis. However, you still need to use rubber gloves so as not to damage the sensitive skin of your hands.
- Suitable for any type of nails. Even the thinnest and most sensitive nails can be strengthened with acrylic.
How to remove acrylic coating?
The strengthener needs to be removed after a few weeks. The process is not complicated, unlike its application, so you can do it at home. The actions are performed very carefully and accurately to maintain the beautiful and healthy appearance of your own nails. They are performed in the following sequence:
- Remove a layer of glitter from all nails.
- Apply nail polish remover to cotton pads and apply to each finger.
- Each finger needs to be wrapped in foil and kept for no more than 10 minutes.
- Remove the remaining material using an orange stick.
- We file the shape with a file and thoroughly clean it to the desired result.
Removing acrylic
Strengthening with shellac powder
The line of varnishes called Shellak has several differences from gel varnishes. Shellac contains fewer harmful components, is much easier and faster to remove, and has a predominant varnish texture.
This is why many craftsmen suggest applying a strengthening acrylic layer under shellac. The sequence of steps will be the same as when using gel polishes, but the process itself will require less time.
Additional recommendations from the experts
- To do a chic, professional manicure at home, you not only need to train a lot, but also listen to the advice and tricks of real experts. It is advisable to include calcium, vitamins A and B, iron and foods rich in calcium in the diet, because the hardener does not treat nails, but only masks the problem of a fragile plate.
- The coating will ensure a long-lasting manicure, but as a precaution, still wear protective gloves for housework, especially laundry, wet cleaning and dishwashing.
- Don't forget to give your hands a gentle massage, use hand moisturizer, and stay hydrated.
- And most importantly, remember that your nails will need periodic rest from the material to prevent their condition from deteriorating. After using acrylic for a long time, take a break and provide the necessary rest from the procedure.