Well-groomed hands have always been a woman’s calling card, which means that the demand for a good manicure will always be present. But to start your own business, you need to obtain at least a minimum of basic knowledge, and it is better to thoroughly understand current trends and learn how to work with materials that are of interest in the market.
You can get all the necessary knowledge without leaving your own apartment - many schools offer online manicure courses, and you can choose both comprehensive solutions, where you will go from beginner to pro, or individual programs dedicated to individual materials or manicure techniques. Some schools, after completing their course, issue a certificate confirming the knowledge you have acquired.
St. Petersburg beauty school
Website: https://online.ecolespb.ru/ Cost: 2,300 rub.
per month Profession “Manicurist” online
Learn how to perform a salon manicure with gel polish. Get the skills to start in one of the most sought-after professions in the beauty industry.
Program
62 academic hours, 17 lessons, 1-3 months for training
MANICURE BLOCK FOR BEGINNERS Classic manicure Hardware manicure Combined manicure Gel polish coating
ADVANCED PROFESSIONAL BLOCK IN MANICURE Removal of coating and repair of nails Alignment of the nail plate French manicure
NAIL DESIGN BLOCK Watercolor technique Decorative elements Geometry in nail design Aeropuffing
ONLINE COURSES “STARTING A CAREER IN THE BEAUTY FIELD” Work in a salon or freelancing Beauty marketing Photography for beauty specialists
Skills after training:
- Master the basic techniques for creating a manicure: classic, European, hardware and combined
- Learn to work with gel polish
- Master working with marbled coatings, rubs and foil
- Create geometry, abstract and floral designs on your nails with a brush
- Carry out repairs to the nail plate
- Carrying out a SPA manicure
- Master the French manicure
About extension methods
To do nail extensions with gel polish, masters use one of two methods:
- Using special pads.
- Using forms onto which gel polish is applied.
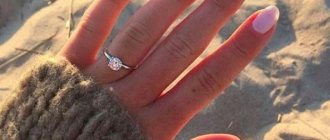
Extended nails
Both methods have their advantages and disadvantages. Before making the final choice, it is recommended to study in detail the characteristics of both methods.
Manicure extensions using special overlays called tips lengthen the nail plates well. But the quality of artificial nail plates depends on the reliability of the tips that we see in the photo.
For an ideal manicure, the overlays should be bent in half, and after straightening they should return to their original shape without grooves or sags.
French manicure
This method has the following advantages:
- The speed of the process.
- Compatible with brittle and peeling nails.
- Gel or acrylic can be used for extensions.
- Tips go well with small nail plates.
Performing a manicure
At the same time, tips have the following disadvantages:
- Tips have a certain shape that cannot be changed.
- Do not combine with nails that naturally widen towards the top.
- If you overdo it with gel polish, the extensions will look unnatural.
For the second method, craftsmen use reusable forms.
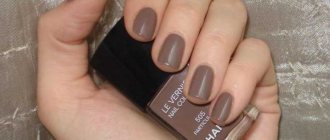
All gel polishes have a limited shelf life
The advantages of this technique are as follows:
- You can create nail plates of any shape and size.
- Extended nails are strong and durable.
- The forms can be used for nails in any condition.
However, if the specialist does not have sufficient experience, it is better not to use extensions using this method. Also, this technique is not a good choice for extensions at home. In most cases, nail plate extensions using forms are carried out in a salon environment by experienced professionals.
Red manicure
Udemy
Website : https://udemy.com Cost : from 999 rub.
Professional manicure from Victoria Klopotova
If you want to quickly learn the correct manicure technique and work professionally using different techniques, this course is for you.
After completing the course, you will learn how to properly prepare natural nails for a manicure, how to choose the right type of manicure, and master a quick technique. You will learn how to perform a high-quality procedure, you will learn all the secrets and nuances of manicure.
At the end of the course, you will easily do a manicure, precisely matching it to the client’s skin type. You can easily perform a procedure of any complexity and for any clients.
Only here, in this course “Professional manicure from Victoria Klopotova”, you will acquire a huge amount of knowledge that will help you earn money now, improve your business, which will make your life better!
The purpose of the training is to improve the quality of services provided by manicurists. The student receives information on the following topics: work safety (standards of antiseptics, disinfection and sterilization); anatomy of nails, how to work safely and not harm the client; nail pathologies.
The course is intended for beginners as well as professionals who want to improve their skills. It is also recommended for end consumers (clients) to familiarize themselves with the performance of Professional manicure and the correct choice of a master.
Christina Os School
Website : https://kursy-manikyur.ru/ Introductory lesson: Watch for free Phone: +7 (918) 9000-301 (WhatsApp) Cost : 1490 rub.
School of Christina Os - master instructor and owner of a chain of manicure studios. Christina has collected her 10 years of experience in the field of nail service in one online course “Turnkey Manicure” on hardware manicure with gel polish coating.
At the end of the course, 3 certificates are issued: “Hardware manicure”, “Gel polish coating” and a bonus “French Design”
And this is the full course program:
Online course “Turnkey manicure” Consists of 18 video lessons + 1 bonus lesson on French manicure + 1 bonus e-book presentation “How to attract your first clients from Instagram”
Course program:
Theory:
- Workplace overview
- Master's health
- Equipment overview
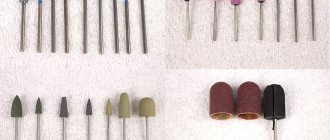
- Milling cutters
- Tools
- Materials
- Disinfection and sterility
- Structure of nails
- Skin structure
- Types of cuticle
After the theoretical lessons there will be mini-tests of 3 questions to reinforce the topic
Practice:
- Removing gel polish
- Creating a Form
- Removal of pterygia
- Lifting the cuticle and removing it with a cutter. Processing side rollers
- Primer treatment
- Applying the base
- Gel polish coating
- TOP. Finish coating
Bonuses when purchasing a course: + BONUS. French design lesson + BONUS. Presentation book “How to attract your first clients from Instagram”
Now you have the opportunity to watch the first introductory lesson for free, learn more about the course instructor Christina Os and her course, and also learn about the profession of a manicurist (how much do masters earn, who is suitable for this profession, and more).
The cost of the entire course, including the discount, is 1,490 rubles.
Gel polish at home
Gel polish at home - it's easy! Step-by-step instructions for applying and removing gel polish at home, as well as all the secrets and tricks!
At first glance, gel polish coating is a rather complicated procedure, and women prefer to have it done by a specialist in a salon. In this article, you will learn how to cover your nails with gel polish at home step by step, what materials are needed for this, and most importantly, how profitable it is to make gel polish at home.
Gel polish at home: what you need
To cover, you will need a starter kit of tools and supplies. We recommend purchasing a beginner's kit, which contains everything you need for a gel polish manicure. You can also purchase the tools separately.
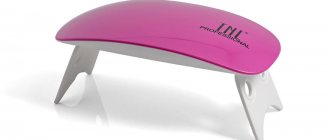
- UV-LED lamp. We wrote in detail how to choose a lamp for manicure in this article.
- A manicure set that must include scissors, clippers and a pusher.
- Buff for polishing and nail file.
- Cuticle remover and orange sticks.
- Lint-free wipes.
- Nail degreaser.
- Primer (ultrabond). If you have thin and brittle nails, it is better to choose an acid-free primer.
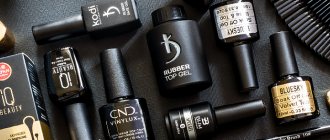
- Base, top and color gel polish. We have discussed how to choose a base and top in other articles.
- Design materials if you want to create a creative manicure.
- Cuticle oil.
- Remover (removal liquid), cotton pads and clips for removing gel polish.
Gel polish coating at home
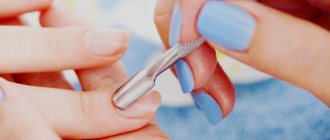
- Preparing nails for coating: doing a trimmed or untrimmed manicure. First, apply remover to the cuticle to soften it. Then we push back the cuticle with a pusher or an orange stick, after which we treat the skin at the nail folds and remove the cuticle.
- We file the nails to the desired shape and polish them with a buff. This is necessary for strong adhesion of the nail to the base.
- We wipe the nail plates with a degreaser. We recommend using lint-free wipes, as lint can make your finish uneven.
- Apply primer (ultrabond), avoiding the skin around the nail. The primer is needed for strong adhesion of the base to the nail plate: it is something like double-sided tape. If you have naturally strong, non-brittle nails, then you can skip this step.
- We cover the nails with a thin layer of base, seal the ends, dry in a UV-LED lamp for 2 minutes/30 seconds. If you have an uneven surface of the nail plate, you need to level it.
- We apply colored gel polish, seal the ends and place them back in the lamp.
- The final stage is applying the finishing coat. Don't forget to seal the ends with topcoat, otherwise the gel polish will quickly chip. Dry the top coat in a UV-LED lamp for 2 min/30 sec.
- If you have a top with a sticky layer, you need to remove it with a cleaner.
Removing gel polish at home
To remove gel polish from nails, salons usually resort to filing with a cutter. But this method requires special equipment and skills. We will look at how to remove gel polish using special liquids.
- We cut off the top covering using a buff.
- We soak a napkin, cotton pad or sponge with gel polish remover and apply it to the nails. After this, the fingers are placed in the clamps to remove the gel polish. They can be replaced with pieces of foil - the main thing is that the disks with liquid fit tightly to the nail plates.
- After 10-15 minutes, remove the clamps and remove the gel polish using an orange stick or pusher.
- The remaining gel polish can be filed off with a buff. Apply moisturizing cream or nourishing nail oil to clean nail plates. Remember: before coating, the nail plate must be degreased. If after removing the gel polish you are going to immediately do a new manicure, then no cream or oil is applied.
These simple recommendations for applying and removing gel polish will help you do these procedures at home.
We wish you success in mastering gel polish!
Best regards, imkosmetik online store.
ESHKO
Website : https://www.escc.ru/ Cost : The first lesson is free, then from 1275 rubles. per month
Online course “Manicure and Pedicure Master”
What knowledge will you gain on the course?
- Sanitary and hygienic requirements. You will learn how to properly use different tools, as well as how to disinfect them.
- Anatomy of nails. The lessons explain in detail how to work with nails and cuticles.
- Special procedures. You will learn about the types of care methods and how to perform them.
- Massage. You will master hand and foot massage techniques.
- Diseases. The training program contains information about common nail diseases and preventive measures that need to be taken to avoid such problems.
- Design trends. You will learn how to make a beautiful manicure according to the latest fashion.
WITHIN THE COURSE YOU WILL RECEIVE
- 10 educational magazines with numerous examples and exercises, allowing you to acquire practical skills from the very first lessons and effortlessly absorb the necessary knowledge;
- 20 homework tasks that will be checked, graded and commented on by your personal teacher. Homework can be done online in your personal account on the ESKO website or in writing on special forms and sent in a postal envelope;
- final examination test, which will allow you to evaluate the acquired knowledge;
- additional opportunities for learning and communication on the ESHKO Campus (a social network for students taking ESHKO courses);
- access to additional FREE electronic publications
Artlix
Website
: https://rumanicur.com
Phone
: none
Cost : free
Take a free manicure course:
- Theoretical part.
- Hundreds of video lessons.
- Manicure ideas by color, occasion.
- Selections for beginners.
- Detailed lessons on various types of manicure (gradient, lunar, French, velvet, marble, newspaper, 3d).
- Working with tools (stamping, sponge, glitter, rhinestones, dots, tape).
The lessons include a theoretical part of the course program, posts on types of manicure and collections of ideas. Based on the results, an electronic certificate can be issued to those interested.
Pilki School
Website : https://pilkionline.com Phone Cost : 14900 rub.
You will learn how to perform classic, hardware and combined manicures; Apply a gel polish coating that will last up to 4 weeks. Learn everything about the structure of nails and how to repair them. We will share the secrets of the masters of the PILKI network that will help you increase your income. The entire course was filmed on a professional camera by experienced camera operators. This is how videos and films are usually shot. This means that you will see all the details: clearly and with the right light. You will not be left alone, our teachers will evaluate each of your practical work and answer any questions during the learning process. There is no strict schedule. You choose when and how much time to spend on training. Do you want to repeat it in a couple of months or take the course several times? - No problem!
Sakramel
Website : https://online.sakramel.ru Phone Cost : 2500 rub. per course
Additionally: teaching supervision
- Control of training by the teacher
- Assignments and comments
- Printed certificate of completion of an international course
Training Support Materials
- Cutters for combi manicure (+ scissors)
- Cutters for hardware manicure
- Author's manual
- Worldwide delivery of tools and manuals
Nailart.Online
Website : https://www.nailart.online Phone : 8 800 301 0071 Cost : 1000 rub. per course
Become a nail service master without leaving your home! Thanks to distance learning, you can master manicure, extensions and correction as in a “live” course. The lessons are filmed with high quality and voiced in as much detail as possible. Each stage of work is so laid out that the entire process, from start to finish, becomes clear. If you are a complete beginner and have no idea what you need for the course, see the tab next to “What is needed?”, There is a complete list of tools and materials. The course contains several video tutorials, in which we conducted a detailed review of equipment, materials and tools for work. The school offers more than 30 courses in the following areas:
- Basic Skills
- Building up
- Painting and design
- Instructor courses
- Trainings
Nail extension with gel polish
Before applying gel polish to your nails, it is recommended to pay attention to the contraindications that are prescribed for the technique. So, if there are hormonal imbalances associated with pregnancy, menstrual periods, dermatological diseases or damage to the nail bed, it is not recommended to do the procedure. Otherwise, the result of the technology will wear off ahead of time.
The method of using gel polish involves fixing a special disposable form to the surface and applying pigment to it in a dense layer, which will create a continuation of natural nails.
Before starting the procedure, prepare consumables and tools:
- File;
- Orange stick/pusher;
- Nail scissors;
- Bafik;
- Remover;
- Degreaser, primer;
- Form;
- Gel polishes – base, color pigments, top;
- Brush;
- Cleanser for removing the sticky layer.
One of the advantages of using the composition is the versatility of their polymerization. To dry the decorative coating, you can use an ultraviolet, hybrid or LED lamp, regardless of which the work will dry completely and turn out neat.
Nail preparation
You need to start the technology with a basic correction of the nail plate, on which you can carefully attach the forms for extensions. Beforehand, if desired, you can make a steaming bath for your fingers to soften the nails and periungual area to make them easier to process.
After this, the preparation itself begins:
- Use a file to adjust the shape of the free edge, file it to a length of 1-2 mm to make it more convenient for you to fix the cardboard backing.
- Apply the remover to the cuticle, after a minute push it back with a pusher or an orange stick and cut it with scissors.
- Use buff to polish the surface of the nails.
- Treat the nail bed with degreaser and then apply a thin layer of primer. There is no need to dry both products; they harden spontaneously after 20-30 seconds.
After carefully preparing the natural manicure for work, you can begin performing manipulations. But be careful - you should not skip the steps of applying a degreaser or primer, as they increase the adhesion of the pigment, preventing premature peeling.
Step-by-step instruction
Keep in mind that the shape can be properly fixed only if there is a small free edge (1-2 mm), since it is attached under the nail.
The technology for lengthening nails is quite simple if you follow all its steps:
- Cut the shape to the desired length of the manicure, fix it on the nail. If desired, the edges can be stapled together to keep the backing stationary.
- The first dense layer of transparent or camouflage agent (which depends on the design you want to make) is distributed onto the plate and form. It must be quite dense, so sometimes difficulties arise in correctly distributing the composition.
- First, the dye is applied to the center of the plate, then spread along the lateral lines, the cuticle area. To eliminate unevenness in the decorative coating, the finger can be turned face down for 7-10 seconds, in this position the defects can be smoothed out with a brush. Then the hand is turned back over, you can make sure the quality of the base layer and dry it for 1.5-2 minutes.
- If you are doing extension repairs or slightly lengthening your nails, you can limit yourself to one dense layer. Otherwise, it is recommended to add another thin layer of varnish.
- Remove the form and correct the resulting manicure. Use a file to smooth out the shape of the free edge.
- Apply the base decorative coating and the finishing coat.
- Remove the sticky layer from the top with a clinser.
Typically, a complete extension takes about three hours, but often at home girls resort to the technology only to partially lengthen their nails or repair them when chips, cracks, or other defects form.
When the pigment is applied correctly, it creates a fairly dense and strong substrate that remains in the same condition for up to 3-4 weeks.
EDUCANTA
Website : https://www.educanta.ru Phone : 8-964-774-85-84 Cost : 2000 rub. per course
EDUCANTA school offers:
- online training from the best of the best professionals in the field;
- conferences, marathons, online courses;
- bringing together authoritative industry experts on one platform;
- knowledge beyond brands and marks;
- comprehensive development of nail service technicians
Course options:
- “URBAN” (Miniature Engravings)
- High-speed watercolor painting with gel polishes
- New Year's design
- Creation of competition nails using acrylic technology
- Mistakes during hardware manicure
- Strengthening, repairing and restoring natural nails
- Chinese painting
- Artificial nail system
- Creation of competitive nails using gel technology
- Painting with brushes level 1 – “Fine lines”
- Painting with brushes level 2 – “Ethnic ornament”
- Subtleties of salon and arch modeling with acrylic
Gel polish and brush
Perhaps the most obvious way to create a stone effect is to paint with a brush. In order for the design to be successful, basic artistic skills will be required.
Prepare for work:
- gel polish in two shades. It is better if the funds are from the same company. To create a classic marble design, use white and black;
- base and top;
- thin brush. Such brushes are available in almost all brands of manicure products – ruNail, TNL, Irisk. The photo below shows a Runail Nail Art Nylon brand brush No. 000/3, 12 mm.
Prepare the background
- Wipe the nail plate with degreaser and after it evaporates, apply base;
- Dry the base layer in a lamp for 30-120 seconds. depending on the type and power of the device;
- Cover the nail with white gel polish and then dry it. If necessary, reapply the background color to ensure an even coverage;
Creating a drawing
- Apply a thin layer of top coat over the dried gel polish;
- With a thin brush dipped in black gel polish, begin to draw barely noticeable thin lines. With a damp top the lines will blur – this is normal, as it should be;
- Draw stripes randomly, differently on each nail, until their number is sufficient for your idea. The lines do not have to be clear, so some tips can be deliberately shaded.
If you are not satisfied with the result, remove the pattern using a disk soaked in cleaner and lightly buff the surface with a 180-240 grit file. Wipe with degreaser, apply topcoat again and start over.
The final stage
- Dry the pattern in a lamp. In ICE this will take 60 seconds, in UV – 120;
- Apply the finish to your nails and dry again.
Before applying the finish, the design can be supplemented with rhinestones, sparkles or other decorative elements. In this case, it is better that the top applied to create the pattern has a sticky layer.
ASGOL
Website : https://www.asgol.pro Phone : +7 996 161 7777 Cost : 9900 rub. per course and up to 70,700 rub. for a six-month training program
Online manicure courses will help you gain the necessary knowledge and practical skills for successful work, and upon completion of training, you will be issued a certificate of an established state standard (manicurist), which confirms your additional professional education and gives you the opportunity to work in different countries of the world.
Course options offered:
- Basic manicure course
- Advanced manicure
- Advanced manicure basic design course
- Modeling polygel
- Nail design and art painting
- Your own nail salon, office or studio
Hedu
Website : https://irs.academy/ Cost : from 2,600 rubles.
Online manicure course
Become a master by taking our online manicure course and earn money doing what you love creatively.
Program
- Lesson #1 – Classic manicure
- Lesson No. 2 - Manicure tips. Pros and Cons of hardware manicure
- Lesson No. 3 - Hardware manicure
- Lesson No. 4 - Japanese manicure
- Lesson #5 - Polishing your nails
- Lesson No. 6 - Paraffin therapy
- Lesson #7 - Massage
- Lesson No. 8 - Gel polish. Coating sequence
- Lesson No. 9 – Alignment of nails
- Lesson #10 – Strengthening your nails
- Lesson #11 – Nail Repair
- Lesson #12 - Bonus. Nail design
- Lesson #13 - Bonus. Nail design. Part 2
- Lesson #14 - Bonus. Nail design. Part 3
- Lesson #15 - Bonus. Nail design. Part 4
Online pedicure course
Learn how to do a pedicure and take professional care of your feet, or get the sought-after profession of a pedicurist.
Program
- Lesson No. 1 - Human skin and foot structure
- Lesson #2 - Interdigital spaces
- Lesson No. 3 - Types and purposes of tools
- Lesson #4 - Workplace
- Lesson #5 - Correct working posture
- Lesson No. 6 - Positioning your hands and working with the instrument
- Lesson No. 7 - Classical, combined and hardware processing
- Lesson #8 - Cuticle
- Lesson #9 – Polishing and shaping your nails
- Lesson #10 – Nail Design
Preparation for the procedure
Before you start painting your nails, you will need to spend some time on the preparatory procedures. Namely:
- purchase a UV or LED lamp for drying the coating;
- stock up on additional components (a nail file, an orange stick, brushes for drawings, tweezers for applications - depending on the situation);
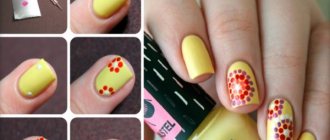
- find ideas for painting with gel polish for step-by-step implementation (masters constantly share new products);
- purchase materials for the procedure;
- select a comfortable place with good lighting.
First you need to file your nails and trim the cuticles.
The materials for the procedure mean not only the gel polish of the selected shade, but also the accompanying mixtures. These include hand and tool sanitizers, degreaser and dehydrator (a popular new product is a combination of both products in one), primer, base/top coat and rub-in (a stick remover). Also, to properly complete the painting you will need cuticle oil.
Perfect manicure school
Website : https://online-manicure-school.rf Phone : 89055365461 Cost : from 1100 rub. per course
The Perfect Manicure School program is a program developed based on extensive experience. 12 theoretical and 14 practical lessons, offers tests on theory and practice on models and testing of work by the teacher. Upon completion of the course, you will receive an electronic certificate of completion of the course after completing the test.
Course options:
- Combined manicure
- Leveling the nail plate and applying gel polish
- Combined manicure and cuticle coating
- Combined manicure and cuticle coating
Required Tools
Beginner manicurists are often faced with the problem of choosing suitable tools and materials. Studying the lessons step by step, not everyone can concentrate on the list of necessary devices. Experts recommend paying attention to lists that include the standard set:
- Lamp for drying helium coating.
- Color palette of gel polishes.
- Tips.
- Lint-free wipes, which are necessary to remove the top sticky layer of the gel.
- Means for degreasing the nail plate.
- Finishing gel.
- Flat brush for applying a decorative layer.
- Buff and files for polishing nails.
- Disinfection solution.
- Tools for removing cuticles.
- Glue for fixing tips.
Applying gel polish
All items included in the list are used by specialists for nail extensions and gel polish coating. If it is not possible and there is not enough knowledge to choose the appropriate tools, you can purchase kits for nail extensions with gel polish for beginners, one of which is shown in the photo. In this case, you don’t have to wonder what you need for the procedure at home. The starter kits include the necessary accessories that will help you learn step-by-step lessons.
Rich Art
Website : https://richart.su Phone : 89055365461 Cost : from 800 rub. up to 2500 rub. per course
Watch at any time convenient for you, as many times as you want. After completion, a certificate is issued in electronic form.
Course options offered:
- Gel nail modeling
- FLASH design
- Chinese painting
- All types of jackets
- Hardware pedicure without cutting tools
- Podology of the foot: hyperkeratosis, cracks, corns, calluses
- Five nail shapes. Correct sawdust
- 4in1 Leveling + reinforcement + growing + IBX
- Hardware manicure
- Own manicure studio
- IDEAL OMBRE
MBACity
Website : https://mba-city.ru Phone Cost : 11,500 rub. per course
The leading and most popular today, distance learning in manicure and pedicure provides for your full participation in the process. You are given access to all tasks and lessons of the manicure and pedicure training course of the Institute of Beauty and Health Business Academy MBA CITY, and you can master the program at a convenient pace and schedule. You will also receive a state certificate. sample with an international application for completing the “Master of Nail Service” course, and this document will be a significant plus to your resume and an excellent confirmation of the acquired professional knowledge.
Training course program “MASTER OF NAIL SERVICE”
- Profession of nail service specialist
- Workplace of a manicure and pedicure specialist
- Structure of skin and nails
- Types of manicure
- How to care for the skin of your hands and feet
- General information about nail extensions
- Acrylic nail extension technology
- Gel nail extension technology
- How to choose a color for your nail design
- The concept of composition
- Method of coating nails with varnish
- Types of nail designs
- Types of pedicure
- Necessary knowledge about nail diseases
- Sanitary standards
MADELON
Website : https://madelon.ru Phone : 8-495-603-30-06 Cost : from 1000 rub. up to 12,000 rub.
The training is structured in such a way that the full course can be completed in stages. The center guarantees everyone an individual lesson schedule. Training is possible on Saturdays and Sundays - this is very convenient for working people. The documents issued allow you to actually apply for a job all over the world, testify to the high professional level of the owner and give the right to work with professional materials. After training, the graduate also receives a State Certificate.
Course options offered:
- Manicure
- Hardware manicure
- Combined manicure
- Pedicure
- Hardware pedicure
- Combined pedicure
- Gel polish coating
- Gel nail modeling
- Modeling nails with acrylic
- Nail Art (nail design and Chinese painting)
Step-by-step coating application
The gel polish should be applied step by step to ensure good adhesion to the natural nail. First, you definitely need to do a manicure: remove hangnails, move or trim the cuticle, trim and file the free edge of the nail plate. Then a sanding file removes the shine from its surface. After manicure, nails must be degreased. To do this, use a degreaser or a means to remove the sticky layer.
Step 1 - Applying Base
The next step is to use a primer. It helps the polish last longer. The primer can dry on its own in the air, or its application will require drying in a lamp.
Step 2 - Use primer
If your nails hold polish well, you can do without applying a primer. In some cases, it dries out the nail plate a little. It is recommended to use acid-free primers. They retain the natural moisture of the nail surface, do not dry it out and increase the wear life of the coating.
Step 3 - Using the Base
The next stage involves using the base. She should cover her nails and dry them in a lamp. Drying time will range from 30 to 120 seconds, depending on the material used and the type of lamp. The procedure for applying the base is mandatory, otherwise the material will not adhere well. The base coating technology is special; it must be applied to the entire surface of the nail and be sure to seal its end. Sealing the free edge is a very important process, otherwise the manicure may peel off and peel off quickly.
Step 4 - Apply the base color
After the base coat, the main color is applied to the nails. Here it is important to know how to make gel polish coating neat and durable. To obtain a rich color and to avoid an overly dense coating, it is necessary to apply a thin layer of gel polish. If there are several of them, it will give a rich color. The gel polish should be applied as close to the cuticle as possible, but in no case touching it. When performing a manicure, you should not touch the side rollers. Material that comes into contact with the skin must be removed immediately, otherwise there is a risk of an allergic reaction. In addition, a manicure done carelessly with gel polish will look ugly.
Step 5 - Use the top
To cover your nails with gel polish, you must use a top coat. It will help the polish stay on your nails for a long time. If the top is glossy, it will give the manicure a special shine. If you choose a matte top, it will create a unique velvet effect on your nails. The top coat is applied to the entire nail; it should not flow onto the side ridges or cuticles. Typically, manufacturers provide their products with specific instructions for applying the material, which should be followed. It will tell you how to apply gel polish from a particular manufacturer so that it looks flawless. The top can be with or without a sticky layer. If there is a sticky layer, it must be removed with a special product. Below is the entire process of applying gel polish with photos.
Academy of Successful Masters
Website : https://yana-luzan.ru Phone Cost : from 890 rub. up to 4000 rub.
The Academy of Successful Masters offers online training in nail modeling, design and basic techniques for running your own business to meet the high standards of the modern market. During the courses you will be able to learn not only about the main modern trends in this area of business, but also learn to avoid common mistakes.
Course options offered:
- Perfect Gradient + Fantasy Textures
- Perfect Gradient
- Fantasy textures
- PRO disinfection and sterilization
- I love FRENCH
- Strengthening nails
- Speed. Express manicure
- Sawdust of natural nail shapes
- Photo intensive
- Stamping
Nail Space
Website : https://nailspace.ru Phone : 8-800-550-76-18 Cost : on request
The course is designed for any level of training, the program is adapted for both beginners and experienced professionals! During the course you receive theory plus homework, and upon completion of the training you are issued a certificate. The training lasts 6 weeks and includes 15 lessons.
Course program:
- Introduction to the profession. Theory
- Nail shapes
- European manicure
- Classic manicure
- Combined manicure
- Hardware manicure
- High-speed hardware manicure
- Gel polish coating
- Removing old coating
- Basics of design in gel polish coating
The importance of following the rules
The technology of applying gel polish includes several mandatory steps, each of which is important. The gradual application of gel polish will allow your nails to remain beautiful and attractive for a long time. To make your manicure pleasing to the eye for at least two weeks, you must follow the step-by-step instructions for applying gel polish. It is this that will help all materials to be applied well and retain their properties for a long time.
Instructions for applying gel polish include several steps:
- Preparatory. It consists of processing the nail plate, removing the cuticle and lightly sanding the surface of the plate to get rid of the natural shine and better adhesion to materials. This stage involves putting your hands in order.
- The main one, which involves the step-by-step application of all the necessary materials directly to the nails - in compliance with all stages of applying gel polish and related coatings.
- The final step is to apply a finishing coat, which will ensure the durability of the gel manicure, and remove the sticky layer (if any).
All stages of applying gel polish must be followed in order to get an excellent result. If the rules are not followed, the result may disappoint you.
After all, gel polish and the technology for applying all the necessary coatings require a certain sequence that cannot be violated.
Beauty Academy
Website : https://academy-beauty.ru Phone : none Cost : from 2800 rub. up to 8650 rub.
Online course options offered:
- Aquarium nail design
- Acrylic modeling
- Spa treatments for hands and feet
- Hardware manicure and pedicure
- Comprehensive nail design program
- Nail service: comprehensive nail program
- Manicure and pedicure - paraffin therapy
- Gel nail extensions, shellac coating
- Japanese manicure
- Nail design and hand painting with brushes
- Acrylic nail extension
- Gel nail design
- Manicure, shellac and nail design
- Chinese painting on nails
About the advantages and disadvantages of extensions
Many girls would like to learn how to do nail extensions and manicures with gel polish at home. However, some doubt the benefits of extensions, preferring a regular manicure using gel. Masters recommend studying step by step what the advantages of conventional manicure and extensions are, and comparing them with possible disadvantages. And after that, draw final conclusions.
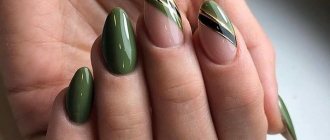
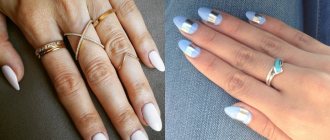
French manicure option
If you do a regular manicure using gel polish, you can get a lasting decorative effect, which, if necessary, can be easily removed with a special product. The procedure does not require special knowledge. It is enough to study step by step the lessons of applying gel polish on nails. However, the durability of such jewelry lasts no more than three weeks.
In turn, nail extensions with gel polish for beginners allow you to get strong, smooth nails that you can show off for more than 6 weeks. If desired, extended nail plates can be decorated with beads, rhinestones, and ribbons. But in order to admire the extended beauty of your nails for a long time, you need to regularly visit a specialist who will do a manicure correction. This is not a painful, but lengthy procedure that is harmful to natural nails.
Gel polish
The disadvantages of extended nails with gel polish include the possibility of removal only by a professional nail technician. You cannot remove artificial nails at home on your own.