Girls always want their manicure to look neat, fresh, and natural, but they do not always take proper care of them, using care products and rubber gloves when working with chemicals. Because of this, the structure of the nail plate gradually begins to deteriorate, becomes thinner, and breaks.
To restore the broken length of the nail surface, you can perform nail extensions with acrylic powder. It is safe for the structure and helps fill cracks, damage, and chips.
What is acrylic powder used for?
Acrylic powder is a powder with small particles related to polymer materials. After contact with the monomer substance, the acrylic powder hardens, forming a durable protective coating.
The first use of this material was noticed in dentistry. Later, the manicure guru decided to try the powder while doing nail extensions. Acrylic has strength and ductility; the hardened substance is elastic and does not require special care.
The powder is used to:
- strengthen nails with gel polish;
- improve the condition of natural nails;
- create a design;
- fill microcracks;
- quickly correct a broken area of the nail plate;
- increase the length of the nail.
Using powder for gel polish
The gel has gained its popularity due to its durability; even with constant contact with water, the coating lasts a long time. A manicure made using gel lasts on the nails for more than two weeks without fading or losing their original shine.
Due to the characteristics of the body, chronic diseases and the structure of the nail plate, for some girls, the manicure deteriorates after a couple of days. To increase the wear time of a beautiful design and give strength to the nail plate, experts advise strengthening the nails with acrylic powder before using gel polish.
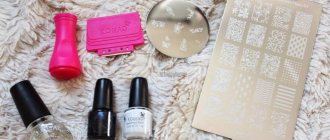
Home Strengthening Tools
- nail scissors;
- cuticle softening liquid;
- container with warm water;
- manicure brush;
- manicure spatula;
- base coat;
- file;
- antibacterial agent;
- degreaser;
- colorless powder;
- monomer;
- primer or primer;
- brush for applying acrylic;
- finishing coating;
- Ultraviolet lamp.
Step-by-step preparation
- Remove any remaining varnish;
- Wash your hands with soap;
- Get a manicure;
- Treat the nail plates with alcohol or hydrogen peroxide;
- Apply a soft buff to remove excess shine;
- Degrease the top layer of the nail using a special liquid.
It is better to do a manicure without cutting, so as not to injure the skin. In case of trimmed manicure, wait 24 hours before applying the material to the nails.
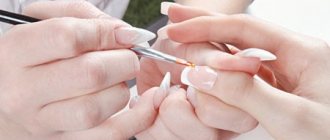
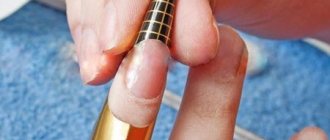
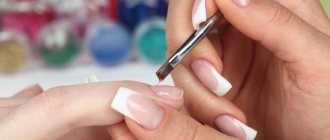
Step-by-step instructions for applying polymer powder
- After manicure and degreasing, apply primer to your nails. For sensitive skin there is an acid-free one.
- Wait a few minutes until the primer is completely dry.
- Cover with base gel.
- Next, using a special brush, pour acrylic powder or dip your nail into it. The more powder, the stronger the nail will be.
- Hold your nails for 2-3 minutes under an ultraviolet lamp.
- Remove any remaining material using a special brush.
- Using a nail file and buff, correct your nails.
- Apply the selected shade of gel polish.
- Dry the coating using a UV lamp.
- Apply the finishing coat, dry the layer using a lamp.
- Remove sticky layer.
- Apply emollient oil to the skin around the nail.
What you need for acrylic nail extensions
Acrylic nail extensions can be done in two ways: using tips or using special forms. The tips are attached to the base of the nail, and the forms are placed underneath and removed after work.
At home, it is better to use tips, since without an assistant it is difficult to move paper forms with one hand.
In order for the extension procedure to be successful, the first step is to prepare all the necessary materials:
- Acrylic Powder.
- Monomer.
- Special brushes.
- Buffs, nail files.
- Tips or paper forms.
- Orange stick.
In specialized or online stores you can purchase ready-made sets or buy everything separately.
Strengthening natural nails
Acrylic powder is used under gel polish, creates decorative patterns, and gives durability to natural nails. The process of strengthening your own nails is similar to using acrylic for gel polish, but the final moments are different. Strengthening nails with acrylic powder begins with preparing the nail plate; you should follow the first three steps from the above step-by-step instructions. Next, dip the brush into liquid liquid and sprinkle it with powder. Wait a little time for the two materials to react.
Stepping back one millimeter from the cuticle, apply the resulting mixture to the nail plate. Distribute the material in a thin layer over the entire surface and dry under ultraviolet light. After hardening, level the surface of the nail, smooth out any unevenness and secure with regular varnish or use shellac to add shine and longer wear. After applying shellac, dry your nails under a UV lamp. Nails will look natural when using colorless powder.
Types of acrylic powder
Strengthening nails with acrylic powder will only be beneficial if used correctly, following safety precautions and choosing the right material.
A good acrylic powder should have a porous structure, completely cover the nail plate, not spread or crystallize, and at the same time be plastic and easy to sculpt.
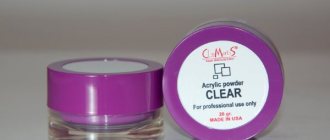
Special series - capable of reacting not only with odorless monomer, but also with ultraviolet curing substances. The powder has good plasticity, making it easy for beginners to work with. The special series is easy to apply to the nail plate, does not spread, and is excellent for the base layer and creating a natural finish.
There are three shades:
- Special White – bright white powder;
- Special Pink – pale pink shade;
- Special Clear - transparent powder.
Camouflage powders - designed to eliminate unevenness of the nail plate. There are several items on sale:
- Cover Pink is an opaque pink powder that optimally lengthens the nail.
- Beige – has a dark beige color that goes well with natural shades.
- Light Pink is a translucent powder with a cool tint that becomes pink-beige during interaction with the monomer.
- Ice Pink is a translucent powder with a matte finish. In most cases it is used under gel.
Stained glass powders are used to build up “crystal” nails and create a “candy” effect. They are widely used by specialists to create a unique design. To create a beautiful applique or make a unique design, use colored powders.
They are divided into several types:
- bright colors are used for sculpting and creating a unique jacket;
- mother-of-pearl - created to create a shimmering French manicure;
- glitter powder - necessary for tinting the nail plate and creating a good mood;
- with glitter – used to create a multi-holographic effect;
- neon - reflective powders, especially loved by young girls, glow under ultraviolet light.
Powder for strengthening nails: indications for the procedure
So, who is recommended for the procedure of strengthening nails with acrylic powder?
Photo from the site: irecommend.ru
- Firstly, for those with fragile nails that are prone to splitting. The thing is that acrylic, penetrating into the microcracks of the plates, polymerizes under the influence of UF radiation, and like cement, it holds together all the damage. As a result, nails not only become stronger, but also even correct serious “breakages.”
- Secondly, the procedure for strengthening nails with acrylic powder is a real salvation for girls with naturally thin plates. After all, long nails are simply contraindicated for them. They won’t necessarily break, but as they grow, they will definitely curl into a cone, thus spoiling the shape given to them during the manicure. And even gel polish cannot save this situation, but acrylic will create an additional layer of nail on the surface of such nails and thus it will become denser and harder.
Strengthening nails with acrylic powder, like any procedure, has its advantages and disadvantages. Let's consider each of them in detail, and you decide whether you should use such a procedure or not.
Photo from website: haiiro.info
The positive aspects of acrylic powder for strengthening nails:
- Strengthens nails.
- The plates look natural, without excess volume, as happens with extensions.
- Eliminates microdamage and cracks.
- Easy to correct.
- Simplicity of the procedure.
Cons of strengthening natural nails with acrylic powder
- Occasionally, acrylic also chips off the nail plate.
- A very complex process of removing material from the nail plate. It comes off only when cut down.
Important
Acrylic is difficult to remove in the usual way - using acetone-containing products. The material will need to be cut down. However, if handled improperly, this can lead to trauma to the nail plate with its subsequent separation from the nail bed. Therefore, when removing acrylic from nails, be extremely careful, and the closer the removed layer is to the natural plate, the softer the abrasive of the nail file should be.
How to extend nails with acrylic powder
Nail extensions using polymer powder provide the opportunity to walk longer with a beautiful manicure and prolong the life of artificial nails. Nails look natural, as there is no thickening of the nail plate, as when using gel.
For extension you will need:
- primer;
- degreaser;
- transparent or camouflage powder;
- liquid;
- extension forms;
- tassels;
- sanding file – 180 grit;
- buff.
Step-by-step instructions for acrylic nail extensions
- Wash your hands and remove the remnants of the previous manicure.
- Push back the cuticle using a nail file.
- Remove the shine with a nail file and make the plate rougher.
- Take the form and put it on your finger, position it exactly relative to your finger. To secure it, you need to press it tightly to the nail, connecting the ends.
- Using a straw, crimp the paper form.
- Apply a dehydrator to prepare and remove excess moisture.
- Apply primer, preferably acid-free.
- Dip the brush into the liquid and lightly walk over the nail plate.
- With the same brush, using circular movements, pick up powder.
- Distribute the resulting ball on the nail using a brush.
- The powder should be distributed from top to bottom.
- At the base of the nail there should be a thinner layer than at the edge of the form.
- Crimp the edges of the nail using tweezers, giving it a natural bend.
- File the edges and end of the resulting nail.
- Lubricate cuticles with oil.
- Apply clear varnish.
Step-by-step video on how to do acrylic nail extensions
We invite you to watch a detailed master class on extensions. You will see how to prepare your nails, how to properly attach the form, how much acrylic beads to apply, and their even distribution.
Here you can learn how to apply a French manicure to extended nail plates. The master shows how to draw a smile evenly using a brush.
Now you know what acrylic coating is and how to make it yourself at home. This procedure is considered expensive, so it may not be affordable for everyone. If you wish, you can purchase all the necessary materials and make such creations yourself at home. After all, now you know what tools are needed for this, and what the application process is like. Using the video for beginners and additional lessons, you can fully understand the basic secrets and tricks of acrylic nail extensions.
We are waiting for your feedback and comments . Write how often you do extensions, what decor is most suitable for you.
Author of the publication
Nail design
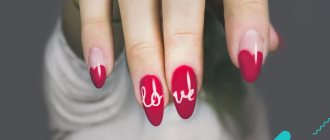
Acrylic powder is widely used for sculpting; you can create three-dimensional shapes on your nails, give the design a convexity, the effect of sugar or velvet sand. Not everyone can do sculpting, but creating the “sugar” effect doesn’t require much effort.
Apply a thin layer of acrylic powder with glitter onto the gel polish using a brush and spread evenly over the surface of the nail. Let it dry. Depending on the size of the grains of sand, you can thus give your nails a “sugar” or “velvet” effect.
To give your nails a matte tint, you need to purchase matte powder. Follow all the steps of applying gel polish sequentially, then apply powder to the nail using a brush. After uniform distribution, dry under a UV lamp.
To create a three-dimensional pattern without modeling, you should perform a number of steps:
- prepare the nail plate, do a manicure and push back the cuticle;
- treat each nail with an antiseptic;
- degrease the nail plate;
- carefully remove shine from nails using a sanding file;
- apply a layer of primer;
- let dry for a few minutes;
- apply base gel;
- dry under an ultraviolet lamp;
- apply the desired color of gel polish;
- dry;
- remove the sticky layer;
- apply a second coat of varnish;
- dry;
- remove the sticky residue again;
- using a brush, draw the desired pattern;
- dry;
- without removing the sticky layer, cover with acrylic powder;
- dry under a UV lamp;
- remove the remaining powder with a brush.
Rational choice
To choose acrylic powder, ask yourself why you need it:
- To ensure a smooth surface of the nail, take and use a camouflage compound. Just try to match it to the color of your nail.
- If you need to strengthen or correct the shape of the tips, then use transparent acrylic powder for gel polishes, even for French manicures.
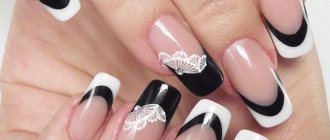
- For bright nail art, glitter or colored products are suitable. You can fantasize with the types of manicures in these cases as much as you want. Options can be seen in the photo.
Neil - glitter art
What you need to know about the pros and cons of this product
The tasks set for acrylic powder are to extend nails. She also works on strengthening nail plates. Just remember to adjust the length of the nails.
There are many different shades here. The texture can also be varied. You can make a three-dimensional pattern, with a knitting structure, French. And for this you only need this powder.
Such salon procedures do not take much time. Polymerization plays a role here. If the product hardens quickly, then further actions occur very quickly. You can ask the master for acrylic called high speed.
Pink acrylic powder
As for the minuses, nothing can be said. It’s just that in the reviews, fans say that it is necessary to use it correctly, strictly according to the instructions.
Do you want to strengthen your nails at home without visiting a salon? Strengthening nails should be step-by-step, in accordance with the instructions. Ah, so anything is possible.
How to use acrylic powder
To get started, watch the master class video. Even for beginners this will not be difficult to do.
If you have thin nails and gel polish does not last long, the following procedures are necessary. Our website has step-by-step lessons for beginners, too.
Gel polish
Here is one of the master classes:
- To begin with, the nails are cleaned of varnish, the edges are smoothed with a nail file, and the cuticle is removed. Each nail should feel the touch of a soft buff.
- Having arranged such preparation, then add degreasing or dehydration, not forgetting about the ends.
- After drying, you need to apply ultrabond or primer to your nails. Use the entire area and length. Please note that such products do not affect the internal structures of the nail plate. They only contribute to the mechanical strength and stability of the nails. That is, natural nails adhere better to coatings.
- Next you need to cover the surface with a base. Without drying the base under the lamp, we begin to strengthen it. Generously sprinkle your nails with acrylic powder using a brush or manicure spatula. Try to do this over the bowl where the powder is. So that the excess is poured there. At the same time, be sure to turn the nails so that the product covers the entire base.
- We crush off the excess acrylic powder and send it for polymerization. After drying, carefully treat the nails with a manicure brush. To ensure that excess unhardened acrylic powder is removed from the plates. You won't achieve this effect with a brush. Even in the instructions this point is present. If the nail plates are severely weakened, this procedure must be repeated.
The color of acrylic powder does not at all affect, after strengthening, the completion of a manicure using gel polishes. If you have transparent powder, then you can apply a layer of base and top. As a result, you will get neat and strengthened nails.
Different colors of acrylic varnish
With the second hand, everything is repeated in the same order, without changing anything. As you can see, the master class did not offer you anything complicated. If you did everything correctly after listening to the lesson, then you will have a fairly even coating after gel polish.
Only use high-quality materials for strengthening.
If necessary, trim your nails with a sander.
There are two options for completing the procedure
- The nails are covered with base again.
- Gel polishes are applied to the fixed powder.
Experts advise using the second option. After all, thanks to the rough surface, gel polishes will not spread or shrink.
Application of acrylic powder
How are such coatings removed?
- First, you need to remove the gel polish. Take a cotton pad and apply gel polish remover to it.
- The fingers are wrapped in foil.
- After 10 minutes, remove the foil using scrolling movements.
- What remains of the nail strengthener can be easily removed with an orange stick.
This is how the procedures for strengthening nails with acrylic powder for gel polish are carried out step by step.
How to remove acrylic powder from nails
If you urgently need to remove the acrylic coating from your nails, but there is no time to visit the salon, the removal procedure can be done at home. To do this you will need to follow a number of simple tips:
- Carefully remove the top coating using a file;
- moisten a cotton pad or swab in a special product designed to remove shellac and gel polish;
- put cotton wool on the nail plate;
- wrap the nail tightly with foil;
- wait 10–15 minutes;
- remove the foil and remove the cotton pad;
- using a pusher, move the exfoliated layer to the edge of the nail plate;
- repeat the wrapping procedure;
- remove acrylic residues using a pusher;
- polish with a buff.
If you do everything correctly, your nails will not be damaged, they will remain strong, without scratches and will not peel off.
How to wear acrylic nails
Extended nails last a long time if you take care of them properly:
1. To adjust the shape, you should use not scissors, but a file of suitable hardness - 150-180 grit.
2. To remove nail polish, you need to purchase a liquid without acetone.
3. Acrylic nails are durable, but that doesn't mean they can be used to open cans or peel off stickers. You should treat them with care.
4. After a bath or other long water procedures, artificial nails soften slightly, so you need to let them dry to regain their strength.
Acrylic nails should be corrected in a timely manner to avoid damage to the material or natural nail. The interval between procedures should be no more than 3-4 weeks. As soon as your nail starts to peek out between the cuticle and the acrylic coating, it’s time to go for correction.
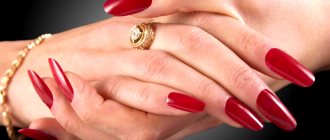
Benefits of acrylic nails
They have the following advantages:
• Durability. Acrylic nails will not break even for those girls who often do something with their hands.
• Possibility of repair. If an acrylic nail breaks, you won't have to re-grow it.
• Elasticity. Acrylic nail extensions are flexible and therefore look natural.
• Ability to air dry. Since a UV lamp is not needed to dry the acrylic mass, this material is convenient to use at home.
• Durability. They last about 4 months.
• Safe removal. To remove acrylic nails, just hold them in a special liquid.
Disadvantages of acrylic nails
When applying extensions, a sharp odor is felt, which quickly evaporates, so the finished nails do not smell. Acrylic is incompatible with liquids containing acetone. To remove polish from acrylic nails, you will need products without acetone.
Advantages and disadvantages of acrylic powder
Further in the table you will find the advantages and disadvantages of using the material in question.
| Advantages | Flaws |
| Eliminates cracks | Strong specific odor |
| Aligns the nail plate | Poor quality material, can lead to allergic reactions |
| Gives a beautiful design | If you do not disinfect the nail plate and immediately apply a layer of powder, fungus may appear |
| Makes manicure more wearable | If used incorrectly, there is a possibility of damage to the outer layer of the nail. |
| Artificial nails look natural and are very durable | |
| Strengthens the nail plate |
Prices
Depending on the artist and the popularity of the salon, the price for strengthening nails with acrylic powder can range from 1000 to 1500 rubles. To save money and give strength to your nails at any convenient time, you can purchase special repair kits. The kit includes all the necessary materials that you can use at home. The cost of the set is 1100 rubles.
The price of one jar of acrylic powder weighing 21 grams varies between 350–450 rubles, the cost of a monomer is 900 rubles. Once you buy several colors of powder and monomer, you can strengthen and design your nails at home for a long time.