Girls who are used to attracting the attention of people around them will certainly enjoy decorative nail sculpting. Depending on the specific design, you can create a manicure in different moods - from casual and relaxed to strict or romantic.
Reborn like a phoenix from the ashes
Richly decorated nails came into fashion several years ago, when masters actively increased the length and decorated it with voluminous flowers. Then the trend faded a bit. But only to now be reborn with new strength.
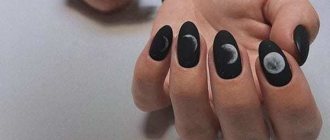
The trend for 2022 is maximum naturalness and realism. If these are buds, then they should really look like real ones. And fish or birds can create the feeling that they are about to evade.
There are a few more features:
- Increased practicality and resistance to everyday activities. Three-dimensional decor is not afraid of chips and cracks if it is made professionally.
- Wide choice of colors. Experienced craftsmen have a wide variety of acrylics, so a fashionista can realize any of her ideas.
- Apply over shellac for a neat look. Due to this, the duration of the session in the salon increases significantly.
- Suitable for medium or long nails. In short ones, the decor will be poorly visible; neither the girl herself nor those around her will be able to distinguish the beautiful details.
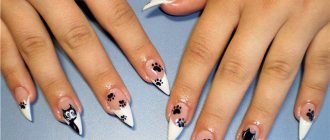
There is a stereotype that 3D modeling is only suitable for special occasions - a holiday or a wedding. Actually this is not true. For an everyday manicure, you can choose a more modest French manicure and decorate 1-2 fingers.
How to make such beauty yourself and is it possible?
It is very difficult for a non-professional to cope with the task, because even a simple 3D design requires time, skills and patience.
Rules for nail extension with a napkin
Many people are concerned about the question of which napkins to choose for extensions? The ideal option would be lint-free fabric wipes, which are used to remove the sticky layer from gel polish.
Rules for nail extension with a napkin:
- Regular wet wipes, which are sold at any hardware store, will also work. They must be dried before use.
- The main advantage of such napkins is that they contain long fibers that are perfectly saturated with the base and hold their shape well. At the same time, the nails are really strong and can be worn well until correction.
- We do not recommend using paper napkins for extensions, since after completing the procedure you need to cover them from the inside with a thin layer of base. This will prevent the napkin from getting wet and peeling off the natural nail.
- However, many girls decide to completely get rid of the napkin, in which case it must be cut out using a carbide cutter from the inside. The end of the nail is sealed with a base or top coat.
Repair with a napkin
Two sides of the coin
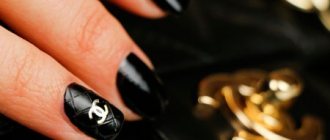
Like any other technique, volumetric decor has its advantages and disadvantages. The main thing that girls all over the world love him for is his spectacular appearance and attractive design. There are a lot of options for what exactly you can do on your nails.
In addition, modern manufacturers produce varnishes in different colors. Among the popular ideas are those that are suitable for everyday wear. They are easy to combine with dresses, trouser suits, and skirts.
A gentle option for every day
The second important advantage is resistance to mechanical damage. The coating is not susceptible to cleaning or washing, because the molding is usually coated with a transparent polymer.
However, there are also disadvantages:
- One manicure session takes a lot of time. It takes from 2 to 4 hours to create a unique nail art, depending on the qualifications and experience of the artist. And for self-taught beginners it will take even longer.
- Uncomfortable to wear. Bulk parts cling to clothes and get in the way when doing household work.
- Weighting of nails. The manicure both looks and feels thicker and more massive compared to classic nail art;
- Risk of allergies. Some materials can damage the nail plate.
Another drawback is the high price. For one session in a beauty salon you can pay twice as much as for a regular plain coating with a design.
We recommend watching the video:
What is watercolor painting in manicure
Watercolor painting on nails is done with acrylic, watercolor or gel paints, as well as watercolor pencils and gel polish.
The application technique depends on the chosen material. The basis of the design is predominantly white, but there may be others - nude, pale pink, pale blue, pale lilac. In addition to pastel shades, nail artists today also offer designs on black gel polish, made in white and light colors. But this design requires single-color or two-color painting (two colors.
A pattern is applied to the matte surface of the nail coated with gel polish. If the base is shiny, wipe it with a buff. This way the paint spreads better and does not roll off.
Attention! The peculiarity of watercolor manicure is the absence of clear boundaries in the drawing. The picture is light and airy.
Some masters often offer this style in the summer, when you want lightness and ease. Soft and calm tones go well with bright summer dresses.
Watercolor nail design offers many variations of different designs, suitable for both everyday manicure and for a special event or a romantic evening.
Understanding the ingredients
Typically, craftsmen in beauty salons use several materials to create sculpting:
- 3D gels that have a dense texture. Thanks to this consistency, it is easy for the master to form the desired element. The best part is that it is easy to work with even for a beginner - you can make all the simple shapes. However, for a complex ornament you will have to choose something else. After finishing the session in the salon, this material must be covered with a top coat.
- 4D components allow you to experiment for a long time and bring the decor to perfection. In liquid form, the paste has a very plastic texture and resembles jelly. The composition is shiny, but after hardening the surface becomes matte. The peculiarity of this material is its drying technology - a special lamp with ultraviolet radiation is required. Although drying takes a little longer, it does not require a topcoat.
- Sculpting gel is suitable for creating small accent elements. Does not require topcoat.
- Acrylic powder, which is then mixed with a special liquid. Together they form pliable plasticine, which is not applied to the nail, but is manually shaped into the desired element.
It is best to check with the specialist before the session in the beauty salon which component will be used. After all, there is always a risk of intoxication or allergies.
Features of the gel
Gel modeling is rapidly gaining popularity. However, the main mistake that a beginning self-taught craftswoman makes is trying to sculpt something using ordinary varnish. For such purposes, a special, thicker composition is required.
Experts distinguish two types of this material:
- 3D gel, very plastic and pliable.
- 4D gel, more difficult to use.
The composition remains the most accessible. It is allowed for all girls, regardless of the condition of the body. Even pregnant women can use it to create ornaments - it is so safe.
Many girls cannot decide what to buy first - gel or acrylic. You should know that creating decor from the first component will take much more time, because each layer will have to be dried in a UV lamp.
In addition, the material is difficult to remove. First, it will take a long time to cut down the stucco molding, then remove the dust resulting from the cut. And only then will it be possible to remove the plain shellac coating using the usual method.
This is what experienced fashionistas recommend: since the process of working with gel is long and complicated, it is better to entrust the first procedures to an experienced master.
It is worth observing his actions, remembering the algorithm of actions and only after a couple of procedures begin to master sculpting on your own.
Timeless classic
Acrylic has recently enjoyed wild popularity, because with the help of this composition you can realize any ideas. There is transparent, translucent, single-color powder - in a variety of shades. To create beautiful ornaments, the master combines powder and liquid - a transparent monomer liquid that makes the powder harder.
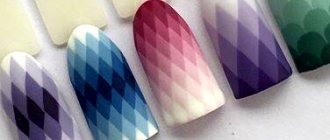
It is customary to divide all acrylic into two groups:
- Aquarium modeling. First, the master creates the details of the pattern, places them on the nail, and then covers the plate with a transparent fixing topcoat. As a result, the drawing turns out flat, as if hidden under transparent glass (the name comes from this analogy). The advantage of the method is obvious - the flat design looks impressive, but does not cause discomfort during everyday wear.
- Volumetric modeling involves a clearer outline of the pattern as a whole and all the details separately. Volume is achieved due to the absence of a thick layer of transparent finish. Manicure is not entirely convenient in everyday life, but it looks very beautiful and attractive.
The composition is indicated for those girls who complain of brittle nails. Acrylic has a good effect on the surface of the plate, strengthens it, gives it a healthy look and shine. However, this same material should absolutely not be used by those who have any fungal disease: the composition will create a greenhouse effect, and the disease will develop even faster.
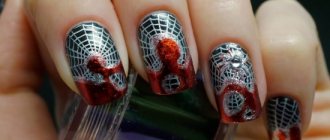
Simple drawing
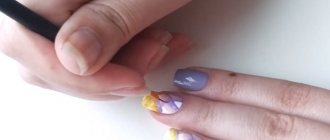
Step-by-step instructions for performing a manicure with poppies:
- Dip a flat brush into red varnish on one side and black on the other. There should be little black (a fifth of the tip), it is needed only for the middle.
- Place the brush on the surface and draw the first pair of petals; the shape can be slightly changed.
- Paint the next pair of petals, lighten them by dipping the red tip of the brush into white varnish.
- Draw a green core using a thin brush, marking the black stamens.
- Draw the stems of the flowers using a dots or thin brush, as well as the leaves. For the leaves you will need two shades of green varnish, one lighter for filling, the second darker for the outline and veins.
You don’t have to draw the centers and leaves; only the flower silhouette will remain.
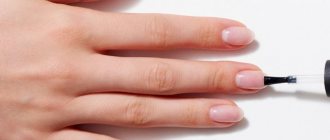
Preparatory stage
Some fashionistas still decide to bring beauty at home. Therefore, it is important to know what tools you will need.
It's best to have:
- Two types of materials - acrylic and gel. Firstly, you can choose from them the one that is more convenient to work with. Secondly, two compositions of different textures will allow you to create more diverse elements.
- Regular varnish, which will be used as a basis for further decoration. It will require the appropriate products - a base coat and a top finish.
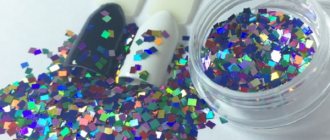
- Additional accessories that will complete the look - rhinestones, beads, shimmering powder, beads.
Don't forget about the tools. You will have to stock up on degreaser, nail polish remover (in case some part turns out wrong the first time), tampons, foil, brushes and dots. A lamp is useful for drying.
If you are about to have your first experience working with volume, most likely, all the necessary tools will not be available. Fortunately, some can be replaced with improvised means. For example, dots: a ballpoint pen or a hairpin with a round end will do instead.
Watercolor manicure ideas: a few tips when working with watercolor paints
First of all, it is worth remembering that in order to turn one dark shade into several lighter ones, you should dilute it with white watercolor paints. Thus, all elements of the ornament will have their softness in transitions. But don’t get too carried away, otherwise the drawing will become too whitish and turn into a brightened landscape.
By applying the desired tone, you can work with the color scheme directly on the nail plate. A brush will be a great help for this. It is this that will add vagueness and help achieve the desired result. The thickness of the brushes may vary. It depends on the size of the image. If the design must fill almost all the nails, it is worth paying tribute to thicker brushes.
After finishing work on the ornament, you should not emphasize all the contours and elements of the ornament. This will give your work translucency and lightness. To get a watercolor effect, do not make the outline too thick and outline the entire ornament.
It is also worth choosing high-quality and professional brushes designed specifically for working with manicure watercolor paints. When creating a drawing, not all masters manage to draw straight lines. Therefore, it is necessary to take into account the main advice: the brush should be held perpendicular to the nail plate.
Watercolor painting of women's marigolds is simply mesmerizing in its appearance. After all, real masters are able to convey in a meager drawing the entire character and mood of the future owner of the manicure. It is this technology of decorating with marigolds that occupies a leading position in modern fashion. But, unfortunately, only a real professional is able to create a real landscape in the hands of women.
Step-by-step master class
Armed with all the necessary tools, you can start creating nail art. If your nails are extended, the situation is simpler: you can immediately start creating a masterpiece. If your fingers are “naked”, you will have to pre-treat them - do a regular manicure with cuticle trimming, apply a transparent base and a plain varnish.
After the final stage - the finishing coat - it is necessary to remove the top sticky layer. Then you can start applying the 3D composition or acrylic.
Step by step procedure:
- Dosom collects a small (bead-sized) amount of material and rolls it into a ball.
- The bead is placed on the nail in the place where it should be located.
- The center is pressed with a tool so that the drop does not slide out of the desired place.
- The bead is dried well under an ultraviolet lamp.
- All elements of the drawing are executed using this algorithm.
- The result is decorated with shadows and small additions.
When the marigolds are completely ready, you can dry them under ultraviolet light.
If you are working with acrylic, the procedure is slightly different.
After preparing the surface, special glue is applied to the desired location. Then the tool takes a little acrylic, rolls the element into the desired shape and places it on the glue. When all the nail art is ready, all that remains is to apply the fixer.
When sculpting, it is important to monitor the speed of creating the decor. Applying too quickly can lead to sloppiness. By working slowly, you may not have time to dry the material and ruin the entire drawing.
Design options:
Video for you:
Techniques for drawing roses
The main types of strokes in Chinese painting Masters distinguish not many strokes and they are easy to remember:
- Smooth surface - created without lifting the brush from the surface;
- openwork - the stroke is uneven because the brush works up and down;
- semi-openwork - loops are threaded;
- wave - to create this stroke you need to make a slight twisting movement with the brush while drawing.
Chinese nail painting is not only fashionable and stylish, it is also sophisticated and elegant. Not every girl can boast of such a manicure, since its implementation will require a lot of time.
But if you manage to overcome your impatience, the result will simply stun you! In addition, once you are immersed in the atmosphere of this craft, you will be able to find peace and tranquility in this work.
Painting for beginners video
Of course, it is impossible to wear such a work of art every day. It would be better if this type of manicure becomes a special, festive option for you, the creation of which you will approach with special trepidation.
And we can assure you that your work will definitely not go unnoticed; Chinese painting will not only attract attention, but will also indicate your refined, incomparable taste.
Secrets from the pros
What newbie would not like to get advice from a professional with extensive experience?
Experienced masters shared several recommendations and lessons for beginners who are still learning the basics of manicure.
Here's what they advise:
- Even before starting work, choose the appropriate shape and length of the nail plates. If this is your first experience with volumetric decor, you can first draw a sketch on paper - how and where exactly the details will be located.
- At first, it is preferable to do nail art with gel, since it is easier to use, although it takes more time. You can then add individual elements from the innovative 4D component.
- Each element must be dried and polymerized separately. Especially if the composition consists of several colors. If you first apply all the shades and only then put the nail under the lamp, the shades will mix with each other and the pattern will deteriorate.
- Do not sculpt near the edge or cuticle. The more free space around the stucco, the stronger and more durable it is.
A very obvious rule, which for some reason many girls forget about, is to keep the tools and work surface clean.
For example, touching the brush with your fingers is strictly prohibited. If the bristles of the brush become greasy, the process will need to be stopped.
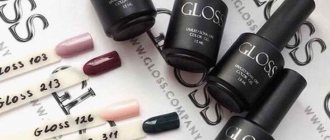
Required tools and materials
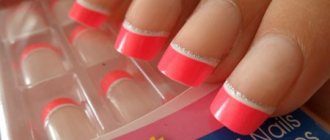
Of course, for nail extensions using tips, you will need the tips themselves that you choose.
You will also need:
- lamp for drying nails;
- glue for gluing tips;
- a manicure machine or several nail files with different abrasives;
- tip cutter, which removes the excess length of the tip;
- buff for filing artificial ends;
- pusher for moving away contact areas (cuticles and side ridges);
- brush for applying gel (acrylic, biogel, etc.);
- lint-free wipes that will not leave small lint on artificial plates;
- degreasing liquid;
- acidic or acid-free primer;
- base, to create durable nails;
- a topcoat used on artificial plates to give a shine or matte finish.
Before applying the top, you can use a colored gel coating, so that later you can proudly show off your perfect manicure, saying, “Wow, how good I am at doing my own nails!”
Tools for nail extensions with tips @kashlanskaya_nail
@nail.art.studio_kovrov
How to do nail extensions with a napkin and polygel, acrylic, acrygel?
The napkin essentially serves as a kind of substrate and allows you to abandon the use of upper and lower forms. This is an excellent solution if you went on a trip, vacation, accidentally broke a nail, but there are no materials for extensions. In this way you can grow a small piece of the nail, or even the entire nail of a short length.
How to do nail extensions with a napkin and polygel, acrylic, acrygel:
- Experienced craftsmen do not use this method due to the availability of professional materials that allow them to complete the job much faster. You can find out how to extend nails onto the upper forms in the article.
- Acrygel can be used as a construction material that is laid out on the substrate. It is laid out in a similar way to gel, but after laying out the acrylic it is necessary to file it.
- There are no problems with this, since the material is very soft, pliable and easy to saw. It is applied using a flat brush dipped in degreaser. You can use professional products or regular medical alcohol.
- After drying in the lamp, sawing is carried out using a buff or a 180 grit file. The nail is covered with gel polish.
Complex nails
How to do nail extensions at home with napkins?
The most interesting thing is that tea bags are often used instead of napkins. In principle, this is a kind of analogue of napkin extensions, since paper, cellulose or thin fleecy fabric is used as a substrate.
How to do nail extensions at home with napkins:
- For extensions, you can also safely use handkerchiefs or thick kitchen napkins, which are multi-layered. Please note that it is best if they are white or beige.
- Pink color is allowed. Remember that the inside of the nail will be visible, so all the designs that are applied to the napkin will be visible.
- It is imperative to layer the napkin to get the thinnest layer. Only after this proceed to cutting into several parts.
Preparation