Updated: 04/23/2021 11:35:07
Expert: Ekaterina Alekseevna Savitskaya
Beautiful, well-groomed nails are the pride of any woman. Therefore, the topic of nail art is always in trend, new techniques and methods of nail decoration are invented. Nowadays manicure with gel polish coating and stamping on it is very popular. This technique allows you to create original drawings, patterns, ornaments and bring the most daring nail designs into reality. Expertology.ru journalists found out from experts what stamping is, how it is done, and what you need to buy in order to start using this technique. You will find detailed information and instructions in this article.
Stamping - what is it, advantages
The term “stamping” comes from the English word “stamping”, the meaning of which is not difficult to understand - applying a stamp, embossing. Based on this, it can be argued that stamping in manicure is a specific technique for performing nail art, which assumes that the pattern will not be drawn with a brush, but applied using a ready-made stamp. Simply put, imprints are applied to nails coated with a durable polymer material, resulting in a specific pattern appearing on them.
Stamping has many advantages:
- You can do a manicure that will be no worse than a salon one at home on your own.
- You can make various patterns even if you don’t know how to draw or don’t have strong artistic inclinations.
- If you know how to draw, but don't want to spend a lot of time doing artistic painting of your nails, do stamping. It will help save a lot of time, which is required to perform a beautiful, unique or simply original manicure.
- Learning to do stamping is not difficult; you do not need much experience in nail art or high qualifications. Moreover, if you make a mistake during the learning process, you can wash off the pattern and do it again.
- If you do stamping specifically for gel polish, then you can change your nail design at least every day. After all, the pattern is applied to a durable polymer coating, which will not be difficult to clean.
- There are many types of stamping stencils with different patterns, made from different materials. This makes it possible to bring any idea to life.
- You don't need to buy any expensive equipment. If you have already purchased a special UV lamp for polymerizing gel polish, all that remains is to select suitable stencil plates and buy a suitable stamp. There is a large assortment of such accessories on sale, including specialized sets, the price range is quite wide, you can buy both expensive stamps and plates, and cheaper devices. Since such accessories can be used repeatedly, such an investment in your own appearance will soon pay off.
Are there any differences between stamping on gel polish and regular polish? There is no fundamental difference in manicure techniques. In both the first and second cases, you simply cover the surface with a pattern using stamps. The only difference is that if gel polish is used, the pattern can be applied and washed off an infinite number of times without affecting the integrity of the polymer coating. If you are stamping on regular varnish, then in order to remove the pattern, you will have to wash off the decorative layer on which the pattern was applied.
How to do color stamping at home using thick gel paint
As a rule, stamping paints indicate their purpose, but for design you can also use paint for Chinese painting, as well as regular very thick gel paint for applying designs on nails. Below, using an example, I will show how to make a print in two colors. It is also called ombre or gradient stamping. In my opinion, this technique only vaguely resembles a gradient, but it looks quite interesting. The main thing is to choose shades that are similar in tone and not too contrasting.
Step 1 – Manicure all your nails in advance, cover them with top coat, except those that will be stamped. I think gradient stamping looks best on a white background.
Advice for beginners
To work with gel paints, it is more convenient to use a transparent stamp with a silicone pad. In order for the paint to transfer better to the stamp, it must be prepared as follows: remove the gloss from the new stamp with a soft buff, give the surface a slight roughness, use a napkin soaked in Nail Prep and remove dust.
When you have prepared the stamp, degrease the design on the stamping plate that you want to transfer and let it dry for a couple of seconds.
Step 2 – Apply two colors of gel paint at once to the selected design.
Step 3 – Take a scraper and run it over the plate 1-2 times to remove any excess paint.
Step 4 – Since my silicone stamp is small, and I want to cover the surface of the tip as much as possible with the design, I took a rubber stamp from Konad. There is no need to buff it, since the surface is quite sticky and picks up paint well. But due to its opacity, it is difficult for beginners to work with it. It is not clear how and where the drawing will be transferred. But it is moderately elastic and the gel paint blurs less when transferred.
The big advantage of stamping with gel paint is that you can aim and hold the stamp for as long as you like before transferring the design. Gel paint does not dry in air, but dries in a lamp. But there is also a significant disadvantage. If your gel ink is not very thick and you press harder on the stamp, the print will blur.
Step 5 – There is one difference between how to stamp nails with polish and gel paint. When you transfer the “varnish” design, you need to press lightly on the stamp. When you transfer gel paint, the pressure should be minimal, otherwise the material will be smeared over the surface. We transfer it in one easy movement without pressure, not forgetting to pinch and slightly pull the side rollers.
My tip is quite large and the stamp did not allow me to print the image on the very edge. But the essence of working with gradient stamping should be clear.
Other stamping design options
In addition to special varnish and thick gel paint, when working with stamping, some artists manage to use ordinary varnish, standard colored gel polish and a thick rubber base. Also, foil and rubbing are used as additional decoration. Similar stamping can be done at home. The step-by-step photos below show simple examples of a simple design, the creation of which uses stamping.
Necessary accessories, tools, devices
To learn how to do nail stamping, you must first make sure that you have everything you need - consumables and tools. Experts recommend buying varnishes, topcoats, paints, stamps and other high-quality accessories
. How this is justified:
- It is easier to work with high-quality materials, and you are less likely to make mistakes.
- When it comes to gel polishes and other cosmetic products, high-quality products are safer for the health of your nails.
- High-quality consumables and accessories will allow you to get excellent, lasting results.
- Quality manicure tools will last longer, so by investing a little more money, you actually save.
So what do you need?
in order to do nail stamping on a durable polymer coating:
- Preparations and tools for performing hygienic manicure.
- Cosmetics for decorative manicure – nail primer, gel polish base, gel polish (or several products in different colors), topcoat. These preparations are needed in order to create a background on which the drawing will be applied.
- A special LED lamp, under the light of which the gel polish polymerizes.
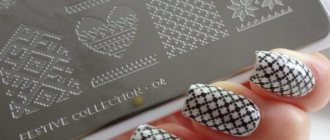
- Prints with ornaments, plates on which the patterns and drawings you need are engraved.
- Varnish or specialized acrylic paint for making drawings. Choose colors and shades, the nature of the finish to your taste. Experts recommend using not ordinary varnish, but acrylic paint for stamping. Such cosmetics are distinguished by increased brightness of pigments and allow you to create a clear, even graphic design. They do not blur during nail art and do not smudge when you start applying the top coat.
- A small scraper designed to remove excess pigments from engraving.
- A special stamp for stamping, which is designed to transfer an ornament from an engraved plate to the surface of the nail plates. This accessory looks like a small plastic object shaped like a cone. Its size is 10-15 centimeters. The lower surface of the base is elastic and convex, made of rubber or silicone.
Experts draw your attention to the fact that plates with drawings, a scraper and a stamp can be purchased individually or as a set. Which of these options is better? Let's try to figure it out - the pros and cons of buying sets:
- The manufacturer included in the kit everything you might need to perform stamping on your nails, except for varnish. The accessories are made in the same style. You don't have to worry about forgetting to buy something. Most non-professional kits cost less than the individual parts if you buy the fixtures one at a time.
- The quality of stamping accessories sold as a set may be lower than the quality of products purchased separately. In addition, the set may not contain exactly the stamping patterns that you need.
It’s up to you to decide whether to buy a set or individual components of the required list of accessories, because both options have their advantages.
What is regular and reverse stamping: an introduction to the topic
Before you start learning how to do stamping on gel polish or even an ordinary non-permanent coating, you first need to find out what it is. You need to figure out what types of stamping there are, whether they have advantages and disadvantages, as well as what materials, tools and consumables will be required to apply such a pattern to the nails. This technique of applying a pattern is rightfully considered a brilliant invention, which allows you to make the complex simple, that is, to create a unique design, without having the slightest artistic skills.
Interesting
Stamping is a very special nail art technique, invented relatively recently. It allows you to apply almost any design to the nail plate using special tools and devices, even without any artistic inclinations. The word itself comes from the English stamping, which means embossing, stamping or stamping. We will talk about how to do stamping on gel polish yourself in our article.
Advantages of applying drawings using the stamping technique
Not so long ago, without a penchant for drawing, any girl would have to turn to professional nail artists to make her manicure unusual, original and beautiful by applying unique patterns to her nails. Today, the stamping technique is available to every representative of the fair sex, regardless of artistic talent. But these are not all the benefits that the nail art we are discussing implies.
- Beautiful stamping, which we will learn how to do correctly today, can easily replace a salon manicure, being in no way inferior in beauty or originality.
- This technique will significantly save your own precious time, which a modern person always lacks in our difficult world of new technologies, since making such a design is much faster than artistic painting with a brush.
- Absolutely any girl can cope with the task clearly and quickly, learn how to do stamping on nails with regular polish and gel polish (shellac), it’s simple, accessible and does not require any special skills.
- By stamping gel polish, you can easily delight yourself with a new design even every day, since the surface will remain untouched and can be decorated with new designs.
Stamping on a gel coating is much easier and more convenient than on regular varnish, since if necessary, you can easily wash off the design from the permanent layer without damaging it. Such numbers will not work with ordinary varnishes, and if you ruin something, you will also have to wash off the color base, and then apply it again.
Devices and tools
When figuring out how to stamp on a gel permanent coating, you first need to find out what you might need for this. It is best to purchase varnishes, topcoats, paints and other things of high quality, so that later you do not regret wasted funds; the same is true with accessories and tools. Give preference to quality, even if the cost is a little more expensive, because you will use the equipment more than once, so you would like it to last longer.
- Base coat for gel polish, shellac itself (one or more, if desired), as well as a top sealer.
- Special ultraviolet lamp for drying gel mixtures.
- Metal discs or plates on which various patterns, ornaments or designs are pre-engraved, which we will subsequently transfer to the nails.
- A scraper that will be used to remove excess paint from an engraved plate and the stamp itself, which is a small cone with an elastic convex surface, with the help of which the pattern is transferred.
- Varnish or special paint for designs in different colors as desired.
Please note that today there are many offers on the market where everything necessary for stamping is presented in a complete set, including bright and rich colors of varnishes or paints. Such a set will be cheaper than purchasing everything separately, but the quality of the materials in the set may be questionable. However, everything depends on the integrity of the manufacturer, so it’s worth deciding on the spot. If we talk about whether stamping can be done with gel polish, then the answer is yes, but it would be better if it were reversible, and we will discuss this point in more detail later.
Preparation for nail design using stamping on gel polish
If all the necessary consumables and accessories have already been purchased, you can prepare the nail plates and begin the artistic process. It is unacceptable to apply gel polish and decorate the coating if the nails have not been pre-treated, as the result will disappoint you and you will simply waste your time and materials.
Preparation of nail plates involves performing a hygienic manicure. It is better not to do a trimmed manicure, since if you remove (cut) the cuticle, it will be possible to apply gel polish, and then the design, at least in a day. And if the cuticle is severely damaged - only after complete healing of the tissue. Therefore, it is recommended to perform a simpler and safer unedged manicure.
:
- Disinfect your tools. Especially if they are used not only by you, but also by other people, even family members.
- Prepare a bowl with tolerably hot water, a towel, files and buffs, in general, everything you might need to perform a hygienic manicure.
- Remove the decorative coating from the nails, if any. It is advisable to use preparations that do not contain acetone for this purpose.
- Give your nails the desired shape using a nail file; it is not recommended to use scissors or pieces for this purpose, since there is a high probability that you will accidentally cut off extra millimeters.
- Immerse the fingers of one hand in hot water for 5-10 minutes to soften the cuticle and become more pliable.
- Apply a special remover to the cuticle, which will dissolve the dead film. If there is no remover, simply push the cuticle to the base of the nail with a special pusher with a rounded edge or a soft orange stick.
- Remove dead skin from the sides of the nail plate, just be careful not to disturb the integrity of the living tissue.
- Treat all the nails sequentially, first on one hand, then immerse the fingers of the second hand in hot water, and then repeat all the manipulations.
- Dry your nails thoroughly with a towel or a stream of warm air from a hair dryer. After this, you can apply gel polish and stamp on it.
Manicure with stamping: symmetry, precision and sophistication!
Stamping technology is based on the ability to make designs, patterns, and prints on nails using a small stamp. Most likely, the idea of banal ink stamping was taken as a basis. Only the tools and materials are slightly different. The technique made it possible to move manicure stickers far back. And all tools and materials are available for sale for every woman. Moreover, the price for them is not so high, considering that now there is no need to rush to the salon and carry out the design for fabulous money! Any woman can master the method of work. Now complex patterns are easy to complete! Let's start the story in order!
How to perform classic stamping on gel nail polish
In order to stamp gel polish, you must first apply the gel itself and let all layers dry thoroughly. Sequence of actions if you use three-phase systems (base, gel polish, top coat):
- Treat your nail plates with a dehydrator and degreaser. As a last resort, you can use alcohol in a concentration of 70-90%.
- Apply a primer to your nails to protect them from the negative effects of polymers.
- Apply a base or base for gel polish to your nails; it will improve the adhesive properties of the surfaces in contact with each other - the nail plates and the polymer layer.
- Apply gel polish of the desired shade to your nails, including a transparent product. Don't forget to seal your nails by running the tip of the brush along the end of the free edge of the plate. Dry this layer under the light of a special ultraviolet lamp for manicure.
- If the polymer coating is not as dense, uniform and rich as you would like, apply one or two more layers of gel polish, each of which must be thoroughly dried under a lamp.
- Apply the final product to your nails - a clear or transparent top coat with glitter, which gives the long-lasting coating a beautiful glossy effect and protects the polymer coating, providing it with additional durability.
- If the last topcoat has a sticky layer, remove it with a special product. After this, your nails with a completed manicure are completely ready for stamping. The pattern you apply can be adjusted and washed off with an acetone-based liquid.
- If the tools you are going to use for stamping nails have already been used, wipe them with acetone or a special cleaner to remove any old paint, dust or dirt. Even the slightest particles of dirt can spoil the design, make it uneven or cause unnecessary stains.
How to perform the classic stamping technique on gel polish:
- Select a plate with a pattern that you want to transfer to your nails. Apply a small amount of acrylic paint to its surface or, as a last resort, regular varnish if you have run out of paint. It is enough to drop one or two drops from the brush into the middle of a specific pattern, then distribute the paint over the entire surface of the pattern with the same brush.
- Using a scraper, distribute the paint more thoroughly over the engraving, make sure that the pigments have filled all the grooves and recesses of the pattern, and remove excess paint. The scraper should be held at an angle of 45 degrees to the surface of the stencil. The coating should be uniform, without bald spots, bubbles or other irregularities.
- Grasp the stamp by the base, holding it with the convex side down. Place it on the plate with the pattern and carefully roll the stamp so that the pattern you want is imprinted on its elastic, soft surface. The process is similar to what happens when a cylinder seal is used.
- Without waiting for the paint on the surface of the stamp to dry, apply it to the nail plate. You can lightly “roll” the design to cover the entire nail. The main thing in the process is not to smudge the pattern. However, if this happens, or if you simply don't like the way the design looks on your nails, erase the design with nail polish remover and try again.
- After the design on the surface of the nail plate has dried, which may take 2-5 minutes, apply another layer of top coat. Dry this layer under a lamp and finally treat the coating with a de-sticking agent. If a design made with acrylic paint gets on the skin around the nail plates, there is no need to worry, this happens often. Simply wipe the leather with lacquer thinner after applying and drying the resin top coat.
- This classic version of stamping nails with gel polish allows you to create ordinary patterns and ornaments - lace, snowflakes, any graphic images. But if you want to apply real mini-paintings on your nails, made in several shades, you will have to master the technique of reverse stamping on gel polish using the gel polish itself. Reverse stamping is a real work of art, and in order to learn this technique, it is recommended to practice not on your own nails, but on special plastic models that exactly imitate the size and shape of real nails.
List of necessary tools and tools
To prepare your nails for work, you need to purchase standard manicure tools:
- scissors;
- wire cutters;
- files for shape correction (preferably made of glass);
- buff for polishing;
- device for pushing back cuticles;
- nail polish remover;
- composition for degreasing nails;
- base coat.
Stamping on nails (it can be done correctly only with knowledge of the technique) is performed only with the purchase of special devices.
Stamping plates
They can have a square or round shape and are usually made of metal. The base is engraved with several designs: there can be from 4 to 42 pieces. These devices are intended for reusable use. It's better if there are several of them.
To prevent damage, new plates are covered with a protective film on top, which is removed before use. A high-quality product has sufficient engraving depth and a clear design.
Types of stamps
They are made of silicone or plastic rubber. For ease of holding, the stamps have a special handle. The sizes can be any.
The choice of product depends on the shape of the nails:
- if you need a small design for short nails, it is better to choose a small stamp;
- For larger designs on long nails, round stamps with large designs are suitable.
The choice of a product made of silicone or rubber depends on the convenience of the master working with it. It is better to try both first and choose the ideal option.
For example:
| Die material | Description |
| Rubber | They are more rigid than silicone ones. They are more difficult to fix on the corner part of the nail. To get a clear design, you have to roll the stamp from one edge of the base of the nail to the other, without lifting it completely from the surface. |
| Silicone | This material is easy to work with. It is enough to apply it to the surface, and it will be gently distributed over it. However, often such a drawing does not have clear lines. |
Popular stamping varnishes
The choice of paints for such a coating is important.
A good varnish has:
- saturated color;
- thick consistency of the composition;
- hiding power, allowing you to create a homogeneous surface. Thanks to it, you can get a clear pattern that will not blur after application.
For this design, acrylic and gel paints are usually used, but high-quality ordinary varnishes can also be used. They should retain a clear pattern. The disadvantage of using acrylic paint is that it dries very quickly, so if you have no experience working with such a coating, it is better to practice beforehand.
Regular varnish is chosen without sparkles and mother-of-pearl: large particles will not allow you to make a clear drawing. A varnish with a thick and matte consistency is recommended. The design looks great if the varnish has a holographic or metal effect.
Gel polish or shellac is not suitable for this manicure. To get a bright base, you should choose thick coatings, because a double layer cannot be used with this technique. Before application, it is recommended to dry the flowing gel varnish in a special lamp without removing the stamp. This ruins the whole concept of stamping.
However, you can cover the sticky layer with sparkles or decorative elements, which will make the design unique. Considering that the material consumption is small, it is better to purchase small bottles for home use.
Other tools
To work, you will need a scraper - a scraper to evenly distribute the paint over the nail plate. It is flexible and made of plastic. Sometimes he has a pen. If a gel base is used, then a special ultraviolet lamp is needed to dry it.
These tools can be purchased as a set or each one can be selected separately. If there is no experience in this type of design, it is better for beginners to use stamping paints.
How to do reverse nail stamping
The preparatory stage remains the same - do a manicure, remove and lay out tools and consumables, wipe the engraved plates and scraper with remover or acetone.
After this, apply a primer, base, and one or two layers of gel polish to your nails (don’t forget to dry under a lamp).
Next you need to proceed like this:
- Apply paint of a suitable color to the engraving you want, level it with a scraper and remove excess pigment. It is better to use high-quality gel polish instead of paint, since all other manipulations will be carried out using this particular product.
- Roll the stamp over the design so that the contours are imprinted on its rubber or silicone bottom surface.
- In order to fill the contours, that is, literally color the picture as children do in coloring books, use the thinnest brush and gel polishes of the appropriate colors. Coloring of the design occurs directly on the surface of the stamp.
- Hold the stamp under the light of your lamp and dry the design that is on it. If after this you feel that the colors are not bright enough, you can repeat the coloring procedure a second time. However, try to ensure that the paint layer is not too thick.
- Cover the drawing with the thinnest layer of transparent gel polish and dry it under a lamp. If necessary, remove the sticky layer.
- On a nail on which you have already applied several layers of gel polish, you need to apply the base again. After this, you need to take tweezers, pick up the image on the stamp under one of the edges, attach this plate to the nail, level it, carefully press and smooth it so that there are no bubbles, creases, wrinkles or other irregularities. Particular attention should be paid to the area around the perimeter of the nail plate - at the cuticle and on the free edge of the nail. It is convenient to press the film at the base of the nail with an orange stick.
- As a rule, the nail plate does not have the same shape as the design made on the surface of the stamp; it is smaller in size. Therefore, the film with the pattern will protrude beyond the contours of the nail. This excess part must be carefully cut off with very sharp nail scissors with thin blades.
- The last stage is to apply a top coat to the glued ornament, dry it under a lamp, and remove the sticky layer, if any.
If you do not use three-phase gel polish systems, but two-phase or single-phase ones, the sequence of steps for stamping does not change. First one or two layers of gel are applied, then the design, then the final finishing layer.
How to choose gel polish for reverse nail stamping
The gel polish that is used as a substrate or background for the stamped image can be anything. It is better, of course, to choose products from reliable brands, but in this matter you can rely on your own preferences and financial capabilities.
However, the gel polish that you plan to use to color the contours of the picture must meet several requirements, otherwise you can’t even dream of a high-quality and beautiful manicure:
Good dense texture, allowing the cosmetic product to be imprinted well on the elastic surface of the stamp.
Increased pigmentation of gel polish. The drawing should ideally be applied in one layer, and at the same time turn out clear, rich, and bright.
It is advisable that a gel that does not have a sticky layer be used for the stamping design. The less manipulation you do with the drawing, the less likely it is that it will become deformed, smudged, or otherwise deteriorate.
Quite recently, special gel paints for stamping appeared on the cosmetics market. They print perfectly on gel polish coating. Alternatively, you can try this product – Elise Braun stamping gel polish, it has many good reviews on the Internet.
How to do dry stamping
This version of nail stamping may appeal to lovers of new and unusual manicure techniques. In this case, to create the pattern, it is not stamping paint that is used, but finely ground dry pigment. Such a product can be found in the assortment of large manufacturers - CND, Additives Medium Green, etc. In addition to the pigment, you will also need a brush for working with fine powder; for example, ruNail and Finest Kolinsky NDO No. 6 brushes do a good job. You also need to prepare a new stamp, the pad of which you did not pre-treat with a buff (read about the need for such treatment later in the article).
Sequence of nail art:
- Get a hygienic manicure.
- Apply primer, base and color layers - do not forget to dry each of them under the light of a lamp. The last layer of colored gel polish should remain tacky, meaning it does not need to be dried.
- You need to apply colored powder to the design selected on the stencil. You can combine different colors to your liking.
- The stamp is pressed against the pattern with an elastic surface and intercepts the powder, after which the pattern can be printed onto a sticky layer of gel polish coating.
- Apply top coat and dry under lamp.
Gradient stamping
Luxurious gradient patterns are not at all difficult to make using stamps.
You can make a gradient background or, conversely, stamp a gradient pattern on a plain background:
- Cover your nails with the base and the selected background shade, wait until the polish dries.
- Apply 2-3 colored varnishes to different areas of the plate.
- Now you should not just remove excess varnish, but make several movements with a scraper so that the boundaries of the shades blur.
- Transfer the design to the stamp and print it on the nail plate.
- Wait for the design to dry and cover your nails with a transparent top coat.
A design that has a gradient pattern on a gradient background looks most impressive. Choose the same shades of polishes, but arrange them in reverse order.
Stamping with pigments
This stamping technique will allow you to diversify the design by covering the paint used to apply the design with colored powder. To complete the design, you will need black stamping paint and a pigment for manicure (neon or rubbing).
The sequence of action is as follows:
- Perform a hygienic manicure.
- Cover your nails with primer, base and decorative layers, each of which needs to be dried under a lamp twice as long as usual.
- On the last layer you need to remove the stickiness.
- Select a design, apply paint to the stencil, spread it with a scraper or plastic card, transfer it to the stamp, then from the stamp to the nail.
- While the pattern paint has not yet dried, you need to dip a soft brush into the pigmented powder and apply the powder over the paint with light tapping movements.
- After one or two minutes, when the paint with the powder on top has dried, excess pigments can be swept off the nails with a clean, soft brush or paper napkin.
- Apply top coat to your nails and dry the last layer in a lamp for twice as long as usual.
What is nail stamping
Translated from English, “stamping” means “stamping”.
- In the case of manicure, the design is applied to the nails with a special stamp.
- This design doesn't take much time and looks amazing.
- Thanks to stamping, you can apply even small elements on your nails that are difficult to do with a brush.
- The stamp allows you to create patterns not only on nails, but also on the body of a mobile phone and other flat surfaces.
Gradient manicure with stamping
Signs of high-quality engraved tiles for stamping
There are two types in total
stamping tiles:
- Original products of a certain brand. Such products, as a rule, have quality certificates.
- Products in the “noname” category, that is, those produced by small companies that do not even have the intention of earning a reputation among consumers.
Experts recommend giving preference to the first option. But there are several more signs by which you can “identify” high-quality plates
with engraving for stamping, not focusing on the brand:
- There must be an identification code on the plate. It can be a set of numbers or a combination of numbers and letters. This code allows you to identify a design or set of designs that are engraved on the plate.
- The plate in the package must be covered with a special protective film. It must be removed without effort and without any residue before using the accessory for the first time.
- All lines of the drawing must be clear, no image disturbances, nicks or similar defects are acceptable.
- All engraving lines on the plate must be the same depth.
- Also, before purchasing plates, pay attention to whether the size of the pattern matches the size and shape of your thumb nail. It is also important to take into account the length of the plate, because you may want to extend your nails and stamp them. It will be a shame if the length of the pattern is not enough to perform stamping on extended nails.
How to choose a suitable plate for nail stamping
The choice of such accessories in the assortment of cosmetic stores is wide enough for the buyer to get confused when trying to choose the best option for himself. Let's analyze what criteria and aspects need to be taken into account when choosing nail stamping plates
:
- The number of squares or rectangles with patterns on one plate. Naturally, it is more profitable to buy products that contain a larger number of ornaments than analogues. Even if you don't initially plan to use certain images, they may be useful to you in the future.
- Theme of patterns on records. These can be New Year's motifs, emoticons, flowers, lace, abstractions, geometric shapes and figures, flags, letters, etc. The patterns are very diverse and you need to choose the right one according to your taste.
- Material for making the stencil plate. It can be metal or plastic. It is believed that designs engraved on metal coatings are more durable and more difficult to scratch with a scraper.
How to choose a quality stamp for nail stamping and prepare it for work
A good stamping stamp is not easy to find. Most of them, presented in the assortment of nail art stores, are difficult, if not completely impossible, to use. In the reviews of women who tried to do stamping on their own, you can find many complaints about the quality of the stamps. It often happens that the design on the rubber/silicone surface is not imprinted at all, and the device turns out to be inoperative.
To begin with, let us indicate that stamps, like engraved plates, can be original (branded) and non-original (the same “noname” ). Also, all possible options for such products can be classified as follows:
:
- Depending on how many “working surfaces” the stamp has. An accessory may have one working side - the one that is soft and plastic. There are also stamping devices that have a stamp of one size and degree of plasticity on one end, and a second stamp of a different size on the other end. The head itself for copying a print of a design can even be removable. In this case, the set with the stamp base includes several heads of different colors. Such accessories are convenient to use if you need to print a shade of paint that matches the color of the main stamp head. For example, white paint on a white surface is difficult to see, and it is difficult to understand how well the pattern was printed.
- Depending on what material the die head is made of. In modern production, rubber and silicone are used. The first option is not very successful, since rubber is characterized by increased cruelty. This material is not always able to repeat the shape of the nail plate when rolling the pattern. Therefore, applying a continuous pattern causes certain difficulties. In addition, rubber heads, as a rule, are very small in size, which does not allow for continuous coating. Silicone material is more convenient in this regard - it is softer, more flexible, picks up and holds pigments well, and allows you to apply a design to the entire nail plate in one go.
A brief overview of not very successful stamps for stamping nails - which options are better not to purchase:
- Miniature stamp made by Konad. This is an original high quality accessory that will last you a long time. But it has too small a working surface. It is thin and flat, and is difficult to deform when placing a print on a curved nail. Therefore, experts recommend using this option only for printing individual fragments of a design or for performing a French manicure. It is not suitable for large stamping patterns covering the entire nail plate.
- A small stamp from an unknown manufacturer, which differs in that there is a scraper on the second side of the handle. Many women purchase such a product in the hope of saving money; after all, there is both a stamp and a scraper for the same price. The advantage of this product is that the scraper will not get lost, which happens quite often. But the main working surface is small, which makes the tool not very convenient to use and certainly not universal for performing different stamping patterns.
- Non-original stamp with a rectangular surface and a replaceable head. Accessories with rectangular working surfaces, as practice has shown, turn out to be the most effective for stamping. But the fact that the die head is removable has absolutely no meaning if the set does not include other replaceable silicone pads. As a rule, such pads are not only absent from the stamp set, but also generally not available for sale. However, given the low cost of such devices, they can be regularly updated without much damage to the budget.
- Stamps for stamping are double-sided with white pads of different sizes. This tool is positioned as a universal tool. One surface is small and elastic, which allows you to leave small, clear imprints of individual decorative elements. The other pad is large and plastic, adapts well to the shape of the nail, allowing you to apply full-fledged designs on large and long nails. But there is one “but” - such accessories can poorly capture the pattern from the stamping tile.
In order not to disappoint you at all with the quality of stamping dies, we will give an example of a successfully executed accessory. For example, the Born Pretty brand tool does its job well. This is a clear silicone stamp with a hollow clear handle. The manufacturer tried to take into account all the needs of customers and brought to life a very interesting and practical idea:
- When transferring a pattern or ornament from a tile to a stamp, from the stamp to the nail plate, you can see through the pad how the design is laid out. That is, you have the opportunity to timely assess whether all elements fall into their intended place.
- On the transparent pad, any colors of the contours of the patterns are clearly visible - from white to black.
- The density of the pad and its size are optimal for making designs and ornaments of any size on any surface, even a strongly curved one.
- In general, if you experiment with different stamping dies, you can quickly choose the best option for yourself. They are not very expensive, so such purchases will not make a significant dent in the family budget.
- In order for the stamping process to be successful, it is important not only to choose the right accessories, but also to prepare them for work. To begin with, the silicone or rubber surface of the stamp needs to be made not as smooth as it was initially. This is necessary so that the rougher surface will better adhere to the varnish applied to the engraving of the plate. To increase the roughness of the material, it can be lightly treated with a nail polishing buff. There is no need to be zealous in this matter, since you can easily damage the stamp head, as a result of which the lines of the drawing or pattern will no longer be clear enough.
- Also, before starting to work with the stamp, its working surface needs to be wiped with NDL (nail polish remover). Flint sticks to silicone very quickly, so additional cleaning will not be superfluous even if the stamp appears relatively clean.
Manicure ideas in different colors
In a manicure with stamping, not only the choice of design plays a role, but also the choice of color palette.
Strict nude and pastel shades are suitable for the office, and bright and even neon shades for the holidays. Let's look at the most successful color combinations.
For romantic natures, a delicate pink manicure with stamping will suit you; choose lace, flowers, hearts or imitation mesh as an ornament.
White, nude and silver colors go well with a soft pink shade. For a brighter design, use a combination of pink and fuchsia.
For a bright red manicure with stamping, choose black, white or gold as an additional shade.
Red and gold are an excellent solution for an ethnic style design, black lace on red nails will support the image of a femme fatale, and white geometric patterns will fit perfectly into the pin-up style.
If black polish is used as a background, in addition to it, use white, red, gold or neon.
Black manicure with stamping looks very elegant, especially with a matte top.
Nail art in the form of inscriptions on nails is in trend; this design can also be reproduced using stamps.
A white manicure with stamping in the form of black letters is best suited, but you can use a different shade for both the inscriptions and the background, the main thing is that the colors are as contrasting as possible.
Yellow manicure with stamping in black, white, orange or turquoise is ideal for summer.
Use floral, botanical, tropical or ethnic motifs, and neon yellow is suitable for geometric designs.
Blue and cyan shades are widely used to create nail compositions in a marine theme, as well as to imitate Gzhel.
Complement the blue color with white, silver, purple, or use several shades of the blue-blue palette.
A nude manicure is always a good solution.
If you don't want to attract too much attention to your hands, decorate your nails with a white design.
Black ornaments will look more elegant and mysterious, and stamps in the shade of taupe will look as cozy and warm as possible.
Don’t think that a manicure with stamping looks cheap, because it is almost as good as hand painting.
If you want to use more than three shades in a manicure design, cover each nail with a different color and stamp the designs in the same shade on all nails.
Also, don't forget about the trend for different hands, when a separate design is done on the nails of each hand.
0 Comments
Stamping for nails - tips for beginners from professionals
To ensure that stamping is not accompanied by mistakes and brings only pleasure from a beautifully executed manicure, consider the advice of experienced nail art masters:
- Save acrylic paint or special gel for painting the outlines of drawings. Do not apply pigments to the entire engraved plate if you see that it is much larger in size than the surface of the nail plate, even on the thumb. Since stamping is a technique that requires a lot of materials, you can learn to save them. To do this, apply a strip of paint at the very beginning of the drawing and distribute it so that it is enough to cover the nail, but no more.
- Use a plastic scraper with smooth edges rather than a metal one. If necessary, you can even use any unnecessary plastic card. If you have a metal scraper, keep in mind that sooner or later it will begin to scratch the engraved plate, rendering it unusable.
- Clean the engraved plate, scraper and stamp surface immediately after performing a manicure, before the paint has had time to dry too much. This can be easily done with nail polish remover if the gel is still fresh.
- It is not recommended to clean the surface of the stamp with cotton pads, swabs or napkins, which may leave tiny lint on the rubber or silicone. Such particles can ruin your manicure next time. Therefore, it is better to use the sticky side of the tape to clean the stamp. If you use one side of double-sided tape, which has a stickier surface, the cleaning will be better and faster.
- As we already mentioned, when transferring a design to the surface of the nail plate, the paint often gets on the skin around the nails. To protect your skin and make cleansing easier, apply a thin layer of rich cream to your skin. A more reliable way to protect the skin around the nail is to use a specialized “liquid tape”. This liquid substance of a bright shade, which is clearly visible on the skin, is easily removed along with the adhering pattern - just pick it up by the edge with tweezers. This product is produced by many brands - MASURA, Kiesque Liquid Palisade, EL CORAZON Kaleidoscope Cuticle Defender, Pure Manicure Dance Legend, Skin Defender, Fire Star. Moreover, you can choose how it is more convenient for you to apply the product - with a brush or a sponge, like with lip gloss.
We hope that these tips will help you do stamping quickly, easily and without mistakes!
