Introduction
- What is hardware manicure?
- Distinctive features of hardware manicure.
- Indications and contraindications.
- What tool is used to perform a hardware manicure?
- Choosing a router
- Selecting cutters
- Step-by-step instructions for beginners.
- Tips for Newbies
- conclusions
- Conclusion
If you are new to manicure, but would like to know what a hardware manicure is and how it differs from an edged one, what tools are needed or not needed, what a router and cutters are, and in the end, how to do this same hardware manicure step by step then make yourself comfortable. You will also receive advice from the experts to protect you from stupid mistakes. And then you will find a training video on how to perform a hardware manicure.
Hardware manicure
Hardware manicure for beginners at home (training)
Do you dream of beautiful and healthy nails?
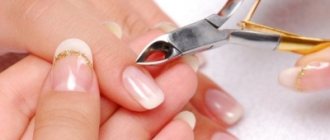
A hardware manicure will help keep your hands in perfect condition - simple, effective and safe. Today, this is the most progressive method of treating the nail plate and adjacent areas, which almost eliminates the possibility of injury. Manipulations are carried out using a special device - a milling cutter with several interchangeable attachments. It allows you to quickly and easily: get rid of the old decorative coating, give the desired shape to the edge of the nail plate, remove the cuticle, pterygium and deeply clean the lateral sinuses, sand the nail and, if necessary, level its surface before applying a new layer of varnish.
Hardware manicure is a modern and effective method for caring for nails, cuticles and skin using rollers. It is carried out with a device called a manicure cutter. This device is equipped with various attachments and also allows you to safely and painlessly remove areas of rough skin and hangnails without affecting the cuticle. Since hardware manicure provides professional care, it is recommended for girls with the following problems:
- lamination of the nail structure and wavy (uneven) surface of the nails;
- dry hand skin;
- with a “fleshy” cuticle that grows quickly.
In addition to standard nail treatment, this manicure also helps correct the shape of the plates. The main feature of the procedure is that it is performed on dry skin, which means that before correction there is no need to steam your hands in advance. This manicure is also good for caring for extended nails.
To get the maximum effect of grooming, many masters offer their clients to perform a combined manicure, which involves hardware processing and trimming techniques. In this case, the more delicate areas of the fingers are treated with conventional tools, and the hardened skin is removed with a milling cutter.
Manicure with one cutter
Sometimes you need a quick manicure. We suggest performing the procedure with just one attachment. If you are a beginner, it is better to use a router bit with a red marker.
You will need:
- drop cutter
- orange stick,
- nail scissors,
- cotton buds,
- degreaser.
The technique is not suitable for thin skin or thin nail plates.
A drop-shaped cutter is best suited for a quick manicure
Step by step process:
- Manicure begins with pushing the cuticle to the edge of the nail.
- Turn on the machine in “forward” mode, speed – 25,000 rpm. At a lower speed, the nozzle will cut off layers of skin, and the manicure will turn out torn. Therefore, you need to work at almost maximum speed so that the cutter cleans the skin. Repeat the manipulations no more than 5 times.
- It is very important not to put pressure on the nozzle. It needs to be able to move freely under the cuticle. In this case, the maximum amount of pterygium (the lower layer of the cuticle) will be removed.
- First, treat the left side of the nail: the cuticle and the side ridge. Then switch the device to reverse mode and treat the nails on the right.
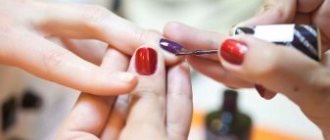
- When finished, trim the cuticle with scissors.
- Apply degreaser to a cotton swab and remove dust from your nails.
Advantages and disadvantages
Most of the fair sex do not have free time to visit salons, so in order to save themselves from long trips and waiting in lines, ladies prefer to take care of their hands themselves at home. Manicure can be performed using both cutting and hardware methods, while the latter is more popular because its advantages are as follows:
- high-quality removal of fragments of keratinized epidermis without damaging healthy areas;
- injury-proof, since cutting tools are not used during the session;
- sterile - during processing, contamination and infection are excluded;
- provides long-term care, skin grows back more slowly and nails do not require frequent correction;
- hands do not need to be steamed in baths and softened, which protects the skin from washing out intercellular fat and reduces the risk of lamination of the horny plates;
- the ability to obtain a symmetrical shape of the nail, the edges become neat and perfectly smooth.
Despite the advantages, hardware manicure also has disadvantages.
- The cosmetic procedure is quite complex and not all novice craftsmen can handle the cutter on their own. Since the device operates at several speeds, which are used to process certain areas, skill is required to set them. Without experience in operating a router, you can injure the plate and make transverse or longitudinal grooves on it. In addition, the procedure can be unpleasant and painful if performed incorrectly.
- Such a manicure does not guarantee complete “cleanliness”, which is achieved with the trimming method. Since the skin does not steam, it is almost impossible for a technician to remove the entire cuticle using a milling cutter.
- Girls whose nails are in too neglected and unkempt condition should not use hardware manicure.
To summarize, we can say that hardware technology is considered useful, it facilitates the work of the master and significantly improves the quality of manicure. The only thing is that to get an excellent result you need to have skills and experience in using the device.
Features of combined manicure
Combined manicure is a type of hygienic nail treatment that combines several forms of manicure. From the name it becomes clear that in this case we are dealing with combinations of various manicure methods. As a rule, generally accepted manicure options are combined. For example, European and classic, classic and hardware, etc.
In essence, this type of treatment is no different from others - it just takes the best from each type of manicure. A combined manicure includes high-quality cuticle treatment, correction of the length and shape of the nail, careful treatment of the sides of the bed and complete hand skin care.
Contraindications to the procedure
It is not permissible to perform a hardware manicure on the nails of a woman suffering from one of the following ailments:
- The cuticles are inflamed and swollen;
- The skin next to the nail has damage (scratches, wounds);
- The nail is affected by a fungal infection;
- The cuticle is too thin;
- Microvessels are located too close to the cuticle;
- Severely deformed nail plates also cannot be treated with the device.
Advantages
- low invasiveness of the procedure compared to classic trimmed manicure;
- unpleasant, painful sensations are minimized;
- since the attachments for hardware manicure are removable, this allows them to be sterilized in a special chamber, which means the risk of infection is minimized;
- The effect of cuticle treatment lasts longer compared to trimmed manicure, the device treats hard-to-reach areas better;
- A clear aesthetic effect is a neat and healthy appearance of the nail plate after the procedure.
Hardware manicure
Hardware manicure technique
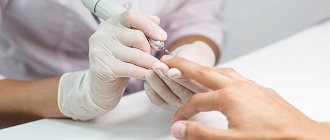
This type of nail work can be done both in a beauty salon and at home. Of course, if the procedure is being performed for the first time, it is better to contact an experienced specialist. Subsequently, you can do a hardware manicure yourself, following the following sequence of actions:
- Step 1 Remove (if necessary) the coating from the nails. Nail polish remover should not contain acetone.
- Step 2 Apply a special softening agent to the cuticle and move it with a wooden stick to the side ridges located around the nail. As a rule, such a stick is included in the basic set of a manicure machine.
- Step 3 We begin to process the nails, holding the device in our hand like a fountain pen.
- Step 4 Do not press the attachments too hard against the nail plate, since the manicure apparatus can injure the nail and periungual space.
- Step 5 We remove dry areas of skin using nozzles with medium abrasiveness and treat the side rollers of the fingers.
- Step 6 File the cuticle using a small ball attachment.
- Step 7 Use low-abrasion attachments to smooth (if necessary) dry calluses on the palms.
- Step 8 Sand and polish the nails. Do not touch the tip of the nozzle to the nail plates, as this can lead to unsightly scratches. The hard washcloth included in the hardware manicure kit is usually used for polishing nails.
- Step 9 After completing the procedure, apply oil or cream to your hands and do a light massage.
Step-by-step instruction
If you have already acquired a device and cutters, we recommend that you study the tips on how to properly do a hardware unedged manicure at home:
- The procedure is carried out only on a dry plate. Otherwise, the plate will begin to heat up, which will cause some discomfort. In addition, the areas will be less well processed;
- If you are using a combined or customizable device (for example, Strong), then you need to set the speed to a speed of up to 10,000. If it is higher, then you will simply erase your nails due to the lack of proper experience;
- Do not press the clipper close to your nail or, especially, put pressure on it while working;
- The first few times you need to practice on the silicone tips first. Then, when working with rough cutters, you will already know how to hold them correctly, at what angle and for how long.
Instructions and technology for performing hardware manicure step by step:
- The cuticle needs to be moved closer to the nail hole using a special wooden stick. Try to act carefully so as not to damage it;
- On it and the side rollers on the sides of the plate, the use of drums with medium hardness is allowed. Watch your own feelings, if it seems that the cutters are not removing enough, then you can take tools with more abrasiveness;
- On the palms and fingers, you need to clean dead cells using soft abrasive ball-shaped burs;
Use cylindrical or trapezoidal cutters to give the plate the desired shape. Be careful - the rules of proper manicure require leaving more than 2 mm above the level of the fingertips, even on short nails;
After this, polishing begins. The technique of this stage is quite difficult for beginners. Firstly, you cannot bring the edge of the polisher to the nail - it will scratch the plate, secondly, you cannot hold the polish in one place for longer than 1 second;
- All that remains is to clean the space from dust and nail residues, lubricate it with oil and paint it.
For a better understanding, we recommend watching a video master class from professionals on how to do a hardware manicure.
Video training for beginners on how to do a hardware manicure
Hardware manicure step by step photo instructions
We treat the skin of our hands with a disinfectant solution and rub it. We wait until it dries.
Hand treatment
If necessary, use a ceramic nozzle to remove the old gel coating.
Using a file, we give the nail the desired shape.
Removing the coating
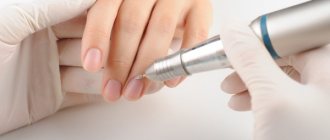
Using a cone cutter with a rounded tip, we begin to lift the cuticle.
Lifting the cuticle
Use an orange stick to gently move the cuticles on all fingers.
Working with an orange stick
The nozzle should be positioned parallel to the surface being treated to avoid making a cut. If the cutter spins to the right, then our hand goes to the left and also in the other direction. The milling cutter operates in reverse. According to the rules, we process one half of the nail on all fingers, then switch the router and process the second half of the nail on all fingers.
While processing the cuticle, we also grind the side rollers.
Hand placement
Important for beginners! The milling cutter should be set to 15-17 thousand revolutions per minute.
Next, take the bur attachment and begin to thin the cuticle.
Working with a bur
Hold the nozzle perpendicular to the surface being treated. We move the cutter in one direction only along the skin; if necessary, we turn the finger and not the nozzle.
Now that the cuticle has been processed, it needs to be cut off. We do this with a smaller ball with fine abrasiveness.
Working with a smaller ball
In this case, we must follow the shape of the nail hole and move parallel to it.
To prevent overheating of the skin during friction, it is not allowed to hold the cutter in one place for more than 5 seconds.
We processed the cuticle. Now we switch the router to 5-7 thousand revolutions per second and use a polishing cutter to process the nail plate. We touch the nail in the cuticle area only with the tip of the cutter. Movements should be light, as if repulsive.
Working with a polishing cutter
The final stage is to go over all the nails with a brush and remove any remaining dust. Then, if we do not cover our nails with varnish, we apply a special cuticle oil. This is necessary to nourish and restore the nails and skin around them, as well as to give our manicure a finished look.
Oil treatment
Tips for Newbies
Treatment of the nail plate
So let's summarize:
The most important thing for a beginner in hardware manicure is not to work at high speeds, so as not to make cuts.
Practice the correct hand position during various stages of hardware manicure.
Select the right nozzles.
It is forbidden to work with a cutter at one point for more than 5 seconds, this will lead to overheating of the skin.
To prevent overheating of the router, it is recommended to take breaks every 5-7 minutes.
Do not neglect the rules of sterilization so as not to get fungal infections.
Hardware manicure
Start your hardware manicure by making sure your skin is completely dry.!
Router attachments
conclusions
What conclusions can be drawn about hardware manicure?.
With the help of one device you can comprehensively treat your nails.
Eliminates the possibility of traumatic effects on the nail plate and surrounding skin.
After a hardware manicure, the cuticle grows evenly and longer.
The appearance of burrs and cuts is eliminated.
After a hardware manicure, you will not get a fungal infection.
When done correctly, processing time is reduced.
After the procedure, the nails become shiny and the yellowness goes away.
The nail plate becomes healthier and stronger.
The correct shape is formed.
Hardware manicure
Set of cutters
A must-have set of tools for a proper manicure
The basis of such care is a special machine with attachments, operating either from the mains or from a battery. The set can contain from 5 to 30 caps. They are installed on a special stand. Sometimes they have pockets in an organizer or case.
Required attachments:
- cone - to get rid of pterygium (skin film growing to the plate);
- cylinder-drum - to remove the previous coating;
- ball - for lifting and removing cuticles.
The rigidity of the caps must be taken into account. To indicate this parameter, manufacturers highlight them in color. Blue notches indicate the highest level of stiffness, red notches the lowest.
In addition to the device you will need:
- mask - to prevent dust particles from clogging the lungs;
- extractor hood is not necessary, but helps reduce the amount of dust in the air;
- brush – for removing dust from fingers;
- antiseptic liquid – disinfects and prevents infection;
- wooden stick - for forming the nail bed;
- degreaser and wipes;
- cuticle oil - for preliminary softening;
- file – for processing plates;
- varnish and decorative elements for covering nails - optional.
If varnish is applied, you will also need an ultraviolet lamp to dry it.
Cutters for hardware manicure: types
The hardware type of manicure is replete with a variety of cutters, which are not limited only to the difference in abrasiveness. Quite important parameters are the limitation of operating revolutions per minute and differences in tip diameter.
Depending on their purpose, all nozzles are divided into three large groups:
- Attachments for working with the shape of the nail plate and for filing it.
- Attachments for grinding the surface of the nail and cutting it.
- Attachments for final polishing work to make the surface shiny.
Also, these groups have their own divisions of attachments with other features. What cutters are needed for hardware manicure:
Ceramic tips
Hardware manicure (training for beginners involves starting practice with a ceramic type of attachment) involves removing the old coating, for which the most common attachment among nail service salon workers is ideal. It is called “corn” because it has a characteristic appearance.
Its purpose is high-quality and painless removal of gel polish (there is a version of the attachment for left-handers). Also on the list of popular attachments is the “carrot”, which has received recognition for the quality of nail polishing. The main purpose of ceramic attachments is to treat the nail and the skin around it.
Such attachments have an inherent hardness indicator, which is marked with special colors on the rim under the main working surface.
Correspondence of color to cutter rigidity indicator:
- Pink or blue color – fine-grained cutter.
- White – a cutter with a medium grain size.
- Black – coarse grain.
The first type from the list is well suited for soft treatment of the skin along the contour of the nail plate. The second one will serve for removing pterygium and gently removing gel polish. The latter is designed to remove keratinized areas of the skin or calluses. Such attachments should be stored carefully so that they are not subject to harmful mechanical influences.
Diamond bits
Diamond bits are an important tool, divided into many types according to the shape of the product and its abrasiveness. Typically they consist of a steel rod coated with a diamond coating (natural or artificial).
Just as in the case of ceramic cutters, abrasiveness can be determined by the color of the rim:
- Yellow color is the smallest crumb, no more than 15 microns.
- Red color – small crumbs, from 30 to 50 microns.
- Blue – medium crumb, from 90 to 125 microns.
- Green – slightly coarser than average, from 125 to 181 microns.
- Black – large grains, within 300 microns.
- Two black marks are very large grains, around 500 µm.
Rare are diamond attachments with white or three black marks, the so-called grinder cutters, which simultaneously serve as a polishing tool. Scarce. Designed to remove heavily keratinized skin areas and thick layers of gel.
The successful outcome when cutting off gel polish depends on abrasiveness. Diamond cutters with green or red notches, made in Germany, are in great demand. It is believed that they are of the highest quality in execution. But there is an analogue made in Russia.
Silicone tips
Silicone nozzles belong to the group of polishing nozzles suitable for both artificial and natural nails. Adding shine to the nail plate can be achieved precisely by using these attachments.
They have divisions according to abrasiveness, which is determined by touch: from almost smooth to rough options for grinding. They are made of silicone interspersed with abrasive particles.
Metal nozzles
Metal cutters, unlike diamond ones, have a lower price, although they are used for the same purposes. Usually made from alloys of carbide and tungsten - medical steel. Among the features of steel cutters, one can note the patterns (notches) on the working surface. They can be straight, oblique or spiral.
Such attachments are well suited for removing dead skin, and not with dust, as usual, but with shavings. It is noteworthy that among the models of steel cutters there is a version made in a “corn” shape, which is used for removing old gel polish.
Criteria for choosing devices for manicure
Hardware manicure (training for novice specialists sometimes takes place on a self-purchased device) is closely related to understanding the criteria for choosing a device.
The first one is power. For personal use, you don’t need a very powerful milling cutter, so you should pay attention to models with a stated power of at least 35, but not more than 50 W. However, if the specialists are visited by at least 5 clients every day, then you should pay attention to models with a power of 100 watts or more to reduce the procedure time.
The second is the number of revolutions. Models with up to 20,000 rpm. suitable for home use. If the number of clients is more than 5 people per day, you should choose a device operating at 35,000 rpm. and more. In cases of professional manicure, the machine must have a speed of 45,000 rpm.
The next criterion will be the provided cutters included in the package. It is very good if the device is equipped with a starting list of basic attachments.
In the best case, you need to include among them:
- For treating rollers and cuticles.
- Nozzles for grinding work.
- Nozzles for polishing the nail plate.
- Attachments for working with keratinized skin.
The devices also differ in the method of clamping the nozzle. There are 3 types in total:
- manual;
- semi-automatic;
- auto.
Inexpensive models for home use use a manual clamp that secures the working part of the tool when tightening the washer. A more expensive device will be equipped with a semi-automatic method of fixing the nozzle when the lever is tightened. And the most expensive devices come with an automatic clamping system that locks the nozzle immediately after its installation.
Working tools for performing hardware manicure are equipped with a brushed or brushless motor. The difference is that a brushed motor is designed to last for several hundred hours, while a brushless motor lasts for several thousand.
A machine with a brushless motor will cost more, but it is quieter than its counterpart with a brushed motor, and is distinguished by the quality and durability of its design. Devices with a commutator motor, despite their shortcomings, can handle a home manicure quite well.
The last selection criterion is related to the fine dust released during operation of the machine. To reduce its amount, you can choose a model of the device with a vacuum cleaner built into the countertop, equipped with a retractable tray for quickly cleaning the filter from accumulated sawdust. If a vacuum cleaner is not provided at all, you can purchase it separately complete with a stand, dust collector and filter.
How to work with a router
- Using a cylindrical attachment, buff the nail plate for a smooth surface and a glossy shine. Work with the body of the cutter, do not touch the edge to the nail so as not to scratch it.
- The tool should be at an angle of 45 degrees. Finding the right position is easy: remember how you held the pen in class - hold the typewriter the same way.
- Apply a nourishing oil (such as almond oil). Next, polish the nails over the oil layer, this process seems to seal the plate, preventing drying and delamination.
- Remove any remaining oil with nail polish remover, apply base coat and nail polish. You can find a large selection of varnishes, tools, and cuticle care products on the website Makeupstore.ru
- Even when using a machine for hardware manicure at home, do not forget about the rules of cleaning, disinfection and sterilization!
I will also make a reservation that it will be difficult to do such a manicure on your own without experience, and the machine is expensive, so the vast majority prefer to have it done in a salon or at home by professional nail technicians.
If you are going to work in this area, then this article can serve as a reference plan for beginning masters, and I recommend starting to practice with hardware manicure courses.
Well, in conclusion, watch a short video on this technology from the online store with which I cooperate - krasotkapro.ru:
Well-groomed hands and a beautiful manicure are always the dream of every woman. But often, in the hustle and bustle of everyday life, we don’t have time to visit the salon. A revolutionary technology—hardware manicure—helps solve this problem; you already know about the intricacies of the process. That's all. All you have to do is improve your skills and be proud of your successes!
Toolbox processing
Tools and attachments should be cleaned after each use. The cutters are washed with water, and at the same time, particles of skin are removed from them using a brass brush.
Cleaning in an ultrasonic sterilizer is also a good option. It works on the principle of purification by vibration, which causes the liquid to vibrate. Microbubbles formed as a result of such exposure explode, clearing dirt from hard-to-reach places on the instrument.
Instruments are treated with antiseptic solutions or sterilized in special cabinets, for example, in a dry heater.
All instruments made of solid materials are placed in it, after which they are heat treated in an environment with a temperature of 180 ᵒC for 30 minutes, then removed and placed in sterile containers with a sealed lid.
Flaws
- This type of manicure causes difficulties, if the nails are thin - pain is possible in such cases;
- If you do a hardware manicure for yourself, at first, due to inexperience, you may experience pain;
- Tools for hardware manicure are much more expensive than tools for classic manicure, and, moreover, the attachments need to be changed frequently;
Set of nozzles
How to do a classic edged manicure for yourself at home?
There is a misconception that a manicure cannot exist without a coating. This is not true, because the coating is just decoration. Well-groomed nails that do not need to be covered with polish or gel polish are truly appreciated. Well-groomed nails should be clean, neat, without burrs, cuticles, with a perfectly even shape and shine. In order to achieve this result, you need to do a manicure. There are several ways to do it. Classic manicure is performed by steaming using nippers, tweezers, and scissors.
Instructions:
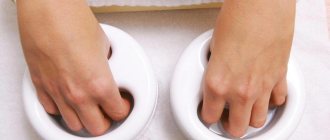
- To do this, you need to fill a special hand bath with some warm water and add sea salt and a few drops of liquid soap. Hold your hand for 5 or 10 minutes.
- After this, one by one, the fingers are removed from the bath. It is necessary to use a pusher or an orange stick to push the cuticle towards the hole. After this, the pterygium at the cuticle is scraped off. Using the sharp side of an orange stick, a transparent film is exposed that must be removed.
- After this, you need to use pliers to cut off the cuticle along the perimeter of its growth. The sharp side of the stick removes the contents from under the nail, if any. This is dirt, possibly dead skin particles.
- Next, you need to use a file for natural nails to trim the free edge and give it shape. The choice of shape depends on the thickness of your fingers and the characteristics of the nail bed.
- Once all the manipulations are done, to give your nails more shine, they can be polished with a regular polisher. The final stage of a classic manicure is applying cuticle oil.
- This manicure is classic, but the most time-consuming, using cutting objects that will have to be sterilized from time to time or use special means to remove microorganisms. In addition, professional tools are quite expensive. It is necessary to sharpen them when they become dull.
- Do not use files with coarse abrasives for shaping. Products made from artificial materials are not suitable for natural, thin nails. They scrape the edge and make it ragged.
Useful tips from the master
In order for the manicure procedure to go according to all the rules, you must adhere to certain recommendations.
Adviсe:
- use only high-quality tools;
- When processing, pay attention to the lighting; a bright lamp is necessary;
- do not forget about sharpening the wire cutters, pusher and scissors;
- buy new cutters as you grind them down, as old ones lead to heating of the nail;
- contact only trusted professionals;
- if you are interested in the idea of doing it yourself, then take training in professional lessons or courses, where you will receive the necessary theory;
- if you are just learning combi manicure, then work with a milling cutter at low speeds;
- monitor the processing and sterilization of instruments;
- when blood appears, urgent treatment with hemostatic agents is necessary;
- when working with cutters, keep them parallel to the surface being processed;
- do not allow cuts to appear;
- do not put pressure on the device during operation;
Always use cuticle oil at the end of the procedure; you can use oils: almond, apricot, grape, etc.
The combined manicure does not need additional description, since by looking at the results of the work in the photo, you can be convinced of its advantages. It’s a rare girl who will be dissatisfied with the condition of her nails after a combination manicure. Since it is this type that guarantees a beautiful and neat result of the work.
When writing this article, materials from olacenters.com were used.
How to give yourself a hardware manicure at home
You can perform a manicure using special equipment. Nowadays, homemade versions of milling cutters are sold, which are quite inexpensive. This is a well-known, popular pen that can be purchased on AliExpress. It is a handle with a motor that is connected to the power supply. Milling cutters of different diameters and grain sizes are inserted into the coupling.
These products are used to remove dead skin cells and cuticles. Here it is also necessary to adhere to a certain scheme.
Instructions:
- The peculiarity of this manicure is that it is carried out dry, that is, without preliminary soaking. That is why it is ideal before painting with gel polish or for extensions. Because the nail does not absorb excess moisture.
- Take a flame router or needle and attach it to the router handle holder. Turn on the device at low speed. Parallel to the nail bed, remove the cuticle and pterygium from the pocket. Do not drive the cutter directly under the cuticle, but gradually move deeper and deeper. Do not try to push the cutter deep at the very beginning with great effort. This can damage the cuticle or tear it away from the nail bed, causing a wound and bleeding.
- After this manipulation, the cuticle rises and becomes protruding. It can be removed using a ball cutter. They come with diamond coating or corundum. We recommend using a diamond-coated ball at the initial stage. It is coarser and allows you to remove large pieces of very dry cuticle that has grown.
- Corundum balls are used for final processing. Please note that ball cutters are not driven along the nail bed, but work exclusively in the cuticle area.
- In the area of the side rollers, processing is also carried out using a needle cutter. After this, a file is taken and the free edge is processed to give a shape. If you are not going to apply gel polish, you can apply nourishing oil to the cuticle area. You can see how gel polish coating is carried out here.
- To avoid cuts, do not stay in one place for too long. Try to work not completely chaotically, but according to a certain pattern. Otherwise, you will get torn cuticles that dry out quickly. Hangnails often form in such areas.
- This handle comes with bad cutters, so you may have to purchase new diamond-coated ones. For removing gel polish, the ideal option is a ceramic corn chip with a blue notch. The set does not include a ball cutter, so you will have to purchase it separately. It is necessary to remove dry cuticle.
How often should the procedure be done?
In terms of durability, a hardware manicure is very different from an edged or some other type. If you cover your nails with gel polish, the procedure can be performed once every 3-4 weeks. It is recommended to pay attention to your arms and legs more often and just maintain the condition so that it does not become neglected and you do not have to spend a huge amount of time on it. Another video from the master will help you achieve perfection in hardware manicure:
In beauty salons, a special coating is applied over the varnish, which allows you to keep your nails looking presentable for much longer. Many women noted that after visiting a manicurist, the effect of the treatment was much higher than with home procedures and it lasted much longer. But over time, you will also learn and will be in no way inferior to any master in professionalism.
If we are talking about extended nails, then you cannot do without qualified help. You will have to visit a specialist every 3-4 weeks to adjust the shape of your nails.
Indications and contraindications for hardware manicure.
Now let's discuss who this type of manicure is contraindicated for.
First of all, hardware manicure should not be done if you have fungal diseases of the nail plate.
Secondly, this manicure cannot be done if there is damage to the skin near the nail.
And the third contraindication is a too thin nail plate.
Who is recommended for hardware manicure?
For those with dry skin and those with blood vessels located fairly close to each other, because this method virtually eliminates the possibility of injuring your delicate skin.
Removing gel polish with a machine
To remove the gel coating, use the same device that is used to perform a hardware manicure. The only difference is the attachments used (cutters) that are inserted into the device. The operating principle of removing shellac with a device is to mechanically remove layers of gel from the nail plate. This is possible due to the high rotation speed of the cutter.
The procedure can be done using a regular nail file, but this method will take much longer and can damage the nail structure.
Ceramic cutter
They came to the nail industry relatively recently. They are durable, have high strength and wear resistance. The main difference from their metal counterparts is the absence of heating during operation. When working, they act softly, as they have a high cutting ability. In practice, it has been established that one such cutter lasts three or even four times longer than a carbide cutter. But what is the design of gel polish on short nails, you can see here.
When removing nails with a cutter, it should be taken into account that its rotation should occur at lower speeds than when performing a manicure, approximately 10-15 thousand rpm.
Carbide cutter
Metal instruments of this variety have appeared a long time ago; they come in not only straight, but also cruciform and oblique shapes. Conventional attachments made of this material work only in one direction, but their reversible type rotates counterclockwise and clockwise.
The latter cut the gel material like shavings, rather than turning it into dust. Carbide cutters ideally remove artificial nails; if they are used for gel plates, you need to choose a tool with large notches.
Pros and cons of hardware removal
Hardware removal of gel polish has a number of advantages:
- There is no risk of damaging your nails. Thus, the liquids used to remove the coating contain acetone, an aggressive substance that dries the nail plate and leads to cracks. In addition, when removing the gel with a nail file, there is a risk of accidentally touching the top layer of the plate and damaging its structure.
- Save time. Removing shellac with a machine takes on average 10-15 minutes, while the manual method takes more than an hour.
The disadvantages of hardware work include technical features: skills in working with equipment, correct direction of movements, etc. In addition, using the device also requires additional costs for the purchase and replacement of cutters or repair of the device.
Milling cutters
The master class on proper hardware manicure, presented in the video, involves the use of at least five different cutters for comprehensive processing. These include cutters for correcting the length of the free edge, adjusting its shape and polishing the entire plate. There are also cutters for removing cuticles, corns and calluses on the feet and treating the skin of pre-nail ridges. If the master works with extended nails, then many other attachments may be required.
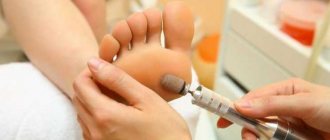
- Treatment begins with the removal of rough skin on the feet (if a pedicure is performed). It is carried out using the most highly abrasive cutter, usually a diamond;
- Then, both during manicure and pedicure, the removal of rough skin flakes from the pre-nail ridges begins. To do this, select a cutter in the form of a truncated cone, softer than the previous one;
- If you want to perform a completely hardware manicure, then the next step is to remove the cuticle with a special cutter, as the master class shows. However, this is quite difficult, and therefore some people skip this stage, removing the cuticle in the usual way - cutting, pushing or dissolving with a remover;
- Now you need to reduce the length of the free edge using a ceramic cutter. If you are working with extended nails, then at the same stage you can remove the old layers of gel from the bottom of the free edge;
- Using a sand or other non-rough cutter (for natural nails), adjust the shape of the free edge;
- Polish and level the plate. Depending on its condition, this may require from four cutters to one;
- Polish the plate with a cylindrical chamois cutter to a mirror finish.
You can evaluate how effective a hardware manicure is by looking at the photos before and after treatment. If it is performed by a competent master, the result is better than with a classic manicure. However, not all masters are fluent in this technique, and therefore often combine this type of manicure with a classic or European one.
https://youtu.be/HzvEdUe1vZE
[yandex3] [google3]
The most common mistakes of novice masters
- Before the procedure, it is not recommended to treat your hands and nails with cream or oil.
- To avoid injury to the nail, do not set the device to too high a speed.
- Cutters should be used exclusively for their intended purpose.
- It is important to choose the correct abrasiveness of the nozzles. Cutters with dark markings are used to process hard cuticles, and with light stripes - for thinned and weak cuticles.
- The device should not be allowed to overheat; for this purpose, it is recommended to periodically disconnect it from the network or initially purchase a tool with a built-in cooling system.
Safety regulations
Manicure using hardware processing is performed the same way both in beauty salons and at home. Inexperienced professionals who are doing the procedure for the first time need to know certain rules. To avoid cutting the skin and damaging the plate, it is important to consider the following points:
- The handle of the device should be held firmly, this will minimize its vibration;
- Do not press the nozzle tightly against the plate;
- During the procedure, you need to maintain an angle of 45 degrees, especially for the correction of lateral zones and hardened areas;
- the nozzle must be moved smoothly from the center to the edge and not linger long in one area;
- It is recommended to start work with minimal machine speed.
In addition, correct operation of the machine also plays a huge role in the safety of the procedure. It needs to be looked after and thoroughly cleaned of dust after each session. Do not overheat the device: if excessive heat appears and a burning smell is noticed, the device must be turned off immediately and allowed to rest for 20 minutes. The device should be stored in a box in a dry place.
Tips for beginners
You can master the art of manicure yourself. Learning a craft occurs better and faster under the guidance of an experienced specialist.
- If you lack experience and self-confidence, you can attend nail service courses or individual master classes.
- Use video tutorials: you don’t need to leave the house, you can pause the video at any time, or rewatch an unknown place.
- Select the right cutters for the appropriate procedures.
- You should periodically give the machine a rest to avoid overheating.
- Removing shellac should be done as carefully as possible.
- You shouldn’t skimp on the machine: the quality of the electric motor in budget models may be noticeably inferior to higher-quality analogues.
- During training, you should avoid sudden movements, teaching your brush to move smoothly, without pressing on the surface of the nail;
- It is important to remember that even experienced specialists avoid long-term work at high speeds: although the degree of removal will be low, the texture will remain intact and undamaged.
Be patient: not everyone succeeds in mastering the procedure the first time; it is quite normal to make mistakes at the initial stage.
Sources
- https://womenshealth.su/kosmetologiya/apparatnyj-manikyur/
- https://vplate.ru/manikyur/apparatnyj/
- https://ladysdream.ru/apparatniy-manikyur-obuchenie-dlya-nachinayuschih.html
- https://LadyBeautiful.ru/kak-delat-apparatnyy-manikyur.html
- https://www.LadyWow.ru/apparatnyj-manikyur.html
- https://nails-class.ru/manicure/504-apparatnyj-manikjur.html
- https://moi-manikur.ru/vidy-manikyura/hardware-manicure.html
- https://heaclub.ru/kak-sdelat-manikyur-samoj-sebe-v-domashnih-usloviyah-s-lakom-i-bez-laka-poshagovaya-instrukciya-vybor-materialov-i-instrumentov-dlya-provedeniya- obreznogo-i-apparatnogo-manikyura
- https://manikurus.com/vse-o-manikure/apparatnyy/v-domdshnyh-usloviyah
- https://noemi.salon/snyatie-gel-laka-apparatom/
- https://tn-club.ru/narashchivanie/kak-snyat-gel-lak-frezoj.html
- https://lifenail.ru/manikyur/%D0%B0%D0%BF%D0%BF%D0%B0%D1%80%D0%B0%D1%82%D0%BD%D1%8B%D0%B9 -%D0%BC%D0%B0%D0%BD%D0%B8%D0%BA%D1%8E%D1%80-%D0%BD%D1%8E%D0%B0%D0%BD%D1%81 %D1%8B-%D0%B4%D0%BB%D1%8F-%D0%BD%D0%B0%D1%87%D0%B8%D0%BD%D0%B0.html
- https://tehnika.expert/dlya-krasoty/prochaya/apparatnyj-manikyur-v-domashnix-usloviyax-sovety-novichkam.html