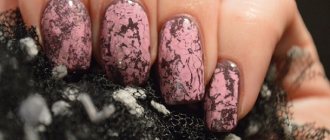
Gel polish
This type of manicure coating is stable, durable and aesthetically pleasing. This varnish does not form scratches, it does not rub off or crack. Compared to a simple coating, it stays on the nails much longer. But every fashionista knows how much it costs to cover nails with gel polish.
[yandex1] [google1]
That is why self-application of such coating is becoming more and more popular. This is not a very complicated process, but it has its own nuances and subtleties. The article will describe the technique, steps and lessons, and also list the materials for coating nails with gel polish.
Application technology
Compliance with the rules is mandatory. Failure to follow this procedure will cause the varnish to chip, become stained, or lose its shine. The technology has been thoroughly developed for a long time - you just need to carry out the required manipulations step by step. The procedure can be carried out at home - if you have the necessary materials and tools.
Completion takes at least 30 minutes. This is the case if one color is applied. If you need to apply a lot of tones, create a jacket, a pattern, attach rhinestones or sequins, the process will take about an hour (plus or minus 20 minutes). The cost of a complete set of items for application is about 4 thousand rubles.
Step-by-step instruction
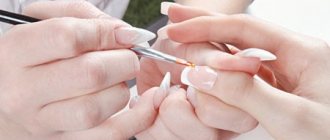
- Treatment of nail plates. The cuticle is removed and given the required shape. You can do a manicure first, then the plate will need to be thoroughly dried, treated with a dehydrator (degreased), and treated with a disinfectant.
- Formation of a free edge. The upper part is given the selected shape using a nail file. Gel polish is applied to nails of any length - short, medium and long.
- Grinding (sawing). The upper part of the plate is cut off with a grinder to ensure adhesion of the gel coating to it.
- Applying the base. The base gel is sold separately or together with the top coat. Apply the base in a very thin layer, as if rubbing it in. The end part is carefully processed.
- Hands are dried in a UV lamp. Average time 1.5-2 minutes.
The optimal period of ultraviolet treatment should be determined according to the recommendations of the product manufacturer for each specific brand individually. Finally, remove excess moisture with a brush or woven napkins. Gel polish is applied carefully with careful up and down movements. The end part must be painted over to avoid chipping in the future. The product is applied in two layers, each layer needs to be dried in a lamp for 1.5-3 minutes. Usually one hand is placed in the lamp, while the artist paints the second hand. - Finish coating. The top (finishing) layer completes the procedure. The fixative is applied to the entire surface, including the end part. The top layer is also dried in a UV lamp for about 2 minutes.
Lessons: gel nail design for beginners
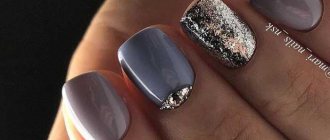
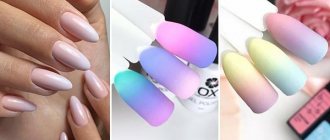
More recently, a new technique has appeared in the manicure world, called stretching or gradient manicure. For a beautiful transition from one color to another, you need a thin brush.
Step-by-step operating principle:
- Apply a base coat to prepared nails and let it dry in a lamp for 1-1.5 minutes.
- One color is applied up to the middle of the nail.
- Cover with a different shade from the middle to the tip.
- The colors are combined using a thin brush, from left to right, creating vertical strokes (drying lasts 2-2.5 minutes).
- Next, the finished result is fixed with a top coat (drying in a lamp for 2 minutes).
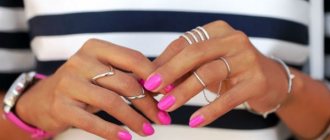
A manicure with gel polish always looks impressive, and it lasts quite a long time, up to 2.5 weeks.
Tutorial on how to create a smooth gradient on your nails
Slider design for beginners
Slider design is a technique that uses special transfer stickers. The images are printed on a film that peels off by soaking. The film, due to its plasticity, perfectly follows the shape of the nail plate.
Nail design lessons for beginners using a slider include several main steps:
- The nails are prepared, the surface is degreased and the base varnish is applied.
- An image is selected that matches the size of the nail plate.
- The sticker needs to be soaked in water for 40 seconds, during which time the adhesive base is activated.
- The image is transferred with the adhesive side using the shear method.
- The pattern is carefully smoothed to remove any remaining air and water.
- After drying, the nails are covered with fixing varnish. If desired, the design can be diversified with various decor (sparkles, rhinestones, colored or shiny dust, etc.)
A lesson on the correct use of sliders
Lessons: nail design with paints
Acrylic paints can be used to create stylish and bright nail designs, which are very popular in 2016. Before you begin the registration itself, you must complete the following steps:
- Cover your nails with varnish and, after drying, apply a base coat of the desired shade.
- After the base has dried, drop acrylic paint onto the coating and use a thin brush to draw the desired pattern. The easiest ones to make are curls.
- Using dots you can draw even dots.
- After drawing patterns and ornaments, cover the nails with a fixative.
Lesson on manicure design with paints
Step-by-step manicure tutorials
Nail design video tutorials
[pro_ad_display_adzone id=”9403"]
Today there are a lot of design variations: with glitter, gel, shellac, paints, etc. Here you can watch detailed video tutorials on nail design, which present the latest trendy items in the world of nail service. Enjoy watching Also see the article Nail design video.
How to remove?
The easiest way to remove the product is in the salon with a specialist. A master can remove a “tired” manicure without injuring the plate. The procedure will take 30 minutes.
Quite often situations arise when you urgently need to get rid of the gel and there is no way to get to the salon. You can remove it at home. The main thing to remember is no rush. It is impossible to remove it quickly. Even acetone liquid takes it with difficulty. It’s good when someone helps during the procedure - it’s difficult to wrap your fingertips in foil yourself.
Tools and materials
- Acetone-containing liquid.
- Cotton wool or cosmetic sponges.
- Orange stick.
- File.
- Grinder.
- Pieces of thin foil measuring approximately 5*5 cm.
You can ask the salon what product was used and purchase a remover to remove it from the same manufacturer. There’s no need to worry too much – regular liquid will do.
First you need to apply nail polish remover. To do this, you need to make circles of cotton wool or sponges and generously moisten them with liquid. Some people immerse their fingertips in a glass of liquid for 15 minutes. “Lotions” are applied to each finger in turn and immediately wrap the nail with foil. Keep the compress for 15 minutes.
After compresses, gel polish softens and hangs in rags. It must be carefully scraped off with an orange stick or the blunt end of a nail file. The hardest part is to remove the base - you will have to remove it with a sander. After this, you need to treat the cuticle with oil and massage each finger.
MK how to apply gel polish under the cuticle
Greetings to all readers!
Last time I wrote a post on the topic of classic and combined manicure, and this time I want to talk about applying gel polish under the cuticle.
PS By the way, the tips in this post will also be relevant for those who prefer regular varnishes.
In order for a flower garden to lay down well, several conditions must be met:
Clean manicure
The color under the cuticle suggests a deep manicure. Its difference from NOT deep is that we clean everything under the cuticle, and not just what is in our visibility area. Yes, the cuticle itself will also have to be removed, otherwise the coating will only be end-to-end. That is, we pull back the proximal roller and make sure it’s clean there! We remember that gel polish will flow over all the dust skins and you won’t get a beautiful coating.
Well, a little life hack on how to clean manicure dust under the cuticle: take a small brush dipped in degreaser, or wrap a lint-free napkin (also soaked in degreaser) on an orange stick and pass it under the cuticle.
Smooth application of base coat
We are not trying to push the base under the cuticle; applying it end-to-end is enough. And be sure to make sure that there is no streaking of the base onto the cuticle and sides. Base leakage = flower bed leakage.
If you see numbness before putting your hand into the lamp, we erase everything and prime it again. If after, we cut out the leakage with a milling cutter. The same rule applies to primers; they should not come into contact with the skin.
Stiff
Optimal flower bed consistency
We take the varnish of the consistency that is convenient for you to work with. Varnishes that are too watery will leak, but thick varnishes have no problem.
And one more thing, if instead of colored gel polish you took a camouflage base or colored gel, you will have to forget about covering under the cuticle for now. The gel and base cannot be pushed under the cuticle, the nail is too mobile there, there is a huge probability of numbness and contact with the skin, which in the future threatens detachments.
And the most unobvious condition: the structure of your nail should allow you to apply a cuticle coating.
If you have almost no subcuticle pocket and the proximal roller lies very low on the nail, then most likely you won’t get a super deep coating.
On the left you can make a very deep coating, on the right not
Let's start with the manicure :) Here's what we need for the coating:
- An orange stick or pusher to push back the cuticle;
- Hair brush. I have a brush from Roubloff 5/0. It is needed for painting under the cuticle;
- Colored gel polish. To make the application border clearly visible, I chose the plum shade from Runail;
- A palette or some surface where you can drip varnish. I just use a piece of foil.
I have already dried the base coat and removed the stickiness with a degreaser so that the varnish does not spread again.
I apply the first layer of colored gel polish, and do not apply it close to the cuticle and side ridges. I always apply 2 layers of the flower bed, so the coating is denser and certainly dries well. You can also apply this method to 4 fingers at once, since painting with an indent will prevent the varnish from spreading.
Dried in a lamp.
Next, I drop a little colored varnish onto the palette so as not to have to reach into the bottle with a brush every time. And I peel off the cuticle with an orange stick, this stage allows you to open the pocket and paint with varnish as deeply as possible.
It is noticeable how the proximal cushion has risen
I apply a second layer of varnish and try to bring it flush against the cuticle. Then I pick up a little varnish with a hair brush, move the back roller with my finger (as in the picture) and paint under the cuticle. In general, it is quite possible to paint under the cuticle with a brush from a bottle, but on yourself it is easier to do it with a brush.
And one moment,
It happens that the side rollers are very voluminous and you just painted your nail, but it’s already imprinted on the skin! In this case, there is no need to try to paint over this junction of the skin and nail; it is much more logical to make an indent. Believe me, no one will ever notice this small unpainted piece of nail
This is what happened in the end, the coating is as close to the cuticle as the structure of my nail allows.
Thanks for stopping by