Trim manicure is a special nail treatment technique that allows you to more thoroughly and accurately remove skin growths in the cuticle area and periungual ridges. The sequence of actions for performing such care is not complicated, and is accessible to beginner nail design lovers. How to properly do a trim manicure at home? Step-by-step execution steps, pros and cons, photos and videos here.
Let's get to the main point
The preparatory work is over and we begin to create beauty on our hands.
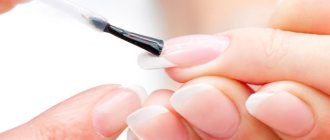
First, let's apply the base. The base layer strengthens or vitaminizes the nails (depending on which one you use). In addition, it provides an even coating.
We begin to apply varnish. It's better to paint the nails of your dominant hand first. And that's why. If you are right-handed, then painting your right hand will be awkward. As a rule, in this case the layer turns out to be thick, and the color, accordingly, is more saturated. Starting with your dominant hand, you can adjust the layer thickness with your second. Thus, the manicure on both hands will not be different.
It is advisable to start painting your nails from the little finger. This way you won't smear the polish on the rest of your nails.
Finally, you must apply a sealing layer to your nails. In this case, the manicure will please you longer. And don't forget to apply cream and moisturizing cuticle oil to your hands.
Criteria for choosing devices for manicure
Hardware manicure (training for novice specialists sometimes takes place on a self-purchased device) is closely related to understanding the criteria for choosing a device.
The first one is power. For personal use, you don’t need a very powerful milling cutter, so you should pay attention to models with a stated power of at least 35, but not more than 50 W. However, if the specialists are visited by 5 or more clients every day, then you should pay attention to models with a power of 100 watts or more to reduce the procedure time
The second is the number of revolutions. Models with up to 20,000 rpm. suitable for home use. If the number of clients is more than 5 people per day, you should choose a device operating at 35,000 rpm. and more. In cases of professional manicure, the machine must have a speed of 45,000 rpm.
The next criterion will be the provided cutters included in the package. It is very good if the device is equipped with a starting list of basic attachments.
In the best case, you need to include among them:
- For treating rollers and cuticles.
- Nozzles for grinding work.
- Nozzles for polishing the nail plate.
- Attachments for working with keratinized skin.
The devices also differ in the method of clamping the nozzle. There are 3 types in total:
- manual;
- semi-automatic;
- auto.
Inexpensive models for home use use a manual clamp that secures the working part of the tool when tightening the washer. A more expensive device will be equipped with a semi-automatic method of fixing the nozzle when the lever is tightened. And the most expensive devices come with an automatic clamping system that locks the nozzle immediately after its installation.
Working tools for performing hardware manicure are equipped with a brushed or brushless motor. The difference is that a brushed motor is designed to last for several hundred hours, while a brushless motor lasts for several thousand.
A machine with a brushless motor will cost more, but it is quieter than its counterpart with a brushed motor, and is distinguished by the quality and durability of its design. Devices with a commutator motor, despite their shortcomings, can handle a home manicure quite well.
The last selection criterion is related to the fine dust released during operation of the machine. To reduce its amount, you can choose a model of the device with a vacuum cleaner built into the countertop, equipped with a retractable tray for quickly cleaning the filter from accumulated sawdust. If a vacuum cleaner is not provided at all, you can purchase it separately complete with a stand, dust collector and filter.
Which is better – edged or hardware manicure:
We are constantly looking for the most gentle ways to get our hands in order. The aggressive trimmed manicure was replaced by the European one, with its careful processing of the cuticle without removing it. However, this technology is not suitable for everyone.
Hardware manicure is the next step towards the development of the nail industry. Its undoubted advantages:
- The cutter carefully removes only dead skin particles without damaging the cuticle, as often happens when trimming with tweezers. As a result, there is no danger of wounds with further possibility of infection. Not only thin, but also denser cuticles are effectively removed, leaving the nail hole smooth and neat.
- To perform a classic manicure with high quality, hands are first steamed in a bath, which provokes the spread of fungal diseases. Hardware treatment is performed on dry skin, so it is much more hygienic.
- After gentle removal with a cutter, the cuticle grows longer and does not become rough, as with a trimmed manicure.
- Problematic nails are treated delicately: brittle, flaking, uneven, damaged by improper extensions. As a result, any gel polish then fits and lasts much better on them.
- The skin around the nails looks healthier and more well-groomed. You can also use a cutter to remove calluses from your fingers if they have formed from work.
- The procedure is easy to carry out at home. It is enough to go through video training, watch relevant lessons and step-by-step photos from professionals, and then practice a little to achieve tangible success. The machine for hardware manicure is so easy to use that high-quality nail treatment will not be a problem even for beginners.
- All necessary operations are performed in 30–50 minutes. For a trimmed manicure, the master will need 1.5 hours.
Machine processing is often called the improved European method. Problems can only arise if the nails are in very poor condition. It will not be possible to bring them back to normal in one session.
Advantages and disadvantages of edged manicure
It is called a classic manicure because its technique has been known since time immemorial and for a long time was the only way to treat nails. And despite the new techniques - hardware and non-edging - it remains the most familiar and, perhaps, popular type of manicure.
With skillful manicure, nails quickly acquire a beautiful, well-groomed appearance.
The technique of performing a manicure is inherent in its name. Nails are processed using scissors or nippers - they cut off the overgrown cuticle. When done skillfully, nails very quickly acquire a beautiful shape and neat appearance. The edged type of manicure is simple and is used by most women. It requires a minimal set of tools and a little training. This manicure has its pros and cons. The advantages include:
- the ability to quickly tidy up even very unkempt hands;
- the fact that you can do it yourself at home;
- no contraindications.
The disadvantages are the risk of injury and the threat of infection. However, if you do a manicure in compliance with all the rules, its disadvantages become very relative.
Some women do not like it because after it the cuticle grows back quickly and they have to carry out the procedure frequently. Yes, after the cuticle is cut, the skin begins to grow faster and becomes rougher. Manicurists advise doing this manicure no more than once every two weeks. In fact, the frequency of its implementation depends on individual characteristics.
Hardware manicure step by step photo instructions
We treat the skin of our hands with a disinfectant solution and rub it. We wait until it dries.
Hand treatment
If necessary, use a ceramic nozzle to remove the old gel coating.
Using a file, we give the nail the desired shape.
Removing the coating
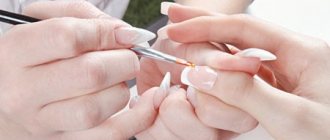
Using a cone cutter with a rounded tip, we begin to lift the cuticle.
Lifting the cuticle
Use an orange stick to gently move the cuticles on all fingers.
Working with an orange stick
The nozzle should be positioned parallel to the surface being treated to avoid making a cut. If the cutter spins to the right, then our hand goes to the left and also in the other direction. The milling cutter operates in reverse. According to the rules, we process one half of the nail on all fingers, then switch the router and process the second half of the nail on all fingers.
While processing the cuticle, we also grind the side rollers.
Hand placement
Next, take the bur attachment and begin to thin the cuticle.
Working with a bur
Hold the nozzle perpendicular to the surface being treated. We move the cutter in one direction only along the skin; if necessary, we turn the finger and not the nozzle.
Now that the cuticle has been processed, it needs to be cut off. We do this with a smaller ball with fine abrasiveness.
Working with a smaller ball
In this case, we must follow the shape of the nail hole and move parallel to it.
We processed the cuticle. Now we switch the router to 5-7 thousand revolutions per second and use a polishing cutter to process the nail plate. We touch the nail in the cuticle area only with the tip of the cutter. Movements should be light, as if repulsive.
Working with a polishing cutter
The final stage is to go over all the nails with a brush and remove any remaining dust. Then, if we do not cover our nails with varnish, we apply a special cuticle oil. This is necessary to nourish and restore the nails and skin around them, as well as to give our manicure a finished look.
Oil treatment
Tips for Newbies
Treatment of the nail plate
So let's summarize:
The most important thing for a beginner in hardware manicure is not to work at high speeds, so as not to make cuts. Practice the correct hand position during various stages of hardware manicure
Practice the correct hand position during various stages of hardware manicure.
Select the right nozzles.
It is forbidden to work with a cutter at one point for more than 5 seconds, this will lead to overheating of the skin.
To prevent overheating of the router, it is recommended to take breaks every 5-7 minutes.
Do not neglect the rules of sterilization so as not to get fungal infections.
Hardware manicure
Router attachments
conclusions
What conclusions can be drawn about hardware manicure?
With the help of one device you can comprehensively treat your nails.
Eliminates the possibility of traumatic effects on the nail plate and surrounding skin.
After a hardware manicure, the cuticle grows evenly and longer.
The appearance of burrs and cuts is eliminated.
After a hardware manicure, you will not get a fungal infection.
When done correctly, processing time is reduced.
After the procedure, the nails become shiny and the yellowness goes away.
The nail plate becomes healthier and stronger.
The correct shape is formed.
Hardware manicure
Set of cutters
Conclusion
In hardware manicure as in any other matter
The competence of the master plays an important component.
After all, there are various nuances in this procedure. We must remember that we are working with a person and the main principle is do no harm. Therefore, I emphasize that this article is for informational purposes only and the data given in it is not enough to use the acquired knowledge in working with clients. The purpose of this article is rather informational, so that you have an idea about hardware manicure and can try this new method on yourself and so that you can imagine the distinctive features and differences from the classic edged manicure.
Of course, you need to invest some money to purchase everything you need. But if you are seriously interested in this topic and are determined to accept clients in the future, then over time you will get this money back. Moreover, with the help of a milling cutter you can do not only hardware manicure, but also pedicure.
Treatment of the nail plate
I wish you success, I hope that our tips, lessons and instructions were useful to you. I am sending you two videos with an example of hardware manicure.
Classic edged manicure: execution technology
The trimmed manicure is performed step by step. First of all, the old coating from the nails is removed, the hands of the master and the client are treated with an antiseptic composition.
1. Nails are given the required length (using clippers or scissors), then the shape of the nails is corrected with a nail file.
2. After the nails are given the desired shape, the client’s hands are immersed in a special bath with water or a special solution at a temperature of 30-40 degrees. The duration of the procedure is 10 - 15 minutes, during which time the cuticle skin softens. Sometimes a cut manicure is performed without soaking; in this case, a remover is applied to the cuticle - a product that softens the skin and makes it easier to remove.
3. Using a pusher (its wide, spatula-shaped part), the cuticle moves towards the nail bed. The sharp side of the pusher removes the ptergy (the thinnest layer of cuticle that grows to the surface of the nail plate).
4. The cuticle is trimmed with nippers or nail scissors.
5. The surface of the nail is polished.
6. Cream, lotion or oil is applied to the skin of the hands.
7. If necessary, nails are covered with a medicinal or decorative coating.
Hardware manicure: pros and cons of use
Hardware manicure is a subtype of European manicure, but involves the use of more complex devices - the manicure machine itself and special replaceable attachments - cutters of various shapes and degrees of abrasiveness. Thus, the coarser texture of the attachments allows you to remove gel polish and file even rough toenail plates. The side rollers and cuticle are treated with medium-hard nozzles. Well, the most gentle cutters are designed for polishing and grinding the nail surface.
Set for home use
Hardware manicure has gained wide popularity due to a number of significant advantages:
- It is less time consuming. So, if a classic edged manicure takes about 1.5 hours, then a hardware manicure, depending on the work required, takes from 30 minutes to an hour.
- What attracts his fans most is the minimal risk of injury. The thing is that with the hardware method of treating nails, there is no need to cut off the skin around the nail and thereby eliminate the risk of bloody fingers. When using this type of manicure, a rotating cutter is used to remove the keratinized layer of already dead skin cells.
- With this method of care there is no need for pre-treatment. Hardware manicure involves working on nails using a dry method. Accordingly, in this case there is no need to pre-steam the skin around the nail or apply any emollient.
- A manicure done using the device will delight you with its “durability”. Many clients note that a properly done hardware manicure, as a rule, retains a fresh look for up to 3 weeks. While a manicure performed using the trimming method becomes overgrown already on the third day, and the cuticle grows rougher each time.
- Relative safety of hardware manicure. It does not use sharp objects that can injure the skin, and accordingly reduces the risk of infection and infection.
- Ease of manipulation. Once you acquire the necessary skills, everyone will be able to do a similar procedure even at home.
- With a hardware manicure, you can not only treat your nails and the skin around them, but also remove rough calluses from your fingers.
Set for home hardware manicure: cutter, set of attachments and brushes
The negative aspects of hardware manicure include the following:
- The result is not clean enough. No matter how hard you try, you will not achieve a perfectly “clean” manicure, as you get with a trimmed one.
- If you lack experience, there is a risk of damaging the nail plate.
Interesting
Many masters prefer to perform a combined manicure. As a rule, a classic trimmed manicure is initially performed, and then, if necessary, the pterygium is removed using a milling cutter. Or, if the hardware manicure is not clean enough, untreated areas are removed using nippers.
Thus, the list of advantages is much greater than its disadvantages. In addition, all shortcomings in acquiring practice and due diligence are easily eliminated and are not significant. In other words, hardware manicure is a worthy alternative to the traditional trimmed version.
Trim manicure - video tutorials for beginners
Although edged manicure is considered an old proven method, few modern girls can cope with recreating such a neat classic of the genre on their own nails. But it’s okay, one can hardly see any serious problems in this. After all, such difficulties can be solved. And it’s not about learning professional skills. Either the most passionate dreamers of becoming a manicurist or the most wasteful people who don’t know where else to spend their money won’t mind spending money on this!
However, there is an economical option. In principle, it saves not only money, but also the time of fashionistas with well-groomed nails who want to personally learn how to do a trim manicure for themselves. This video contains detailed lessons for all interested beginners. You can calmly gain new knowledge at home, drinking coffee or tea, without rushing anywhere.
And it is precisely these lessons that are now in front of users, for which in ordinary courses in real life, of course, you have to pay! We can only hope that each of the beauties who wants to finally learn how to do an edged manicure will stop by here. And these videos will tell her much more about this manicure than she hoped to hear. Basically, in modern times, even little girls have started playing videos on how to beautify themselves. A new generation is growing!
Video lesson: Trimmed classic manicure!
Video lesson: Correct classic edged manicure!
Video tutorial from YouTube: How do I do a trim manicure?
A selection of video tutorials on trimmed manicure for beginners:
Below there is a whole selection of step-by-step video lessons for trimming manicure for beginners at home, which will no doubt teach you something necessary and useful. The video squares are small, click “full screen” or double-click on the video for easier viewing.
If you have questions, objections or would like to express your opinion or point of view, then you can always freely leave a comment below. We wish you good luck in your endeavor!
Distinctive features of hardware manicure.
This means that you can easily save on baths, disposable bags, bath salts and of course water.
The third and fundamental difference between hardware and classic manicure is the tool with which the master works. In a classic manicure, this is a set consisting of nippers, scissors and a pusher (special spatula), and in a hardware manicure, all these tools are replaced by one device called a milling cutter.
And such manipulations as removing old coating, manicure, and cuticle removal are performed using cutters. They are different, depending on their purpose, but let's talk about this in more detail.
Description of cutters for hardware manicure
Diamond tips work best with thin cuticles; you can “trust” them with the most complex nails. However, the cost of such products is high. When performing hardware manicure at home, two cone-shaped diamond cutters of different diameters will be quite sufficient.
Pay attention to the markings of the cutters. For manicure, you usually need a tool with a red and blue line, which means low and medium abrasiveness, respectively.
What should be on hand
First of all, these are sharp manicure scissors and a nail file. No woman's cosmetic bag should be without them. Try to choose a glass or plastic file; they are less damaging to your nails.
For trim manicure, metal tweezers are simply necessary. With their help we will subsequently remove the cuticle
When purchasing, be sure to pay attention to what material they are made of. Surgical steel will remain sharp for a long time
How to choose a tool for manicure and pedicure
We will need a metal spatula to push back the cuticle. Some people use an orange stick instead.
We will also need various bath products. Which ones specifically are up to you to decide. These can be various oils, sea salt and much more.
Choose nail polish remover without acetone. This way we will damage the nail plate less. You can add a little glycerin to a regular liquid containing acetone and save your nails from dehydration.
Cotton pads (balls, just cotton wool) are indispensable assistants when removing polish from the nail plate and around. For more “jewelry” work, you can use cotton swabs. In stores you can easily find a special correction pencil. It's a pleasure to use.
We will also need cuticle remover, cuticle oil, hand cream, base coat and nail polish fixer.
Master class on implementation
Preparatory stage
- All instruments are disinfected in a special chamber or using alcohol solutions if the procedure is carried out at home.
- Hands are treated with antiseptic.
- If the nail plates are covered with varnish, it can be removed with a nail remover.
Treatment of nail plates
- Using a nail file, the nails are given the required shape.
- It is recommended to start processing with the little finger and finish with the thumb.
- The file must be professional to avoid delamination and damage to the edge of the plate.
Filing technique
Only clean and dry hands should be processed.
- The file should be manipulated in one direction, starting from the left side, otherwise you can seriously damage the nail plate. The file should file the inside of the nail.
- The nail plate is given the desired shape, however, we do not recommend rounding the side edges too much.
- To eliminate small roughness, you can use a block or buff.
Baths for softening cuticles
- Fingers are immersed in a special container with warm water.
- You can add essential oils, herbs or sea salt to the liquid.
- When the skin softens, you can complete the procedure.
- While your fingers are wet, you can treat your nails with a special brush to remove any remaining filings or cuticle particles.
Cuticle removal
- Excess moisture is removed from the fingers.
- The cuticle is treated with a special preparation for removal - but this is not necessary.
- Using an orange stick, the peel is carefully moved away from the plate and lifted up slightly. It is necessary to act delicately to avoid damage.
- All elements are trimmed with sharp, sterile tweezers.
How to do it right
If you don't want to spend money on a manicure at a salon specialist, you can do it at home. With some skill, it will turn out no worse and will take a little time. In addition to tools, you will need:
- disinfectants in case of a cut - chlorhexidine or 70% alcohol solution;
- napkin or small towel;
- a bowl of water or soap solution;
- nail polish remover;
- degreaser (you can use the same alcohol) to wipe your nails before applying polish.
Trim manicure is carried out in several stages.
Nail preparation
Start by removing the old coating. Use nail polish remover without acetone, it is more gentle. Dry nails need to be shaped. If necessary, cut them with scissors or special nippers; if not, simply file them down to the desired shape. Try to move the file in one direction - from the side edge to the middle of the tip. This way your nails will peel less. When filing the tip, take into account the shape of the base of the nail. If they are the same, the manicure will be more harmonious.
Nails should be the same length and shape, otherwise the manicure will look sloppy.
If the nails are short, they are given the shape of a soft square. Almond and oval shapes look better on long nails. Square nails have already lost their relevance. But it is the square that is the starting point for giving the nails all other shapes.
Next, slightly move the dry cuticle with a pusher and apply remover to it - a softening agent. Usually such drugs are quite aggressive; if they get on the nail (and this is inevitable), they can damage the plate. Therefore, place the prepared hand in a bath with water, a small amount of liquid soap and sea salt.
Use a hand bath not only to soften the cuticles, but also as a caring procedure
To make the bath more beneficial, you can add essential oils to it. To strengthen nails, use almond or calendula oil, for whitening - lemon or rosemary ether, for growth - sandalwood oil.
Cuticle removal
Cuticle trimming is the most important step. The beauty of your nails and their health depends on how you do it. Move the cuticle softened in water with a pusher or an orange stick. Soaked skin differs in color from the rest - it turns white. It is this part of the cuticle that needs to be cut off with tweezers. This must be done without stopping to avoid burrs. Also, the white skin must be cut off from the side bolsters. The position of the tweezers on the side rollers should be parallel to the nail, when cutting the cuticle - perpendicular.
You should not cut the skin at the very base of the nail. A severely trimmed cuticle will open up infection. In addition, transverse ridges may form on the nail (as it grows, it takes on the appearance of a washboard).
You can use a trimmer to remove cuticles. Although, it must be said that it has not really caught on with professional manicurists, and it is rarely used at home. The trimer has one significant drawback - it injures the most delicate part of the nail - on the hole at the very base. Therefore, it must be used with caution.
Do all manipulations on one hand first. Having completely finished the manicure on it, do the same with the second one.
Cuticle care after manicure
After trimming, you need to polish your nails with a buff. Movements should go from the base of the nail to its free edge. Particular attention is paid to the tip. After treating both hands, take care of the skin around the nail. After using the remover, it needs to be restored and moisturized with a special cream or cuticle oil. There are always bottles with different oils on sale; they are equipped with a brush, just like decorative varnishes. After drying your hands after a manicure, spread oil on the nail and the skin around it and rub it in with massage movements. If you do not use decorative colored varnish, you can simply apply a protective colorless coating to your nails. It will protect them from the aggressive effects of detergents and other household chemicals.
There are many recipes for caring for kutila. One of them is a scrub. It is prepared from olive and castor oil (1 tablespoon each), a teaspoon of honey and half a glass of ground walnuts. The procedure must be done 2 times a week.
If you regularly use a nail scrub, you can slow down the growth of the cuticle. This will allow you to trim your manicure less often.
Materials and tools
Trimming manicure (video tutorials for beginners will help you get comfortable with the tools) can also be done at home. This requires tools, several cosmetics and consumables.
Tools
For a trimmed manicure, you will need several tools: files, pushers, nippers or scissors.
- Files are used to correct the length and shape of the nail plate. There are metal, glass, ceramic and paper files. Files also differ in shape, purpose and abrasiveness. The shape of the files are square, oval, or “boomerang”. By purpose - for filing, polishing, grinding or removing gel. The abrasiveness (surface hardness) of files is measured in special units - grits. The larger the number indicating their number, the harder the surface of the tool. For natural nails, the optimal abrasiveness is 220-320 grit. For artificial ones - 90-120. Files of 320-400 grit are also used to process side ridges (areas of skin on the sides of the nail bed).
- A pusher is a spatula-shaped tool for pushing the skin away from the nail plate. Pushers are made of metal, silicone, wood. A silicone or wooden (orange stick) tool can be used daily. The metal pusher is intended for professional use. For trim manicure, a metal pusher is preferable. As a rule, this tool is double-sided: a spatula on one end and a scraper (blade) on the other. The pusher can be more rounded or sharper - the first option is less traumatic and is suitable for thin, damaged nail plates.
- Nippers are pliers with handles and a spring, designed for cutting cuticles and hangnails. Wire cutters differ in purpose, material, and blade shape. Pedicure clippers are not suitable for manicures. A tool made of medical alloy is preferable. This material is durable, does not rust and does not cause allergic reactions, unlike some types of metal.
- Scissors perform the same function as wire cutters. You should choose scissors with a blade of medium width. It is also worth opting for scissors of a solid design - the handles should not be plastic or wooden. The blade of the scissors, as well as the cutters, should not have cracks or nicks.
When choosing a tool, you should pay attention to the fact that it fits comfortably in your hand. Nippers and scissors must be sharpened regularly - this can be done in a professional tool store or in a special service
Cosmetical tools
The very first step of the procedure is treating the skin of your hands with an antiseptic. You can use a regular alcohol-based pocket sanitizer. An option from a pharmacy is also suitable - a solution of chlorhexidine. The most effective are medical antiseptics - they are used in many beauty salons.
Alcohol products have the most pronounced antibacterial effect. Aqueous solutions are less damaging to the sensitive skin of the hands and do not cause dryness. An antiseptic solution is also used for treatment in case of a cut or other injury to the skin. At home, it can also be used to process metal tools, provided that only one person uses it.
Step-by-step execution of trim manicure.
Before using nippers or scissors, you can use products that soften the cuticle - removers. As a rule, these are gels with a high acid content that remove dead skin and soften living skin. The remover must be held for 15-60 seconds - the exact time is indicated by the manufacturer.
If the product is too aggressive, or natural nails are thinned, the remover should be applied to varnished nails. Otherwise, the product will damage the nail plate.
Consumables include wet lint-free wipes, cotton pads, extension molds, and so on. – the list depends on the goals of the manicure. Lint-free wipes will be needed to remove dust after filing your nails. Such napkins, unlike ordinary ones, do not leave fiber particles on the nails that can get under the varnish layer.
Required Tools
The procedure can be performed with a minimum number of tools. List of items:
- nail clippers, tongs or scissors. The cutting parts must be well sharpened to avoid ruptures of the thin skin;
- tools must be made of metal;
- pusher Shifts and lifts excess skin. The width of the blade should correspond to the width of the nail.
- wooden stick with flat ends. Suitable instead of a pusher;
- a file with an abrasive coating for filing;
- buff. Polishes nails;
- water container. Warm liquid softens the skin and makes it supple.
Home manicure kit
A classic edged manicure can be done at home, with a minimum of tools on hand. To cut the cuticle, it is appropriate to use tweezers or scissors with good sharpening. To push back and lift the skin in the cuticle area, in the absence of a pusher, you can take any object with a flat end (wooden stick, match). A nail file, a container for water, clean napkins, disinfectants in case of injury - the minimum set for performing the procedure.
How to choose a manicure set
A manicure kit must contain a standard set of necessary tools. Choose items made from a metal alloy. The set must be completed with:
- tweezers;
- scissors with a long thin nose;
- tweezers;
- pusher (scraper). With spatula, spatula on both ends;
- nail clippers (nippers);
- a nail file (preferably made of glass, ceramics with abrasive coating).
When choosing, pay attention to the completeness of the items. Tools should not duplicate each other. The cutting parts are well sharpened. The reliability of the case and the method of fastening will allow you to store items in proper condition.
Criteria for choosing a device for manicure at home
So, you have decided to purchase a router for home use. How to choose the right option?
Professional device for performing hardware manicure
Don't go for professional devices. While you are just starting out and you only need to purchase a machine with a speed of 20,000 rpm and a power of 40 W
If you are planning to do a pedicure, then you should pay attention to machines with a power of 40 - 60 W and a rotation speed of 30,000 revolutions. When purchasing a router, focus on the average price range. Expensive models are intended for professional use, or contain many unnecessary functions and attachments
Cheap models can quickly fail. And even more so, under no circumstances purchase manicure machines from Chinese websites. As a rule, they are all of low quality, they have poorly secured cutters, which are also poorly processed, such machines do not have switching modes - all this can cause harm to your nails. When choosing a machine, pay attention to the convenience of the tools, how the router fits in your hand, whether it is too heavy or, on the contrary, light for you. Based on your personal feelings. Don't chase too many cutters. As a rule, 5 attachments will be enough for you.
You will learn more about the main types of cutters for performing hardware manicure from the video training.
How to choose a manicure set?
Trim manicure can be performed either with separately purchased tools or with tools from a set.
Basic recommendations for choosing a manicure set:
- You should purchase sets of proven brands - low-quality tools have a short service life and can cause injury.
- Sets of 4-7 items are preferable. They must include the following tools: file, pusher, nippers, manicure scissors, scraper. With experience will come an understanding of which tools need to be purchased individually.
- It is preferable to set the components of which are made of medical steel.
Which manicure is better: hardware or edged?
Edged and hardware manicures have a number of differences. You can learn about them in video tutorials for beginners. The first technique involves the use of a special apparatus with a rotating element.
The device can use dozens of cutter attachments:
- for removing and polishing cuticles;
- for cutting off gel coating;
- polishing nails;
- removal of calluses and corns on the feet.
Unlike unedged manicure, both hardware and trimming techniques use a mechanical method of removing the cuticle. During the hardware manicure procedure, the master selects the necessary cutter, the speed of rotation of the nozzle and cuts down the dry cuticle. Hardware treatment is performed exclusively on dry skin. Wet skin can tear from the rotation of the cutter, so the skin is not steamed before the procedure.
The advantages and disadvantages of hardware manicure relative to edged manicure are presented below:
| Advantages: | Flaws: |
|
|
Trim manicure has many advantages and can be easily done at home. You can learn it using video lessons that are understandable even for beginners. All you need for the best result is a high-quality tool and compliance with safety regulations.
Features of edged manicure
The specificity of manicure is the mandatory removal of keratinized parts of the skin, cuticle, and periungual growths with scissors and manicure tongs. The technique does not require any special equipment; a regular manicure kit will do.
Treatment of fingers using the circumcision technique is indicated in cases of severe keratinization and hardening of the skin, which cannot be softened with cosmetics. In this case, rough areas must be cut off.
Why is it dangerous to use unsanitized tools?
A tool that has not been disinfected can cause infections. The risk is especially great if the tool is used by several people. There are several stages of instrument processing: cleaning, disinfection and sterilization.
- Cleaning is simply rinsing the instrument with water and cleaning agents.
- Disinfection is carried out by placing the instrument in a special solution for a short period of time - such treatment is sufficient at home for an instrument used by one person. As a result, microorganisms located on the surface die.
- Instruments are sterilized using autoclaves, dry heaters, and sterilizers. This treatment eliminates the occurrence of bacterial and fungal diseases on the hands, hepatitis B and HIV when using the instrument on several people.
List of sources
- nailme.ru
- ladysdream.ru
- womenshealth.su
- salon-nagorkogo.ru
- lifegirl.ru
- idealnyi-manikur.ru
- 1lats.com