Most hairdressers in beauty salons offer extension services. Unfortunately, not all of them are professionals and, perhaps, their work does not follow the technology and procedure for gel nail extensions on forms, which can cause significant harm to the plates. Almost every girl wants to have long and beautiful nails. But growing such beauty on their own is often hampered by the fragility and fragility of their own nails, which is why they resort to extensions.
This service is currently very popular, which explains the emergence of masters with a low level of training and self-taught. In this article we will discuss how to properly extend nails with gel.
[yandex1] [google1]
What are gel extensions?
Learning how to do nail extensions is a profitable business, as lessons can be obtained online for free. And when you do it professionally, you can save significantly on the services of salon specialists. In addition, your skills will certainly be successful and popular with your friends, who will also want to get the perfect manicure without visiting a salon.
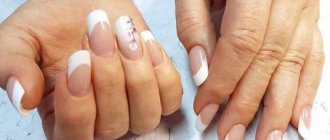
French extension
Before you start learning how to do gel nail extensions, it is important to understand what it actually is. There are two main categories. They differ in the technology of performing the procedure and some operational characteristics.
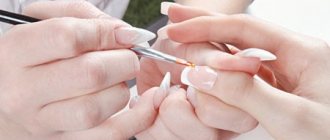
- Extension of French manicure on gel tips is shown step by step in the video. The main difference is that, in fact, an artificial nail is glued directly onto the bed, onto which the gel is then applied. The method is convenient because it can be applied even to very short natural nails. In addition, it can be made into much longer lengths or varied shapes. Removing a manicure on nail tips is quite difficult;
- The process, procedure and technique of gel nail extensions on forms are presented in the following video. In this case, small plates are glued to the stock. The gel is applied to them and the protruding part of its own bed. Such nails can be easily removed even on their own, but they hold well and do not break. The manicure looks more natural after this procedure.
https://www.youtube.com/watch?v=YvIq_e1-M9I
Regardless of which gel nail extension technology is used in each specific case, the procedure for removing such beauty is very complicated. Especially compared to acrylic extensions. In fact, the gel is cut off from the bed with a rough file or a special machine. This can seriously damage the nail plate.
Advantages and disadvantages of purchasing materials and tools as a kit
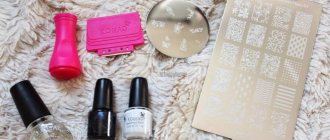
A set of tools for gel extensions in the photo.
There are many gel sets with different configurations, but whether it is worth buying components for extensions as a set, the opinions of experts differ. Purchasing materials and tools as a kit has its advantages:
- Acceptable price. The price of the kit is always cheaper than the cost of materials purchased separately.
- By purchasing materials in a set, it is possible to purchase the necessary tools, even if a person does not fully understand the topic.
- During the work process, the master will need to additionally purchase only some components; all the rest will last a long time.
You can buy a set of tools and materials on the Internet in one click, which significantly saves the buyer’s time, but there are also negative aspects:
- It is not possible to select the required volume of a particular product.
- Products from only one manufacturer.
- In any case, ready-made sets will have to be completed. The principle of work of each master is distinctive, and it is impossible to take into account all individual characteristics when creating a kit. For example, every master is accustomed to working with a brush of a certain size. Kits rarely include silk, which is used to repair cracks on artificial nails, and every master should have this material, etc.
Professionals purchase all materials separately because they clearly know what they need for their work. To buy modeling gel inexpensively, it is better to buy it in large volumes, and gel that is sold in sets most often comes in a volume of 15-20 ml.
What are the types of gel?
There are also different types of gels for nail extensions. They are as follows:
- Three-phase (three-phase system);
- Two-phase (two-phase system);
- Single-phase (single-phase system).
Below is a video master class on gel nail extensions using a three-phase system. In this case, the three components are applied in layers. The first layer is necessary for good adhesion of your own plate and the artificial one. The second layer directly creates a new plate, and the third layer protects the new manicure and gives it strength.
And this is a clip in which gel nail extensions are presented step by step and are performed using a two-phase system. In this case, only two types of gel are used. One of them is necessary for adhesion to the plate, as well as for the formation of the nail body. The second is used to give it strength and smoothness, as well as shine.
Step-by-step nail extensions with single-phase gel are described in step-by-step instructions in photo and video lessons. In this case, one type of gel is involved in the entire creation of a manicure. It is entrusted with the functions of both adhesion and formation of the plate, and in addition, giving it strength.
[yandex2] [google2]
Advice from manicurists
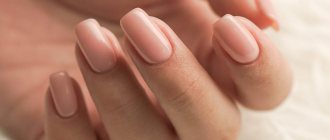
Strengthening nails with gel
To successfully create a manicure at home or in a salon, listen to the advice of the masters. It is worth noting a few useful tips:
- To obtain a quality result, diligence is important. The first procedures will take from 4 to 6 hours. This process is long, boring, and requires attention and effort.
- The nail plate should be carefully prepared. The result depends on proper processing.
- The lightest material is gel. It is worth choosing for beginners, although working with it requires skill, since you have to mix the material in certain proportions. After you gain experience, you can move on to more complex options.
- There is no need to purchase a large amount of material in advance. When it reacts with air, it deteriorates. It's okay if you have to buy something extra as you work with clients.
Important! It is recommended to buy 1 copy of all the necessary materials if the work is carried out for yourself at home.
Before extensions, you should familiarize yourself with the contraindications:
- the presence of fungus on the nail plate;
- presence of diabetes, heart and vascular diseases;
- injured cuticle;
- increased sweating of hands;
- time of treatment with antibiotics or hormonal drugs.
Nail extension is a painstaking job that can be compared to jewelry. The availability of materials and equipment allows you to create beauty with your own hands without spending a huge amount of money on visiting a salon.
At first you will have to spend a significant amount on purchasing the material, but after a while it will pay off in full. Every woman can not only extend her nails herself, but also create bright and interesting designs. It is more practical to take care of the beauty of your hands on your own than to wait for a visit from a specialist.
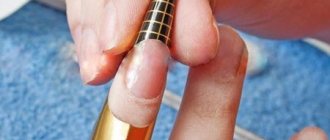
Tip extension procedure
Extension with tips
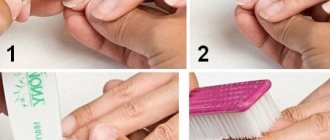
Nail extension with tips can be presented in stages, and with a photo of such a manicure and a video showing the execution process, the training will be even more effective. This type of extension is relatively simple. It will work even for those who have undertaken this procedure for the first time. However, such a manicure lasts less time compared to extensions on forms. The process occurs in several stages. First we prepare:
- Disinfect all tools;
- Remove nail polish and polish them, push back the cuticles;
- Treat your hands with a disinfectant solution or wash them;
- Select tips according to size, nail width and length;
- Give them the desired shape.
https://www.youtube.com/watch?v=r52FPK0FWWE
After that, we proceed directly to how to do gel nails, that is, to what the video lessons show.
- Degrease and dry your nails;
- Apply glue to the natural plate in small quantities and distribute well;
- Press the tip onto your nail;
- Displace air bubbles from under the tips;
- Glue all the nails and wait a little;
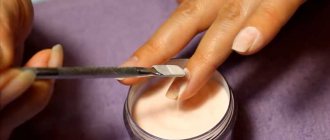
- Apply the gel and dry under a UV lamp for 2 minutes. A common mistake when applying gel nail extensions is to under-dry or over-dry the layer;
- Apply another layer of gel and sculpt the new plate;
- Dry under a UV lamp;
- Remove the sticky layer and file your nails;
- Apply a finishing layer of gel;
- Dry under a UV lamp and the manicure is ready.
This tutorial on how to do proper nail extensions with colored or transparent gel and a training video will become your best assistants in performing the procedure. Thanks to them, the quality of the extensions that you do yourself will be comparable to those in the salon. Now you can move on to a more complex method.
Nail preparation
Before extensions, the nail needs high-quality preliminary preparation:
- Disinfecting treatment . To avoid possible infection, it is necessary to thoroughly treat the nail and surrounding skin with an antiseptic. In this case, you should choose a material that does not leave lint.
- Cuticle treatment . It is not cut to avoid possible injury. A special softening agent is applied to the base of the nail plate, after which the cuticle is carefully pushed back. The same product softens the skin that has grown on the nail - pterygium. The pterygium should be moved away especially carefully, because its particles will disrupt the adhesion of the gel to the nail plate.
- Filing the nail. The edges of the nail plate are processed with a file to give the desired shape. The length of the edge of the nail is about 3 mm.
- Treatment of the surface of the nail plate . To ensure adhesion, the top layer of the plate is removed. It is important not to remove too thick a layer, which will lead to thinning of the nail, so you should not use files with a high degree of abrasiveness. Experienced professionals advise using a 180 grit buff. The direction of treatment is from the cuticle along the nail to the edge. Processing across is unacceptable, because leads to nail damage.
- Removing sawn-off particles . Avoiding touching the sawn plate with your fingers, carefully brush off the resulting dust.
- Disinfection , degreasing, dehydration. To do this, the nail is treated with a special composition - liquid or spray.
- Application of adhesive compounds . A layer of adhesive (primer, gel adhesive, etc.) is applied to the treated surface. When using molds, the primer is applied after applying the templates. There are two types of primers - air-drying and UV-drying.
The nail plate is ready for extension.
Tips for choosing
When choosing a brand, we recommend paying attention to several main factors:
- The increased strength of the material creates a durable coating: the nails are strong and do not break under influence.
- Wearability, resistance to external damage.
- Polygel composition. It is better that it be equipped with a vitamin and mineral complex to strengthen the nail plate.
- The absence of a strong odor is the key to comfort in the work of the master and for the model itself.
- Availability of a line of products from one manufacturer. We recommend purchasing coatings, tops and polygels from the same series, so you will strengthen your nails to the maximum level.
Based on the level of complexity of the coating for which your skills are tailored, pay attention to the image of the manufacturer. We recommend that you read reviews and ratings like ours in advance to have a more complete understanding of the products.