The mysterious nail extension procedure holds a lot of secrets. Once in the hands of a high-level professional, your fingers are transformed, as if by magic, taking on exquisite shapes. A specialist with extensive experience in the field of nail art can handle any client’s request, since over the years of practice the master is fluent in all the tools necessary to create extensions. Clear, streamlined movements and following certain rules guarantee excellent results. And it doesn’t matter what the client chooses: gel nail extensions on forms or on tips using acrylic technology. There are no impossible tasks for a good specialist.
The final result of a manicure depends on many factors, but today we will talk about special forms for artificial nail extensions. Let's look at the main types of forms and principles of their use. In our article you will find a lot of useful information, which will be accompanied by explanatory photos for clarity. For beginners in the field of nail art, video lessons on modeling tips using different materials will be very informative. And the traditional collection of photos in the final part of the article will amaze you with the variety of shapes and designs of extended nails.
Important Rules
In order for your extension to be successful, you should definitely follow the rules below:
- Do not cut your nails at the root, because for full extension they must be at least a millimeter in length.
- Before applying extensions, you should always treat your nails and remove cuticles. To learn how to do a trim manicure, you can read about it here.
- Refrain from taking baths, showers, swimming pools, or traveling to bodies of water approximately half a day before the procedure.
Gel or acrylic?
To begin with, you should always decide what material you will work with. There are two methods: acrylic and gel. Let's look at each of them in more detail:
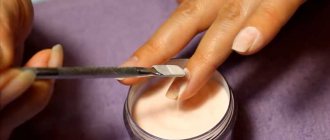
Acrylic is a composition obtained by mixing powder and monomer, and only in this case does it begin to harden. The trouble with acrylic is that it is quite difficult to work with, and it also has a specific smell.
Gel - gel has a more viscous, liquid consistency and does not need to be mixed with any other additional materials. The gel can only dry and harden under ultraviolet rays.
Materials for extensions
First of all, you will need an ultraviolet lamp, without which you simply cannot dry your nails.
You will also need a cuticle shovel, a file with an abrasiveness of 180 grit, tips (these are the forms on which nails will be extended), special glue, gel brushes, and tweezers.
You will also need an antiseptic, a dehydrator (dries out the nail plate), a primer (allows you to create better adhesion of the gel to your nail), a bonder, the gel itself, a finishing top, a remedy for the sticky layer that always remains after nail extensions, as well as scissors for tips .
What are tips
Nowadays, the method of nail extension using tips is in great demand. Moreover, those who do this at home will need time to learn.
Tips are plates of plastic material that replace natural nails. The question immediately arises, what are they made of? The material for this is ABS plastic, which gives artificial nails hardness and flexibility.
On a natural nail, the tip fits tightly due to the use of a fixing material - gel or acrylic. All tips for artificial extensions are divided into 10 types, based on size.
The initial number is the highest, then the numbering moves down. The photo shows a wide range of nail tips.
When making their choice, you must initially compare the size of the tips with the size of your own fingers. A small artificial nail cannot be used, but a large one can be cut down to size.
Tips can be made of colorless plastic and also vary in color. Extensions using acrylic are done by those women who have a brittle nail plate.
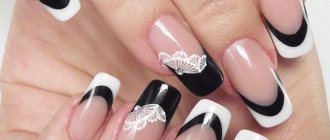
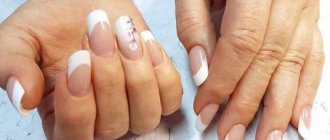
White tips are perfect for French manicure. Today, artificial plates with engraved crystal glasses are popular. Thanks to their presence, you can create an elegant design on your nails.
Nail shape
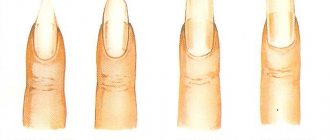
Now it's time for you to think about the shape of your future nails. First, what length do you want, and then select the shape. There are not many forms, of which two types are distinguished: classic and original.
Classic
- Square, rectangle, soft square, oval, almond, round, mountain top.
Original
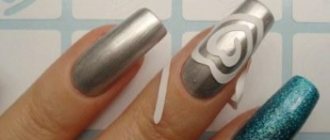
Edge, stiletto, pike, lipstick, ballerina, bell-bottom, arrow
We carry out extensions on forms (tips)
To fit the tips to your chosen shape, you need to use a special knife for cutting tips. After all, the tips themselves are very long and not everyone needs that length. Then, using a nail file, we give the tips the shape you need.
Then we start working with the nail plate. Gently push back the cuticles from the nail bed, and ideally, do a classic manicure. Afterwards we give shape to our already nails. The shape must match the shape of the tips.
Do not forget that each instrument must be disinfected before use. Then take a nail file and carefully file off the top, shiny layer. The movements of the file should be directed in one direction. Try not to put too much pressure on the nail so as not to damage it when filing away the shiny layer.
Treat your nails with an antiseptic afterward, and then apply dehydrate to dry the nail plate. Now take your prepared tips and apply a little glue on them so that it is distributed over its entire surface, which you will use to glue it to your nail.
After the tip, you should press it firmly against your nail so that the glue sets. Then apply bonder to the tips and hold your nails in the lamp for a couple of minutes. Now apply a drop of primer to the tips and proceed to the gel step.
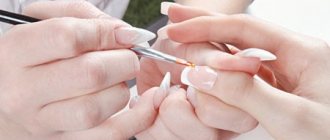
Take a brush and apply a large drop of gel to the tip, which you immediately carefully distribute over the entire surface. The distribution should go from the center to the edges, so you can apply the gel evenly. First, apply the gel to several fingers and dry in the lamp for at least two minutes, and then another two, and dry again. We always dry big nails last.
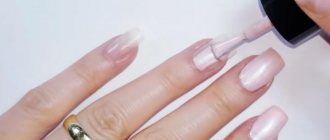
Then, when the gel has already appeared on your nails, you can remove the sticky layer and then cover your nails with a finishing topcoat. Dry again under the lamp for two minutes and your nails are ready.
Step by step instructions
How to shape your nails
For homework to create the desired form you will need:
- high-quality file (laser, glass or ceramic);
- buff;
- sawdust removal brush;
- nail polish remover;
- lint-free wipes or regular cotton wool;
- disinfectant;
- scissors or nippers.
Before making a beautiful shape for your nails at home, you should thoroughly wash your hands and remove any remaining polish. After this, hands are wiped with a disinfectant solution. Filing when there is a varnish coating can damage the nail plate.
Chic sharp shape
To make a sharp manicure, you will need a little patience and accuracy:
- The step-by-step guide involves trimming the free edge to the desired length with scissors or wire cutters. It is important to ensure that the nails (on the index, middle, ring fingers) are the same size. On the thumbs and little fingers, a slight slack in length is allowed.
- Next, the sides of the plate are sawed off. To do this, the file is held parallel to the finger and extends slightly under the nail.
- After this, you should give your nails the shape of a clear square. To do this, the free edge is cut parallel to the center of the nail plate. In this case, you cannot focus on the cuticle. The cuticle often ends up a little slanted.
- After all the manipulations, the sides of the nail are filed to give them sharpness. You should not make the plates too narrow, as they will quickly break off. The tip of the form should be parallel to the middle of the nail. In this case, the nails will look symmetrical and impressive.
- The final stage is a small polishing of the plate with a buff.
Sharp plate shape
Practical round shape
- The free edge is trimmed to the required length.
- Next, all corners are cut down. The movements go from the central zone of the nail to the edge. The free edge takes on the shape of a circle and completely follows the shape of the top of the finger.
- After this, the nail is polished with a buff.
Note! Round design can be done on both short and long nails. On short ones it looks more impressive and practical.
Practical rounded shape
Form nail extensions
In specialized stores you can find forms for nail extensions. It is the forms that are most often used by masters in salons, since with them the nails turn out as natural as possible.
You should do all the same manipulations that we described above (preparing the nail and giving it shape). Each form has a hole for your finger. The form is torn first to fit comfortably on the tip of the finger, right under the nail. You must fit it tightly to your nail, and then fix it. It is fixed very easily, thanks to the sticky edges.
Each form has a scale for the length of your future nail. You can easily determine what length you want and remember the border by number. Perform extensions on a couple of nails first to make it more convenient for you.
Take the gel with a brush and apply it to your nail. Then carefully spread the gel over the mold to the length you need. We also distribute the gel to the sides from the center. To make it easier for you to check whether the gel fits correctly, turn your finger over and pay attention to the shape. This way it will be much more convenient for you to correct what is unnecessary or add what is needed.
Dry the nails under the lamp for 2 minutes. Remember that the thumbs are the last thing to work on. Don’t be alarmed if the gel in the lamp starts to burn your nail plate, you can take out the handles for a second and then put them back in the lamp. This is a normal reaction to the material hardening.
When the extension is finished, remove the sticky layer from the nails and cover them with a finishing topcoat. Dry your nails again under the lamp and voila! The marigolds are ready.
Competent design
How to shape eyebrows at home
The preparation of nail plates by a master consists not only of proper filing, but also of giving all nails a decent appearance. Most often, a specialist suggests strengthening this area with gel polish. The procedure will decorate any hands. Before applying gel polish, the free edge of the nail is filed. In this case, the client’s wishes, type of fingers and hands are taken into account.
Nail shapes:
- Oval is suitable for all types of hands. Oval nails are considered a classic option.
- A square (soft or clear) will save those with delicate hands with long fingers. A square manicure will make your hands neat and visually make your fingers smaller.
The soft square shape is comfortable
- The round shape looks great on petite fingers that lack length.
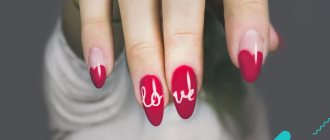
- The elongated almond fits medium to compact hands. He will visually stretch his fingers a little.
Additional Information. Every year the fashion for nail shapes changes. According to reviews from experts, in 2022 more and more beauties prefer elongated, sharp almonds or stilettos.
Fulfilling the client’s wishes and creating the desired design can sometimes be problematic. For example, if a square, oval, or circle can be made without problems on short plates, then for a sharp almond or stiletto, an elongated and strong free edge is required. Therefore, beauty salons often recommend that fashionistas who decide to go for a sharper look have extensions done using tips.
Women with healthy nail plates that do not peel or break can try to create a sharp outline on their own, without extensions.
