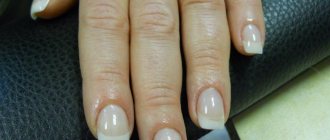
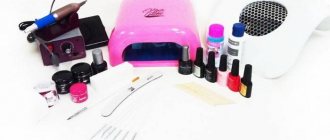
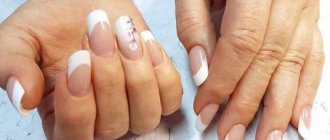
Have you decided to do your own acrylic nail modeling and do acrylic nail extensions at home? Before you go to the store, it doesn’t hurt to find out what should be in the set of tools for acrylic technology, how much these tools will cost, and what will be more convenient – tips or forms.
Practicing beauty experts tell you what you need to do acrylic nail extensions at home.
Photo on Unsplash
What you need to do acrylic nail extensions at home - a starter kit for extensions
Based on the indicated price range, remember that for the first time it is absolutely not necessary to purchase the most expensive products. Moreover, this technology may simply not suit you, and as a result, the money will be wasted. Start small.
- Hand disinfectant.
- Tool for disinfecting instruments.
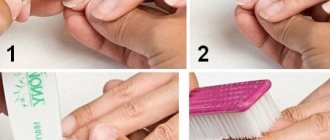
- Files for filing natural nails.
- Files for filing and polishing acrylic nails.
- Monomer (needed to dissolve powder).
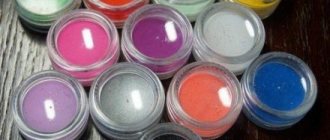
- Acrylic powder (white - for French, pink, colored).
- Primer (needed for adhesion of the nail and coating).
- Brush for removing dust after polishing nails.
- Brush for spreading acrylic (preferably several).
- Bonder (needed to wash off dried acrylic from the brush).
- A couple of stacks (cups) for working with acrylic.
- Pusher. Price – 200-500 rub. Or orange sticks.
- A solution that softens the cuticle.
- Cuticle oil (for the final stage of extension).
- Tips.
- Glue for tips. Liquid glue dries instantly. Glue gel – about a minute (it will cost more). The second option is optimal for wavy nails - it evenly fills all the cavities of the nail plate.
- Tip cutter.
- Finish coating.
Gel extensions: tools and materials
Let's look at it in detail.
List of basic tools
Ultraviolet lamp.
Almost no nail extension is possible without a special ultraviolet lamp. This is one of the most important devices, thanks to which the thick gel polymerizes and acquires solid properties and dries.
An LED, hybrid or ultraviolet lamp can be used to dry the gel on the nails. The choice depends on what structure the gel polish has. Lamps with a power of 36 W or more are considered the best.
@beauty_onnails
Tools for removing cuticles.
Such tools can be found in almost every home cosmetic bag: standard manicure sets most often include tweezers, nippers, a file and scissors. Additionally, you will have to buy orange sticks or a pusher spatula. These tools help push back the cuticle, lift it, and trim it. The main condition is that the tools are clean, sharp and undamaged.
@line_beauty_161
Antiseptic.
When removing cuticles or cutting off excess skin, as well as to disinfect instruments, you need to have the simplest antiseptic on hand. It is used to treat hands, nail plates, as well as the tools necessary for extensions.
Files.
Files are necessary to give shape to extended nails. Files are classified according to their hardness. The stronger the abrasiveness of the file, the more it affects the nail, and the more it removes the unnecessary layer. The abrasiveness of the files is selected depending on the condition of the nails.
Also, special files are needed for different areas of the nail plate:
- Oval – to correct the edge of the nail shape;
- In the form of a boomerang - for treating nails near the cuticle;
- Rectangular - rub the upper part to remove the excess layer of gel or the resulting tubercles.
Brushes.
Brushes are used to apply designs, base coats, designs and decorate nails. When choosing them, pay attention that the pile is natural and hard, otherwise the coating will be uneven.
There should be several brushes, with straight edges, bevels, and tapered tails.
@nailclub_official
Buffs.
Buffs (or buffs) resemble four-sided rectangular files with foam rubber in the middle, only their coating is finer than that of ordinary files. They are used for top grouting of nails, to remove excess particles from the edge of the nail.
Each side has a different level of hardness, and use it from the hardest side to the least abrasive to polish the nail.
@nails_di_shop
List of basic materials
So, when thinking about what is needed for short nail extensions, you should know that in this case you will not need too many materials. A larger assortment is useful for extensions to fiberglass and top forms. But more on that later.
First of all, you will need the gel itself. It is a viscous thick substance with which the shape of the future extended nail is modeled on the treated nail plate, and then the composition is dried under an ultraviolet lamp.
Gel polishes for extensions can be one-, two- and three-phase. Single-phase gel polishes are recommended for home use. This way, a manicure on gel nails will be easier to do, and it will take a minimal amount of material.
@beautychoice_prof
Single-phase gel is a base, modeling agent and top in one bottle. Therefore, you do not have to select different products for each stage.
The primer is used to make the nails adhere more firmly to the gel, and also helps prevent the formation of uneven spots and air bubbles. Primers are:
- Acidic (bond);
- Acid-free (ultrabond).
Top (matte or glossy) is, as a rule, a finishing coat that helps strengthen nails and consolidate the previous coating (pattern, colored gel polish).
Since some of the above materials have a sticky layer, you may need a cleaner (degreaser) to remove the stickiness. At home, you can replace the cleanser with lint-free wipes soaked in medical alcohol.
Additionally, decorative elements are used:
- Rubbing;
- Sequins;
- Rhinestones;
- Foil;
- Broths;
- Kamifubuki, etc.
As a result of using all these materials and tools for nail extensions, you will get a beautiful manicure at home, which you can show off to your girlfriends.
@nogti__idei
The best brush for acrylic extensions – what is it?
One of the most important criteria for choosing acrylic brushes is the density and elasticity of the beam, as well as the sharpness of the tip. Also remember:
- Don't skimp on brushes. The quality of your manicure will largely depend on the quality of your brushes.
- The best brushes are made from kolinsky, sable and marten. Cheap ones - made from squirrel.
- The handle of the brush should be light and comfortable.
- Marking: for modeling – No. 6-12, for design – No. 1-6. For extensions, as a rule, number 8 is used.
- Brush shape. To create a thin layer of acrylic on the cuticle area - oval, with a thick “belly”, with a flattened base, the tip is thin. For acrylic modeling - the same, but smaller in size.
Don't forget that a new brush is usually coated with a special factory glue. Therefore, before starting work, the brush should be washed.
Price
Materials and tools for modeling with gel and acrylic can be ordered online or purchased in specialized departments. They can be sold individually or as whole sets, which significantly saves money.
Kits can be divided into starter kits (for beginners), their cost will vary around 4,500 rubles for gel coating and around 2,500 rubles for acrylic. Luxury sets are complemented by natural brushes, crystal files, expensive decorative elements, and additional tools for processing and washing instruments.
By purchasing everything you need at retail according to the list, you risk overpaying by about 10-25%
Tips for nail extensions
Colady illustration
- It is easier to lay tips on the free edge than forms.
- Tips are more comfortable with large pillows.
- With the help of tips, you can model even nails that have been broken at the root.
- Tips are easier for a beginner to handle.
Disadvantages of tips
- Flatter nail shape.
- Inability to create an edge, gothic stiletto, side or pipe.
- The weak point is the gluing area. If the tip was glued poorly, the nail will fly off very quickly.
- Tips are a bad solution for wide nails. And also for those growing down.
How to choose
For the best result, you need to choose high-quality, nail-friendly materials and tools that are widely available on the market. Experienced craftsmen can determine the qualities of a material by appearance, smell, and consistency, predicting its further behavior during modeling. They all agree that quality products can be very inexpensive. For a beginner, it is more difficult to understand the presented assortment. Reviews of manufacturers and advice from professionals will come to the rescue here.
Forms for nail extensions
Colady illustration
- Possibility of creating any shape.
- Possibility to make nails narrow.
- Subtlety and elegance of nails.
- The resulting monolithic structure (provides very high strength to the nails).
- The ability to hide defects in natural nails (latitude, downward growth, etc.).
Disadvantages of forms
- Not everyone can create a beautiful shape with their help (you need experience and talent).
- Extending injured nails using forms is very difficult.
Materials for acrylic
Since extensions can be carried out with two sculptural polymers - gel or acrylic, the set of necessary materials will be different. Below we list what materials for acrylic nail extensions are needed to create a manicure at home.
- Acrylic liquid is actually the material from which the new nail will be made;
- Acrylic powder for extensions, transparent;
- White acrylic powder for extensions;
- Acrylic powder for extensions, pink or peach, depending on the desired color of the future nail bed;
- Camouflage powder;
- An antiseptic that will prevent the development of infection under the new plate;
- A dehydrator that will dry the plate and improve its adhesion to the acrylic layer;
- If extensions are carried out using tips, then glue for tips will be required;
- An acid-free primer that will act as a primer under the first layer of acrylic.
To remove acrylic you need a special liquid. Mixing the monomer (acrylic liquid) and powder leads to rapid hardening of the material. The main advantage of the material is that for gel nail extensions, the first thing you need is a UV lamp, while acrylic polymerizes in air.
[yandex2] [google2]
How to work with acrylic paints correctly?
Before creating a nail design with acrylic paints, be sure to remove the old coating and perform a mechanical manicure. A step-by-step drawing on nails with acrylic paints is created as follows:
- the cuticle is pushed back or removed;
- the surface of the nail is polished;
- the free edge is given the desired length and shape;
- the marigolds are thoroughly degreased;
- base coat is applied;
- a drawing is created (using the selected application technique);
- If the result is satisfactory, a fixative is applied.
Nail design with acrylic paints step by step for beginners is not too different. But it is worth remembering that acrylic is difficult to remove from skin and clothing after drying, so if it gets on your fingers, it is better to solve the problem immediately.
To work with such paints you do not need special tools. It is enough to have several brushes of varying thicknesses with you. Ideally, these should be nylon brushes - they have more elastic and thinner bristles. This will allow you to draw clear and thin lines. But it should be remembered that after finishing painting, the brushes must be thoroughly rinsed under water and allowed to dry.
When creating a design with acrylic nail paints, it is not necessary to have a huge color palette with you. You can get by with basic colors, including white. The latter goes away faster with constant mixing, so it’s better to have an extra tube.
Several educational examples of creating drawings are presented below.
Video “Working with acrylic paints”
From this video you can learn how to use acrylic nail paints coated with gel polish.
Features of nail care
To ensure that acrylic nail extensions please the owner for a long time, adhere to the following rules of care:
- Adjustment of artificial nail plates is carried out periodically - after 2-3 weeks.
Correction of extended nails is a necessary procedure
- If your nails split, you will need to correct them with acrylic. Other methods are not suitable.
- Nourish and moisturize the epidermis of the nail with oil for several days after manipulation.
On a note. Hand cosmetics provoke delamination of extended nails. When purchasing, it won’t hurt to study the composition.
- Beginner users prefer a short length of nail extensions.
- Do housework with gloves.
- Use kitchen utensils carefully: graters, knives, so as not to damage the manicure.
- Avoid contact of extended nails with fire.
- Do not use acetone when caring for acrylic nails.
- Do not cut acrylic nails with tweezers and scissors; remove the length only with a file.
