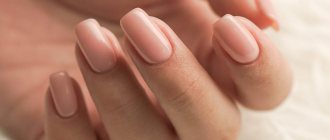
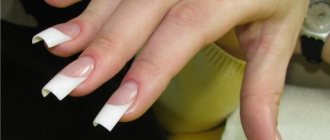
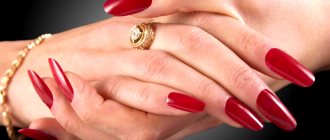
Various materials are used to lengthen nails, correct and repair them. Professionals distinguish them by purpose, quality and ability to polymerize. All such materials are called composite. This is a large group consisting not only of nail extension products, but also dental preparations.
During their short existence, these materials have undergone significant modifications. Initially, nails were lengthened with medical powder, which was used to make fillings. Then, with the development of the nail industry, it was replaced by a new material called acrylic. It was almost the same powder, but adapted for application to nails. With the discovery of gel technology, light-curing fillings and gel nails appeared.
What materials should you avoid?
In inexpensive cosmetics stores you can see nail extension products in ready-made kits with instructions for use. Most likely these are low-quality materials that can quickly lead to allergies. Many masters have encountered this problem due to lack of awareness at the beginning of their careers.
In addition to low-quality gel, you can find obsolete products - gels of early generations. They do not adhere well to the nails, are afraid of water, peel off and spoil the nails. Cheap primers are mostly acidic. They can cause a beginner to get a chemical burn to the nail plate.
Our country has a certification system, and a self-respecting manufacturer will offer a copy of the certificate. To ensure that you do not buy dangerous drugs, it is better to purchase them in professional stores for beauty salons. They organize master classes and have consultant technologists who will advise on how to use the purchased materials.
Is it possible to extend the service life of acrylic powder?
Using acrylic powder to strengthen, build or design and decorate nails is not a cheap pleasure. Even if you carry out the procedure yourself, without going to a beauty salon. And the cost of services of a good specialist is even higher. Therefore, women who often use acrylic powder for manicure begin to wonder if it is possible to somehow extend the time during which this protective and decorative material stays on the surface of the nails. Indeed, careful handling and care can ensure that the coating lasts much longer. What you can do:
- Try not to expose your nails to any chemical or natural, but aggressive substances. If you wash floors or dishes by hand, always use thick rubber gloves.
- Do not expose your nail plates to mechanical stress. This means that you should not use your nails as a scratching tool or for other similar purposes.
- Do not expose your nail plates to sudden temperature changes. For example, you should not immerse your hands that were in hot water into ice water, otherwise the acrylic coating may crack.
By following these simple recommendations, you won't have to worry about your acrylic manicure cracking or fading.
What is the name of the nail extension product?
All modeling materials for nails can be divided into two large groups: gel and acrylic. They have different technologies, but both are acrylates. Modern techniques for applying them to natural nails allow you to combine gel and acrylic. There is no single remedy for lengthening nails. And those that are used now always act in tandem and under conditions that trigger polymerization.
For an acrylic system, it is a powder called "acrylic powder" and a monomer - a chemical liquid to mix with it. When powder is combined with a monomer, the resulting composition polymerizes very quickly, so a gel was invented for ease of use. This is an acrylic composition that is not capable of polymerization without additional lighting. In its presence, under the influence of photoinitiators, the polymerization process starts and takes place in two minutes in an ultraviolet lamp or in thirty seconds in an LED manicure lamp.
Advice from experienced manicurists
Acrylic powder for nails is something new, so if you are going to try it out, you should listen to the advice of experienced nail technicians.
It is better to work with the polymer composition outdoors
Most popular recommendations:
- It is better to work with the polymer composition outdoors or in a room with good ventilation, since the chemical has a specific odor. Specialists in salons sometimes even use respirators.
- If the nails are affected by a fungal infection, it is not recommended to apply powder, otherwise it will lead to even greater complications.
- Many diseases can negatively affect the adhesion of the nail and the acrylic composition. These diseases include problems with the digestive system and high blood sugar levels.
- It is worth considering that the composition dries very quickly, therefore, before doing such a manicure yourself, some experts recommend honing your skills on mock-ups.
- For training, you can apply acrylic powder on 1-2 nails in a small amount.
- Despite the fact that acrylic powder does not contain dangerous components, it is not recommended to use it too often.
- To remove the result of such a manicure, you need to use only special cosmetics.
Note! Taking into account professional opinion, it becomes obvious that using acrylic powder is a simple process.
To use it yourself at home, it is recommended to purchase a special lamp with UV radiation and some specific products. With sufficient skill and careful study of the instructions, a new manicure can turn out very beautiful and will last a long time.
Using acrylic powder, you can decorate your nails in any way you like, or simply make them healthier by decorating them with various elements and even extend them. Acrylic powder can be not only an additional accent in a manicure, but also its main part. It all depends on the imagination and wishes of the salon clients or home craftswomen.
What you need to buy for nail extensions
To model your nails, you first need to decide on the technology that will be chosen. The starting set depends on this. If you choose an acrylic system, then the following materials can be listed for making a jacket:
- Acrylic powder: clear, camouflage, pink clear and white.
- Monomer of the same brand as the powder.
- Acid primer.
For the gel system, the list of nail extension products will be different:
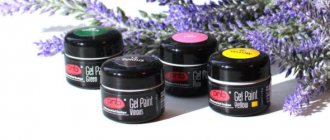
- Gels: base, camouflage, clear, pink clear, white and top.
- Acid-free primer.
- Means for the sticky layer (can be replaced with a clinser).
Both methods require careful preparation of the nail with a clinser. Gel technology requires a UV lamp; gel polishes do not dry in it. Therefore, if you choose a gel, it is better to purchase a combined UV/LED lamp. This will be useful for applying gel polish. In addition, you will need brushes (they are different for gel and acrylic), files, buffs and polishers. And, of course, manicure tools. To file nails, it is convenient to use a manicure machine with a set of cutters. This significantly speeds up the process of extension and correction.
Acrylic extension procedure step by step
Modeling is a procedure for changing the shape and length of a natural nail plate using artificial materials.
Analyzing the skills of the master or your own skills if you are planning a procedure at home will help you choose gel nail modeling or acrylic modeling. As well as the technical capabilities of the workplace (the presence of an extractor hood, a vacuum cleaner) and simply personal preferences, yours or the client’s.
How to prepare for extensions:
Both in the salon and at home, preliminary preparation of the nail plate for extension with an acrylic system will be required.
- A manicure is performed to remove the cuticle and remove the pterygium;
- The surface is filed with a 180/240 grid file to improve adhesion to the artificial material and avoid peeling. Please note that only the shine of the nail is removed so that its surface becomes matte;
- Dust is removed with a brush;
- Nails are treated with a dehydrator/degreaser;
- Acid or acid-free primer is applied.
Let's move on to working with the acrylic system. There are several modeling techniques - on forms and on tips - disposable and elastic reusable.
What is better to choose depends on the professionalism of the master, his work experience and personal preferences, his own or the client’s. The easiest way for beginners is extensions using disposable tips. You just need to choose the right size of the ready-made template form, and then attach it to the nail and fix it on top with acrylic.
Let's consider the procedure for working with tips or template blanks in a step-by-step manner:
- Select the tips according to size, file the edges if necessary
- Arrange the blanks in the order of gluing for ease of use
- Cut the length of the nail to 0.5 mm and file the edge
- Before extensions, the cuticle is removed and the pterygium is removed using hardware cutters.
- A trimmed manicure must be done a couple of days before the planned extension.
- The nail plate is prepared in accordance with the preparation procedure described above.
- The edge of the natural nail in the adhesion zone and the edge of the tip are treated with a special glue, which comes with the tips or is purchased additionally.
- The template is applied at a slight angle and fixed for 15 seconds. There should be no gaps, bubbles, or distortions in the fixation area
- Using a tip cutter, the excess length is removed and the edge of the artificial nozzle is shaped with a file, not only in shape, but also the thickness of the ends is removed so that the acrylic later looks neater and more natural. The thickness at the joint is removed, and irregularities in the area of the side rollers are also removed
- The top of the tip is sanded
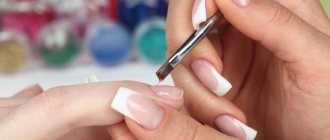
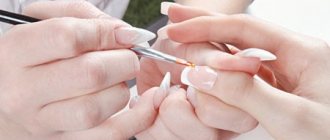
- Now you need to moisten the brush in monomer, squeeze 50% on one side, and pick up a ball of powder with the other side
- Place three balls, one large in the central, stress zone, a second small in the growth zone, and a third on the free edge of the nail. Smooth out using a pressing motion from the center to the edges.
- If the brush “catches” the material, it is recommended to moisten it in monomer
- Having completed the application, you need to look at the work from the side: the shape should resemble a crescent with the most convex part in the stress zone of the middle of the nail
- Repeat for all nails
- Next, the thickness and shape are filed
- Use a file to remove excess thickness from the side rollers, along the length and at the ends
- The length is polished by a grinder
- The base and colored varnish are applied, and the design is made as desired.
When modeling on a form, the steps are the same, only acrylic balls are laid out on a disposable form and adjusted with a brush. Next comes classic filing.
How to remove acrylic coating?
The strengthener needs to be removed after a few weeks. The process is not complicated, unlike its application, so you can do it at home. The actions are performed very carefully and accurately to maintain the beautiful and healthy appearance of your own nails. They are performed in the following sequence:
- Remove a layer of glitter from all nails.
- Apply nail polish remover to cotton pads and apply to each finger.
- Each finger needs to be wrapped in foil and kept for no more than 10 minutes.
- Remove the remaining material using an orange stick.
- We file the shape with a file and thoroughly clean it to the desired result.
Removing acrylic
Aids
Manicurists have long figured out what products are needed for nail extensions. The fact is that sterility is necessary for high-quality work. If there is fat on the nails, there will be no adhesion. Therefore, to prepare the nails, they are degreased. The product that is used is called “clinser”. This is an alcohol-containing liquid that may have some other inclusions (for example, thymol, an antifungal drug). In Russian, this name has not taken root; the word “degreaser” is often used instead. It can be replaced with pure alcohol.
The acidity of alcohol is 6 units, and nails and skin have a natural acidity of 5.5 units. To equalize acidity and increase adhesion (adhesion of the material to the keratin of the nail), a weak acid solution is used. It's called a "primer". For acrylic technology, the primer contains a higher concentration than for gel technology. Therefore, a distinction is made between acidic and acid-free primers. The name is conditional, since both contain acid, but in different proportions.
Advantages and differences of the material
Acrylic gel for nail extensions, which nail industry professionals prefer to work with because of its convenience and lack of need for special tools, has a number of advantages over the usual acrylic or gel, such as:
- no harm to health - most polygel manufacturers do not contain methyl alcohol, acrylic gel does not emit fumes during polymerization, it does not have a pungent odor like gel or acrylic, dust after filing a nail extended with polygel does not float in the air, but falls on surface. This property reduces the risks of allergies and respiratory diseases.
- lightness - polygel, in comparison with gel or acrylic, is lighter, it is almost not felt on natural nails when worn.
Because of this property, polygel is suitable for extensions for girls with thin or brittle nails; The advantage of acrylic gel for extensions is its consistency - minimal contact of acrylic gel with the skin - during work, acrylic gel does not flow and can be easily controlled with a brush, which allows the master to bring it close to the cuticle and side ridges, but not touch them. After hardening, unlike conventional liquid gel, no additional cutting out of excess material is required;
- polymerization – acrylic gel does not dry out in air or sunlight; when using hybrid lamps, polymerization takes about 30 seconds. The master can spend more time working on modeling or design without fear that the coating will harden;
- no burning sensation when drying in a lamp - no discomfort for the client during the procedure;
- application technique – the stages of nail preparation, extension or correction, and design execution coincide with working with acrylic powder or gel, so additional training in technique is not required. Polygel does not flow, this gives the master the opportunity to control the amount of material for work.
Read the popular article in the category: Nail fungus: treatment, inexpensive but effective drugs
How to use monomer
Working with monomer and acrylic powder requires care and concentration. It is also necessary to follow the sequence of actions. Let us describe in detail the general extension scheme using a paper form.
You can do without it, but it requires more skill and experience.
We will assume that we have already completed the standard hygienic preparation and we can proceed directly to creating our manicure.
- Treat the plates with a dehydrator or degreaser depending on the type of nails (the first composition dries, the second removes excess fatty deposits).
- Apply a coat of acid-free primer. This will ensure a high degree of adhesion between the acrylic coating and the nail surface.
- Take the paper form you prepared in advance and carefully secure it on your finger.
- Take a small amount of monomer from the bottle into a specially prepared container. It is very convenient to do this using a pipette.
- Dip the brush into the container with monomer. Touch the lint to the edge of the glass to remove excess.
- Immediately move the brush into the powder and form a ball using short circular movements. This will take literally a few seconds. You can test the composition onto a white paper napkin to assess the degree of viscosity.
- Apply the mixture with a brush to the center of the nail plate and with short smoothing movements, distribute the material over the surface of the nail: first towards the hole, then down to the free zone. During the process, you can add a little monomer to the brush. Make sure that the acrylic mixture is evenly distributed and that you have “kicked” all the air out of it.
- If necessary, the entire operation can be repeated, and more than once, until you get the desired result. During the process, you must clean the brush on a napkin and add monomer to it. Use the required amount of powder; you don’t need any extra. Don't forget that you need to work quickly with the acrylic mixture!
- After the acrylic composition has hardened, release your finger from the mold. Using a file and buff, remove the dispersed (sticky) layer from the surface, remove the bumps from it and correct the unevenness along the edges of the nails. Don't forget to wipe off the dust with a brush, wash your hands and apply moisturizing oil to the skin near the cuticle.
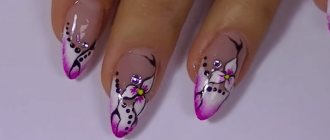
Then everything depends only on your imagination. You can apply gel polish, drawings, make three-dimensional figures, stick rhinestones, etc. on the nail plates.
Read more about creating various nail designs using acrylic extensions in the next article.
Gel polishes
Recently, materials have appeared that allow nail extensions, combining both technologies. Acrylic powder is added to the rubber base for gel polishes and applied to the nail like a gel. After polymerization in a lamp, the material becomes solid. This way you can model your nails to a short length. The advantages of such nail extension products are that the material is not removed by soaking and can be worn as long as the owner of the nails desires.
If necessary, the material is cut down with a milling cutter and a correction or new coating is made. Since the transparent base is applied in a fairly thick layer, there is no need to cut off all the material when making corrections. This allows you to change the color coat every three weeks and have your nails as long as you want. The rubber base adheres very well to the nail and does not cause detachments as it grows. Therefore, soon natural nails coated with gel polish reach the desired size. This technology allows us to recommend a base mixed with powder as a means for nail extension at home.
What to remember
Let's summarize:
When adding nails, monomer and acrylic powder are used only together - they are like Siamese twins, each of these components separately is simply useless.
To the question “What can replace monomer for nails?” There is only one answer - nothing. You can only change the extension method itself - use gel rather than acrylic.
It is best to use monomer and acrylic powder from the same manufacturer.
Before extensions, be sure to clean the surface of the nail from fat and treat it with a primer. This will ensure good adhesion and durability of the coating.
When mastering the art of working with acrylic, it is better to use slow-hardening monomers.
Have you ever done acrylic nail extensions? What monomer did you use? Share your experience in the comments!
Source
