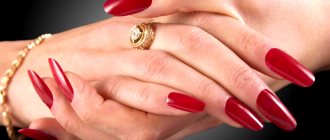
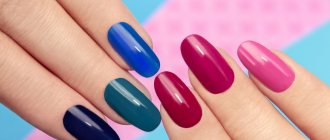
What is acrylic gel?
Acrylic gel (also known as acrygel, combigel or polygel - each manufacturer has its own names) combines the advantages of basic products for nail extensions, their modeling, strengthening, repairing chipped edges and design - durable like acrylic, but plastic and pliable like regular gel. Available in soft tubes and jars of various volumes (usually 5 - 30 ml).
Polygel is easy to use, hypoallergenic and suitable even for pregnant girls. It does not require the purchase of additional tools other than those the master used to work with ordinary acrylic or gel. Synthetic brushes or brushes with natural bristles are suitable for applying the coating.
The material consumption is small - taking into account the length of the future nail, a drop of polygel from 5 mm may be required. When removing extended nails, acrylic gel is not dissolved by gel removers and acetone.
Acrylic and gel nail extensions
In addition to acrylic, gel is used for nail extensions. Both of these materials are synthetic and have a lot in common. But a gel is a jelly made from a polymer using the right temperatures. And acrylic is a liquid and a fine powder; they are also obtained from a polymer, but using different temperatures and under different pressure. The liquid (monomer) is mixed with the powder, achieving a material with a liquid consistency, which hardens in a few seconds under the influence of oxygen.
Gel came into use later; it is a derivative of acrylic. Manicurists, having started working with acrylic and gradually changing technology, achieved a gel that hardened when exposed to sunlight. This simplified the technology: the gel is easier to apply; once on the nail, it immediately takes its shape. That's why some people prefer gel. But most masters still use acrylic.
Differences between acrylic and gel false nails
- Acrylic nail extensions are convenient because they correct imperfect (weak, broken) nails. Under acrylic coating, your own nails become stronger, grow, and take on a beautiful shape. If nails are extended with gel, then it is desirable that they are smooth and healthy: the gel does not hide obvious defects.
- Acrylic nails are stronger than gel nails and do not react to temperature changes. The gel does not withstand temperature changes. In cold weather, such nails can crack or break.
- Matte acrylic, glossy gel. Transparent and clear, like glass, the gel allows you to apply more complex and sophisticated painting to your nails. Acrylic helps create a three-dimensional design.
- When removing gel nails, you can only file them down. When sawing, tiny dust is released, which is harmful to health, constantly settling in the lungs. Of course, craftsmen are at greater risk than clients. Acrylic is removed using a special solution. Acetone can also remove it, but this is undesirable because it can turn your own nails yellow. True, the flexibility of acrylic to acetone does not allow you to immediately apply varnish to acrylic nails, because when removing the varnish from the nails, the acrylic will also come off. Those who love acrylic nails have to cover their nails with a special base. But acrylic nails don’t need to be varnished at all, they look so natural.
- Acrylic hardens on its own in a few seconds. In order for the gel to harden, a special ultraviolet lamp is used. When drying gel nails, there may be strong, albeit short-term, painful sensations.
- Sometimes they say that gel is healthier than acrylic (ultraviolet light, which is used to dry gel nails, protects your nails from fungus, under the gel layer the nails “breathe”), and that acrylic violates the integrity of the nail plates. These misconceptions are spread by craftsmen who do not know how to work with acrylic, the application of which requires greater skill. Gel is no healthier than acrylic, and acrylic is no more harmful than gel. Both materials have the same chemical composition.
Ideally, you should use both materials, covering acrylic nails with gel. Then your nails will be super strong and shiny.
Both acrylic and gel nails last up to four months. True, every two weeks you need to make adjustments (adjust the border between false nails and your own, change polish and designs) so that your nails continue to look natural.
Advantages and differences of the material
Acrylic gel for nail extensions, which nail industry professionals prefer to work with because of its convenience and lack of need for special tools, has a number of advantages over the usual acrylic or gel, such as:
- no harm to health - most polygel manufacturers do not contain methyl alcohol, acrylic gel does not emit fumes during polymerization, it does not have a pungent odor like gel or acrylic, dust after filing a nail extended with polygel does not float in the air, but falls on surface. This property reduces the risks of allergies and respiratory diseases.
- ease – polygel, in comparison with gel or acrylic, is lighter, it is almost not felt on natural nails when worn. Because of this property, polygel is suitable for extensions for girls with thin or brittle nails;
The advantage of acrylic gel for extensions is its consistency - minimal contact of acrylic gel with the skin - during work, acrylic gel does not flow and can be easily controlled with a brush, which allows the master to bring it close to the cuticle and side ridges, but not touch them. After hardening, unlike conventional liquid gel, no additional cutting out of excess material is required;
- polymerization – acrylic gel does not dry out in air or sunlight; when using hybrid lamps, polymerization takes about 30 seconds. The master can spend more time working on modeling or design without fear that the coating will harden;
- no burning sensation when drying in a lamp - no discomfort for the client during the procedure;
- application technique – the stages of nail preparation, extension or correction, and design execution coincide with working with acrylic powder or gel, so additional training in technique is not required. Polygel does not flow, this gives the master the opportunity to control the amount of material for work.
Read the popular article in the category: Nail fungus: treatment, inexpensive but effective drugs
How to dry a thick layer of nail polish?
beautiful colored manicure dried in a lamp
The best solution to this problem is to avoid applying a thick layer of varnish, replacing it with two passes with a thin application after two to three minutes.
If you don’t have time to repaint your fingernails, then use:
- a plate with cold water and ice cubes, where to dip your fingers for 5 minutes. Then shake off and let the water dry on its own.
- a flow of cold air from a fan or hair dryer
- the ability to reschedule time by allocating the legal half hour for natural drying of the varnish
Avoid using fixative varnishes, as they will smear the varnish during application and cause unevenness to form on the surface of your painted nails.
Pros and cons of acrylic gel nail extensions
Acrylic gel for nail extensions has many advantages noted when working with it by nail industry professionals and their clients:
- naturalness - nails extended with polygel look more natural, in contrast to those extended with gel, which makes the nail plate larger and more voluminous;
- convenience - strengthening with polygel, designing or extending nails does not require additional actions to eliminate possible defects of the nail plate;
- strength - the material is quite elastic and has high durability, so it is not afraid of chips and scratches, and its lightness, in comparison with gels, adds comfort to wear;
- economical consumption - the material can be applied in one layer, while such qualities as texture density and color saturation are preserved;
- no peeling – acrylic gel is compatible with any other materials (bases, decorative coatings or regular varnishes);
- modeling options - the polygel does not flow during operation, allowing the master to create the required shape, dome-shaped or flat;
- no prohibitions on use - since the polygel has no odor, to comply with sanitary hygiene standards, a nail specialist in the salon does not need a separate room, as when applying acrylic or gel extensions.
The disadvantages include:
- drying – longer polymerization of polygel in a lamp, when compared with acrylic or gel;
- cost - the price of the material can exceed 5 thousand rubles. per packaging;
- removal - due to the fact that most polygels are not soluble in liquids, they only need to be cut off with a ceramic cutter or files;
- liquid for wetting the brush - depending on the manufacturer of the acrylic gel, a regular cleaner for moisturizing brushes may not be enough and you will need to purchase a specialized product;
Advantages of acrylic nail paints
Compared to varnish painting, which was more common before the advent of acrylic paints, the advantages of the new technique are obvious:
- ease of use
- color saturation
- Density of application even in thin lines
- and, most importantly, complete
This is not to mention the fact that when using nail polish in art design, mixing colors to obtain new shades is almost impossible, but when using acrylic paints, you can mix anything without any restrictions.
Moreover, complete drying of paints occurs almost instantly, which allows you to avoid waiting time to apply a fixative, as is the case with varnishes.
We've sorted out the advantages. Now let's figure out how to properly use acrylic nail paints.
Possibilities of manicure and nail design using acrylic gel
Combining the advantages of other polymers for nail extensions and manicure (varnish, acrylic, gel) in polygel has made it possible to expand the number of services provided in the nail field.
Acrylic gel nail extensions can be done on special forms or tips. This material can be used to strengthen the nail plate, level it, or correct a chip.
Acrylic gel for nail extensions, which specialists can work with even without the use of forms, makes it possible to prosthetize weakened or problematic nails (fungal disease, detachment).
The peeling part of the nail plate is removed, the remaining part is processed, filed and degreased. Then, polygel is applied directly to the skin. The specialist models the desired shape and polymerizes the coating.
Polygel can be applied to protect natural nails from the aggressive effects of household chemical solutions, or for further application of varnish coatings. When creating various designs, the material can be mixed with any color of gel polish to obtain the desired shade.
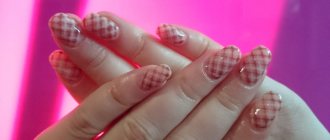
Options for designs on nails using gel paints
Nail design is not difficult to create, but this process will require some experience. Masters use different techniques to create original patterns, from which a beginner can choose the simplest method in his opinion and gradually develop his skills, bringing it to perfection. Nail design step by step for beginners looks like this (we will omit the description of standard hygienic procedures for preparing nails and covering them with base and gel polish):
- The simplest pattern that a novice master can master is the application of horizontal thin stripes, curls, and “lattices.” For this purpose, gel paint for a French jacket is perfect, which is also considered one of the simplest types of design.
- By dipping the dots into gel paint, you can decorate your nails with a dotted pattern. You can use paint of one color or several colors for this. The dots can be carefully connected to each other and get an interesting pattern.
- By drawing a smile line on the free edge of the nail, you will get a beautiful, delicate jacket. If you make a “reverse French” or an inverted French, the design of the nails will also be very original. In this case, the contrasting color fills the hole space of the nail.
- By carefully placing small dots with dots so that they form a geometric pattern, you can get a delicate, beautiful manicure - a “veil”.
Having mastered simple drawing methods, you will gradually be able to learn more complex techniques of drawing on nails. Many of them do not require good artistic abilities at all. All you need is imagination, precision and the desire to experiment.
Depositphotos/kanzefar
The industrial use of acrylic paints began quite a long time ago, but nail art design specialists appreciated their advantages only in this decade. This is due to the appearance on the Russian market of new high-quality acrylic paints with a thin, but at the same time opaque texture. Since then, manicurists can no longer imagine nail art without acrylic paints.
Want to learn how to use acrylic nail paints? Read on!
How to use acrylic gel?
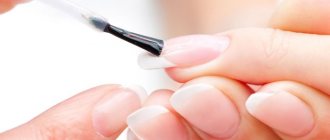
When working with polygel, the brush should be damp, but not wet, so that the material does not stick to it. To do this, the instrument is periodically dipped in a special liquid or degreaser and blotted on a lint-free cloth.
If the material is packaged in a tube, the required volume of the drop is squeezed out and removed with a spatula or other sharp object. During the formation of the nail, slapping movements are made, as when applying acrylic. The remaining polygel is pulled to the free edge of the nail plate and removed with a brush.
Acrylic gel for nail extensions, which experts recommend working with on each finger separately, so as not to touch the modeled nail when forming the next one, allows for leveling and laying out until polymerization
Examples of painting nails with acrylic paints
"Flower"
- This is both an elegant and simple design that is suitable for a romantic and gentle look.
First you need to draw the stem of the future flower, for this you need yellow paint. Draw a straight thin line from the lower left corner to the upper right corner of the nail plate. Apply it in a quick, oblique motion, pressing slightly on the brush. Then add white paint to a small brush. Place 5 dots next to the stem - this is the base of the flower from which the petals will come; you can make the base a round dot. After everything, finish drawing the flower, namely, draw blue petals with veins, and paint the core in yellow. You can paint a couple of flowers on one nail plate, but one looks better. When you finish painting, you should seal everything with colorless varnish. Flowers can be of different sizes and colors. "Zebra".
To visualize the future drawing, you should look at the coloring of the zebra and copy its cool stripes.
Cover the nail with white paint and wait until it is completely dry, then you need a toothpick, a needle or a thin brush. Dip it in black paint and draw horizontal stripes. In this case, they need to be made slightly curved, start moving from the right or left side from the very edge of the nail plate, and finish, slightly short of reaching the end of the other edge. Then repeat a similar stripe, starting from the other edge of the nail. It is worth making sure that there is a distance between the stripes so that the white background is visible. As a result, you can highlight the black lines with glitter and finish with clear varnish. "Dalmatian"
In this case, everything is quite simple - cover the nail with white paint, wait until it dries, and then take a toothpick, needle or thin brush and draw spots in random order with colored or black paint.
Finally, apply a clear varnish. "Tiger".
Take yellow as the main color, wait until it dries, and then, as in the previous painting, draw orange spots in random order to repeat the tiger coloring. After this, dry the paint again and draw a black curved line, at the end it should be a little thinner, and draw the same broken line to meet it. Do this over the entire nail plate and fix with clear varnish. All designs can be made with regular varnish, but acrylic paints will make the design more vibrant. In the end, it’s worth highlighting one more important rule: when you paint with dark-colored acrylic paints, then you should choose a whiter background, and vice versa, if the drawing is white, then make the background dark.
Tools for work
To extend your nails with acrylic gel you will need:
- a router for hardware manicure or tools for trimming manicure;
- buff (special file, in the form of a rectangle, for polishing artificial and natural nails);
- files, abrasiveness 180-240 grit;
- brushes;
- clinser, primer or dehydrator (degreaser that removes excess moisture from the nail);
- base (special for acrylic gel or any top);
- acrylic gel (and the necessary liquid for wetting the brush, if included);
- top
How to properly dilute acrylic powder?
Powder of the type you need. Liquid used to dilute acrylic powder
. It is called liquid and is a monomer containing plasticizers. The liquid does not change the original shade of the substance.
Interesting materials:
How can I find out what I visited in VKontakte? How do I find out that I have been blacklisted in contact? How to find out that you have been blacklisted in contact? How to find out that you have been blacklisted in contact? How to find out someone else's contact list? How to find out the date of birth of a friend in contact? How to find out the date of birth in a contact if it is hidden? How to find out if you are on the Viber contact list? How to find out groups of friends in VKontakte? How to find out the user ID in a contact?
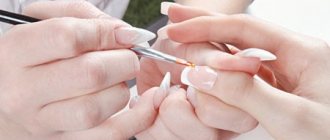
Step-by-step instructions for beginners on how to work with acrylic gel
Polygel nail extension technique:
1. Manicure.
The cuticles are removed, the nails are filed, and polished with a buff. After which they are wiped with a cleanser, including the side rollers and hard-to-reach places near the cuticle.
2. Primer.
After degreasing, a primer is applied to the nail. A dry nail plate does not require the application of a primer to enhance adhesion (adhesion) to the future coating. And an acid-free primer is applied to a damp nail and dried in air for 60-120 seconds.
3. Base.
Apply with rubbing movements over the entire surface of the nail, including the end, and dry in a lamp.
4. Acrylic gel.
- The material is distributed using a brush. Before work, it is moistened with a clinser to moisten it a little to prevent the acrylic gel from sticking.
- If necessary, a form for extension is installed.
- Take a drop of polygel onto the brush and apply it to the beginning of the nail, close to the cuticle, with slight pressure. After which, with short movements, the master lowers the brush to the free edge of the nail, removing excess material.
- After polymerization of the extended nail, the acrylic gel may have a slightly rough appearance. This can be corrected by brushing over the material without pressure, with a slightly damp brush, to achieve an even coating.
- Before drying, it is recommended to wait a little and let the polygel smooth out onto the nail.
5. Polymerization.
The extended nail is dried in an LED lamp for about 30-60 seconds, and in a UV lamp for 60-120 seconds. If, after hardening, the surface of the nail plate is uneven or “grainy”, it is necessary to file, give the desired shape and treat it with a buff.
6. Top.
After applying the top, the manicure with acrylic gel nail extensions can be completed or supplemented with gel polish.
Read the popular article in the category: An effective drug - Mikoderil varnish for nail fungus. Reviews, price.
Is it possible to dry gel polish without a lamp?
a girl applies oil to speed up the drying process of nail polish
The answer to this question depends on the type of gel polish. Today the following varieties are presented:
- photosensitive
- not sensitive to light
- biogel
- the alternative is a regular varnish with a glass coating effect
You can’t do without a lamp if you use gel polish of the first and third types. However, even light-sensitive gel polish can harden when exposed to direct sunlight or a blue lamp. The only disadvantages of this method:
- long drying
- high probability of poor hardening or formation of cracks and bulbs
Precautions during operation
Despite the fact that the dust from acrylic gel sawdust is 30% heavier than from gel or acrylic sawdust, the master needs to use a vacuum cleaner to collect it. And also use a protective mask, glasses and a screen when doing polygel nail extensions.
Do not neglect the antiseptic treatment of the natural nail before applying an artificial coating. Acrylic gel is designed for long-term wear. By covering the entire nail plate, it disrupts the natural circulation of air, resulting in an increased risk of the proliferation of pathogenic bacteria.
Individual intolerance to the components of acrylic gel by the client is possible.
General recommendations when working with acrylic primers, paints and other compounds
Before you start work, no matter what exactly you are doing: painting, decoupage, scrapbooking, carefully read
the information from the manufacturer of
the material. It is usually indicated on the label. This is the purpose/application of the material, what surfaces it is suitable for, recommended drying time, consumption, etc. You should not work on a metal surface with primer “on fabric” either. Acrylic materials are considered quite universal, but it is better to take what is suitable for the specified surface: there are still nuances and differences.
Be careful! Choose the right compounds suitable for your surface.
By the way, drying time also directly depends on the surface on which you are working. Porous and absorbent surfaces (paper, cardboard, wood, fabric, etc.) dry much faster than metal, glass and plastic. The latter have a very smooth surface, so materials applied to them dry only due to surface evaporation of moisture.
Care of the finished coating
To ensure that nails extended with acrylic gel last longer, do not neglect the basic rules of care:
- refrain from water procedures 2 hours before and 2 hours after nail extensions, and also do not visit the sauna or solarium on the first day - this will help avoid possible detachments;
- You should be careful when working with the keyboard, buttoning clothes and opening various doors without sudden movements, so as not to accidentally damage the extended nail;
- experts recommend using a soft file and buff for maintenance, instead of metal tools and nail clippers - they can damage the artificial turf and lead to chipping;
- refuse trimmed or hardware manicures - remove dry skin and overgrown cuticles with a remover;
- the space under the free edge of the nail should be cleaned regularly with a brush or orange stick;
- Correction of extended nails, on average, is required every three weeks. During wear, the natural nail opens more and more and air can get under the coating, which will lead to chipping or injury to the nail plate.
How long does acrylic (art) primer take to dry?
Primer is a composition intended for priming hard and flexible surfaces, such as: canvas, paper, cardboard, wood, chipboard, fiberboard, plastic, glass, fabric, stone, etc. After drying, it forms a dense, rough surface that is resistant to water. It has excellent adhesive properties when working on difficult surfaces (glass, stone, fabric, plastic). Levels and whitens the surface, preventing the absorption of all subsequent applied materials. Dries on average from 30 minutes to 2 hours under natural conditions.
Blow drying is acceptable
when using primer on highly absorbent surfaces - wood, paper, cardboard, fiberboard, MDF, fabric. Ideally, it is recommended to dry it with a hairdryer not immediately after application, but after 10 minutes. The primer should be slightly absorbed into the surface and “grasp” with it. Drying should not be done with a hot stream of air at a distance of 15-20 cm from the working surface.
It is not recommended to use a hairdryer
when drying soil on plastic, metal, glass. Remember that this group of materials has a smooth, slippery surface and the soil adheres to it mechanically. When drying with a hairdryer, the primer layer may begin to peel off from the surface, especially if you turn on the hot air flow.
Do not do it
blow dry champagne bottles! There have been cases when bottles exploded during the drying process.
It is better to dry primed canvases for painting only in natural conditions.
Thank you for reading our articles! We are giving you a promotional code BLOG for a 15% discount in our online store
. Enter it in the “enter coupon” field when placing your order.
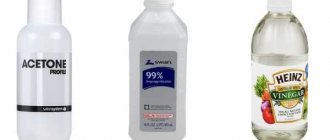
How to remove acrylic gel
Acrylic gel for nail extensions, which most nail professionals prefer to work with, cannot be soaked with acetone or special liquids for removing gel and acrylic polymers.
The material requires cutting with 100-150 grit abrasive files or a cutter for artificial nails. It is recommended to leave about 10% polygel on the nail plates as a protective layer.
Nails extended with polygel are removed step by step:
- The length is removed with a file.
- Using a router or file, the polygel is gradually and evenly cut off. Sudden movements can damage the natural nail.
- After removing the material, the surface of the nail plate is polished with a soft buff - it seals unevenness and scratches.
- At the end of the procedure, cuticle oil or any essential oil is applied to the nail and cuticles.
Tips from professionals: Nail rub - what it is, how to use it. Instructions
How to dry nail polish quickly in cold water?
open tap with cold water to dry nail polish
Cold acts as a catalyst to speed up the drying process of regular nail polish.
Therefore, this method has been tested in practice by more than one generation of women.
The only disagreements are in the method of cooling a fresh manicure on your hands:
- with immersion in a container of ice water
- placing your fingers under a stream of cold water in the sink
Regarding the first method, representatives of the fair half of humanity note the peeling of the varnish from the nail plate, its spreading over it.
Regarding the second method, the opinion is more clear - 5-7 minutes under running cold water and the varnish dries so much that it is fashionable to safely move on with business.
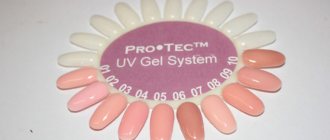
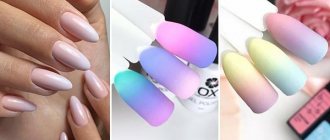
The best brands of acrylic gels
Today, polygel is produced in various colors, price categories and packaging formats.
Nail service specialists recommend several brands:
| Brand | Advantages | Minuses | Compound | Price |
| TNL Professional is mainly produced in cans |
|
Before applying the topcoat, it is recommended to sand the coating with a buffer to avoid the appearance of spots after sawing. |
| from 350 rub. for 18 ml. |
| IriskProfessional is available in both tube and can | excellent strength and plasticity consistency |
|
| from 250 rub. for 8ml |
| Pudding Gel from Bluesky Released only in tube |
|
|
| from 250 rub. for 8 ml. |
| Elpaza |
| small color range |
| from 350 rub. for 30 ml. |
| Tertio |
|
|
| from 350 rub. for 30ml. |
Acrylic gel, which is convenient, simple and safe to work with, has allowed nail extension artists to expand the range of services they offer. Girls choose polygel nail extensions because of its durability, ease of manicure creation and natural appearance when worn.
Author: Svetlana Novikova
Article design: Mila Friedan
What is polygel
Polygel is a material based on a construction gel with the addition of acrylic powder. Previously, masters mixed the ingredients themselves and selected the proportions. Today this product is sold in finished form.
Advantages of acrygel:
- High wear resistance and strength. The polygel does not crack or chip for more than a month. Thanks to high-quality adhesion to the nail plate, the manicure remains neat and attractive.
- Hypoallergenic. Acrylic powder is an aggressive substance, but the final composition is safe for health. The material does not have a strong odor and does not cause burning during drying.
- Ease of use. The consistency of the polygel is similar to soft plasticine, so the acrylic does not flow onto the side rollers and cuticle.
- Versatility. The material is suitable for nails of any length and shape.
- Speed of work. During application, the acrygel does not spread or harden, which simplifies and speeds up the procedure.
After polymerization in a lamp, the polygel forms a dense substrate that maintains its integrity even when exposed to the free edge. It is important that the nail plate continues to “breathe” after a manicure due to the porous structure of the coating.