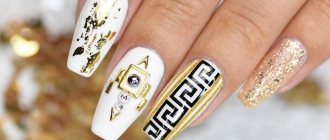
Fashionable "sweet" design
A manicure with ice cream looks original, cute and feminine. Making this design is quite simple with a thin brush and dots. Or you can use stickers, which also look beautiful. Below are instructions on how to make ice cream on your nails step by step.
- Give each nail a different background color. It is best to choose bright colors so that they look like scoops of ice cream.
- Then highlight the top edge of the nail plate with brown so that the edge is wavy. Then, using a thin brush using a dark brown color, draw diagonal lines. You have a waffle cone.
- On the border between the colored background and the brown, make a few white strokes.
You may be interested in: Manicure for small nails: fashionable ideas and options, technique, photos
You've got a beautiful ice cream design on your nails. You can create this manicure using a stencil to create a beautiful wavy edge. This version of the “sweet” design will look more impressive on sharp or oval nails.
Ice cream manicure ideas
No matter how long your nails are, a summer manicure with ice cream will look great on them. Here are some creative ideas for applying it:
- preference is given to beige, lilac and pink shades, giving tenderness;
- can be presented in bulk. For such nail art, the pointed shape of the nail plates is more suitable;
- Modeling can become a relevant technique, which makes the image more expressive and original;
- A popular method of applying a 3D pattern.
Nail design with ice cream in a cone
Using gel polish, you can easily and quickly apply ice cream on your nails in a cone, which is characterized by the following features:
- Nude shades are suitable for the background pattern; these light colors will evenly cover the nail plate;
- to draw the horn, it is better to take a beige shade, which will be slightly darker than the main one;
- The ice cream must be highlighted with bright colors so that it attracts attention;
- An ice cream cone on nails can be used in different types of nail art: French, French, moonlit or ombre, such an original design will add piquancy and a cheerful mood.
Manicure with ice cream and powder
Powder can become not only a decoration on the nail plates, but also act as a strengthener, since a special material is used - acrylic. Acrylic powder is durable and easy to use. The “ice cream with sprinkles” nail design involves the use of several types of powders:
- transparent – used in modeling and serves as a reinforcing material;
- beige color - hides all imperfections of the nail plates;
- white – will be an excellent option when drawing white lines;
- colored - any components can be made with its help;
- shiny - preferably applied to one or more nails and can add expressiveness to a sweet filling;
- neon – glows in the dark, such decoration will become a bright element in a nightclub.
This nail art technique is performed in various variations and manicure with ice cream is no exception:
- Using acrylic, you can add volume to a drawing and highlight its component parts.
- In addition to the three-dimensional picture, you can decorate it with rhinestones, but you just need to resort to fixation using a finishing gel.
- Using glitter powder, you can make three-dimensional pictures sparkle in the sun, but the color of acrylic should be chosen to match the image.
- Acrylic is also used for sculpting. The main thing is not to apply too much volume, as the design will become blurry and lose its beauty.
French manicure with ice cream
One of the best variations would be to create an “ice cream” nail design in the form of a French manicure. It is very simple, you just need to add modern interpretations to it:
- a dessert on the ring finger adds extravagance to the jacket and makes it an excellent summer option;
- You shouldn’t overload the image; you should focus on 1-2 fingers decorated with such an image. The rest are done using the traditional technique of applying a French manicure, while the stripes decorating the tip of the nail can match the color scheme of the picture;
- A manicure with beautiful ice cream can be done in absolutely any form, the main thing is that the white or colored line characteristic of a French manicure is visible on the fingers.
Moon manicure with ice cream
The ice cream design on the nails goes well with lunar nail art; when applying it, it is worth considering certain points:
- on short nails it is not recommended to make a large lunula; you need to stick to transparent or white varnish, then it will look sophisticated and feminine;
- this kind of nail art looks charming on any shape of nail plates, be they oval, square or pointed;
- you need to consider for what occasion a lunar manicure with beautiful ice cream is being created. A theme with the addition of stripes and dessert is perfect for a summer holiday. The main part, the lunula, can be created using foil, sparkles and stones.
Bright manicure with ice cream
A summer look is characterized by brightness and rich colors; a yellow manicure with ice cream would be a win-win option. It can be created using any technique, the presentation can be completely different, the main thing is that the image is applied to a contrasting varnish. The picture can be supplemented with glitter, which will make it more expressive. Often, rhinestones and beads make images incredibly bright, and there is a play of colors between these elements.
Manicure with ice cream and cake
Nail art can be embellished with another version of a sweet dessert, and create a nail design with ice cream and cake. In such designs you can combine an incredible palette of colors and make nail art much more fun by using the following variations:
- the master gets the opportunity to fully express his imagination, the main dessert is depicted in a cone, a glass or in chocolate glaze, the cake is also not inferior in its variety;
- for applying images, light, cream and other delicate shades are mainly used;
- fun nail art can be combined with stripes and polka dots on other fingers;
- The glossy finish combines perfectly with the picture, and a rubbing effect has been added to the design.
More sweet
You may be interested in: Manicure according to Feng Shui: what is special and how to do it
If you like original nail design ideas, then you can depict not only ice cream, but also cake and cherries. This design will be appreciated by fans of sweets.
- Make a monochromatic coating in a light shade.
- Draw an ice cream cone on one nail. To do this, use bright colors. On the other is a cake, then several cherries. Additionally, you can draw lollipops and candies.
- To make the design look more impressive, use a thin brush and black varnish to draw a neat design.
This version of the “sweet” design is suitable for creative people who like an unusual and original manicure.
New products of the year
The hit of the last summer is the design with ice cream. Stylists on their models demonstrating Spring-Summer clothes prefer to see a bright and cheerful manicure with their favorite dessert.
The classic application of a bright and contrasting pattern on one ring finger while painting the rest in a single “calm color”, for example, pale yellow or milky pink - this option looks very fun and fashionable.
The flow from pale to bright colors, starting from the thumb and ending with the little finger, also looks very interesting. You can draw ice cream on one or two fingers, for example, in a waffle cup, and you can stick to the same colors as the main background, but use brighter shades. For example, make the background soft purple, and decorate the ice cream balls in blue, violet and purple.
Another fresh idea is to use the brightest and most acidic shades. Nightlife lovers will appreciate bright nail designs using glowing polish. Feeding on daylight, luminescent varnish will stand out very brightly at night.
You can also use different designs on different nails. A lunar design will look very delicate when paired with a French manicure, and a tiny ice cream cone in the upper left quarter of the nail will be a piquant highlight to the whole look.
Various strokes, polka dots and folds will look interesting as a background for the main design, the main thing is to choose the color correctly so that there is no merging or excessive pretentiousness.
For those who like to experiment, there is another interesting image: cover four nails with absolutely black varnish, matte or shiny, and on one draw a horn with a filling. With such a rather strict, but at the same time simple design, you can go to work or go on a date.
Those who like to paint sweets on their nails should not overload the image with numerous designs on all fingers. If, for example, you draw all the sweets in a row, you will simply end up with a merging mass of bright colors, and as such it will not be possible to make an accent in the drawing.
Combined with confetti
Often a manicure with ice cream is complemented with confetti or kamifubiki. This makes the design even more delicate, even sweeter. Also, in ice cream manicures, a background coating of different colors is often used.
- For the background, use soft pink, mint, lilac and berry colors.
- For four nails, apply multi-colored confetti to the entire surface of the nail plate.
- Draw an ice cream cone on one nail. Use sand color to draw a small triangle. Take the dots and place three dots on the base of the triangle. Place small colored dots on top of them.
You may be interested in:Blue French: color combination, design options
Confetti fits perfectly with a “sweet” design. Kamifubiki are similar to caramel sprinkles, which makes the manicure even more impressive.
Manicure with ice cream: 25 of the most summer and spectacular designs
Manicure with ice cream is the most summery and very impressive design. It is suitable for a strict dress code and a special event. In the selection you can see original ideas and use them for yourself.
@asnail72
The most delicate and delicious manicure can be done on a pink monochromatic coating with the addition of an original design in the form of ice cream. The sweet design lifts your spirits and makes you feel like a flirt.
Due to the fact that ice cream can be of any color, manicure is performed in bright and summer shades. Yellow monochromatic varnish and the main detail in the form of a tube with ice cream scoops will highlight refined fingers and well-groomed nails.
@alenakapriz_studio
@anna_nail_vesna
Ice cream made from bright rhinestones looks very interesting and attractive in a manicure. The overall tone, made in white, will highlight the brilliant design detail and transform the entire manicure.
@asnail72
@cndworld
For a more festive and fun manicure, you can create nails with glitter. All nails are covered with shiny details, and the ice cream nail is left in the classic style, highlighting only the balls. The design will perfectly complement a bright and colorful dress for any occasion.
@deryabinayulia
For a super bright and incredibly effective manicure, you should choose acidic shades of varnish. In this case, the ice cream will become a distracting detail and will smooth out the varnish that is too prominent. A manicure is suitable for a summer holiday or a theme party.
@el_nailsspb
@ewuleek
@indigonails
@kapus_nails
@kapus_nails
@koba_nails_studio
One of the most popular colors for women when choosing a manicure is red. The passionate tone of the varnish allows you to emphasize femininity. To prevent the design from being too pretentious, it should be supplemented with an extraordinary element. Ice cream will be just the thing that will make your manicure a little more gentle.
@tkalich.nail
Short nails are no exception for ice cream designs. A neat detail in addition to other interesting designs will make your manicure more fresh and stylish.
Delicate design
A manicure with cakes can be done on a romantic date. It will emphasize your femininity, add more tenderness and sophistication to you. It's easy to make and looks beautiful.
- Choose a mint color for the background.
- Draw a little cake on the tips of your nails. For cream, use white and pink colors. You need to draw a semicircle with a slightly wavy outline. Then make very thin soft strokes of color that look like caramel sprinkles.
- Place a red dot at the top - it will be a cherry.
You've got a delicate manicure with cakes that will go perfectly with full skirts.
Add a piece of cake
You can complement the ice cream manicure with an image of a piece of cake, which will look harmonious in the “sweet” design. How to draw a piece of cake?
- Draw a small triangle with a chocolate shade. You can make the edges slightly wavy so that it looks like cream.
- Below, draw a narrow line for the milk chocolate shade.
- Using a thin brush, draw another dark brown line below.
- Even lower, make a wider stripe of soft pink color.
- And another thin dark brown stripe.
You have a nice neat piece of cake. On top you can make several bright dots that will look like caramel sprinkles, and paint the cream with white varnish. The drawing will look even more impressive.
Step-by-step guide and master classes
If you have an idea to create a manicure with ice cream, then you should think in advance about the materials that might be useful. A simple step-by-step guide will help fashionistas do their own manicure at home.
- Before applying varnish, you need to get your nails in order: wash your hands with soap, dry your nails thoroughly and remove all dirt underneath them. Using a file, give the long part of the nail the appropriate shape. Then we remove the cuticle from the nail plate and use a special soft file to polish the surface of the nail, cleaning it.
- Then you should degrease your nails. Using napkins, we wipe our nails with a special liquid.
- Applying a primer or bond provides the gel polish with better adhesion to the nail, it will not peel off and will remain firmly in place for at least three weeks.
- Then apply the base coat or top coat.
- After completing the preparatory stage, we proceed to applying the gel polish base to the nails. It is applied using a regular brush and then placed under a UV lamp for 30 seconds.
- When the base coat is completely dry, you need to apply a layer of colored gel. You need to apply a medium amount of varnish, since a large drop will be smeared all over your finger, and an insufficient amount will “strip” the nail.
- Then we apply the main design, in our case, three balls in a waffle cone. We use acrylic powder for the balls, and paint the cone with gel polish with a special thin brush. We apply the design to the ring fingers of both hands. All other fingers are simply painted in a single color.
- The final stage is to apply a top coat over the main design; do not forget to cover the cut of the nail, and then polymerize it.
How to draw an ice cream cone on your nails using the velvet sand technique, see the following video.
Source of the article: https://wlooks.ru/lak/dlya-nogtej/manikyur-s-morozhenym/
"Velvet" design
Ice cream on nails made using “velvet sand” looks especially beautiful and unusual. This adds a nice texture to the design and makes it more elegant. A particularly sophisticated manicure will turn out to be in lilac-pink tones.
- Apply a soft pink coating on one nail, and lilac on the others.
- Use Velvet Sand to highlight one lavender-coated nail. This material must be applied to a non-dried layer of varnish.
- Use a light brown color to draw an ice cream cone, and use a thin brush to draw a neat dark brown outline.
- Make three scoops of ice cream of different colors. You need to work with each ball separately, because you will apply “velvet sand” to them; it will be of different colors.
- Apply top coat only to those nails that do not have “velvet sand”.
You got an unusual, beautiful manicure with ice cream. This design will look beautiful with a romantic clothing style.
Design ideas
The modern fashion for painting sweets on nails is very diverse; you can bring any interesting idea to life.
Almost any summer look can be combined with such a manicure, and the owner of such fashionable nails on the beach in combination with a swimsuit will look very stylish and fresh.
Manicure design ideas with sweets can be very diverse, but you can still divide them into small groups:
- With ice cream. Volumetric or flat, patterned or smooth, ice cream scoops can be drawn or stenciled. They can be in a regular cup or in a waffle cone.
- With cake. Typically, this design uses the brightest colors of varnish - green, pink, red and blue. An interesting idea: on four of the five fingers the cakes are drawn whole, and on one - bitten. No fashionista will refuse a manicure with such decor.
- With donuts. Different in size and diameter, with or without sprinkles, with icing of any color - donut manicure remains one of the most favorite designs in recent years.
- With cotton candy. For lovers of glamor or Barbie style, this design is perfect. Bright pink sugary cotton candy on a white background looks very impressive both on paper and on nails.
Beach style design
A manicure with ice cream goes well not only with romantic dresses, but also with beach style. For greater effect, you should choose a yellow color as a background - this will make the design even more summery.
- Make a yellow one-color coating.
- You need to paint ice cream on several nails - the manicure will turn out “not overloaded”. Draw a light brown waffle cone. You can add light touches of dark brown.
- To create the cream, use white and lilac shades. Make wavy lines so that they look like cream.
- Place two red dots in the corner of the nail plate. Then use a thin brush to paint twigs and leaves in green.
- Apply top coat on top.
You have a bright summer manicure that looks original. But it will be most impressive if the clothes contain any of the colors from this design.
More cream
The “Ice Cream” nail design is a feminine and at the same time a little perky and playful option. Most often, confetti is used to create it to create the effect of caramel sprinkles. Here's how to make an ice cream design with lots of cream:
- On one nail, apply a single-color coating in a light shade. Apply kamifubiki on top.
- Make an ice cream design on the other nails. Use a light brown color as the background.
- Starting from the top edge, start drawing the ice cream cream with white color, draw the edges uneven to get the effect of slightly melted ice cream.
- Spread the kamifubiki over the white background - this will be caramel topping. Draw a red cherry in the middle.
- Using a thin brush, paint diagonal lines using a dark shade of brown. Apply top coat over the design.
This Ice Cream nail design looks good with a casual style, adding a bright touch to it.
Volume manicure
The volumetric design of ice cream on the nails looks beautiful and impressive. You can do it if you apply several layers of gel polish. Only each part of the drawing needs to be dried in a UV lamp separately so that the drawing turns out neat.
- As a background, you can use a soft turquoise shade. This will make the manicure more sophisticated.
- In one design you can make an image of a cake and an ice cream. To draw a “sweet” design, use soft and light shades. Decorate the cake with a cherry to make the design look even more impressive.
- Complete the images with beautiful monograms, which need to be painted with white varnish. This will make your manicure look even more elegant.
This design looks airy and original thanks to the three-dimensional pattern. You can add “velvet sand” to the monogram, which will add even more sophistication to it.
Gradient manicure
This pattern looks great in combination with bright colors. It is best to use the ombre technique - the design will be more feminine and elegant.
- To create a gradient, use aqua and fuchsia shades. You can do “Ombre” on all nails, or on several. On others you can make a monochromatic coating.
- Draw an ice cream cone on one nail.
- Apply top coat on top.
You can use stickers, which will also look nice. A gradient manicure looks impressive, so you don’t need to paint all your nails. The combination of ombre and plain coating also looks beautiful and aesthetically pleasing. A manicure with ice cream and cake looks original, feminine and playful. This is one of the popular trends in nail design.
How to draw ice cream on your nails: step-by-step photo instructions
In a cup and cone, in a block and on a stick - ice cream comes in different forms. In our photo instructions, we will step by step analyze the two most beloved and popular types: popsicle and ice cream in a waffle cone. We will draw in pop art style!
As always, we recommend starting the process by creating the perfect basic manicure. We have attached detailed video instructions that will help you do everything in the best possible way at home.
Now that everything is prepared, let's get creative. To create this image you will need:
- base coat,
- finishing coating,
- thin manicure brush,
- polishes in six different shades (pale blue, pink, white, azure, black and light brown).
1
Apply a base coat to your nails and paint them with any pastel varnish - soft blue, pink or yellow (in our case, the main color was pale blue). Of course, you can choose any other varnish, depending on your preferences. For example, on a dark background (burgundy, dark brown, olive), the design will not look so delicate, but the manicure will turn out to be more contrasting.
© Makeup.ru
2
Draw a pea (large white or pink dot) in the center of the middle nail. It will serve as the basis for the future “popsicle”.
© Makeup.ru
3
Draw a triangle on your ring finger with beige polish - it will symbolize a “waffle cone”.
© Makeup.ru
4
Add a white stripe (“stick”) to the popsicle and mark the “bitten off” piece with white varnish.
© Makeup.ru
5
Using white or blue varnish, draw a “leaky” circle on the top of the “waffle”: it’s okay if it turns out uneven—the ice cream might have melted a little.
© Makeup.ru
6
Using a very thin manicure brush, outline the outlines of the designs with black polish and add the details of the “waffle cone”, as shown in the pictures below.
© Makeup.ru
© Makeup.ru
7
Apply a topcoat to your nails to seal the result.
© Makeup.ru
Ready!
© Makeup.ru
Below are three more ice cream manicure options for short and long nails of different shapes:
© angelnailsgso
© just_my_manicure
© knails_kaunas.

