Today, gel polish is surprisingly popular, due to its durability, beauty and safety. Anyone can experiment with it, so knowledge of how to remove gel polish will be useful to every girl.
The nail industry does not stand still, and traditional methods of nail polish removal are being replaced by methods with devices that greatly facilitate this process.
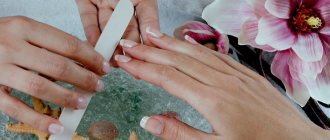
Traditional method of removing gel polish
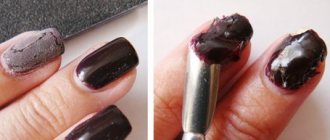
Most people practice removing gel polish in the traditional way, when a cotton pad or small napkins soaked in a special liquid (remover) are applied to the nails, and a layer of foil is placed on top. After 10-15 minutes, this compress is removed along with the gel polish. It is better to remove the residues with a manicure spatula.
However, this method has its drawbacks. The biggest difficulty is that it is quite difficult to independently apply compresses to the other hand when one is already formed. In this case, you can remove the gel separately on each hand, but then the whole procedure will take more time. Another problem may be the inability to tightly wrap the fingers of the other hand in foil.
Gel polish remover clips
To make the process easier, manufacturers have come up with reusable nail clips. They are also called clips, caps or clothespins. They really look like plastic clothespins. It is noteworthy that all the clips in the packs are the same size, but this does not cause discomfort. The devices do not fall off the little finger and do not put pressure on the thumb.
There are clamps for arms and legs, they differ in size and design shape: for legs they are slightly wider.
The design is very easy to use. The plastic clips are designed so that you can quickly and easily squeeze and unclench them on your fingers. With their help, the process of removing gel polish is much cheaper, because the clips are universal and reliable, and foil is not always at hand.
Advantages of clamps
Gel polish remover clip set
- Ease of use
- Durability
- Versatility, for example mother and daughter can use one pair of clamps
- Fixation density
- Prevalence and reasonable price
- The effect of removing the gel is not inferior to the method with foil
Typically, clamps are sold in packages with a separate compartment for each unit, which will prevent them from getting lost or broken.
What are the advantages of clothespin clips
Plastic caps for removing shellac have many undeniable advantages and benefits. We consider the most important thing.
- The products have a universal size and therefore are ideal for the fingers of any woman.
- The procedure for removing shellac with clamps is completely painless and harmless to health.
- The clamps use comfortable springs, elastic and tight, thanks to which they hold tightly and do not slip.
- When using such caps, there is no need to use film.
- Since these products are reusable, you can forget about any problems and difficulties associated with removing shellac for a long time.
We recommend:
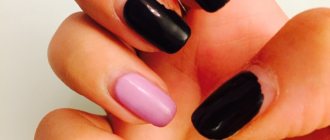
Black and red manicure
Thanks to all these positive qualities inherent in capsule clip-on shellac removers, these convenient products deserve only the most positive reviews.
Clamp Manufacturers
The most popular manufacturers of clips for removing gel polish are Mirage, Reusable Keeper and Makartt. The design of the tools from the first two companies is the same, but Makartt presented their own version. If in the first case the design looks like a clothespin, then here the clip opens using a recess on the top cover. This can be a pain when all the fingers are closed and you have to use your fingernail to catch the notch to open the clamp.
Makart clamps
It cannot be said that there are any significant differences between the clamps of these manufacturers. They are all made of plastic with a ribbed interior to securely hold a damp cotton pad. There are 10 or 5 pieces in a package (usually leg clamps are sold in 5 pieces). Designed for safe and harmless removal of gel polish from nails. Products from these manufacturers will serve long and reliably.
Feedback on use
Reviews posted on the Internet indicate the proper quality and ease of use of the devices.
Maria, Samara:
“I purchased clips for removing gel polish, the reviews of which inspired confidence. Now removing all stubborn coatings takes no more than fifteen minutes. With the help of multi-colored tools, gel polish can be quickly and flawlessly removed without any injury to the nail. The caps stick tightly to your fingers and don’t tend to slip off like regular foil.”
Svetlana, Moscow:
“Removing gel polish with special clips at home has become my favorite activity. Multi-colored clips save time and nerves, coping with the removal of coating perfectly. I purchased my set about a year ago. Even with frequent use, the items have not broken and still do their job well. I recommend this convenient invention to girls who are struggling with how to remove gel polish without foil!”
Removing gel polish using clamps
Using clips, you can eliminate the need for foil entirely. Some people still add it out of habit, but this is unnecessary.
Clip clip
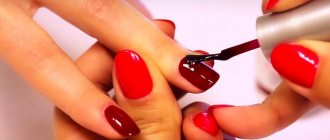
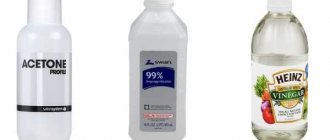
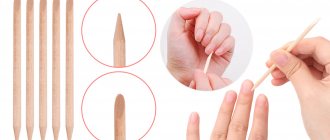
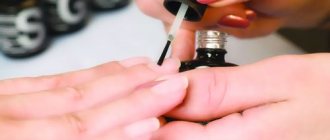
For the procedure you will need a nail file and a spatula, nail polish remover or a special remover, and cotton pads. Experts advise smooth layer of gel polish before removing it This will allow the liquid to penetrate deeper and faster into the gel layer.
Soak small pieces of cotton pads and apply to the nail . Secure the clamps and leave for 10 minutes .
The big advantage of this method is the ability to re-close the clamp if the varnish has not yet peeled off. If the varnish does not budge, you can hold the clamp for another 15 minutes. There will be no harm from this.
Gel polishes are difficult to remove at low temperatures, so you can use a hair dryer or UV lamp to speed up the process. The main thing is not to heat the clips for too long, so as not to soften the plastic.
remove cotton pads using circular movements . Remove leftovers. It is advisable to carry out a restoration procedure after removal. The clamps do not need sterilization if used by one person. Otherwise, you can wipe them with alcohol.
This video tutorial provides instructions on how to use clips when removing gel polish compared to the traditional method.
Basic set of nail extension tools
Before starting the nail extension procedure, a novice master must prepare a set of necessary materials and tools. With their correct selection, a woman will be able to do her own manicure.
Basic set of tools for nail extensions:
- UV lamp;
- a set of files of different shapes (oval, rectangular, boomerang) and sizes (100, 120, 180 grit);
- pusher;
- modeling brushes (straight and tapered);
- four-way buff.
Let's take a closer look at each of the tools and determine which one is best for a novice master to choose.
See also...
✅ How to extend nails with gel: all stages with description
✅ You need to be modern: we study the signs of outdated makeup
✅ Which nail extension gel is better to choose?
✅ How to cover your nails with gel polish at home?
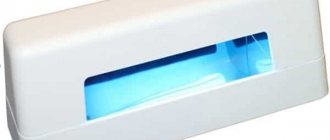
UV lamp
The lamp is selected with a power of 24-36 WATT. The tool is necessary in the procedure of nail extensions and when covering them with acrylic. The functions of the UV lamp include:
- gel crystallization;
- protecting the nail plate from the appearance of a fungal infection (it can occur as a reaction to the application of a foreign substance to the nails).
It is not recommended to look into a UV lamp during the nail extension procedure. This action may harm your eyes.
It is recommended to initially select a powerful ultraviolet lamp. The rate of crystallization of the gel on the nails depends on this indicator. When choosing a tool, beginners should pay attention to its structure. The device is a small box with a hole for two hands. Inside there are lamps (one or two, the number depends on the power), protected by a foil coating. The use of foil is also necessary for precise focusing and amplification of ultraviolet radiation power.
When applying nail extensions, pay attention to the serviceability of the lamp and its appearance. It should not have cracks. It is not recommended to keep UV lamps in rooms with high humidity or touch them with wet hands, as this can lead to damage to the instrument.
A selection of lamps that a novice master should pay attention to:
Lamp for nail extension CND UV Lamp 36W
UV lamp for extensions JessNail 36 W
Lamp for nail extension LED+CCFL “Diamond”
Nail files
When choosing a file, a novice master should pay attention to the following criteria :
- shape - oval, rectangular or boomerang-shaped;
- material - soft sandpaper or ceramic base;
- functions - the file will be used for polishing nails, grinding, etc.;
- purpose - for natural nails or those treated with gel, acrylic;
- abrasiveness - the hardness of the tool. It is determined in grits (from 80 to 400). Index 80 is the hardest file, 400 is the softest.
Each file has its own purpose. For example, oval is used to give shape to nails and to straighten them. This type of file is also used to shorten nails. The rectangular shape of the instrument has functions similar to the oval one.
A boomerang-shaped tool is convenient to use if you need to round the edges of the shape of the nail plate. The second way to use a boomerang-shaped file is to file away the gel (acrylic) in the cuticle area.
When choosing files for nail extensions, we recommend paying attention to the following:
Oval file for nail extension
Rectangular nail file
Boomerang file for nail extension
Pusher
The second name of the tool is scraper. It is used in manicure, pedicure and nail extensions. A pusher in cosmetology is used to push back the cuticle on the nail.
When choosing a scraper, pay attention to its condition and shape. It is selected depending on the shape of the nail plate. Pushers are:
- oval;
- square;
- semicircular.
The pusher recommended for beginning masters is Mertz 109 . It has a visually pleasing design and structure that makes it comfortable to hold in your hands. The Mertz 109 pusher has a universal shape, which allows you to push back the cuticle on any nail shape.
Pusher Mertz 109
Modeling Brushes
To do nail extensions, a novice artist will need to purchase gel modeling brushes. When choosing them, you should pay attention to the material of manufacture. Brushes must be made of synthetic bristles. To create a flat surface on the leg, the composition of the tools must be rigid.
When choosing brushes for modeling, you should pay attention to the consistency of the gel. If it is liquid, then choose narrow brushes; if it is thick, then wide models are suitable.
Four-way buff
An indispensable tool for nail extensions is a four-sided buff. It can be used to polish and polish nails of different sizes and shapes. The buff copes with all imperfections on the nail plate, smoothing it out and giving it a natural shine.
A standard buff has 4 sides and each of them has its own purpose:
- first - it is used to model the desired shape of the nails;
- the second - levels the nail plate, making it even;
- the third is intended for polishing flaws;
- fourth - polishes nails to shine.
When choosing a buff, pay attention to abrasiveness. Suitable for nail extensions are from 300 to 900 grit.
The buff must be disinfected after each use. This will prevent the proliferation of pathogenic microorganisms.