Making your nails hard and durable is what every girl wants to achieve when turning to nail extensions. It seems that such a complex procedure can only be done by experienced professionals in beauty salons, but this is not so.
Any girl can do home nail extensions using toilet paper and starch, and the cost of the procedure does not exceed the cost of a box of matches.
How to do nail extensions with napkins: instructions
Despite the absurdity of the method, it has become widespread among girls who are not masters and prefer to do manicures at home, on their own. The main advantage is that there is no need to purchase molds or special expensive components for modeling. The whole method is quite simple, and with a little skill and experience you can grow quite decent, beautiful nails. The preparation procedure is not much different from the classic extension.
How to do nail extensions with napkins:
- It is necessary to sand the upper surface of the nail to fluff up the scales and lift them. After this, the pterygium must be removed. This can be done using an orange stick, a pusher, or a flame cutter, which allows you to go deep into the sinuses and sinuses.
- After this, a dehydrator is applied to the surface, it can be ordinary alcohol, as well as a primer. If extensions are being carried out for the first time, and there is no artificial material on the nails, then it is imperative to use an acid primer.
- This will protect the nails from peeling and artificial material coming off along with the napkin. After this, you need to apply a thin layer of base to the nail with rubbing movements, but do not dry it.
- After this, a thicker layer of base is applied to 2/3 of the nail, starting from the tip to the cuticle, on which a napkin is laid out. Please note that the napkins must be cut in advance into pieces of the required length, as well as a width that is equal to the width of the nail.
- It is necessary that the corners of the napkin continue the lateral parallels of the nail. Thus, this will allow the napkin to become as accurate as possible during extensions. After you place the napkin on the wet base, you need to use an orange stick and press the napkin into the liquid with a stamping motion.
- It is necessary that it is completely saturated with the base; there are no light areas that are not saturated with the base gel. After this, you need to place the nail in the lamp so that the base dries and the napkin sticks.
- After this, take a thick brush and liquid base. It is necessary to moisten the brush in the liquid base and completely saturate the napkin backing. It is necessary that the entire free edge becomes wet, the napkin is completely saturated with the base.
- Try not to pour too much material, but do not leave areas that are not saturated with polymer. Dry for one minute in the lamp. While the base is hot, use reverse tweezers to pinch the arch and make the nail narrower.
Preparation
How the procedure is performed
The technology of nail extension or correction using a base is carried out according to the standard scheme. It may vary slightly depending on the type of product used. Typically, the nail extension procedure includes the following steps:
- Prepare the plates and the skin around them well for extensions. To do this, file and sand them, treat the cuticle, and also degrease the surface and apply a primer.
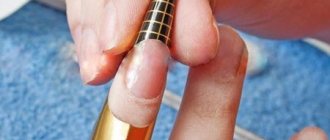
- Secure the form under the free edge of the nail and use a brush to carefully apply the base coat. It is necessary to correctly distribute the product over the entire surface. Starting from the root zone, apply a thin layer, thickening it towards the border of the plate and the future artificial tip.
- Dry your nails under the lamp, then remove the forms. Re-coat your nails with another coat of base coat.
- After hardening, polish the surface of the plates and give them the desired shape. Apply the gel of the desired color or decorate your nails with decorative materials.
In addition to traditional extensions, the base is perfect for correcting or eliminating small defects. The procedure follows the same scheme, only manipulations are carried out on a specific problem area.
How to do nail extensions with a napkin and base?
After this, you can proceed in several ways. It all depends on what materials are available.
How to do nail extensions with a napkin and base:
- Next, you can simply level the surface of the nail using a rubber base. In this case, there is no need to use any more modeling materials. However, using this method you can increase a small length.
- The base as a whole is not as strong and hard a material as gel, acrylic or polygel. Therefore, it is best to increase a small length, about one or two. Nails of this length will hold up well, even with the use of a base, without the use of hard materials.
- After this, you can, if necessary, file in the cuticle area and also do a manicure. If you are confident in your abilities, you can get a manicure at the initial stage, when the nail is being prepared for extensions, and it is filed down.
- If you have little experience, then you can cut the base directly, leveling its edges, as well as irregularities near the cuticle. In this case, it is better to postpone the manicure so that using a file in time to avoid fluffing up areas of the skin and injuring them. Only after extensions can you do a manicure.
Base with napkin
What is a base?
The base layer is usually used as the basis for a decorative manicure or before starting nail extensions. It is a thick coating, usually transparent. There are also bases with light flesh tones.
Some manicurists use this base as a material for extensions, as it has distinctive properties:
- well used for smoothing the nail surface and eliminating external defects;
- helps strengthen nails during extensions, as an additional layer is created, making the nails thicker;
- ideal for correction after modeling;
- makes a strong connection of natural plates with artificial turf, as well as decorative elements;
- easy to use, as it does not require additional application of base before performing a decorative manicure;
- protects natural nails from aggressive colored varnishes and other chemical materials;
- a base with a natural shade replaces colored gel coatings.
@oks.nails_brn
The base layer has its disadvantages. So, when building up, it can sag significantly or become damaged during operation. The reason may be the wrong choice of product or excessive stress on the nails after the material has hardened.
Gel nail extensions using napkins
If you decide to use a solid gel, then a leveling layer of gel is applied on top of a regular napkin backing.
Gel nail extensions using napkins:
- It is best if it is single-phase, constructive and fluid enough to work in equipment without sawdust.
- This will allow you to straighten the nail without cutting it after drying in the lamp.
- Remember, if you are using camouflage gel, it is best to apply it in two stages, since due to the presence of pigment it may not dry out in a thick layer or burn very strongly in the lamp.
- After the nail is ready, it is covered with gel polish and the necessary design is made.
- If you don’t yet know how to work with machinery without sawdust, then after laying out the material and drying it, sawdust is carried out.
- If you have a router, you can make the sawing using hardware technology. For these purposes, a red carbide milling cutter is used.
- It removes the material as gently as possible, without leaving grooves; after such filing, it is enough to treat the nails with a buff and apply the coating.
Nail correction
Preparatory treatment of the nail
Every girl is interested in how to properly and beautifully extend her nails with gel polish, but you should take into account that first of all you need to carefully prepare the nail plate.
Preparation is carried out in several stages:
- Treating hands and nails with disinfectants to prevent infection during work.
- Cut the cuticle , having prepared it in advance and treated it with a special softening oil. Before cutting, the skin is carefully moved using a pusher or an orange tree stick. This procedure is mandatory; it helps the gel and nail adhere better.
- Shape the nail by cutting and filing the free edge.
- In order for the grip to be good and reliable, it is necessary to file the surface of the nail plate . There is no need to remove too thick a layer so as not to damage the nail structure. You need to process in the direction from the base to the free edge.
- Brush off any sawing dust using a wide brush. Under no circumstances should you touch the treated nail with your fingertips, so as not to leave greasy marks.
- Degreasing the nail is done using a special product, they come in the form of sprays or liquids.
- Before applying the gel itself, it is necessary to treat the surface with a primer , which must dry completely naturally. This is another procedure for degreasing the nail.
Don't miss the most popular article in the section: How to extend nails with gel polish. Nail extension instructions for beginners. Photo.
Rules for nail extension with a napkin
Many people are concerned about the question of which napkins to choose for extensions? The ideal option would be lint-free fabric wipes, which are used to remove the sticky layer from gel polish.
Rules for nail extension with a napkin:
- Regular wet wipes, which are sold at any hardware store, will also work. They must be dried before use.
- The main advantage of such napkins is that they contain long fibers that are perfectly saturated with the base and hold their shape well. At the same time, the nails are really strong and can be worn well until correction.
- We do not recommend using paper napkins for extensions, since after completing the procedure you need to cover them from the inside with a thin layer of base. This will prevent the napkin from getting wet and peeling off the natural nail.
- However, many girls decide to completely get rid of the napkin, in which case it must be cut out using a carbide cutter from the inside. The end of the nail is sealed with a base or top coat.
Repair with a napkin
Instructions
Using biogel for nail design requires careful implementation of all stages of this procedure. Attentiveness and accuracy of actions will ensure their beauty and dry the gel , preserving its quality for a long time.
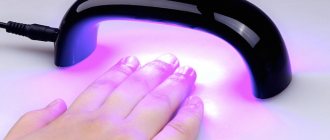
The only way to dry the gel No matter how long you expose your nails to the sun, no matter how long you wait, the coating cannot be fixed except with the help of a UV lamp. It can be freely purchased at a specialized beauty salon.
The procedure for nail extension using biogel lasts about one to one and a half hours. And the coating is fixed in a matter of seconds. It is worth noting that previously used acrylic gels required longer exposure to ultraviolet radiation. Of course, this was in some way detrimental to the health of the skin.
A varnish should be applied over the biogel, which dries naturally within a few minutes. Thanks to the high adhesion that the gel , the varnish stays on the surface for a long time.
Bio gel lasts on nails for about two to three weeks. This largely depends on the fragility and health of the nail plate. You can remove the coating using an ethereal solvent that strengthens your nails.
Helpful advice The uniqueness of biogel lies not only in its beauty, but also in its composition that strengthens the nail plate. The creators of the material excluded a number of harmful components from its composition, such as acrylic acids, methacrylates and plasticides. The newest biogel contains about sixty percent proteins.
Nail extension and design with biogel for women with nail problems is an ideal option. Their fingers will now not only be beautiful, but also healthy.
How to do nail extensions with a napkin and polygel, acrylic, acrygel?
The napkin essentially serves as a kind of substrate and allows you to abandon the use of upper and lower forms. This is an excellent solution if you went on a trip, vacation, accidentally broke a nail, but there are no materials for extensions. In this way you can grow a small piece of the nail, or even the entire nail of a short length.
How to do nail extensions with a napkin and polygel, acrylic, acrygel:
- Experienced craftsmen do not use this method due to the availability of professional materials that allow them to complete the job much faster. You can find out how to extend nails onto the upper forms in the article.
- Acrygel can be used as a construction material that is laid out on the substrate. It is laid out in a similar way to gel, but after laying out the acrylic it is necessary to file it.
- There are no problems with this, since the material is very soft, pliable and easy to saw. It is applied using a flat brush dipped in degreaser. You can use professional products or regular medical alcohol.
- After drying in the lamp, sawing is carried out using a buff or a 180 grit file. The nail is covered with gel polish.
Complex nails
Step-by-step photo and description of the procedure
Before you start doing your own manicure, it is recommended to go to a professional manicure at least once to take a closer look and become familiar with the nuances and intricacies of its implementation. After that, feel free to do a manicure at home using step-by-step instructions.
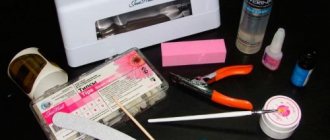
- Prepare all necessary materials and tools.
- Using a file, carefully remove the top glossy layer of the nail. This is a prerequisite in order to improve the degree of grip.
- Glue the tip of the selected size to the nail plate, clamp it and wait a while.
- Cut the tip with scissors to the desired length, then use a nail file to give it the desired shape.
- It is recommended to stir the gel before use. After which it must be carefully applied to the surface of a natural nail that is not covered with a tip.
- Dry your manicure with a UV lamp for about two minutes.
- Apply a layer of gel again. After each step of applying the gel there is a drying step with a lamp. Apply the required number of layers of gel to achieve the desired thickness.
- Use a degreaser to remove the sticky layer.
- Make a coating with colored varnish, French manicure or other original design.
Tip: To ensure that the finished manicure is strong and lasts a long time, it is recommended to designate a so-called stress zone. This is the approximate middle, the center of the natural nail plate. The gel layer in this area should be as thick as possible, and towards the edges it should be minimal. This way the shape will be rounded, natural and held securely.
How to do nail extensions at home with napkins?
The most interesting thing is that tea bags are often used instead of napkins. In principle, this is a kind of analogue of napkin extensions, since paper, cellulose or thin fleecy fabric is used as a substrate.
How to do nail extensions at home with napkins:
- For extensions, you can also safely use handkerchiefs or thick kitchen napkins, which are multi-layered. Please note that it is best if they are white or beige.
- Pink color is allowed. Remember that the inside of the nail will be visible, so all the designs that are applied to the napkin will be visible.
- It is imperative to layer the napkin to get the thinnest layer. Only after this proceed to cutting into several parts.
Preparation
Nail extension with a napkin at home - short nail bed
Masters rarely use this method due to the presence of a large number of modern techniques. However, this method is a real solution if the client has a very short nail bed and developed side ridges.
Nail extension with a napkin at home:
- In this case, the nail is deeply recessed, making it impossible to properly cut and place the lower shape. The placement of the upper forms is hampered by the side bolsters. In this case, the extension turns out to be crooked or even impossible.
- Modeling on a napkin is an excellent method to help grow nails for a person who bites them, as well as for those who have a short nail bed and developed side ridges. After the nail has grown a little, you can safely use other materials.
- How to correct nail extensions using a napkin? In fact, the correction is carried out quite simply, by laying out the material.
- It is necessary to file down the regrown part, remove the coating, that is, colored gel polish, perform a manicure and only after that apply the gel or base to the regrown part. After polymerization, standard filing is performed.
Corner repair
Nail extension on a napkin: reviews
Below you can read reviews about nail extensions using napkins.
Nail extension on a napkin, reviews:
Olga, 23 years old. I first encountered napkin extensions 5 years ago. Back then I had very difficult nails, I bit them a lot. I wanted a beautiful manicure and started dating a guy, so I went to the salon. The master suggested extensions using napkins. I had my nails done for a month and then had them corrected. The extensions were done using acrylic. I don’t bite my nails anymore, I’ve grown them longer, and now I strengthen them with a base.
Elena, 22 years old. I’m not a manicurist, I’m a student, so I don’t have the means to go to a salon. I first learned about this type of extension on YouTube after watching a video. I took the base and the lamp from a neighbor. I did everything as in the video, and it turned out well. Now I do my own nails. Since then I managed to grow the length; I no longer use napkin extensions.
Svetlana is 28 years old. I am a manicurist and was critical of this type of extension until I came across a client with a very short nail bed. She bit her nails terribly; some of them had onycholysis; there was nothing to put the nails under. I decided to use this technique. Sometimes she helps me out. This happened in that case too. The client has become my regular, these nails wear very well. I build it up with a base, my nails turn out thin and look like natural ones.
In general, such techniques are universal, and can be used if a person has a damaged nail, it may be injured, so part of it simply peels off from the nail bed. In this case, it is impossible to substitute the form, and napkin extensions will save the situation.
