- 2820
- 20-05-2020
- Author: Mysekret Team
- 0
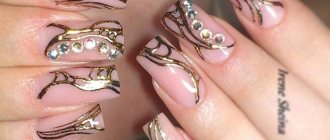
Gold manicure is not only beautiful and fashionable. It is also very stylish if you choose the right design. The length of nails can be both long and short. And the shape is both square and ballerina, and almond, and oval.
Nails with gold particles look original and festive. This is a manicure that is suitable not only for New Year or corporate events. This design is relevant in spring and summer, and, of course, in the autumn-winter period, when the time comes for garlands, confetti and other bright decorations.
Nail designs with gold can be done using foil, glitter, sequins, broken glass particles, scales, and ribbon. The golden metallic rub gives a beautiful effect. There are also special gold-colored gel polishes that contain shimmering microparticles.
Gold foil particles or “liquid metal” are suitable for glossy and matte manicures. They can also be applied to a single-color manicure, or a colored rainbow, monochrome, in cold or warm shades.
See also...
✅ Fashionable floral manicure: 50+ ideas that are trending
✅ Light manicure is trending this year: 100 gentle ideas
✅ Elegant manicure: 50+ ideas for graceful adult women
✅ Fashionable nude manicure 2019
This year, gold nail art designs are often combined with French manicure, with holes, geometric and abstract designs. Ideal colors to combine with gold are white, green, black, red. The combination of gold with purple, olive, and emerald is also considered stylish. The color of the sun, orange, and pomegranate also looks harmonious with a gold design made of small crystals, stones, ribbon, and foil.
Gold nail designs never look boring. It is always bright, so it can be the main accent in the image. In summer, nails with gold manicure shimmer beautifully in the sun, and in winter they sparkle gently against the background of snow.
What is nail casting
Casting on nails is a special technology for applying an interesting pattern by embossing transfer foil onto the gel. In rare cases - gel polish. The design is most often performed on extended nails, since the default technology involves the use of gel as the main material.
It is noteworthy that there are several separate subtypes of casting: “liquid stones”, simple patterns, deep and complex ornaments. Naturally, each subspecies has its own special execution technique, which should be taken into account when choosing a design. That is, casting does not necessarily mean stones on nails, nor vice versa.
Not every gel is suitable for casting. So, for example, a special casting gel is usually thicker than any other, most often black or very dark in color. Foil is used mainly thin, tear-off or in rolls.
Stones on your nails!?
To indicate their originality, women use beautiful clothes, complex hairstyles, bright makeup and unique nail designs. Applying liquid stones to the nail plate is the best solution for creating a bright, unique image.
Luxurious manicure in burgundy tones
Liquid stones combined with French
Manicure in refreshing light green shades
The idea of luxurious design of the nail plate belongs to professional stylist Ekaterina Miroshnichenko, one of the authors of modern nail techniques.
Beautiful liquid stones are obtained on nails using a polymer substance that looks three-dimensional, three-dimensional, slightly convex. Polymerization completes the process.
Types of nail designs casting
The simplest cast manicure is abstract designs that the master applies to the nails. It can also be dots and various stripes. Beginning craftsmen often cover the entire nail with foil. A design that uses white French manicure and gold will look beautiful. Or French can be combined with gold varnish.
Liquid stones add a special luxury to your nails. Essentially, these are polymers that harden in a special UV lamp, which is used for gel polish. The stones not only imitate precious ones: rubies, emeralds, sapphires and even semi-precious ones - malachite, but also reproduce their natural shape.
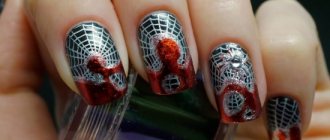
Stained glass and mosaic patterns will look beautiful on nails. It is not possible to apply such a pattern right away; it requires skill. The black and red design looks very bright and eccentric.
Liquid stones - the main trend in manicure
Nail designs in the form of liquid stones help make your manicure sophisticated and refined. There is no need to use expensive materials, so you can achieve beauty and shine even at home. Among the disadvantages of a fashionista are:
- in beauty studios, the service is expensive because enormous hard work is done to create the effect of liquid stone;
- Not every master can perform a flawless manicure, since the service is new and the technique is not yet familiar to everyone.
In beauty studios, manicure services with liquid stones are expensive, because enormously hard work is done to create the desired effect.
Not every master can perform a flawless manicure, since the service is new and the technique is not yet familiar to everyone
What matters in the end result is how the stones look. They should have a rich color, shimmer, and unique shine. Imitation of green malachite, turquoise, crimson and red ruby, rose quartz, and all shades of sapphire adds luxury.
The popularity of liquid stones in 2022 is off the charts, so manufacturers of high-quality varnishes have developed suitable stained glass gels. The CNI company produces gel polishes that are easy to create liquid stones. Excellent stained glass options can be found in the Nogtika product line. Specially developed varnishes for the design of liquid stones are produced by the YRE brand. The line offers a wide selection of colors, so you can make any plate design.
What matters in the end result is how the stones look. They should have a rich color, shimmer, and unique shine.
Imitation of green malachite, turquoise, crimson and red ruby, rose quartz, and all shades of sapphire adds luxury
The MagikNail company offers to deviate from the basic rules and simplify the work of the master, where they offer special stickers that replace painstaking work with ready-made holographic stones.
It is quite difficult to compare manufacturers and their offers, since the use of gels and stickers leads to different amounts of time and final results. Regarding the cost, there is also no similarity. Therefore, each master must choose for himself: what material is more convenient for him to work with.
Advice! Confidence in materials is a guarantee of quality. Therefore, you need to use licensed drugs. Then the decor will be durable and effective.
The popularity of this type of manicure is growing, so manufacturers are producing special coatings for creating designs with liquid stones. Special stickers have also appeared that imitate this technique
What is nail foil and its types
Foil for manicure differs from the usual one used in everyday life. It is thinner and fits easily. Several types have now been developed, each with a different method of application:
- Translated, untranslated. Transfer foil is mainly produced in rolls placed in transparent plastic jars. Very easy to use, suitable for beginners. The thinnest of all types. Looks beautiful on plates in both glossy and matte versions. The name of the type means that the design from the tape is transferred (copied) to the surface of the plate, which is pre-coated with a special glue or varnish base.
Non-transferable nail foil is also available in rolls, but its structure is denser; use requires special equipment and experience.
These types can be sheet, tear-off, continuous. Tear-off foil is more convenient; just detach the desired size along the dotted line. The continuous option involves cutting out a size according to the shape of a plane or pattern. In the sheet version, individual elements are cut out using a stencil.
- The crinkled tape is thinner than other types of film. Looks like a noble metal on the plates.
- Embossed tape is produced in reels or sheets. Various colors, patterns, elements.
- Thermal material involves the use of devices that emit a warm air stream, which makes the structure more elastic and easier to apply.
- Tape material up to 3 mm wide is produced in skeins. Has an adhesive base. Used to create nail designs.
- Charminons are stickers with an adhesive base. Easy to use.
- Liquid foil for nails is a dense, viscous composition, reminiscent of a varnish coating, only in its composition it contains a large number of different sparkles.
Foil for nail design
We won’t be lying if we say that rhinestones have somewhat lost their former relevance, but girls still have a penchant for luxurious glitter on their nails. What to do - tame your desires or find a healthy alternative to them? For an experienced manicurist, the answer is obvious - use a trendy and unusual nail art design, such as a foil print, reminiscent of a glare of precious metal.
The best photos that reflect the essence of such a popular trend in manicure are collected in our inspiring selection.
Foil for casting
A special casting technique replicates the metallic sheen of the same type of artistic activity. Silver or gold foil creates the illusion of a product “forged” by the hand of a skilled craftsman.
Peculiarities
As already mentioned, casting is a type of nail art that requires foil to create. This technique has its own subtleties, and without clear instructions it cannot be implemented, because fixing the foil on the nail is not so easy.
The cast design looks much more impressive on long nails, so it is often used on extended nails or tips. The impressive shine of foil has made it possible to use it in many designs and discover new styles.
Gold foil has become the most popular; it is often used in combination with colored gel polishes. A real sensation was created by such shades as purple, black, red, emerald - they all go perfectly with gold casting. Using this combination, you can create a festive manicure with a spectacular pattern. Thanks to the foil, the nail is decorated with an intricate image of various curls and geometric lines.
Tools for creating manicure casting on nails
Ideal casting on nails is achieved if you choose the right basic materials:
- foil of your choice;
- colored and black acrylic gel;
- professional sculpting gel;
- liquid to remove the sticky layer;
- manicure brushes;
- Ultraviolet lamp;
- protective covering;
- liquid stones.
Foil for casting on nails
Which foil for casting nail designs is better to choose? Foil can be used as transfer or non-transfer. It is easier for a beginner to print translated material. It is translated on the finished contour. There are a wide variety of foil shades available. To draw intricate patterns, the gold foil shade is most often chosen.
The pattern that you want to apply to the nail surface is cut out of non-transferable foil. You can use pictures from the Internet, or come up with your own. Afterwards, the nail is degreased and covered with a special varnish, and a pattern should be applied on top. Then we apply a base or clear varnish.
To create a design, the foil is cut into pieces, which are completely random and different from each other. Then they are laid out over the entire nail surface in the form of a specific pattern. You can decorate only part of the nail with foil, or you can create complex graphic compositions. The main thing is to dream up your imagination.
What is casting gel?
The gel is applied as a base for casting. Shades of gels can be varied. They are mixed to create something interesting. You can often see golden and silver shades of gel on store shelves. A good product should be sticky.
Casting paint
Casting paint is used for complex design patterns. Using this tool you can get drawings with the finest lines. This is due to the fact that the gel is viscous. The paint can dry in two to eight minutes under a UV lamp.
To create three-dimensional decors, paint is applied not in one, but in two or more layers. Each layer should be dried in a lamp.
Detailed instructions for creating nail casting for beginners
In order to make such precious beauty on your fingers, you need to prepare the following materials:
- foil (gold or silver);
- acrylic gels;
- thin cysts for creating patterns;
- UV lamp;
- fixative
We perform a manicure with casting step by step:
Step 1
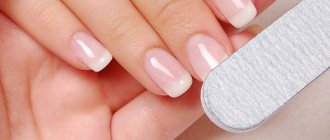
We prepare the nail plate: we make corrections, polish, and degrease the surface.
Step 2
We apply the selected color gel to the nail - the basis for the future design. You can decorate your nails with colorless gel. Dry in a UV lamp for 2 minutes, remove the sticky layer.
Step 3
Using dark-colored gel, we draw patterns on which gold or silver leaf will be applied in the future. And again we send our fingers into the lamp.
Step 4
Take the foil and press its matte side to the nail. Tear it off sharply and dry it in a lamp for 3 minutes. We cover the nails with a layer of fixative, and again put our fingers in the lamp. Finally, remove the sticky layer.
As you can see, making a cast manicure is not difficult, and the end result is striking in its beauty, sophistication and sense of complexity in the design.
How to do it yourself?
The step-by-step casting technique consists of several points. But before you start performing the technique, you need to prepare your nails. After all, you don’t want to spend a lot of effort and then watch how after a couple of days the casting simply cracks and crumbles. If you do the design correctly, the result will please you for about 3-4 weeks.
Step-by-step casting takes place in the following stages.
- Do a standard manicure, that is, use tweezers to get rid of excess cuticle. Use a file to give your nails the desired shape and carefully sand the surface of the nail so that it becomes matte and smooth.
- After preparations, apply primer base to the nail plate. Dry thoroughly under the lamp, cover with a colored varnish of your choice, but it is advisable that the shade matches the future ornament. If the gel polish is pale, then apply a second layer for brightness.
- Dry the main background thoroughly with an ultraviolet lamp; if desired, you can add a pattern or spraying. The main thing is that the casting is harmoniously combined with the added design.
- After thorough drying, you need to remove the sticky layer, and on the treated nail, using a brush and a special contrast gel, create the desired pattern, which will later be covered with foil. It is better to go over the helium contour more than once to give the drawing volume.
- Dry the ornament a little and press the foil with the wrong side against the nail plate using tapping movements until it is completely smooth. Next, sharply remove the foil, then gold dust will be imprinted on the pattern, giving the manicure some zest.
- The fruits of your efforts must be coated with top gel, dried in a lamp for a couple of minutes, and the sticky layer removed.
Basically, this step-by-step instruction applies to transfer foil, because it is the most convenient, and even beginners can use it in practice. But there are other ways to create casting on nails.
How to do casting at home
You can perform nail design using the casting technique at home.
To begin with, you should worry about purchasing the following devices and materials:
- silver, gold and other foil;
- thin brushes;
- acrylic gels of different colors;
- stained glass gel designed to imitate natural precious stones;
- sculpture, protective gel and varnish;
- ultraviolet lamp.
When the necessary materials and devices have been purchased, you should first make a simple abstract pattern using any color or completely cover the nail plate with this material, following the sequence of actions.
The order of casting techniques for any design decisions should be as follows:
- A base gel is applied to the surface of the nail plate If a specific color is not provided as a base, a protective colorless gel coating is created on the nail plate.
- The helium layer is fixed by exposing it to a UV lamp for two minutes.
- Using a contrast gel, the planned pattern is applied to the surface, which will later be covered with foil. To do this, use thin brushes. The application of the helium outline of the pattern is repeated several times to give the pattern volume.
- The helium pattern is again cured using a UV lamp for two minutes.
- The foil is pressed with the wrong side to the surface of the nail and after a few seconds it is sharply pulled away from it. In place of the applied helium pattern, a shiny foil pattern is imprinted. It looks voluminous because it completely covers the surface of the previously applied helium pattern.
This technique is focused on the use of transfer foil and is most convenient for beginners.
You can also make a drawing yourself, including imitation of precious stones. First you need to create the outline of the stone. To do this, select a gel of the appropriate color. The gel outline can be outlined using different colors to create a sun flare effect.
After fixing the contour with a UV lamp using stained glass gel, the volume of the stone itself is created, which is also fixed with a UV lamp. You need to apply a sculpting gel on top of the stone. You should start creating a design with liquid stones at home once you have gained experience in nail art using casting.
When making such a design, it should be taken into account that it does not last long. Therefore, a protective coating is used to secure it. Transparent varnish is sometimes used as such a coating. But this causes the foil to significantly change its attractiveness: its shine is lost and cracks and folds appear. In order not to harm the applied pattern, it is better to use a special gel as a protective coating. It should not be applied immediately after completing the drawing, but after several hours.
Manicure technology with casting and liquid stones
Do you still think that luxurious design is only possible in a salon setting? We dare to assure you that having acquired the necessary skills, you can repeat amazing nail art at home. We present to your attention a master class on creating nail designs with stones, including casting elements. For manicure you will need the following tools and materials.
- Brushes: angled, natural and hair.
- Gold foil (tear-off).
- Art gels of different colors.
- Stained glass gel. You can take any color, in this case azure.
- Sculpting gel (thick consistency).
- Protective gel.
- Ultraviolet lamp.
Step 1
Draw a French pattern with white gel. Then cure it in a UV lamp (2 minutes). Next, coat your nails with protective gel without dispersion and repeat the two-minute polymerization.
Step 2
Using black art gel, apply patterns that correspond to the future casting. Use a hairbrush and draw lines that are thick enough to allow the foil to adhere. Place the fingers in a UV lamp to cure for 2 minutes. Then apply the foil (matte side) to the nail and sharply tear it off. There will be a golden mark on the art gel line. Repeat the procedure for all patterns. The end result is the casting.
Step 3
Next, use colored gels to outline the place where the stone is “attached”. It is advisable to use two colors so that the emerald shimmers in the rays. After two minutes of polymerization, apply stained glass gel. In a composition of several colors, “liquid stones” turn out to be unusually beautiful. To fix the polymer, place your fingers in a UV lamp for 2 minutes.
Adviсe
Manicure casting is a fairly broad topic. There are a huge number of options and ideas. And there are even more subtleties in this matter. There is much more theory here than practical part. A number of tips to help make your design even more perfect.
- It is desirable that the shade of the gel polish on which the film will be printed is as close as possible to the color of the foil itself. If the tone is not imprinted somewhere, the color of the substrate will be visible. And if they fit together, the effect will be hidden as much as possible.
- The choice of foil itself is also important. There are some that print well, and some that don’t. The important thing here is to try.
- Try to make do with a minimum number of movements when printing. There is no need to press hard, the foil will be printed without titanic efforts.
- It is advisable that there is no foil at the end of the nail so that the nail can be sealed well on all sides.
- Do not paint those places with gel polish where the foil obviously will not be imprinted (side rollers and near the cuticle).
- Sometimes, when covering with top, pieces of the coating come off and slide down along with the top. It is worth polymerizing the foil a little before applying the top, and this problem will be solved.
Filling your nails
Not every gel polish is suitable for such a manicure. It should be thick and not runny. It is important to strengthen the nail well so that it does not bend and the coating does not crack. With the help of casting, you can cover the nail completely or create unique patterns.
Application technique:
- Before starting to work with the freshener, degrease your fingers so as not to stain the clean work surface. It is important to wait a minute so that it has time to evaporate. For the same reason, you need to degrease the skin around the cuticle.
- Before transferring the foil, it is recommended to wipe it with a cleaner on the back side to remove dust and deposits. All this affects the imprint.
- Gel polish is applied evenly in one layer, since any bumps and irregularities will be immediately visible.
- It takes a little longer to dry the color layer than usual. In a regular LED lamp about 2-2.5 minutes. Experiment with the timing and figure out what the best drying time is for you.
- Apply the foil to the nail, trying to cover a large area. There is no need to rush to tear it off. You need to give it a couple of seconds for it to stick, in which case the casting manicure will turn out very neat.
- Tear off with a sharp movement and continue imprinting on those areas that could not be captured. At the same time, try not to touch areas covered with foil so as not to wrinkle it.
- When the foil is printed, put your hands in the lamp for 15-20 seconds. Then it will grip the gel polish more strongly, and this will increase the wear time of the manicure.
- You need to seal the casting with top coat on all sides in 2-3 layers, like a slider. The foil should not completely cover the end of the nail. Just apply a minimal amount for aesthetics. If there is a lot of it, you can grind it off with a buff or wipe it with a sponge and cleaner.
- If desired, decorate your nails with rhinestones or patterns.
Casting on the entire nail.
If casting fails
For some reason, the manicure may not work out. This happens in several cases:
- The foil was loosely attached to the gel. As a result, we will get a blurry picture. The gel base must be sticky enough, otherwise the pattern will not transfer well and ruin the manicure. If something doesn’t work out during the work, we remove the damaged foil with a special liquid and do the coating again. It is advisable to choose high-quality foil.
- Some gels need to dry longer than usual - from seven minutes. In addition, it is advisable to select a powerful lamp. A weak lamp will not give such a good effect; the gel simply will not dry. It is necessary to timely replace the bulbs in the lamp.
- If done well, the manicure will last about two weeks.
Sources
- https://vashi-nogti.ru/dizajn/lite-na-nogtyah/
- https://www.pilka.su/lite-na-nogtyah-s-zhidkimi-kamnyami-v-domashnih-usloviyah/
- https://VseProKley.ru/raznoe/kak-kleit-folgu-dlya-nogtej
- https://prostonail.com/nail-foil/
- https://vplate.ru/manikyur/dizajn/lite/
- https://www.pilka.su/lite-na-nogtyah-s-zhidkimi-kamnyami-v-domashnih-usloviyah/
- https://krasota.guru/nogti/manikyur/lityo-na-nogtyax.html
- https://modnail.ru/photocat/po-stilyam/manikyur-lite/
[collapse]
