How to do casting on nails?
Nail casting is a type of extended nail design that is created using specialized tools. The design is created using metallized foil, gel, rhinestones and, of course, a UV lamp.
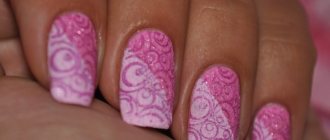
Casting on nails
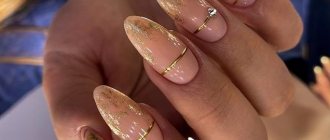
Casting is the creation of a unique design using foil stamping from polymerized gel designs.
To perform casting you need:
- Cover your nails completely with gel and draw a design on top with foil.
- Place your nails in a UV lamp for five minutes
- Then tear off the foil and cover with the finishing layer of gel.
Casting is based on making a pattern with imitation gold and silver, as well as applying patterns in the form of precious stones, curls, flowers, and butterflies.
Casting on nails
The general meaning of the technology and its features
Casting is a manicure for which it is preferable to have extended nails. This is due to the fact that it is performed using foil embossing, which is performed directly in the gel. However, often masters can also create casting on natural nails with gel polish. To do this, a layer of gel is applied to its plates, on which the casting patterns are already made with a second gel layer.
The general technique for casting on nails is as follows. Part of the nail or the entire plate is covered with gel. This gel is polymerized under a UV lamp, after which the future pattern is drawn on it with a new layer of gel with a thin brush. Foil is applied to the pattern, and the hands are again sent under the lamp. After polymerization, the foil is sharply pulled off and only its intricate pattern remains on the nail, which has managed to gain a foothold on the new layer of gel polish.
Nail casting technique step by step
The casting technique involves applying gel to both the entire nail plate and half.
Casting on nails
Nail casting 2016
The tools you will need to perform casting are: manicure set, gel, fine-tipped brushes, silver or gold foil, coating, UV lamp.
Casting on nails
We perform the technique step by step:
- We apply the gel as a basis to protect the nail plate from aggressive pigments
- We polymerize the first layer of gel under an ultraviolet lamp, apply colored gel, French
- We fix a colored background under the lamp
- We take a contrasting gel to apply the pattern itself, using a thin brush
- Create visual volume and dry it in a lamp
- Take the foil and press it tightly to the nail for 5 minutes.
- Rip it off sharply and let it dry in a lamp.
- Apply sealer and dry
- To create liquid stones, before the fixing layer we sculpt them from polymer gel
Advantages of casting:
- Manicure lasts more than two weeks
- Convenient and simple creation of a unique manicure
- Fast technique and application speed
- Custom nail art with exquisite details
note
If you are using false foil, then you will have to cut patterns out of it, then remove the backing to ensure that the adhesive covering the bottom of the foil is firmly attached to the nail plate.
You can make a mirror manicure that covers the entire nail plate with a beautiful and shining coating, resulting in a monochromatic decoration. This type of design is created using a film varnish, which you can buy at any cosmetic store. All you need to do is choose films according to the size of your nails, apply them to the nail plate and use a hairdryer to attach the coating to your nails. Excess film is simply cut off with nail scissors.
Stained glass and mosaic manicures done using the casting technique look very expensive and luxurious. This volumetric design is created using special stained glass varnishes - self-leveling varnish. This manicure looks transparent and voluminous in different colors. At the same time, your nails look crystalline and fragile, which creates a delicate and soft image.
Some stained glass varnishes have a fairly liquid consistency, and this allows them to be successfully used for casting designs with foil. For example, to create a spectacular Venetian mosaic, you just need to apply foil and cover it with stained glass varnish, then paint the stains with dark varnish. As a result, you get an elegant manicure in the style of an ancient Venetian mosaic.
We recommend: Manicure with cats - French, cat paws, eyes, whiskers and tails
Casting on nails - materials
Nail design using casting can be done at home. To do this, you should purchase the necessary materials with a variety of gel paints, several shades of foil, a UV lamp, and a set of manicure brushes.
Thanks to the use of foil, a beautiful mirror shine is created and this effect will depend on the color of the base gel.
Necessary materials:
- Medium-priced gel for creating a higher-quality coating.
- Liquid for removing the sticky layer from a coating or napkin based on alcohol.
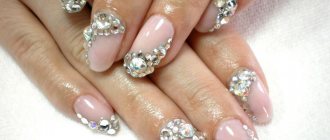
- If casting is combined with liquid stones, you will also need: stained glass gel, polymer stones and decorative jewelry, rhinestones.
Manicure with gold and liquid stones
Very often, cast nail designs are decorated with liquid stones. They create a very delicate, rich, luxurious nail look. The stones seem to sparkle like real ones on the nails, turn into real jewelry, and act as a key design element, for example, owl eyes, turtle shell, etc.
It is not difficult to make casting with liquid stones; the technique is as follows:
- The nails are covered with a base - gel polish of the selected color, and dried. Then the sticky layer is removed from them.
- A substrate of any shape for liquid stone is made using gel paint of the selected color. The background is painted with a thin brush.
- Take a gold or silver colored manicure transfer sheet and press it onto the backing.
- A pattern is made around the substrate, the intended design.
- The matte side of the sheet is adjusted to the pattern and removed with a sharp movement of the hand. Can be repeated several times. In place of the applied pattern there should be a casting.
- To create voluminous nails, a transparent gel is used. The gel is mixed with colored shellac on the foil in order to create the effect of natural stone: turquoise, malachite, onyx, amber, amethyst, agate, etc. Take a small ball of mixed gel paint with a brush and place it on the substrate. Dried in a lamp.
- The nails are covered with a topcoat and dried in a lamp for 2 minutes. The sticky layer is removed.
To create liquid stones, you can use a special polymer coating or sculpting gel. With these materials the stones will look naturalistic and more convex.
Gel for casting on nails
To apply and create a base for casting, you need to have a number of colored gel bases. By combining shades, you will get the desired color depending on the purpose and season of the manicure.
Most manufacturers produce this gel in silver and gold shades. A good quality material has sufficient stickiness, which can be checked in a store, and due to this, such a gel is actively used for casting.
Gel for casting on nails
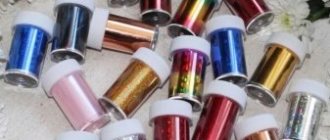
Foil for casting on nails
The emergence of new trends in decorative manicure has increased the product line of casting foil. Now you can buy foil in a wide range of colors and shades: with a metallic sheen, with gold and silver tints, with hologram patterns.
The foil is designed to perform all kinds of embossing, mosaics on nails, to create patterns on the entire nail or part of it. The casting design turns out luxurious when using foil in gold, silver and even bright red, creating an imitation of the Barocoque style.
Foil for casting nails
What is nail foil and its types
Foil for manicure differs from the usual one used in everyday life. It is thinner and fits easily. Several types have now been developed, each with a different method of application:
- Translated, untranslated. Transfer foil is mainly produced in rolls placed in transparent plastic jars. Very easy to use, suitable for beginners. The thinnest of all types. Looks beautiful on plates in both glossy and matte versions. The name of the type means that the design from the tape is transferred (copied) to the surface of the plate, which is pre-coated with a special glue or varnish base.
Non-transferable nail foil is also available in rolls, but its structure is denser; use requires special equipment and experience.
These types can be sheet, tear-off, continuous. Tear-off foil is more convenient; just detach the desired size along the dotted line. The continuous option involves cutting out a size according to the shape of a plane or pattern. In the sheet version, individual elements are cut out using a stencil.
- The crinkled tape is thinner than other types of film. Looks like a noble metal on the plates.
- Embossed tape is produced in reels or sheets. Various colors, patterns, elements.
- Thermal material involves the use of devices that emit a warm air stream, which makes the structure more elastic and easier to apply.
- Tape material up to 3 mm wide is produced in skeins. Has an adhesive base. Used to create nail designs.
- Charminons are stickers with an adhesive base. Easy to use.
- Liquid foil for nails is a dense, viscous composition, reminiscent of a varnish coating, only in its composition it contains a large number of different sparkles.
Casting paint on nails
Casting paints are used to produce exquisite design patterns of the highest complexity. Gel paints help create paintings with the finest lines due to their viscosity. These paints dry under a UV lamp for 2 to 8 minutes, depending on the manufacturer.
To obtain a voluminous decor, the paint is applied in several layers and each of them is dried. The most popular paint manufacturer is Masura. It offers the richest collection of colors and is much cheaper than its analogues.
How is casting done?
The execution of the cast pattern depends on the type of foil , which can be:
- translated;
- untranslatable (tear-off);
- on an adhesive basis.
If non-transfer foil is used, the procedure should be as follows:
- First, the selected pattern is cut out of it.
- Varnish or sticky gel is applied to the surface of the nail
- to the sticky varnish surface.
- It is secured with a colorless varnish or gel, which is applied on top.
Transfer foil is made in the form of thin strips or sheets.
The technology for applying the pattern in this case should be as follows:
- to the surface of the nail in the shape of the selected pattern.
- The entire nail surface is covered with thin transfer foil.
- After the foil sticks in the places of the pattern, it is quickly removed from the surface. At the same time, in places where the helium pattern is applied, the adhered foil remains and repeats the applied pattern.
Adhesive-based foil has a bottom sticky layer covered by a backing. It is produced in two forms: for the entire nail plate and in the form of random pieces.
Its application to the surface is the simplest:
- The protective backing is removed from the product and the adhesive side is pressed against the nail plane.
- Using a cotton swab, the “cast material” is carefully smoothed in the direction from the cuticle to the upper edge to level and remove all bubbles.
In addition, shiny material has a different appearance. Its surface can be mirrored, matte, holographic, or have various patterns and designs on a mirror background. Any variety of it can be successfully used to create original nail art.
Molding patterns on nails
Casting on nails always involves applying a variety of patterns, from openwork to the liquid stone technique. Mosaic and stained glass patterns are very popular, which require some skill and experience.
Stained glass casting
Stained glass casting
The casting design with a cracking effect in blue and gold color looks very noble.
Molding on nails in blue and gold tones.
The marble jacket with silver casting also looks very beautiful. For this purpose, silver-colored foil is used.
Casting liquid stones with a matte effect
Marble French with silver casting
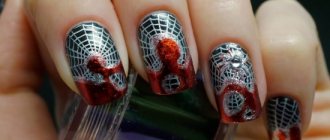
For bright, eccentric girls, the casting technique with an aggressive black and red design is suitable.
Aggressive red casting
Casting with a French jacket is an ideal solution for the holidays and for every day.
Casting with French
Stylish, fancy patterns made in gold, with the help of a floral jacket, are suitable to complement your everyday look.
Floral print
Owl casting on nails
Peculiarities
As already mentioned, casting is a type of nail art that requires foil to create. This technique has its own subtleties, and without clear instructions it cannot be implemented, because fixing the foil on the nail is not so easy.
The cast design looks much more impressive on long nails, so it is often used on extended nails or tips. The impressive shine of foil has made it possible to use it in many designs and discover new styles.
Gold foil has become the most popular; it is often used in combination with colored gel polishes. A real sensation was created by such shades as purple, black, red, emerald - they all go perfectly with gold casting. Using this combination, you can create a festive manicure with a spectacular pattern. Thanks to the foil, the nail is decorated with an intricate image of various curls and geometric lines.
Nail design with liquid stones casting
For lovers of the brilliance and chic of precious stones, the technique of casting liquid stones was developed. To implement such a design solution, it is necessary to use a specialized polymer that imitates such precious stones as sapphire, emerald and malachite.
We perform casting with liquid stones step by step:
- Initially, we apply the French coat using white gel.
- Fix for a few minutes.
- We cover the top with a colorless layer and perform polymerization.
- We use black gel to make casting designs. Using a brush, we draw volumetric lines to secure the foil. Place your nails in the lamp for a few minutes.
- Apply the foil for 2 minutes and then tear it off. We repeat the casting along the remaining gold traces.
- We outline the attached polymer stone with colored gel in two colors to obtain an overflow. We perform a two-minute drying.
- We apply a special stained glass gel. We fix the polymer for another two minutes under the lamp.
- To give the stone a natural look, we cover the top of the pattern with sculptural gel.
- Then we apply the finishing coat and cure it in an ultraviolet lamp.
- Casting with liquid stones is ready.
What to do if the foil does not fit well on the gel?
This problem occurs quite often, especially among beginners. There may be several reasons for this state of affairs.
First of all, pay attention to the quality of the materials you purchased. Perhaps the foil isn't good enough and just isn't sticking as well as it should. Maybe the reason is in the gel itself. After baking in the lamp, a sticky layer should form on it. If this does not happen, then there is simply nothing for the golden layer of foil to stick to. In this case, you can use special glue for foil.
It is also necessary to pay attention to the baking time of each layer in a UV lamp. Each gel has its own individual polymerization time. Take this into account when creating a manicure.
A manicure made using the artistic casting technique lasts about two weeks. It is not afraid of harmful environmental factors, so nothing can stop you from enjoying the beauty of your hands in the near future.
French casting nails
French casting
French casting
To create a spectacular and neat manicure, fashionistas choose French casting. White French is very famous for being cast in gold and silver with the addition of the effect of liquid stones. The golden and silver border gives the French manicure a rather sophisticated look, and girls usually choose this manicure for a wedding or special celebration.
Unusual designs
Today's materials for nail art make it possible to create not only various designs, but also incredible color schemes.
- Casting allows you to cover the nail plate either completely or partially, recreating any patterns.
- Metallic shine gives the manicure a special look. In addition, it can be pastel shades, exquisite gold and silver colors, and any others at your discretion.
- The mirror-like shine adds glamor, and if it is complemented with intricate curls or an entire composition, you will get a dizzying and unique manicure.
Using the casting technique, you can create not just a manicure, but a real jewelry masterpiece. With its addition, even an uncomplicated and simple design becomes sophisticated in appearance. And if you add other decorations, such as liquid stones, you will get a three-dimensional design that is perfectly suited for the celebration.
Why didn't casting on nails work?
Many masters fail to cast nails for various reasons:
- If the design does not have sufficient stickiness and has time to dry, it will not print completely and will ruin the entire casting. It is very important to purchase high-quality foil and a powerful drying lamp.
- If the UV lamp is low power, all your casting efforts will be in vain - the gel will not dry completely and everything will be ruined. You also need to remember to change the light bulbs. Old light bulbs will negatively affect the casting quality and will not dry out the gel layers.
- The foil must be pressed with force against the nail plate and torn off with the same force. When these conditions are not met, the desired design will not be produced and the lines will be blurred.
If something goes wrong, you just need to remove the deformed foil using a special liquid and repeat the coating.
Types of foil
The casting technique directly depends on the type of foil; it comes in three types:
- translated;
- tear-off;
- based on glue.
When using any of these types, there are small features that should be taken into account to achieve the desired result.
When using transfer foil, material is applied to the design and once peeled off, it is transferred onto it like a sticker.
When tear-off foil is used, the required pattern is cut out of it and attached to a gel with an adhesive layer.
Foil with an adhesive backing is also easy to apply. To do this, you need to remove the bottom protective layer and press the foil onto the nail plate with the adhesive side. After which the foil is smoothed so that there are no bubbles left under it.
Foil comes in a variety of colors, from standard silver to gold, matte, hologram and mirror textures. Plus, foil comes in a variety of patterns, so any kind can be used to create a masterpiece.
