General recommendations
Ombre on nails with gel polish (photo samples are given below) is something every woman has done at least once in her manicure. It is impossible to remain indifferent to this technique. The elegant transition of color on each nail will attract the attention of others.
There are several recommendations for creating a gradient, which are taught to masters in manicure courses:
- It is necessary to purchase a high-quality ombre brush - “comb”. She is cut in a special way. Its bristles should not be very soft, otherwise the long hairs at the end of the brush will stick together under the weight of the thick material.
- When using a brush, it must be wiped frequently on a cloth soaked in degreaser. The cleaner the brush, the softer the transition between colors will be.
- The gradient can be from 2-4 colors. It is irrational to use a larger amount due to the small surface of the nail. On artificial nails, where hard polymer materials provide a longer free edge, a larger number of shades are allowed.
- To get soft, graceful color transitions, you need to choose colors that are neighbors on the color wheel.
- If it is necessary to stretch a gradient of contrasting colors, insert a strip of medium tone between them. For example, the transition from white to black is made through an intermediate gray color. It can be obtained on the palette by adding a drop of black to white gel polish. In this case, the transition will be more natural, otherwise there is a risk of creating a dirty spot in the center of the nail.
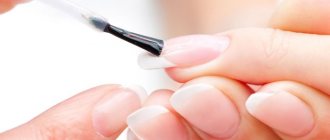
- You need to start working on the gradient on the base coat, from which the sticky layer has been removed, or cover the nail with a topcoat without residual stickiness. Simply remove the dispersion (sticky layer) by wiping the nail with a lint-free cloth and degreaser.
- You need to pull one color onto another using only the ends of the long bristles of the brush. The rest of it serves only for density and support of the protruding pile and is not working.
- I perform the movements in small strokes, without putting pressure on the brush. The desire to add varnish and forcefully move it down will lead to the formation of bald spots and depressions in the wet material.
- Any gradient will be made in 2 or 3 layers. The first (draft) does not require careful development; it is the background layer (substrate). All subsequent layers require careful work with small movements and provide ombre quality.
- The movements of the brush are reciprocating along the junction of colors. For example, work begins from left to right horizontally, back the brush moves from right to left along the same row. Then it moves a few millimeters, and also works on the bottom row.
If you follow simple recommendations, even a beginner can achieve a neat gradient the first time. Using this technique, simple and elegant designs are created, and if used for a complex background, then multi-component compositions with decor.
For craftsmen: how to create a design
To reduce the potential number of difficulties to a minimum, we present you with instructions on how to create an ombre design step by step:
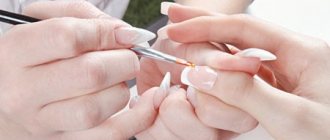
- Before you start coloring, you need to prepare your hands: push back or trim the cuticle, give the plates the desired shape and treat the surface with a buffer, providing a protective film to the skin.
- A primer and/or dehydrator is applied to prepared nails to degrease and disinfect. The compositions must air dry.
- The next step is the base layer, which needs to be processed in a UV lamp.
- It is now that the creation of ombre begins, where, depending on the chosen method, three scenarios are possible: The first method is with a brush. The initial shade of varnish is applied to the upper half of the nail with a brush, then, leaving a gap of a millimeter, the lower part is covered with the second tone. Using short movements with a brush, stretch one composition towards the other, leaving the excess on a napkin.
- The second method is with a brush. The lightest tone is applied first to the entire plate. Next, the second varnish is distributed over the lower half, and the border is carefully shaded with a brush.
- Using a sponge. Selected shades are applied in strips to pre-prepared foil so that the total width reaches the length of the nail. The borders of the colors are lightly shaded with a toothpick. Now a piece of sponge or sponge is dipped in varnish and printed on the plate so that there are no unpainted areas left. Excess is carefully removed from the skin ridges.
And for professional masters it will be useful to watch a video tutorial on ombre nails with gel polish from KrasotkaPro. The video shows a technique that makes a manicure neat and elegant:
Techniques and methods
Ombre nails with gel polish (photos of different techniques are given in the article) differ not only in color, but also in materials and spatial orientation. This type of design can be done by anyone. It is necessary to have a quality brush and patience when doing the meticulous work of mixing shades.
The photo shows a step-by-step creation of the ombre effect on nails with gel polish.
How to create your own gradient:
| Tool | Process description |
| thin brush | Using a thin paint brush, shade the border between the colors, drawing a wavy line and mixing the undried varnish |
| brush "Scallop" | the brush is specially designed for creating a gradient; it has a long bristles at the end, which pulls one layer of color onto another |
| aeropoofing | brush with a foam ball at the end. The brush material resembles a cosmetic sponge, but has a ball shape. The background color is applied to the nail, and a gradient color is applied on top using slapping movements of the aerofoil. First, the free edge of the nail is worked on, and then the brush moves downwards, reducing the color to nothing. |
| gradient rubbed in with a sponge | Color pigment or “chrome” rub is applied to a cosmetic sponge. The most concentrated strip is applied at the edge of the nail plate, then with the same spray (without adding pigment) the strip is shaded towards the center of the nail |
| glitter gradient (stretch) | glitter on the palette is mixed with base or top gel. With a thin brush, apply in a thick layer at the nail hole or at the end. Then the brush is cleaned of the mixture on a napkin and stretches the glitter downwards in small straight lines. If the result seems pale, the procedure is repeated. It is necessary to stretch the thick strip of the mixture downward so that an accumulation of material does not form at the end of the nail, which will significantly thicken the end |
| gradient pigments stamp | stripes of glitter and pigment are mixed on the surface of a rubber or silicone stamp. The material is applied to the stamp with a sponge, then the gradient is printed onto the sticky layer of gel polish on the nail. This option is used to create horizontal gradients using neon pigments. |
Types of gradient:
- Vertical - stripes of gel polish are located along the nail plate, given its width, as a rule, only 2 colors are used. This type of ombre is easier to perform. Horizontal color placement visually lengthens the nail. This type of gradient is recommended for a wide nail plate.
- Horizontal - stripes of varnish are located on the nail across the nail plate. On long nails you can combine up to 5 different shades. It is done with a special gradient brush, the bristles of which are cut in a special way.
- Along the perimeter there is a smooth transition of color, as if creating a ring around the nail plate, with the darkest color located closer to the skin, and the lightest color towards the center of the nail. It consists of 2 shades and is done with an angled brush for painting using Chinese painting techniques (the same principle for applying gel polishes to a brush). Looks like a frame around a medallion.
- Corner is one of the latest trends in the use of ombre in design. The color transitions go from one corner at the nail hole to the opposite point at the end.
- Counter – usually consists of 2 colors. The darkest shade is applied at the nail hole and at the free edge. They are mixed on both sides with a light-colored stripe, which is located in the center of the nail. This ombre is often used as a background for sliders with inscriptions.
Ombre nails with gel polish (photos below) have different spatial orientations. A gradient made of the same colors, but in different directions, is perceived differently by the human eye. Masters in salons offer the client to choose a color, and then show samples with different orientations, which expand the choice of possible design options.
Technique for performing a horizontal gradient:
- Get a manicure (treat the cuticle and nail under the side ridges).
- It is good to clean the nail from dust using a dehydrator (you can use any alcohol-containing liquid). At this stage, the task is not only to clean the nails from dust after filing, but also to clean the coating.
- Apply an acid-free primer to part of the natural nail (if any), which air dries for 2-4 minutes.
- To level the plane of the nail and ensure the strength of the coating, apply a base layer.
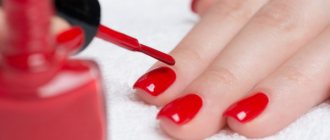
- Select the shades that participate in the gradient and apply them in horizontal stripes using a thin brush or a brush from a bottle of varnish.
- When applying color, remember that the darkest shade is made in the form of the thinnest stripe, and, accordingly, the lightest shade is made in the form of a wide stripe.
- Prepare a brush for the comb gradient. It is enough to fluff its long fibers along the width of the tip of the brush.
- The brush has specially cut bristles, which are tightly packed at the brush socket and trimmed in steps towards the edge. At the end of the brush there are thin, long, scattered fibers; they are the ones involved in the work. The rest of the cysts are of an auxiliary nature and serve to provide density to the pile. The tips of the pile begin to make small strokes at the border of the junction of the colored stripes. You need to pull one color onto another using point-to-point touches, achieving a smooth transition from color to color. Movements are made from the cuticle to the free edge. You cannot return with the brush up without first cleaning the pile on a napkin. The brush needs to be cleaned and ensure that the bristles do not stick together.
- The gradient is made in 2 or 3 layers, each of which is dried in an LED lamp for 30 seconds.
- When the appearance of the design matches the desires, the nail is covered with a glossy or matte topcoat.
- If desired, proceed to further decoration.
Vertical gradient technique:
- The standard set of actions described above is performed - manicure, application of dehydrator and primer.
- Base leveling layer.
- Using a thin paint brush, apply two colors along the surface of the nail. In this case, the border of their connection can be located in the center of the nail or be shifted to the side.
- Using a dry fan brush, brush along the junction of shades from top to bottom, then move it to the left by 1 mm and repeat the stroke.
- After thoroughly cleaning the brush from varnish, the same actions, offset from the center, are repeated to the right.
- This type of ombre is also applied in at least 2 layers. Each of which is dried for 30 seconds.
- Once the appearance is satisfactory, the design is covered with a topcoat.
Technique for performing ombre around the perimeter:
- The creation of any coating begins with standard manicure procedures, primer and dehydrator.
- Apply the base coat to the nail and dry for 30 seconds in an LED lamp.
- The design consists of 3 colors - base coat and 2 ombre colors. Using a brush from the bottle, apply the base color to the entire nail. For coverage density, it is recommended to repeat the application of varnish after drying (30 seconds).
- Place two colors on the palette for a gradient. Place them simultaneously on a flat, angled brush so that the dark color is at the top of the brush and the light color is at the heel. The difficulty is that you need to shade two colors. To do this, long strokes are made with the plane of the brush across the palette.
- Repeat the set of colors and shading.
- The brush is placed on the nail at an angle so that the sharp end of the brush (dark color) is closer to the skin and the perimeter of the nail is outlined with broad strokes.
- The result should be a frame with a dark edge around it and the color of the main background inside. This amber is suitable for inscriptions and designs with floristry. In this case, the end result looks like a jewelry cameo. Ombre has an unusual and elegant appearance.
The uniqueness of the gradient technique is that using different directions of color on the fingers of one hand, you can create original designs that do not require additional decor.
There is another technique for creating a design - different combinations of top shades.
For example, dark blue color fills the base of the cuticle on all fingers, and the upper part is decorated: on the little finger - white, on the ring finger - blue, on the middle finger - nude, on the index finger - peach, etc. Colors are chosen at the request of the client. This technique will allow you to create a bright, avant-garde design that attracts attention.
How to do Ombre nails with gel polish
Since the gradient involves clear transitions between tones, the technique of its implementation is not particularly remarkable. Another thing is ombre, where the whole point is a soft, leisurely glide from one gel polish to another.
This type of manicure has gained considerable attention from nail art masters, despite the fact that the technique has its own subtleties.
The article will tell you what to do when your lips are chapped.
Sponge technique (photo)
Before you start professional coloring, study hair dye oxidizers and their properties. Find out how long henna eyebrow tinting lasts here.
In the case of a gradient, you can combine white and colored polish together, changing the saturation of the composition from nail to nail. Similar experiments are also suitable for ombre, but it is better to use different bottles, using from 2 to 5 options. For beginners, it is better not to use combinations of colors and varnishes from different manufacturers. Otherwise, you may not understand why nail polish bubbles and peeling occurs.
It is best to place light or transparent colors at the base of the platinum; this will visually increase the length, and the regrowth process will not be noticeable. The maximum number of colors is due only to the fact that more shades simply will not fit on the surface.
The variety of rainbow coatings is achieved not only by numerous combinations of tones, but also by stencils, rhinestones, sparkles - all technologies are combined with a hybrid of gel and varnish and give excellent results. And once this technique is mastered, you can try making entire pictures with gel polish.
Having decided on the design, you can begin practical preparation for the process. Nothing supernatural is required compared to a regular manicure performed with shellac; the list of necessary materials will only be lengthened by a couple of points:
A fashion trend is dyeing shatush on dark hair.
Classical
This article will help you appreciate the richness of Ollin’s hair dye palette. It's easy to update your look with the help of the Olia hair dye palette.
With a sponge option No. 2
Today this name has become a household name, as it once happened with Pampers and Xerox.
- Dehydrator, primer, base, top, clinser for different layers of coating.
- UV lamp that dries varnish.
- A collection of selected shellac shades.
- Manicure set for preparing nails (this item depends solely on the individual preferences of the master).
- A stencil, tape, liquid tape, very thick cream - anything that can protect the skin from getting varnish.
- Foil, toothpick and lint-free wipes as aids.
- Creating differences in colors is possible using a thin brush or sponge (which can easily be replaced with an eyeshadow sponge). The first method is gentle and affects the skin next to the plate much less, but the second method is a little easier for a novice specialist to master.
When all the necessary components are prepared, you can proceed directly to the procedure. We will look at how to do an original manicure at home with the help of a detailed guide.
Summer motives
Holiday option
Options in different shades
The gradient technique itself involves combining several shades. Experts recommend choosing related (close in color wheel) shades. They mix easily in the contact area and set the overall tone of the design. For example, delicate pastel and natural shades are suitable for gentle, calm manicure designs.
Without additional decor, they are used for everyday life and work. They have a calm, pacifying character. Combinations of dark colors are more suitable for evening and special occasions, but gold decor and rhinestones look perfect.
People subconsciously choose ombre shades depending on the season. So in summer, women prefer bright colors reminiscent of the sea, sun and relaxation. Even office manicures at this time are full of bright neon gradients. In autumn, shades are chosen to match the color of falling leaves and rainy skies - all shades of gray, dark blue and yellow-orange.
The choice of color also depends on the main theme of the design. For example, to decorate with inscriptions, it is necessary to provide for the presence of a light stripe, but with which black text is clearly readable.
Matte manicure
Matte manicure (without glossy shine) remains trendy this season. To create a fashionable design yourself, just purchase a special finishing coating and replace it with the usual glossy top coat.
The gradients under such a top serve as an independent, complete design without additional decoration. However, it should be remembered that light colors under this type of coating can get dirty. Dirt and other staining substances quickly stick to the nail, and the manicure becomes untidy.
However, if the finishing gel was purchased from a trusted brand in the nail art industry, then it is capable of being cleaned. To do this, just take a brush with soft synthetic bristles and rub the nail plate with a regular soap solution. Rinse your hands under cold water and the manicure will restore its original appearance.
There is another problem with matte manicure when worn for a long time. The top changes its properties and acquires a glossy shine. This depends on the quality of the material, and this can only be changed by correcting and removing the material. But if a manicure with a gradient was intended for daily use in everyday life, the resulting gloss will not in any way affect the appearance of the ombre.
Useful video lessons
In conclusion, we invite you to watch the training videos. Popular beauty bloggers show by their own example how to properly do nail art using a sponge. Thanks to the video, you will clearly understand how to create a stylish ombre effect on your nails. Ombre manicure in summer or spring is one of the most popular designs that will never lose its relevance. Discover new horizons. Give free rein to your imagination and realize the wildest ideas in a gradient style on your nails!
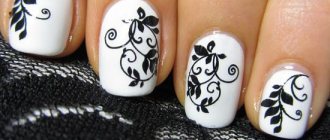
Options with patterns and designs
It may seem impossible and pointless to place a design on top of a gradient. But many clients want to additionally decorate 1-2 fingers on their hand. In order not to block the beauty of the smooth transition of colors, a certain set of techniques is used. The drawings are created in a minimalist style and do not overload the overall design. They are placed on the ring and middle fingers.
What patterns are most often used together with a gradient:
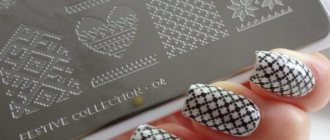
- Stamping is the easiest and fastest way to apply patterns. Choose a plate with thin lines, loosely filling the plane so that the gradient is visible. Modern gel paints allow you to imprint the smallest engraving elements on the nail. Fine line designs have an airy, ghostly appearance and only add depth to the design. This method is suitable for beginners and masters of quick salon design. Suitable for everyday life with any style of clothing, depending on the ombre color.
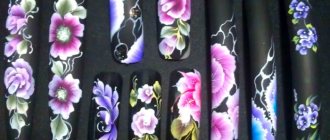
- Floristry with thin lines.
- Dots - with the ball of the tool, they draw fancy patterns of dots, placing them on the side surface of the nail or at the end (you can use dots of different diameters to create an imitation of a French manicure).
- Inscriptions – located horizontally or vertically on the nail plate. If the ombre is created from dark shades, use white text color. The transparent base of the inscription does not overlap or spoil the appearance of the gradient.
- Volumetric monograms are created using special pastes that allow you to draw a volumetric curl from the first stroke and dry well in the lamp. They do not have a sticky layer and are not covered with topcoat. Therefore, before drawing the monograms, it is necessary to cover the ombre with a finishing layer.
- Butterflies with gel paste - using the same material, butterflies are drawn against a gradient background. Only the outlines of the wings are drawn so that the main background can be seen underneath them. Mirror designs are popular, when the left wing of a butterfly is drawn on the ring finger, and the right wing on the middle finger. Then, when connected, instead of fingers you will get the image of a large butterfly.
- Crystal flowers are created by drawing the thin lines of the flower’s outline. After drying in a lamp (30 seconds), the petals are filled with a transparent top. The work is done with a thin paint brush. The main difficulty is to distribute the top inside the petal without going beyond the contour. Experts recommend drying for 10 seconds, each petal separately. The top is laid out on the nail in the form of tall drops, which creates volume in the design and, like a lens, enlarges the background with a gradient.
Drawings, done correctly and in small quantities, decorate the main background - a gradient. At the same time, its beauty is not violated. Such designs are suitable for women and girls of any age, they look gentle and are appropriate in different life situations.
Decor ideas
Ombre nails with gel polish (photos from nail art competitions are shown below) are not compatible with all types of decor. When creating a design, you should remember that ombre is already an independent coating option. When used as a background. The main task is not to cover up the beauty of the gradient with glitter.
What decor is used for the gradient coating:
- Rhinestones in the style of lunar design - a large stone (ss 6-8) is installed in the center of the hole near the cuticle; smaller stones are attached to opposite sides of it. The composition is arranged in the form of a string of beads. The space between the rhinestones is filled with bouillons (metal or plastic balls with a diameter of 0.8 -1 mm). Rhinestones are installed on a drop of base or special glue for rhinestones. After drying in a lamp (30 seconds), all the crystals are processed with a thin brush using the same material, tracing them in a circle. Then the second drying for about 30 seconds. The inlay on top is not covered by the top coat.
- Geometric shapes with foil - any geometric shape is cut out of tear-off foil using nail scissors. Most often, a strip along the vertical of the nail plate or a triangle, or a semicircle at the nail hole is used. After completing the gradient, the design is covered with a top coat with a sticky layer and a shiny figure is placed on the liquid layer. Dry in a lamp for 30 seconds. Then, using tweezers, you need to carefully pick up the edge of the decor to remove the thin protective film from it. An even and clear imprint of shiny foil remains on the nail. This design must be covered with 2 layers of topcoat, which will prevent the foil from abrading.
- Casting foil onto monograms - on a gradient created and covered with a top (without a sticky layer), monogram compositions are drawn with black paint using a thin brush. They should not be too dense so as not to block the beauty of the gradient. Dry the composition in the lamp for 60 seconds. While the nail is still warm, apply foil to the surface, press down, straighten it and tear it off sharply. Perhaps not all monograms will imprint shine the first time. The manipulation must be repeated on untreated areas. Cover the top with a thin layer of topcoat (so as not to fill the volume of the monogram structure), dry in an LED lamp for 60 seconds.
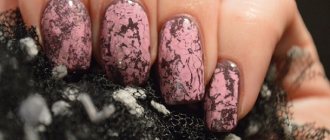
- Glitter – you can use it to stretch it in density or decorate only part of the nail. To distribute the glitter evenly, mix it with a transparent base or top. The material must be liquid, so rubber bases and tops are not suitable. But in the arsenal of every master there are “unsuccessful” bases that quickly spread and are difficult to level the nail plate with. They are ideal for stretching glitter and creating ombre glitter. A few drops of base and dry glitter are mixed on the palette. Using a thin brush, apply the mixture to the area where the greatest density is planned (at the cuticle, at the free edge). Then the strip of material is stretched downwards with the tip of a brush (movements like when creating a gradient) until the shine disappears. Dry in an LED lamp for 30 seconds.
When decorating with bright shiny elements, you need to arrange them in such a way that the gradient is visible.
Then different design techniques will be harmoniously combined. The complex gradient background allows you to create bright, shiny and eye-catching designs. They are perfect for evening wear. However, more and more often women are using rhinestones and foil in everyday manicure, expressing the desire to sparkle every day.
Fashion trends in 2019
It would seem that no one can be surprised by a gradient, but masters are constantly improving this technique. So last year, angular gradients and color changes from the center became widespread. For the 2022 season, when creating ombre nails with gel polish, the trend is degrading.
Photos of an unexpected gradient solution from the winter filled the pages of glossy magazines. All terms (gradient, ombre, degradé) denote a smooth change in color without a clear border between colors. Degrade (from the French word "dégradé") means lightening of color.
At first, this technique was adopted by fashion designers to create collections from silk fabrics. She was born in the depths of the “hippie” subculture, when they, through special processing and washing, gave individual parts of clothing a lighter, as if sun-bleached appearance.
In nail art, this technique is used in the form of a smooth transition of any number of colors into the natural nail area. For example, a blue pastel tone turns into white and goes down to the unpainted area at the cuticle (negative space). This is what a horizontal degradation looks like, which creates a very delicate and soft image.
This does not mean that the nail is completely uncoated. A camouflage base or any nude or powdery gel polish that imitates a natural nail is applied to it. In this zone, threads of rhinestones or charmicons with inscriptions look elegant.
This design is performed either on all fingers or on one finger that is being decorated. The universal design is suitable for any length of nails, it looks especially good on the trendy nail shape in 2022 – almond.
Ombre nails made with regular gel polish can turn into a unique design that will highlight any look. This is confirmed by photos that are full of the Internet with the works of self-taught and salon masters. New options and nuances in gradient decoration are constantly emerging.
Author: Anna Beauty
Color selection for ombre
When choosing colors for a gradient design, your imagination is not limited. You can create a rainbow on your nails or create a classic transition from a bright color to white. You cannot mix opposite colors, such as green-red, yellow-violet, blue-orange. The color wheel will help you choose; it clearly shows color shades and color transitions from one to another. Otherwise, you are allowed to experiment as you please. You can use 2 or more colors and apply a pattern on top of the gradient. Stencils are often used to create geometric designs. First, the figures are painted with a bright color, then lighter shades are used, which turn into white.
Photo ideas for gradient manicure
In summer with a bright manicure
Gradient on nails with gel polish: how to do (PHOTO)
Gradient on nails with gel polish: how to do (PHOTO)
Thank you for reading to the end!
Don’t forget to give a “ thumbs up ” if you liked the article!
Share with friends, leave your comments
Add to our group on VK:
Manicure and nail design
and suggest topics for discussion, together it will be more interesting!!!