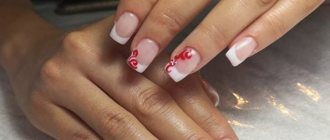
Any beauty salon will offer you a service such as a French manicure. The cost of such a manicure is not small, but what sacrifices can you make for the sake of beauty? Watching how a nail art master does French, you may think that it is very simple and there are no special secrets and no skills are needed. However, we will dispel your assumptions and share with you secrets that will help you make a French jacket yourself.
Preparing for a manicure
When creating a French jacket, the main thing is to choose the right tools and materials. To create your own French manicure you will need:
- nail polish remover,
- metal pusher,
- file,
- orange stick,
- cuticles,
- cuticle liquid,
- polishing buff,
- base and top,
- nude and white varnishes,
- stencils.
All you have to do is be patient and diligent, then a great manicure will not keep you waiting.
White gel paint
This color is ideal for snowflakes, monograms, and jackets. Don't forget to stock up on white for the holiday season. Excellent pigmentation and consistency. For the wedding season, this shade is as relevant as ever.
French with stripes
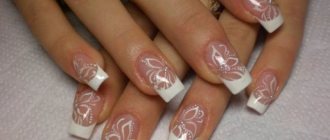
The easiest way to make a French jacket yourself is to use strips. If you've never done a DIY design, use stripes. The process of creating a French jacket can be divided into the following stages. The first stage is applying a transparent base or nude varnish to the plate. Next, glue a strip to the edge of the nail, moving 2-4 millimeters from the edge. The empty part of the nail is painted with a white or milky shade, after waiting for it to dry, remove the strip and then cover the entire nail with a glossy topcoat.
French without stripes
French without stripes differs only in the preparatory stage. The rest of the process corresponds to the above. Don't have a stencil? We bring to your attention several options for replacing strips. The first example of replacing strips is masking tape. Cut short pieces of tape to the shape of your nail, and then glue them to the free edge of the nail. Housewives will always have cling film in their kitchen. It also adheres perfectly to the nail and works on the principle of a strip. Medical tape is a great example of a replacement strip. Cut small pieces of the adhesive side of the patch and use them as stencils for French tape.
"Ink" gradient
The shading does not have to be symmetrical; chaotic also looks interesting, and it can be done in any tones:
- A drop of gel polish in two colors (for example, black and blue), as well as a top coat, is applied to the palette.
- The nails are prepared and the base applied to them is dried.
- At the base of the plate a top coat is applied in a stripe, the middle part is coated with blue varnish, and the free edge is coated with black.
- On the undried top coat, make streaks with both colors using a flat brush.
- It is used to smear the border between shades, after which the nail is dried.
- Then additional black and blue stains are applied with a hair on the transparent part.
- The free edge is drawn more clearly in the darkest tone.
- All that remains is to dry it, cover it with top coat, and polymerize it again.
Liquid varnishes are perfect for this manicure. But they need to work quickly. And the areas near the cuticle and sinuses should be painted with a thin brush after the first drying.
Watch the video on how to make an ink gradient:
Performing a French manicure using a stencil
Any girl can make herself a French jacket using a stencil. Stencils come in both paper and durable metal. There are some subtleties when using metal stencils. First, after applying a nude color or clear polish, you need to wait for it to dry. White paint is applied to the metal base, then an impression is made on the nail along the edge of the nail. The final stage is to let the polish dry, and to complete the manicure, cover the nail with a glossy or matte topcoat.
French with a brush
Have you decided to make a French look with a brush? This means you are already an experienced user. There are several tips for creating such a manicure. For a French brush, choose a brush with long and elastic bristles. When drawing a smile, move your finger, not the brush. With this method, your smile will become clearer. The curve of the line should follow the curve of the cuticle, this will create a more natural looking design. To avoid chipping or cracking your design, use a brush to seal the edge of your nail. Use a brush with synthetic bristles.
Black gel paint
The color is rich and well pigmented. Ideal for drawing lines, outlining pictures and inscriptions.
French with gel polish
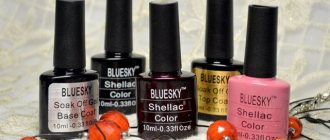
French gel polish is distinguished by its strength and durability. Girls don't always have time to correct their nail design. French polish made with gel polish requires more time and painstaking work. If you follow certain rules, you can please yourself with a beautiful manicure and surprise your girlfriends. Fix each stage of this manicure and finish with drying in a UF or LED lamp. To ensure a clear smile, remove the sticky layer from the base. Use a self-leveling topcoat, with which you can easily smooth out the “step” before decorating and fix the result. If you don't get a smooth transition, use a sanding buffer to gently polish out any rough spots. To make it easier for you to work when creating a French jacket, choose medium-density varnishes and paints.
How to design a nail
Design on a French jacket is done not only by hand, with a brush, but also with the help of:
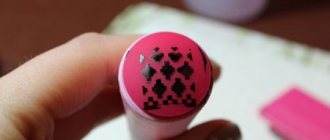
- Stamping. These are dies with a soft silicone base and accompanying plates with extruded patterns. Gel polish or paint is applied to the latter. The silicone stamp pad is then pressed onto this plate to transfer the design onto it. The next step is to imprint it on the nail, which has already been processed, covered with a camouflage base and dried. When the stamping is on the nail plate, this finger is placed in the lamp.
- Sliders. These are decals that are applied to nails that are already covered with a base, flower bed and top coat with a sticky layer. The slider is cut along the width of the nail plate and placed on a cotton pad moistened with water. This removes the dense substrate. And the transparent picture itself is fixed on the nail and straightened out. The section of the slider sticking out at the free edge must be cut off. Finally, a glossy top coat is applied over it and dried in a lamp.
- Fimo. These are polymer particles that look like fruit and berry slices. They are also glued to a sticky layer of the finishing coat, another top coat is placed on top and dried in a lamp.
French with simple varnish
French, made with simple varnish, has its disadvantages, such as fragility, but it also has its advantages. One of these advantages is that you can adjust the design at any time, while spending a minimum of time and materials. The first stage when creating a French manicure with a simple varnish is giving the nails a shape, removing the cuticle and polishing the nails with a buff. Then apply the base coat to the nail and let it dry completely. Make the base a soft pink or beige color. If you use a stencil, simply glue the strip and paint the space with white varnish. If you prefer to draw a smile, follow the rule that you don’t need to make the smile very thick, this will visually “eat up” the length of the nail. Secure the result of the manicure with a transparent top coat, treat the cuticle with oil, which will moisturize and slow down growth.
Tips from nail art masters for creating a French manicure yourself
To make the nude color on your nails look beautiful, first whiten the nail plate with a simple toothpaste. To extend the life of your manicure, use a degreaser before applying the top and finish. The unevenness of the French manicure can be easily masked with a line of sparkles or glitter; this will visually hide errors in the manicure. Let each layer dry thoroughly. Ice water will help you reduce the time between drying. You just need to dip your nails in water and the polish will dry faster.
French is a timeless classic. With a little patience and skills, you can easily do this manicure yourself at home. Taking advantage of all our secrets, you will simply be a master of this matter.
Useful tips and tricks
Not every nail technician knows how to competently and accurately draw a smile line, since it often turns out to be of different widths and depths on different fingers.
To make the procedure easier, especially at home, you can use auxiliary materials - stickers, stencils or stamping, which will become an alternative to a regular brush.
If you use special stickers for the jacket, you just need to fix them on the plate, leaving the free edge area free. Then, using a regular brush, apply contrasting gel polish to the open area and remove the sticker. You should get a perfectly even smile area.
When performing a French coat, consider other recommendations:
- Manipulations should be carried out gradually, gradually applying gel polish to each nail and then drying it. If you immediately apply a contrasting shade to all your fingers, there is a risk that somewhere it will start to flow, and somewhere you will accidentally wipe it off with your hand.
- You can also perform an inverted French manicure - “moon manicure”. Then the smile line is drawn not on the free edge, but on the cuticle area. This option looks impressive, but the gradual regrowth of nails quickly becomes noticeable.
- If there is yellowness on your nails, which may be noticeable under camouflage, pre-whiten the plate using compresses of toothpaste, baking soda or lemon juice.
- The ideal shade of camouflage gel is a combination of the tone of the periungual area and the color of the nail bed.
If you follow the recommendations and rules, you can independently draw a neat French jacket in a few hours that will look impressive in any situation.
