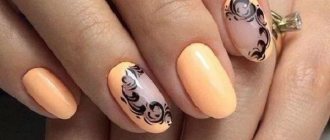
In this article you will become familiar with the technique of drawing on nails, such as monograms. You will learn how to draw swirls in different ways.
Since ancient times, girls have always strived to look beautiful and well-groomed. Moreover, not only the hairstyle and outfit should look great, but also the manicure. Thanks to the imagination of stylists, many techniques for painting on nail plates are known in salons.
Charming patterns on nails using the monogram technique look great. This type of manicure is known for its sophistication and tenderness. That is why monograms are becoming increasingly popular nowadays.
How to draw monograms on nails?
Doing this type of manicure is not easy; you will need accuracy, attentiveness, perseverance, and patience. If you have these qualities, then you will be able to draw monograms of absolutely any complexity, and you are guaranteed to get a stylish nail design.
How to draw monograms?
The choice of monogram technique can be very diverse; you can come up with your own design, or look at various photos on the Internet.
The execution algorithm remains unchanged. It is important to keep the sequence of actions step by step.
Combined black and white version of the monogram
Before you start applying the monogram to your nails, it is recommended to draw the selected pattern on paper.
You should ensure smooth, precise movements. When you achieve the desired result, you can begin applying the monogram to the plates.
A beautiful, easy version of monogram manicure
IMPORTANT : It is best to use acrylic contour paints for this technique. It will be more convenient for you to paint with such varnishes.
What is a monogram
By opening an explanatory dictionary, you can find an explanation of the word “monogram”; it meant the interlacing of the first letters of the first and last names. Initially, monograms were used by noble people who made seals or embroideries with capital letters. Then monograms began to be widely used in jewelry, as well as in ceramics.
After a while, manicurists decided to transfer the beautiful interweaving lines onto the nails. Taking ideas from nature, looking at the graceful interweaving of grape and strawberry tendrils, stylists began to paint curls on the nails. In manicure, a monogram is considered to be any elegant and beautiful interweaving of thin lines that create an intricate and sophisticated pattern.
Curl styles
To make it easier to understand what the client wants, monograms were divided into styles. Each style implies a certain type of pattern and execution technique.
The following styles are distinguished:
- classical;
- French;
- for brides;
- modern or contemporary.
Style description table
In the table you can read a brief description of each style and look at examples of monogram design.
| Style name | Description | Example |
| Original | Must be identical on each finger. To ensure that the lines and curls do not differ from each other, the master must have high professionalism. A classic style can be created using stamping, stickers or stencils; these options are also suitable for beginners. | |
| French style | The basis is French or soft pink tones of varnish. Curls are applied from the side of the nail. In this style, you can independently choose how to draw the pattern; it can be the same and be present on only one finger, or it can be different. | |
| Art Nouveau style | The peculiarity of this style is that the curls should not be the same, they must be fundamentally different from each other, not repeating on any nail. The curl pattern should cover the entire nail plate. | |
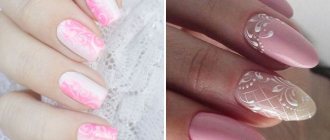
| Wedding style | The main nuance is given to the tone of the coating and the pattern. Nails should be painted in delicate, light colors that will not be too noticeable, but at the same time emphasize the romance of the bride. Monograms are painted in white, light pink, milky or peach colors, with a round shape. |
Monograms are a flight of imagination of the master, there are no specific design criteria, you can come up with any interesting weaves, the main thing is that the lines are clear and neat.
Tips for Beginners
Most girls love beautiful curls that decorate their nails. To create original curls yourself, there are several tips on how to learn how to draw monograms on your nails.
Adviсe:
- Before you start drawing on your nails, you should practice on paper. You can draw images of nails and use a thin pen to draw monograms.
- After practicing on paper, you can buy tips and practice working with a brush.
- During calligraphy painting, the hand should be relaxed so that trembling does not appear.
- You should learn to apply equal pressure while drawing each monogram so that the thickness of the line does not change.
- You should not start drawing on all your fingers at once; first, you can make a design on one or two nail plates.
- It is best to start with simple curls, and after mastering the technique, proceed to more complex patterns.
- On a monochromatic surface, monograms look better and are more striking.
- Paints are best suited for drawing; they are easier and more convenient to paint with.
Video “Drawing monograms step by step”
In the video you can watch a step-by-step master class on drawing simple monograms on nails.
Training cards
For beginners, there are special training cards that help master drawing techniques and provide many creative ideas. Training cards can be bought in special stores or printed from a computer.
There are different types of training cards, they are divided by complexity:
- for newbies;
- patterns of medium complexity;
- for professionals.
Initially, it is better to take the simplest cards, on which, as for small children, a drawing is drawn with a solid line, and then there is a dotted line or a noticeable solid line. By tracing the lines with a brush, the hand remembers the movements, and drawing becomes much easier.
Materials for creating curls
Before you start drawing monograms yourself, you need to have the necessary tools and materials at hand.
Tools:
- base or varnish base;
- top;
- nail polish remover;
- file;
- orange stick;
- cuticle nippers;
- beveled brush, styper, kolinsky or dots;
- needle;
- decorative decorations (optional);
- nutritious cream;
- oil;
- bath;
- degreaser.
The list can be slightly adjusted, the varnish can be replaced with paints, the needle can be replaced with a toothpick, and the cuticle nippers can be replaced with a special emollient. It all depends on what you feel comfortable drawing with and what type of manicure your fingers are used to.
Paints are much easier to use, since they do not spread, and some do not need to be additionally dried in an ultraviolet lamp. However, such a manicure will last less than using gel polish.
Technique for drawing monograms on nails: how to draw monograms on nails, what brush?
An important tool for painting nails is a brush. If you take a brush more than once, then buy a good quality tool.
What type of brush should I use for a monogram?
There are several points to pay attention to:
- The base on the handle should not wobble or fly off it, and the connecting seam of the hand should not, preferably, not twist
- The hair should be securely attached to the tip of the brush. To check the quality, stroke the tip; if at least one hair falls out, then you should not take it
- You can moisten the brush with water, but it should be perfect (nothing can bristle anywhere), then take this brush with confidence
- It should also be taken into account that brushes with a seamless frame, that is, without a seam, are more convenient to use than others.
- An indicator of quality is also the material. A wooden handle on a brush made of hard wood (birch, beech) is a good choice
Based on the shape and size of the brush, we may need the following brushes:
- With short thin hair - perfect for thin curly lines, dots, letters, miniature elements
- Medium sized brush - used for basic design
- With long hair - suitable for drawing long lines
- A very thin, sharp, small dotting brush - good for small elements, complex designs, used as a stroke, and also for gradients
- Angled brush - perfect for drawing curls
The process of turning a brush
IMPORTANT : You can buy a special brush for the monogram, as described above, or you can make it yourself from a regular one. To do this, we’ll use a little trick: we need to cut a regular brush in a circle and make it thin enough. As a result, you will have a ready-made working tool.
Features of the pattern
The monogram pattern appeared a long time ago and over time undergoes more and more changes and different interpretations. To paint beautiful monograms you will need acrylic paint, thin brushes for painting, as well as plastic dummy nails on which you can practice.
The main thing to remember is that a pattern like monograms will not suit you if you have short nails. Such an elaborate pattern will hide the nail plate, and it will look out of place on short nails.
Monograms on nails - step-by-step instructions for beginners
Monograms are often drawn in the form of curling, intertwining lines. If you come up with your own pattern, it will unexpectedly please those around you.
For beginners, you can use auxiliary tools in the form of stamping, stickers, or draw simple monograms.
The process of performing a manicure using the monogram technique
The drawing algorithm is as follows:
- The most important stage is the preparatory . This mainly applies to natural nails, not acrylic ones. The nail plate must be highly polished and degreased. It is not recommended to use hand cream
- The base is applied to the prepared nail. As a base, you can use a clear varnish or any chosen varnish color, depending on your design.
- We begin to draw our monogram from the edge of the nail . To achieve maximum effect, use a brush to open the petals of each monogram. Let all design elements dry separately
- When finished, cover your nails with a protective layer of varnish to ensure that the manicure lasts as long as possible.
Cute design with floral monogram elements
Monograms as a type of nail painting. Popular types and their features
As a decoration, the monogram has become popular because it is a win-win way to visually give your nails greater length and a beautiful arched bend. What types of monograms are especially popular in classic nail art?
- French. French monograms
are “frame painting”, neat and original. The design frames the nail plate from the side or along the entire contour. The design got its name due to the fact that it is most often used to decorate manicures in pastel colors or typical French looks.
- Original.
This type of monogram nail decoration is typical for extended nails. It is characterized by pretentiousness and even shockingness, a bold and creative combination of colors. Original monograms cover the entire nails. Unlike the French look, the entire manicure is often decorated, rather than individual accent fingers.
- Modern.
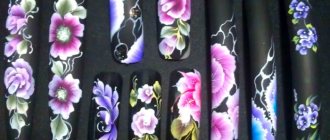
This variety is interesting because each nail in it can be decorated with an individual pattern on the entire plate, which is not repeated anywhere else in the manicure. Fancy ornaments have a voluminous appearance and visually look like rich embroidery on expensive fabric.
- Wedding.
This is the familiar and beloved gossamer lace, thin and airy. The most filigree type of monogram, time-consuming, but as feminine as possible.
Monograms on nails with gel polish
For a manicure with monograms you will need:
- Ultraviolet or LED lamp for drying gel polish
- Base coat
- Gel polish, base for the chosen design
- Top
- Gel polish for pattern
- Monogram brush
- Degreaser
- Lint-free wipes
Progress of making a monogram with gel polish:
- We prepare the nails, apply the base, main color, top. Dry each layer in a lamp, do not forget to seal the tips of the nails
- Remove the sticky layer from the topcoat so that the monogram does not crawl
- To make our design neat, we apply varnish to the tip of the brush so that we get a voluminous drop. Which we then lead in the right direction. It is important to do all the touches without haste
- It is recommended to make patterns voluminous; for this you need to double the lines and leave empty space between them
- It is recommended to draw monograms symmetrically, visually divide the nail into two parts, mirror the same elements
- Also, do not overdo it with details, so as not to make your manicure heavier.
- The completed stage is applying the top.
Combining cat eye gel polish with a monogram
What you should know about painting with a brush
You can create simple monograms on your nails step by step with a brush, even if you haven’t done this before. It may not be possible to do everything neatly right away, but a couple of training sessions will correct this.
What should you keep in mind when getting started?
- Use just a little bit of polish. There should literally be a drop on the brush. You will then stretch it into stripes. In this case, there will be nothing superfluous on the sides.
- The brush for drawing monograms should be thin and elastic. This is exactly how it will be convenient to work.
- Before applying paint, the tool must be formed with your fingers. A thinly folded pile will pick up just a little liquid.
- If you want to draw complex monograms, then do it gradually, drying each curl with ultraviolet light. This will take a long time, but it will be of high quality. The pattern will be really clear.
- Don't go overboard with the decor. It is difficult to do this when drawing from a stencil. But when applying curls according to your imagination, you can overdo it without noticing it.
Having learned to draw patterns with a brush, you will be able to create a beautiful manicure at any time, even when you don’t have stencils or other tools at hand.
Simple monograms on nails
The most common simple way to apply monograms to nails is stamping. It consists of two main procedures: spreading varnish onto a steel stencil plate, and then transferring the resulting design onto the nail plate.
This method makes drawing much easier and speeds up the creation of a beautiful, complex pattern. However, such work requires certain skills.
A simple monogram design
In order to make a design using stamping, you must:
- Buy scraper, stamp
- Find a disk with a beautiful pattern
- For painting, use certain stamping varnishes, the best one is paint varnish
- Transfer the image from the disk to your nails with a stamp
You can add a decorative element to this manicure - Swarovski stones - this will add tenderness and volume to the nails.
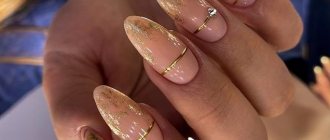
Delicate French manicure with simple monograms
Methods of applying monograms
Monograms on nails can be obtained in several ways, each of which has its own advantages and disadvantages.
Methods:
- Nail stamps are a very easy way to create monograms. You need to apply a drop of varnish to the metal plate, then use a stamp to transfer the design to the nail. Stamping is one of the easiest ways to create identical curls. The disadvantage is the inability to create a modern monogram design, since stamps do not allow imagination to run wild.
- Stencils differ from stickers in that you need to draw the design yourself, filling the outline of the stencil with varnish, paint or shellac. After filling, the stencil is removed and the design is covered with topcoat.
- Self-application is the most labor-intensive, but also the most sophisticated option. Manual application can be done using a needle, pin, dots or special brushes.
- Nail stickers - the easiest option is to buy ready-made stickers with a design and attach them to the nail plate with the adhesive side. Using stickers, you can quickly create a manicure with monograms, but remember that paper blanks quickly deteriorate.
Drawing with a needle or toothpick
Most girls began using needles and toothpicks to create manicures during their school years. Although, they probably didn’t even know that they were drawing monograms on their nails. There are two ways to draw monograms using a toothpick: on a dry base and on a wet base layer. Below is a step-by-step description of creating monograms on nails for beginners.
First way:
- get a manicure;
- cover your nails with the selected shade of varnish;
- dry in air or under a UV lamp;
- remove the sticky layer if necessary;
- Having chosen a contrasting shade of varnish, place several dots on the surface of the nail plate;
- using a needle or other sharp object, stretch the droplets, creating a pattern.
Second way:
- give nails shape;
- cover your nails with a base coat;
- without waiting for it to dry, apply a few drops of another varnish to the base;
- Using a toothpick, mix two shades, drawing curls.
When working with a wet base, the colors flow smoothly, creating an original combination of lines and patterns.
Creating monograms from dots
To create a pattern of dots, several objects are suitable: a pen that has run out of ink, a hairpin or a special device - a dots. Dots - resembles a stick with a small ball attached to the tip. The sticks differ in the diameter of the ball; the larger it is, the larger the dot will be. The diameter of the dot, slightly, can be adjusted by pressing force on the dots.
To make a dot pattern, you first need to prepare your nails and coat them with polish. When the base becomes dry, the dots or pen should be dipped into the paint. Then put a dot and slowly begin to draw out curls or thin lines. A monogram created from different sized dots looks beautiful. Before you start painting on your nails, you should carefully consider the design.
Types of brushes for painting nails
Before you begin calligraphy painting using a brush, you should choose the appropriate tool. For drawing monograms, a striper with long and thin bristles or a column with the number 00 or 0 is suitable; this designation indicates the thickness of the brush.
Brushes come in natural and synthetic bristles. They differ in price and quality; a synthetic brush will not last long, but it is perfect for nail art beginners. Synthetic bristles do not absorb paint and, due to their increased elasticity, are more convenient to use. You may need an angled brush; it is good for drawing and making smooth transitions from thin to thick lines.
You can make a brush yourself; to do this, you need to take a brush from an old varnish, clean it well and degrease it. Then, using nail scissors, carefully cut off the hairs along the contour, leaving a pile of minimal diameter in the center.
After completing the preparation, the brush should be lightly lubricated with top to get rid of unwanted separation of the fibers.
Velvet monograms on nails
The nail design technique with velvet elements was originally used on extended nails using special materials.
These days, due to the popularity of this design, other options have emerged that could achieve the same result.
We will look at one of these options. Gel polish is applied to natural nails, and the velvet effect is achieved by applying acrylic powder to a special gel paint.
Delicate velvet design
Technique:
- We prepare the nails for applying gel polish, after which we apply the base and colored gel polish in two layers
- Apply the top coat to the nails and dry them in a lamp.
- We draw our design with a thin brush using gel paint, it is more convenient to work with than gel polish, and the drawing also turns out to be more voluminous
- Apply acrylic powder on top of the gel paint, then you need to polymerize the material, shake off the remaining powder
- Velvet nails are not covered with topcoat
Velvet monograms on nails
What paint to choose for drawing monograms
First of all, it should be thick enough. If the paint is liquid, it will start to spread. Then nothing will work out at all. Moderate density is especially important if the brush has synthetic bristles that are poorly absorbed.
For a core brush, you can use thinned acrylic paint. The usual varnish of the corresponding color is added to it. The proportion should be 40:60.
Gel polish is also often used to paint monograms. It's convenient to work with him. It then lasts for a long time.
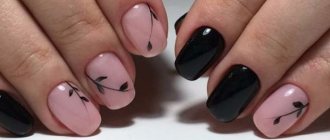
Black monograms on nails
A manicure with black monogram elements can be quite light. But he looks very impressive, shocking.
Also, this design can give the effect of “nylon tights”. Many girls prefer it, so let's see how it can be made using stickers.
A beautiful manicure with black monograms
Stickers are a wonderful lightweight option for creating a manicure. Today there is a huge selection of different patterns. They are quite easy to use.
Selected stickers in the form of black monograms should be glued to the base. A clear or colored varnish works well as a base. It will provide good grip and will also increase the life of your manicure. The final step will be coating with a fixative.
Beautiful manicure with black monograms
Photo examples of New Year's manicure 2022
This season, the most natural, natural forms are in fashion. That is why you should not grow super-long nails for the holiday or go to a salon for extension services. Even acrylic plates are recommended by nail experts to be cut down to acceptable, natural sizes. Well, as for the design, today everything depends on the wishes of the beauty, the flight of fancy and the skill of a specialist. Nail art luminaries offer the following options that can be creatively modified or changed:
- themed winter and New Year drawings, stickers, stamps;
- decorating with thick mirror foil “broken glass” with a glossy, transparent, matte finish, a “cat’s eye” look or with patterns made with powder;
- gold patterns on a dark blue, chocolate or black background, with colored fill or sand sprinkles;
- compositions in the form of rings or necklaces, snowflakes, Christmas tree decorations, lined with rhinestones, beads, stones;
- acrylic modeling in the form of snowflakes, Christmas trees, bullfinches, bunnies, deer;
- French and holes, complemented with rhinestones, stickers or painting;
- inlay with stones on a background of foil, pearl or mirror rub;
- “frozen window”, snowflakes, bells and garlands.
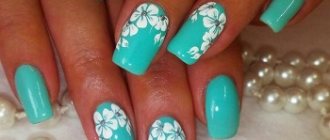
White monograms on nails
To make white monograms on your nails, you will need:
- Varnish base
- Blue varnish
- White varnish for our future monograms
- Fixer
- Brushes
- Napkins
- Nail polish remover
- Palette
Work progress:
- It is necessary to apply the base to the prepared nails. This is necessary so that the varnish adheres better, and also your nails are protected from the harmful chemical effects of the varnish.
- Next, apply blue varnish, if necessary in two layers.
- We must first prepare a palette from which we will subsequently take white varnish with a brush
- Take a napkin and soak it in nail polish remover; this is necessary to remove excess polish from the brush.
- Apply a small amount of white varnish to the palette, dip the brush into the varnish, and draw the monogram
- The brush should be soaked in a napkin frequently to prevent lumps or excess varnish from forming.
- Upon completion, we cover our design with a fixative.
A beautiful, simple version of white monograms
Adorable "cat's eye" for the New Year 2022
A recent invention - magnetic gel polishes - allows you to apply an excellent coating to your nails. With its depth and sparkling effect, it resembles the chrysoberyl gemstone. This coating is self-sufficient, but it can be combined with white patterns, complemented with pieces of foil and inlays.
Training card for painting nails with monograms
Manicurists are often not always artists, but they paint very beautifully. All this is achieved with the help of training cards. They are good at helping you develop certain skills.
It's true that it's not easy to learn with practice cards. There are different levels of complexity of drawings, based on this, you need to choose exactly your level.
First there must be a base. We present to you a set of basic training exercises for developing the skill of drawing monograms. There are all the necessary elements that will help you create unique nail designs yourself.
Basic training card for painting using the monogram technique
Monograms on nails - diagrams
There is a wide variety of monogram designs. They come in different levels: for beginners, professionals. On the Internet you can find drawings for every taste. Let's look at some of them.
The diagram below shows how to make simple, effective monograms . They consist of straight lines, curls, and dots. The entire space of the nail plate is filled with a stylish pattern. Thanks to this, such a manicure looks holistic and professional. This manicure is perfect for going out to various events or for everyday wear.
Step-by-step diagram for drawing a monogram
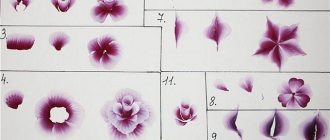
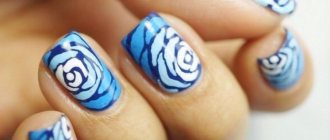
Consider the following lightweight flower-shaped monogram . It is done quickly, just stretch the flower petals in a circle towards the center.
This technique is common and universal. With a brush you can make many drawings, filling the space with various shapes. It all depends on your flight of fancy.
Scheme for drawing a monogram in the form of a flower
Charming New Year's nail art
One of the most striking associations with the New Year is Christmas tree balls. Drawn on the nails, in combination with silver or white snowflakes, cobwebs of “rain”, they create a wonderful, positive mood, reminiscent of childhood and gifts from the kind Father Frost.
Design and painting of nails with monograms
There is also a smear technique . This manicure design is available to masters who have already trained their hands.
Original design on nails with monograms
It is necessary to have working materials such as:
- Brush, paints for painting
- Use rhinestones, sand, and
- other materials you may need for the design
Smear technique - monograms from professionals
IMPORTANT : Before drawing the monogram, it is recommended to connect the petals into one circle. The resulting patterns emphasize the curves of all elements of your design.
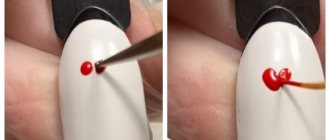
The first stroke in the painting is the petal stroke. It starts from the end of the nails, goes down, and the brush rests on the plane of the nail. Then the brush comes out again to the thin tip. Each hand movement should glide smoothly without jerking. Such strokes are made in different directions.
The second stroke is the monogram. It also draws smoothly, continuously. Can also be performed in different directions. The brush can be torn off if the element comes from a thinned edge. Next, the elements are smoothly connected into one monogram.
The third touch is the transformation into a classic monogram. To do this, add identical petals in a circle without touching. It is convenient to add petals from the bottom edge; this method of drawing also saves time.
Chic monogram design on nails
IMPORTANT: Remember not to tear the lines. Therefore, think through the design clearly in advance. You shouldn’t expect miracles from the resulting creation if you haven’t put in the effort and patience.
