Nail design turns a manicure into a work of art, and learning nail art is not that difficult. We will reveal for you all the secrets of nail design, based on the experience of practicing manicurists.
In this article we will tell you:
- How to paint on nails - what tools are needed to paint on nails?
- What materials can you use to paint on your nails?
- How to paint with nail polish?
- What is the difference between gel polish and shellac?
- How to paint with gel polish on nails?
- How to paint with gel paint on nails?
- How to paint with watercolors on nails?
- How to paint with acrylic paints on nails?
- What can you paint on your nails?
- How to draw designs on nails?
- How to draw monograms on nails?
- How to draw flowers on nails?
- How to draw French on nails?
- How to draw patterns on nails?
You can sign up for manicure training courses in St. Petersburg, Nizhny Novgorod or Moscow and learn how to create stunning nail designs from professionals!
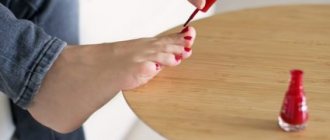
How to paint with nail polish?
The varnish has a thick texture and dries quickly in air. Therefore, it is difficult to paint on it with a brush. It is suitable for elementary drawings made on a wet layer with a needle or dots.
The downside of this manicure is that it doesn't last long. Rarely does polish last on your nails for a week. It is suitable for those who like to change their image.
A simple application technique is suitable for girls with no experience in nail design.
Simple instructions on how to learn how to paint on nails with varnish:
- Apply the background color of polish to the treated nails.
- Place dots of a contrasting color on the still damp surface with a brush or dot and gently stretch. This way you can make petals or artistic patterns.
- When choosing a nail polish for nail design, pay attention to the pigment. It should not be transparent, otherwise the drawing will be dull, almost invisible.
Where to start - materials and tools
Before covering your nails with varnish, you need to do a high-quality and neat manicure:
- Remove any remaining varnish.
- Pull back or trim cuticles.
- Give the nail plate the required shape by filing carefully.
- Sand your nails.
Nail designs for beginners can be done using simple available tools.
For this you may need:
- Cotton swabs (to carefully remove any polish that protrudes beyond the nail).
- Nail polish remover.
- Sponge
- Bamboo (wooden sticks).
- A needle (it is better to choose a safety pin - a needle with a ball at the end).
- Skewers or toothpicks.
- Varnishes of different colors with a standard and thin brush.
- Foil for manicure.
- Rhinestones or small beads.
- Sponge or piece of foam rubber.
- Scotch.
- Stickers for nails.
- Special glue.
Tip: You can buy or make your own manicure box or box with compartments of different sizes. This way, all the necessary tools will be in one place and nothing will get lost.
The above list is basic. Later it will be possible to purchase special brushes and dots. Dots are a manicure tool, shaped like a pen, with a tip in the form of a ball of various diameters.
How to paint with gel polish on nails?
Gel polish is used to paint using the “wet on wet” technique, which is also called “wet on wet” . This design is very easy to make .
Step-by-step instructions on how to learn how to paint on nails with varnish:
- Apply one coat of the background color to the nail and cure in a lamp.
- There is no need to dry the second layer. Apply drops of contrasting colors onto it, and use a thin brush or dot to make streaks.
Gel polish is not suitable for complex patterns. It is impossible to draw thin lines with it because it spreads. Large elements are easier to draw. For example, French or reverse French.
If you decide to apply a complex pattern with gel polish, then apply the paint in thin layers, and then dry each one in a lamp. This makes it more likely that the image will not float.
When choosing gel polish for drawings, pay attention to the pigmentation of the material. Transparent colors are not suitable for design. They can be used as a background. The drawing requires rich and dense colors, otherwise the pattern will be difficult to see.
Tips from the experts: what not to do when creating a manicure
Common mistakes that should not be made:
- the cuticle is not cut, it is pushed back with an orange stick and then removed with a remover;
- the nail plate is filed in one direction to avoid cracks and brittleness;
- Before using the varnish, do not shake it, otherwise bubbles will appear, which will become an obstacle to creating an even coating;
- You can’t apply varnish in a thick layer, 2 thin layers are better;
- the edges of the nail are caught when painting, otherwise chipping cannot be avoided;
- Do not underestimate the benefits of the fixative; it increases the service life of the manicure;
- coatings are dried in the open air or under a lamp, do not try to do this in ice water;
- to remove excess polish on the skin, use a nail art brush;
- You cannot remove gel polish with a file; there are professional tools for this.
There are many techniques and decorative options, so every woman will choose an option to suit her taste. Salon procedures are expensive, but you can learn the basics of nail art on your own.
It is easy for a novice manicurist to learn how to make simple designs on nails. They are created using varnishes, bouillons, rhinestones, foil, acrylic powder or watercolor paints.
Article design: Olga Pankevich
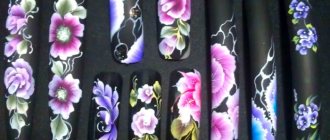
How to paint with gel paint on nails?
Gel paints have high density and pigmentation. They are easy to draw various design elements, including fine lines and raised details. It won't spread. Usually one layer is enough for the image to be bright.
Step-by-step instructions on how to learn how to paint with gel paint on your nails:
- Apply gel paint to the finished manicure covered with top coat.
- Start drawing from the central element.
- Dry the final result in a lamp.
- Cover with top coat if desired.
Choose gel paints from trusted manufacturers. Cheap options often turn out to be fakes. They apply poorly and are of poor quality.
Experiment with gel paints from different manufacturers. Only through experience can you choose the best option for yourself. Keep in mind that the paint color should be rich. The consistency should not be liquid so that it does not spread during drying in the lamp.
How to paint with watercolors on nails?
Watercolor design is simple, but looks very impressive.
Any watercolor will work. Choose fresh colors. They should have a uniform consistency without inclusions.
Watercolor is transparent, so it works best on a white background. Painting with watercolor is not so easy, so we have prepared step-by-step instructions for you.
Step-by-step instructions on how to learn how to paint with watercolors on nails:
- Gel polish as a base must be dried.
- To paint on nails with watercolors, treat the surface of the nail with buff until matte. Then the paint will spread less.
- If you apply an image in several layers, then the previous one must dry.
- Cover the finished design with 2 layers of top coat. The top will provide good durability to the manicure for about 2 weeks.
Before applying paint, draw the outline of the future design with a simple pencil or acrylic paint.
The difference between these approaches is that the pencil will not be visible at the end of the work, but the acrylic outline will be noticeable. The lines of the template drawn with acrylic will act as borders for the watercolor and will not allow it to spread over the entire nail plate.
The simplest drawing ideas for beginners
Having prepared your nails for work, you can apply a design on them using any tools, even handy ones - those that every girl absolutely has at home.
Working with a needle
Original and even simple drawings here and there can be created using a needle. How to use it:
- You don’t need to draw on your nail right away, try doing it on paper. Firstly, you will understand how it works, and secondly, this way you can choose the proportions as close as possible to your nail.
- Apply the base (transparent base) to the nail plate, wait until it dries completely. The base is always applied in 1 layer.
- After the first base layer has dried, you will need to apply another layer - the background layer. Choose the color of polish that will accent the nail, for example, white.
- There is no need to wait until the second layer dries. You can continue working right away.
- Somewhere in the middle of the plate, drop three small dots of, say, red varnish onto a white background, forming a triangle or alternately one after another along the nail.
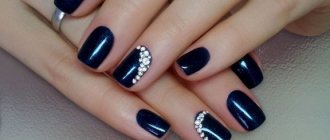
- You can draw with a needle by immediately poking it into the middle of the highest point, stretching it to the bottom, and so on to all of them, one by one. The result will be an ornament like the one in the photo.
- You can drop, for example, the same white varnish into the center of a red drop, then when stretched, a white stripe on a red background will follow the needle.
- You can stretch the varnish from side to side, and then you get an unusual pattern.
Drawing on nails with a needle
The color palette in such simple drawings has no specific boundaries. The author himself decides what to combine with what.
You don't need to work on all your nails at once. Draw them in order from the very beginning to the victorious finish. Otherwise, you definitely won't succeed.
Painting with a brush
This drawing technology is a little more complicated, but with a great desire, any novice master will cope with this task.
Practice, for starters, using artificial nail plates - this will be a very good workout. If you don’t have them at hand, draw a nail on paper that is approximately the same size and shape as yours.
Drawing technology:
- First, as always, a base coat of clear or medicated varnish is applied to prepared nails.
- Leaves the nail to dry. In this technology, all layers must dry completely as they are applied.
- After the base has completely dried, apply the background layer. The color in this technique should be chosen so that it contrasts with the future painting. First, in one step, the brush is moved from the center towards the cuticle, then the left side of the plate is painted, then the right. If you notice, you should only get 3 strokes of the brush.
- Further work will require a very thin brush. Dab it into the varnish, be sure to remove the excess. And, as they used to do at school, start drawing an element of the pattern or the drawing itself.
- The final step should be the fastening procedure. That is, the nail is completely covered with colorless varnish, along with the design.
For clarity, here are photos of simple drawing ideas.
Brush painting technology
This technology uses a different number of colors. First, try drawing hearts, simple flowers, lines and other geometry. If you feel the strength to draw a more complex pattern, feel free to get down to business.
Simple painting on nails with acrylic paints
These paints are respected by professionals and those who know how to paint with them. Their peculiarity is that they do not spread during operation, are easy to apply, dry fairly quickly, and last a long time. In addition, they are not dangerous to human health. On sale:
- colorless;
- translucent;
- opaque (overlapping the previous layer);
- pasty.
Can be diluted with water without any problems. They mix easily with each other. After drying, you can safely apply another design on top of them without fear of damaging the original layer. The coating is breathable and looks very attractive and bright.
Bright and cheerful designs on nails
According to the drawing technique there are:
- Oily. It is used in paste and undiluted form. They are called that because they resemble paintings done with oil paints.
- Pasty. The consistency is similar to liquid dough. The composition is not diluted and is used in the form in which it was purchased. You can only add pigments to it if the idea of the drawing requires it. Paint in the form of thick strokes. When the paint dries, the appearance is similar to gouache painting.
- Watercolor. Water must first be mixed with the binder, only then watercolor is added. The drawing in its pure form is similar to a watercolor pattern. Characterized by high quality.
- Sliding. You can mix this composition with structural nail gel. The difficulty here is that it will be quite difficult for a novice master to predict the end result. But after a few trainings you can learn this too.
- Glazing. You need to work with this material carefully. All layers that will be applied must be very thin, almost invisible.
Simple nail art
You can paint with any type of brush that you know how to work with. For training, it is enough to purchase 6 basic shades and white in order to correct any mistakes in time. To understand them in action, you must first draw a checkerboard-shaped field on paper.
For 6 colors you will need 6 squares of approximately 2x2 cm. Apply the purchased paints to this field one after another (alternately) - paint the entire square with one pigment, then draw them with horizontal lines of a different shade, and finally with vertical lines of a different color. You should end up with 36 colors.
Painting with a brush using acrylic paints
Paint a twig with acrylic paint:
- Choose a very light color for the background (then choose a dark color for the drawing) or vice versa. In our example, it is lilac.
- Draw curved lines in yellow. Choose the location at your discretion, not necessarily exactly as shown in the photo.
- On this arc, draw leaf-shaped figures of the same tone using curved lines.
- Make the veins inside the leaves lighter.
- Secure the result with a transparent fixing layer.
Leaf drawing
If this drawing seems too easy for you, try recreating these simple ideas. In the first photo the drawing technique is depicted in pictures.
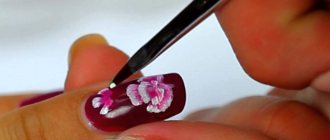
Step by step drawing of a rose on nails
Learn to draw with dots
From the simplest designs to very complex patterns, professionals draw with dots. The simplest techniques are a combination of dots, commas, rulers, and so on of different sizes. The tool needs to be soaked in paint or varnish and begin to paint with it as with a regular brush. During the work, the amount of coloring agent decreases, this can be seen in the ingredients on the nail ornament, which makes the design more natural and realistic.
Dots drawings
You can draw your nails with dots however you like. With it you can draw:
- flowers or animals;
- modify the traditional version of French manicure;
- It’s easy for them to create New Year’s motifs;
- personify the seasons on your nails;
- You can draw very stylish abstractions using dots.
Bright dot pattern
Drawings using regular tape
Regular household tape can greatly help in creating nail designs. With its help you can make very different shapes, drawings and even compositions. Geometry is the easiest to do - it is based on lines, and cutting them out with tape is very easy. The cut strips can be applied to the nail plate in any order or sequentially if you want to create a specific shape.
Techniques for working with tape:
- As in all previous cases, the nail is first prepared.
- The first layer is the base layer.
- After drying, apply the background - at your discretion.
- While the varnish is drying, cut a few thin strips from the tape (about 1 mm wide, it can be thicker if you want it yourself), the length should be greater than the size of the nail, so that later there will be no difficulties in removing the strips.
- If the background layer is dry, apply the tape sheets to the nail the way you want it.
It is very important that it is thoroughly high. Otherwise, when removing the strips, you may damage the background layer if it has not dried well.
- On top, cover the entire surface of the nail with varnish of a different shade or several - this is also your prerogative in choosing.
- Allow a few seconds for the polish to begin to dry, but not completely dry.
- Peel off the pasted strips and see what you got.
You can leave everything as it is, or you can further refine the drawing with a thin brush or dots. Adding sparkles, circles and other elements with a different color of varnish.
Grilles made with adhesive tape
Today there are many types of decorative tape on sale; it can also be used to create drawings. Here there is no need to cut the strips yourself. It can also be used in terms of decoration. Glitter on nails always looks beautiful, and with decorative tape it looks excellent and unique.
Toothpick drawings
Simple but unique patterns on your nails can be made with a regular toothpick. It is an indispensable attribute of every home, always at hand, and can always help in creating a complete image. If you have already learned how to work with a needle, then there will be no problems with applying designs with a toothpick. The drawing technique and sequence are similar here, only the drawings are slightly different.
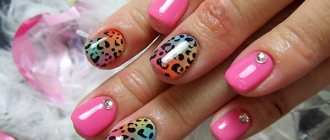
Leopard pattern with toothpick
How to paint with acrylic paints on nails?
Acrylic paints dry quickly in air, so it is better to dilute them with water or a special liquid. They are easy to draw clear lines and openwork elements, and draw contours.
Acrylic is a difficult material to apply. Choose brushes with artificial bristles. The thickness of the beam depends on the chosen pattern: the thinner the pattern, the smaller the diameter of the beam, and vice versa.
Step-by-step instructions on how to learn how to paint acrylic designs on nails:
- Apply the material to pre-dried varnish or gel polish.
- Use acrylic to draw individual elements of a design made with another material, or create a complete composition.
- Cover the finished design with 2 layers of top coat to seal the nail well. Make sure the acrylic is completely dry before you “seal” your finished design.
Be careful, oil acrylic paints are not suitable for painting nails. They contain drying oil, which slows down the polymerization process.
How to draw monograms on nails?
Monograms are curlicues. They can decorate any manicure: both everyday and festive.
Step-by-step instructions on how to learn how to draw monograms on nails:
- Buff the glossy surface of the nail to prevent the paint from spreading.
- Apply paint onto the brush using a twisting motion. It should be elastic and thin, No. 0 or 00. If the material is not collected at the very tip of the bundle, then you need to dip it in paint again.
- Place a point and stretch the paint, slowly lifting the pile. This is the main element of the monogram.
- To make a curl, place a dot on the nail, press the brush, draw the paint, turning the bristle a little, then lift the brush and bring the tail of the monogram to a very thin line. You cannot tear off the brush while drawing the monogram.
- If an unpainted area is formed, then the movement is repeated on top of the applied layer from the very beginning, but there is no need to reapply paint to the brush.
- Dry the finished design and cover it with topcoat.
We found an inspiring video for you and are sure that you will learn to draw too:
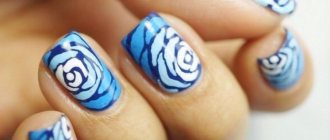
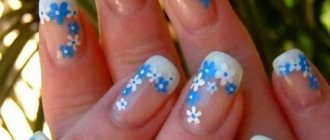
How to draw flowers on nails?
You can draw flowers using different techniques. The easiest way is to create a template of petals with gel paint or acrylic and fill it with color.
You can also use the “wet coating” technique, that is, put dots and connect them in the form of petals.
Let's take a closer look at the Chinese painting technique. It is often used by masters when creating flower designs on nails. Flowers using this technique are voluminous and vibrant.
Step-by-step instructions on how to learn how to draw flowers on nails using Chinese technique:
- Apply paint to the palette.
- Put one color on one side of the pile, and another on the other.
- Place the brush on the edge of the nail and extend the stroke away from the center of the future flower. At the end, lift the brush a little and place it on the edge. You should get a smear of two colors.
- Do the same for all the other petals of the flower.
- Decorate the middle of the flower with a different color or rhinestones.
- Draw leaves and petals on the sides of the resulting flower. No drawing of lines is required.
- Dry the nail with the design in a lamp.
- Cover the entire surface of the nails with the topcoat and dry.
Watch the training video to reinforce your new skill:
Using a sponge
There are two techniques for painting with a sponge. They differ from each other in the degree of complexity and the final result.
For this manicure you will need:
- Base coat. Better with strengthening function.
- Varnishes of different colors, but similar shades.
- A piece of foam rubber.
- Foil.
- Cotton swab to remove unevenness.
- Nail polish remover.
- Toothpick.
- Finish coating.
The first method is perfect for those who decide to do such a manicure for the first time. It is easy to implement.
Technique:
- Any manicure begins with applying a base coat.
- Then the varnish of the color that will be the main one is applied. This should be the lightest shade. You must wait until it dries completely.
- You need to drip a different color of varnish onto the foil (darker or any opposite color, in which case the manicure will turn out brighter and more extravagant).
- Dip a sponge into the polish and apply to the base of the nail. Press down, but not too hard. Remove sponge.
- If several shades are planned, then the next color is applied overlapping slightly higher than the previous one.
- The third or fourth color, if desired, is applied to the tip of the nail.
- It is necessary to remove excess nail polish (on the cuticle and sides) with a cotton swab dipped in a special solution (nail polish remover, acetone).
- Secure the design with colorless varnish.
The second option at first glance seems easier than the previous one, but, in fact, requires more concentration:
- The nail is covered with a manicure base.
- 3-4 colors are applied to a piece of foil.
- Using a brush or cotton swab, transfer all the colors right next to each other to another piece. If there is free space between them, you can simply connect the layers with a toothpick.
- The sponge is dipped into the palette and pressed against the entire length of the nail.
- Remains of varnish are removed with a cotton swab dipped in liquid.
- After drying, the finishing coat is applied.
Advice! It is better to choose a sponge of small thickness and dense texture. A good option would be a regular eyeshadow applicator.
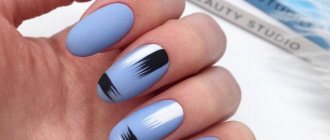
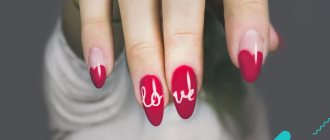
How to draw French on nails?
French manicure is easy to draw if you follow the rules.
Step-by-step instructions on how to learn how to draw French nails:
- Cover the nail with the background color and dry.
- Walk over the nail with a soft buff and degrease the surface of the nail plate so that the material does not spread.
- Just below the smile line, place symmetrical dots with gel paint using a thin brush.
- From the marked points, draw straight lines to the free edge. There is no need to connect them.
- Mentally divide the square nail into 2 parts, and also divide each part into 2. Place dots on the free edge. This will be the end of the line. Mentally build oval or almond-shaped nails into a square and divide based on this shape.
- On a thin brush, pick up the paint you are using to paint the jacket. Draw a line parallel to the free edge, setting the thickness of the jacket.
- Round the inner corners of the lines with a thin brush.
- The French coat is ready, the last step remains: dry the coating and apply top coat.
There are several ways to draw a French jacket. You can watch some of them in the video instructions:
Decorating nails with a gradient
Gradient manicure is a gradual transition from a dark varnish color to a lighter one. This technique is often called amber.
The simplest gradient option is to cover each nail in a different color. To do this, you will need 5 varnishes of different colors (for example, from white to blue). If this is not possible, then you can use only two colors of varnish: base (for example, red) and white, and by mixing yourself achieve the desired result.
For a design on nails for beginners Hearts You will need 2 colors of varnish, a base, a toothpick and a fixative.
Procedure:
- The first nail on the thumb is covered with the main color.
- On a piece of foil you need to drip varnish of the main color and add a drop of white.
- The resulting shade is applied to the second nail.
- A little more white is added to the remaining mass and the third nail plate is covered, and so on until the last.
You can perform a gradient manicure using a sponge.
Advice! When making amber, shades can be applied not only horizontally, but also vertically.
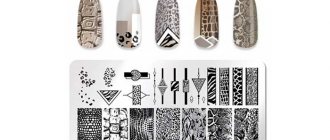
How to draw patterns on nails?
Even the most complex patterns are formed from various simple basic elements. You can draw geometric shapes, monograms, lines, dots, commas. The elements are first applied separately and then combined with each other.
Watch the video showing fine line patterns in detail:
In order to quickly master nail painting techniques, you should turn to professionals or take courses. During the learning process, teachers will help you place your hand and avoid mistakes.
When choosing courses, follow simple rules:
- Read reviews about the school. They can be found on the official website and on social networks. Write messages to the reviewers and ask them about the training.
- Look at the students' work. The best works are posted on the Internet. If you don't like these works, then the ones that haven't been posted are even worse.
- Sign up for a school as a model to assess the situation from the inside. Pay attention to the quality of the materials the students work with, the sterility of the instruments, and the presentation of information by the teachers.
- Choose a course where practice prevails over theory .
- Check to see if there is an exam at the end of the training and if a certificate is issued. It is important what is written in it: you took a course or passed an exam .
- Choose the cost of courses whenever possible, but remember: good courses are rarely cheap. There is no need to pursue expensive training if finances do not allow it.
- Be sure to enter into an agreement with the school and read it carefully before signing. Please ensure that your name, course title and class start date are spelled correctly.
Upon completion, you will be a certified technician. Clients trust more if they have a certificate and more easily forgive specialists for small mistakes.
Learning how to paint your own nails is not as difficult as it seems. You can practice each element on paper, then on tips, and only then apply it to the nail. The processing process can take a long time. The reward for your patience and work will be a beautiful manicure with a design.
This training may be right for you:
- Best Online Manicure Courses from 1,000 Rubles
- 10 Best Manicure Training Courses in Moscow
- 10 Best Manicure and Pedicure Courses in St. Petersburg
- Best Nail Extension Courses in Moscow from 1,000 Rubles
- 10 Pedicure Training Courses in St. Petersburg
- 10 Best Nail Extension Courses in St. Petersburg
Choose the Best Courses in Your City: Yekaterinburg , Krasnodar , Nizhny Novgorod , Novosibirsk , Rostov-on-Don , Perm , Krasnoyarsk , Voronezh , Omsk .