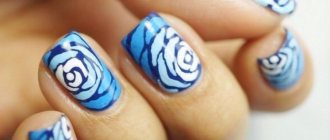
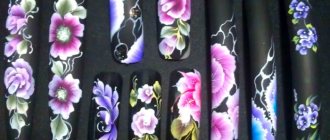
The nail industry is constantly improving, so the fair sex will be able to try new solutions and ideas to create a flawless manicure. Drawings on shellac add variety to the usual nail coating. Girls are given unlimited opportunities to experiment.
Shellac is the varnish of the American brand CND, which released the original Shellac collection. They have a gel texture and increased resistance to damage. The product is odorless and dries quickly in a special ultraviolet lamp. Nail art shimmers beautifully in daylight and looks great in photos.
Thanks to the wide color palette, girls will be able to choose a polish for any look and special event. The coating will last for several weeks and will delight you with its impeccable appearance. It is necessary to apply the drawing only after the base layer has thoroughly dried.
Advantages and disadvantages, features
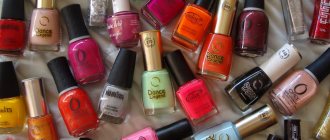
The color palette of varnishes allows you to choose any shade to create beautiful designs on your nails with shellac. Representatives of the fair sex can combine different colors and textures. The following features of shellac can be distinguished:
- durable coating;
- no chipping, cracking or peeling;
- safety;
- no pungent odor.
Shellac paintings do not cause allergic reactions and do not harm natural nails. Even when worn for a long time, they do not deplete and remain healthy.
The coating has virtually no disadvantages, except for some listed below:
- Expensive. If you do a manicure at home, you need to buy a basic set and an ultraviolet lamp.
- Duration and complexity of the procedure. To remove the old coating you will need to use special products and film.
- Using sanding after removing shellac.
Drawings on nails with gel polish: fresh photos and instructions for beginners
Well-groomed hands with a lovely manicure are one of the main points that a real woman should adhere to. The manicure industry is developing dynamically. A huge number of nail design techniques have already been invented. All of them are interesting in their own way and have their own characteristics. Today it is difficult to surprise anyone with an ordinary classic manicure. But every girl wants, even in the depths of her soul, that her well-groomed nails and new manicure do not go unnoticed. This is why designs on nails with gel polish have become so popular in our time.
They look great not only on long, but also on short nails. Content:
How can you paint on shellac, what painting methods exist
Many representatives of the fair sex want to know what they use to paint on shellac?
- Acrylic paints are perfect for manicure at home and for beginners. This is a safe material that has no foreign odor. A distinctive feature is a wide color palette and the ability to mix colors to get new shades.
- Gel paint. It has high pigmentation and provides unlimited possibilities for creating raised patterns due to its density.
- Regular varnish. You can paint on a shellac coating in the usual way, but this will require drying time and patience. It is important to give preference to varnishes with a dense texture that will not spread.
Total: you can paint on shellac with regular varnish, gel or acrylic paints.
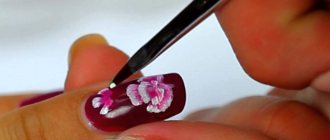
You can paint on shellac with a long brush, but you need to have the skills to do the job. To do this, you can watch design lessons, master classes, photo or video instructions. This tool is indispensable when drawing flowers, clear lines and hearts. Another universal technology for creating an original manicure is to use tape. You will need two varnishes of different shades and a finishing clear coat. Scotch tape is useful for painting in the geometry style or French manicure.
Gradient designs on shellac are extremely popular among the fair sex. The main distinguishing feature is the combination of several shades with a smooth and barely noticeable transition. The varnish is applied using a foam sponge, so smooth lines look beautiful on the nails.
Read more: how to make a beautiful manicure using a sponge at home.
Below are photos of nails made using this technique:
An article we recommend reading: gradient stretching with gel polish: ombre at home.
Water-based shellac manicure with a pattern looks beautiful and original on the nail plate. It is necessary to use several contrasting shades. Before applying a water manicure, the nails are covered with a base, and the finished nail art is thoroughly dried in an ultraviolet lamp.
Read about this type of coloring here: water manicure at home: tutorials, varnishes, designs.
About abstract drawings in the video master class:
Design for the more experienced
Complex patterns are suitable for those who have experience in creating nail art.
Before starting the main work, you will need to prepare the nail plates. For this purpose, you can apply a stencil with the desired image option on them or cover them with a base color and let it dry completely.
Depending on what you have in mind, you can apply up to 2-3 different colors and shades, but each of them must be dried until completely hardened. Then, if stencils were used, you need to carefully peel them off, then paint over the empty spaces with varnish of a different shade; if not, apply the desired pattern with a toothpick.
In any case, the final stage will be the application of a fixing layer. It is recommended to use regular clear varnish for this purpose.
Drawing monograms. Master class on video:
Gel polish
The technique of working with gel polish requires attention and accuracy. This coating option will allow you to create designs of any complexity, suitable for summer or winter manicure.
If you don’t have enough experience or you have chosen a complex pattern, you can use glitter - they will correct mistakes and make your nails attractive.
It is important to apply them no less carefully than the main coating, since a mistake at this stage can ruin everything.
Techniques for working with gel polish for beginners. Video:
Some manicure options with a pattern can be done simply and easily.
For painting you will need:
- gel of desired shades;
- glitter (optional);
- lamp (UV);
- base coat;
- protective covering.
You will also need a toothpick or a thin needle for application, a tool that allows you to remove the sticky layer. At the initial stage, you need to prepare the nail plates - the work involves removing the cuticle and polishing.
Then a base coat is applied to the prepared plates (it must dry completely before further work; there is a special UV lamp for this purpose). Then a colored gel is applied - the shade is selected as desired or to match clothes and accessories.
It is important to remember that it does not need to be dried. Using a needle or toothpick, collect the required amount of glitter. They need to be carefully distributed over the surface, but not pressed against it. Excess glitter must be carefully removed so as not to visually spoil the manicure.
The next step is to dry your nails under a UV lamp. To complete the work, you will need to apply a final protective coating, which also needs to be completely dry. You can then use a stick remover.
This option is suitable for any season. It can be used for both daily and holiday use.
Acrylic paints
An excellent design and manicure option is delicate pink and white.
- Cover the plate with a colorless coating (you can use a beige base, which is used for French manicure).
- You need to drop a little varnish onto the sponge and then press it onto the nail for 5-7 seconds.
- Using a thin brush, you need to apply white acrylic paint and draw any designs along the edges (this could be waves, curls).
Then you need to apply the finishing coat. Additionally, you can use a small amount of glitter.
Painting with acrylic paints. Video:
What else can you paint on with shellac?
You can also make a design with shellac on gel or acrylic nails.
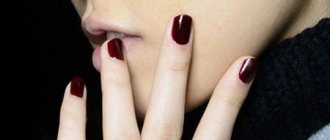
A French jacket with a pattern on long extended nails looks very beautiful and attractive.
However, in any case, we also recommend using shellac as the main coating; it does not harm the natural nail plate, and it can also be applied to any gel, gel polish, acrylic. The composition includes medicinal components that have a beneficial effect on the top layer. Thanks to this coating, light defects or unevenness can be hidden. It combines the functions of a regular varnish and a strengthening agent.
Stage 2. Preparing the nail plate for coating
Next, you need to prepare your nails for a manicure with gel polish. This stage is very important, since it determines how well the adhesion of the natural nail and the artificial coating will occur. To carry out proper preparation, we will need the following materials:
- buff;
- brush or brush for removing dust;
- lint-free wipes;
- 2 in 1 liquid: degreaser and sticky layer remover - this product removes natural deposits (grease and dust) from the surface of the nail plate, thereby preparing the plate for better adhesion to the artificial material;
- dehydrator (nail-prep) - deeply dries the nail plate and removes excess moisture from it. A dehydrator is a must for people with oily skin and prone to excessive sweating, since usually the structure of their nails is damp and oily, which impairs adhesion to artificial turf;
- primer - translated as “primer”. There are acid-free and acidic primers.
The acid-free primer acts as double-sided tape and ensures strong adhesion of the natural nail to the artificial nail.
The acid primer lifts the keratin scales of the nail plate for better adhesion to the artificial material. Since the acid primer contains aggressive components, you must be careful not to get it on the skin and cause a burn. It is recommended to use it before extensions for girls with wet or oily nail texture.
What do we do at this stage?
- We treat the surface of the nail plate with a buff to lift the scales of the nail plate and improve adhesion.
- Remove dust with a special brush.
- Apply degreaser to a lint-free cloth and wipe your nails. If you want to make the process as comfortable as possible, we recommend using liquids without chemical fragrances, such as ParisNail liquids. They have pleasant aromas and 100% rid the nail plates of germs, grease and dirt, thus guaranteeing long-lasting wear of the coating.
- If you have oily skin, then to improve adhesion, apply a dehydrator to the entire surface of the nail and air dry for a minute.
- Then you need to apply primer to the free edge of the nail. The free edge is one of the most vulnerable places, and thanks to the primer, the adhesion between the nail plate and the artificial material improves, which contributes to longer wear of the coating. We also air dry the primer for one minute.
Tools and materials you will need
To easily start painting on your nails with shellac , you need to purchase the following materials:
- main or base layer;
- several shades of shellac;
- finishing coating.
To dry shellac, it is important to use an ultraviolet lamp and additional tools:
- a product with an antibacterial effect;
- spatula or orange stick;
- file;
- bondex;
- softening cuticle oil;
- sanding file.
Simple designs
Applying a pattern to your nails yourself is quite simple, especially if you use your imagination.
Before you start painting, let the first layer, which is the base, dry.
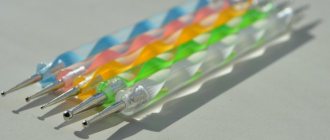
If you are confident in your creativity and drawing skills, you can apply the motifs yourself using a regular needle.
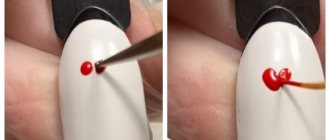
Take any ship that you are not afraid of (you can use an ordinary piece of cardboard), drop a drop of the chosen paint. Now take the needle, dip it in the drop and start drawing on your nail with it. As a template, you can use any template that allows you to embody your imagination and skill in manicure.
You can quickly and easily create a unique design on your nails using thin masking tape. Colored shellac is applied to the base. Don't forget to dry the next layer well! It's time to style the model using masking tape.
You can make the pattern the same for all nails, or you can apply the tape to each nail differently. Now apply a layer of shellac of a different color. Before drying your nails, remove the tape from your nails.
An interesting pattern is obtained if you use lace on your hand. Attach the lace to the nail at the desired angle, and then apply a layer of shellac. Dry the drawing thoroughly under the lamp and apply a layer of transparent shellac on top.
Making a drawing, the easiest option at home
Below is an accessible lesson that will answer all questions on how to paint with shellac using acrylic paints. Some masters create video presentations where you can clearly see each stage. This nail art technique has gained popularity because girls can make simple drawings and create original designs.
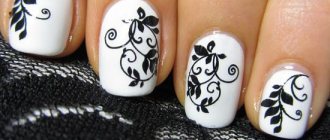
Manicure twigs
It can be done with yellow or green paint in strict sequence:
- application of base and main coating;
- from the bottom corner you need to draw two stripes with bends;
- small leaves are drawn in the same color;
- the middle of the sheet can be painted over with a light shade;
- a finishing coating is applied as a fixing agent;
- Each layer is thoroughly dried in an ultraviolet lamp.
The photo shows one of the painting options: