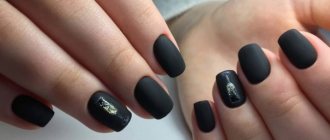
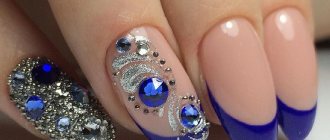
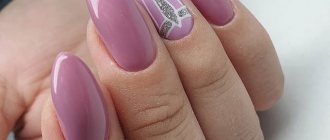
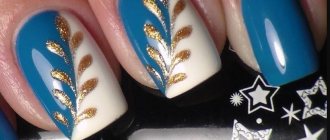
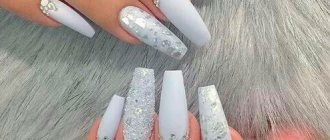
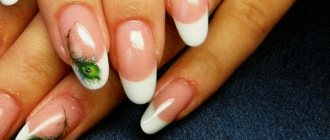
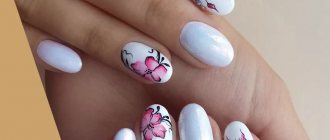
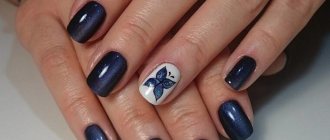
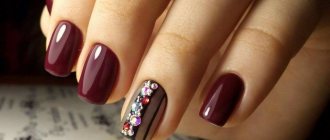
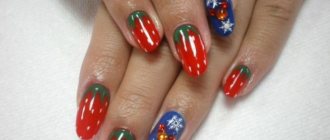
A beautiful manicure is an integral part of any female look, and by well-groomed and neat nails you can confidently judge the attractiveness of a lady. However, no matter how sad this may sound, in the pace of modern life, the fair sex does not always have time to regularly visit a nail salon. And what to do in such a situation, because you always want to look decent? Many young ladies are trying to reconsider their busy schedule and still make time to go to a beauty salon or are looking for a master who provides services at home. And some decide to learn how to do a beautiful manicure on their own. At the same time, the manicure procedure itself must be performed with high quality, and the design must look relevant and attractive. We will tell you further about what materials and devices you will need to achieve your goal, and what design ideas you can create on your own, without having the skills and experience in this direction.
Nail design for beginners - general recommendations
In order to learn how to perform a manicure beautifully and efficiently, first of all you should learn a little about its varieties, because when visiting a salon, any young lady, as a rule, simply sits down in a comfortable chair, voices her wishes and puts her hands at the complete disposal of the master, without delving into into the nuances and details of the procedure. But before you start designing your nails, you should additionally tidy up the nail plate itself and take care of the overgrown cuticle. A classic trimmed manicure is a procedure during which the cuticle is removed using special tweezers or miniature scissors. This option is ideal for those with rough cuticles, but is considered very traumatic and requires extreme care.
Unedged manicure is performed using lactic or fruit acid and completely eliminates the use of cutting tools. This procedure takes much less time, is considered less traumatic, but is contraindicated for young ladies with sensitive skin and allergies. Hardware manicure is also considered a fairly well-known and popular procedure. In this case, the cuticle is removed and the nail plate is processed using a special device - a milling cutter and several attachments. However, it is very difficult for a novice master or amateur to judge how correctly and accurately to handle this method. After the cuticle is removed, the shape and length of the nail plates are adjusted using a nail file, the surface of the nail is degreased and you can begin to create a design.
How to draw flowers on nails?
You can draw flowers using different techniques. The easiest way is to create a template of petals with gel paint or acrylic and fill it with color.
You can also use the “wet coating” technique, that is, put dots and connect them in the form of petals.
Let's take a closer look at the Chinese painting technique. It is often used by masters when creating flower designs on nails. Flowers using this technique are voluminous and vibrant.
Step-by-step instructions on how to learn how to draw flowers on nails using Chinese technique:
- Apply paint to the palette.
- Put one color on one side of the pile, and another on the other.
- Place the brush on the edge of the nail and extend the stroke away from the center of the future flower. At the end, lift the brush a little and place it on the edge. You should get a smear of two colors.
- Do the same for all the other petals of the flower.
- Decorate the middle of the flower with a different color or rhinestones.
- Draw leaves and petals on the sides of the resulting flower. No drawing of lines is required.
- Dry the nail with the design in a lamp.
- Cover the entire surface of the nails with the topcoat and dry.
Watch the training video to reinforce your new skill:
Design for beginners - choosing materials and tools
If your plans include completing the design with regular varnish, which, by the way, can be used to gain skills in uniform application of the coating, then you will not need any additional tools or materials other than nail polish remover. Well, if you decide to learn how to make a “long-lasting” design using gel polish that will last on your nails for at least two weeks, then in this case you should purchase a special set. The standard set includes several types of nail files and a polishing buffer, lint-free wipes, orange sticks, a top coat with and without a sticky layer, a base coat, acrylic powder, several colored gel polishes and a lamp for drying. This set is quite enough to create the easiest and most common monochromatic design.
To decorate your nails with a more complicated version, you may additionally need thin brushes, a stamping kit, dots, stencils, sliders and various types of decor, for example, glitter, foil, metallic strips, rhinestones, beads, bouillons and other options.
Simple gel polish designs
Of course, we always want the manicure to last on our nails for as long as possible. Especially if we made it ourselves. There is a gel polish specifically for this purpose that can last at least 2 weeks. With its help you can create absolutely any manicure, after which the varnish must be dried under an ultraviolet lamp.
As you can see, even with a minimal set of tools, you can make a spectacular manicure yourself. If you didn't manage to do what you planned the first time, don't despair. Over time, you will be able to create real masterpieces.
Plain Nail Designs for Beginners
As we have already mentioned, this design is considered both popular and the easiest to implement, so we recommend starting your career as a manicurist with this example. Practice, first, with a design in light colors, in which imperfections and unevenness will be less noticeable, and later you can use brighter shades in the process. This type of manicure always looks laconic, attractive and universally suitable for many looks. And most importantly, plain nails go well with various decors and serve as an ideal canvas for applying designs.
How to paint with acrylic paints on nails?
Acrylic paints dry quickly in air, so it is better to dilute them with water or a special liquid. They are easy to draw clear lines and openwork elements, and draw contours.
Acrylic is a difficult material to apply. Choose brushes with artificial bristles. The thickness of the beam depends on the chosen pattern: the thinner the pattern, the smaller the diameter of the beam, and vice versa.
Step-by-step instructions on how to learn how to paint acrylic designs on nails:
- Apply the material to pre-dried varnish or gel polish.
- Use acrylic to draw individual elements of a design made with another material, or create a complete composition.
- Cover the finished design with 2 layers of top coat to seal the nail well. Make sure the acrylic is completely dry before you “seal” your finished design.
Be careful, oil acrylic paints are not suitable for painting nails. They contain drying oil, which slows down the polymerization process.
Design Ideas for Beginners with Patterns
Drawings on nails always attract attention, look beautiful and emphasize the individuality of every fashionista. However, no matter how much beginners would like to decorate their nails with outlandish paintings, only experienced craftsmen with artistic skills can create a “wow” effect with their work. If you are just starting to master this creative profession, then we suggest giving preference to images that are not difficult to execute. These can be all kinds of stripes applied with bright varnishes or acrylic paints using a thin brush, zigzags and geometric shapes, flowers and twigs, cute polka dots, abstract patterns and other ideas that you can do yourself.
If for some reason you don’t dare try on the role of an artist, you can always use ready-made stickers, sliders or stamping in your manicure. Stickers are applied directly to the base of the nail plates. Sliders simultaneously act as both a covering and a design. All you have to do is attach the blanks to the base of the nail and carefully trim off the excess parts.
As for stamping, in this case such a device is a set of a stamp, a board with motifs and a scraper for removing excess varnish. Apply the selected shade of coating to the pattern you are interested in, remove the excess, press the stamp firmly onto the image and transfer the design to your nails.
How to paint with nail polish?
The varnish has a thick texture and dries quickly in air. Therefore, it is difficult to paint on it with a brush. It is suitable for elementary drawings made on a wet layer with a needle or dots.
The downside of this manicure is that it doesn't last long. Rarely does polish last on your nails for a week. It is suitable for those who like to change their image.
A simple application technique is suitable for girls with no experience in nail design.
Simple instructions on how to learn how to paint on nails with varnish:
- Apply the background color of polish to the treated nails.
- Place dots of a contrasting color on the still damp surface with a brush or dot and gently stretch. This way you can make petals or artistic patterns.
- When choosing a nail polish for nail design, pay attention to the pigment. It should not be transparent, otherwise the drawing will be dull, almost invisible.
Manicure ideas for beginners with decor
The use of different decor allows you to transform and refresh any design, be it a plain design or a manicure with a pattern. Therefore, even an inexperienced beginner should definitely use one or another type of decor in the design of a manicure. Using rhinestones and stones, you can highlight the base of the nail plate or lay out a simple pattern. Pieces of shiny or colored foil can be used as an independent decoration or act as a base for drawings. Designs with acrylic powder and manicures with metallic stripes look no less attractive. A little imagination, time and your own design is in no way inferior to expensive salon procedures.
Today we have brought to your attention some basic knowledge that will definitely come in handy for those who want to learn how to do a manicure on their own. And as you can see, it is not as difficult as it seems at first glance. Of course, this will require small investments and time, but as practice shows, all the young ladies, without exception, are satisfied with the result.
Step-by-step gel manicure for beginners
Regardless of the design, gel manicure must be performed strictly following the sequence of actions. Before applying the gel, it is important to prepare each nail by applying a base coat. Then distribute the colored varnish correctly and secure it well with topcoat. Below is a step-by-step description of each of these stages.
Applying base coat
Before applying the base, you need to treat the nail:
- The plate is given the correct shape and the cuticle is carefully pushed back or cut off.
- A thin layer is removed from the nail using a coarse-grained buff. It is necessary to give the plate a matte surface. Do not press the buff too hard, otherwise you may injure the nail.
- The dust is swept away with a brush and the plate is degreased with a special product.
- If your nails are thin and bend easily, then you need to apply a primer.
- The base coat is applied in a thin layer from the edge of the nail to its root, and then from the cuticle towards the edge.
- The coating must be dried in a lamp.
In UV lamps the drying time takes 1 minute, and in LED lamps it takes 10-15 seconds.
Applying gel polish
Colored varnish is applied in 1 layer to obtain a translucent color.
For a rich color you need to apply 2-3 layers:
- Application begins from the middle of the nail at the bottom, smoothly moving upward.
- When painting the sides of the plate, it is important to ensure that the gel covers the surface completely, without gaps.
- Each layer of gel polish must be dried in turn for a minute. In an LED device – 30 sec.
Particular attention should be paid to the last point. If you do not dry the layers and apply more varnish, the coating will swell or crack.
Applying top
The final coating is necessary to securely consolidate the result:
- The top is applied in the same way as colored varnish. The layer should be a little thicker.
- The ends of the nails must be completely sealed.
- The coating is dried for 2-3 minutes. In LED lamp 30 sec.
The top coat gives nails strength and shine. To achieve a matte effect, you can purchase a special finish or use colorless powder.
