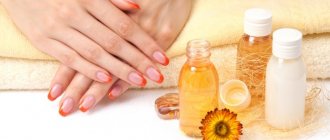
Can't grow your beautiful and long nails? No problem! After all, they can be increased. They do this in a beauty salon, or on their own at home. In this article we will look at step-by-step instructions with photos of gel nail extensions and what materials are needed for this.
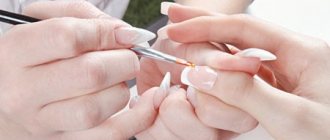
The technology of gel nail extensions is based on the use of a special material that hardens under the influence of ultraviolet rays - UV gel. It gives nails a glossy shine, smoothes out the uneven surface of natural nails and allows you to achieve the desired length. In most cases, it does not create irritation to the cuticle and skin lateral ridges.
Girls prefer UV gel because it:
- ideally corrects imperfections of the natural nail plate;
- allows you to achieve a glossy shine to your nails;
- suitable for modeling popular nail shapes;
- has high strength;
- easy to use;
- has no smell.
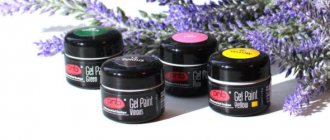
You can create designs on gel nails in a variety of ways. These nails are decorated with special decor: beads, rhinestones, sparkles, foil, three-dimensional elements. In addition, the surface of gel nails is painted with acrylic paints or gel paints for design. You can purchase attributes in the nail art department.
Gel extensions
This procedure, like any other, has positive and negative aspects. Therefore, before you decide to have gel nail extensions, you need to carefully analyze everything.
Many girls prefer gel due to its following characteristics:
- Very easy to spread.
- Does not have an unpleasant or harmful odor.
- Does not cause any irritation to the skin.
- Allows the nail plate to breathe.
- It’s easy to work with (no intensive filing required).
- It can be used for tips (false nails), French and sculpting.
- Does not interfere with the growth of your own nails.
If we talk about the disadvantages of extended nails, there are not so many of them: a long procedure time, slight fragility and long removal. If the master does not know how to properly extend nails with gel, then various negative consequences of the manipulation are possible. In some cases, incorrect actions can lead to damage to the nail plate.
Extension methods
There are two ways:
- On tips;
- On forms.
Tip extensions involve lengthening the nail plate using a plastic overlay called a tip. Then the gel itself is applied to the attached bed.
On forms it requires more skill. In this case, the result is more natural and accurate. Used in most modern salons. A modeling gel is used, which is applied to forms made of paper, plastic or metal, attached under the nail. After the procedure, the form is removed and only the extended nail remains.
Gel nail extension technology
There are 4 types of gel nails:
- on paper forms;
- on the upper forms;
- on liquid tips;
- on tips;
Paper forms are placed on the nail plate and the gel is used to create the shape and length as desired by the client. Then it is still sanded and polished.
When extending nails using top forms, they are applied to the prepared surface and held until completely cured under an ultraviolet lamp.
Liquid tips, made using a special mold, are applied to 2/3 of the nail plate. After polymerization, the reusable stamp is removed and the finished tip remains on the nail surface. Next, everything is covered with gel and kept under an ultraviolet lamp until completely hardened.
The step-by-step technology of gel nail extensions using tips presents some difficulties for beginners. But if desired, anyone can master it if they acquire special tools and materials.
What is required for the procedure?
Gel nail extensions at home for beginners are performed step by step using salon technology, so when getting a manicure it is important for a girl to pay attention to the choice of consumables and tools that will be used during work.
You need to start with choosing the material itself, as well as the extension method - using forms or tips. The first method involves fixing a cardboard backing under the free edge and further applying a gel composition to it, the second involves laying it out in a finished layout, which is then simply attached to the nail bed.
As a standard at home, it is recommended to use forms, since it is more difficult for beginners to work with tips - there is a possibility of illiterate selection based on the size and shape of the nails.
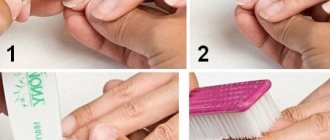
About 15 cardboard supports need to be prepared so that if one layout is accidentally damaged, it can be replaced.
Prepare other consumables and extension tools:
- File;
- Orange stick or pusher;
- Remover;
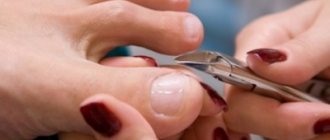
- Nippers or nail scissors;
- Bafik;
- Degreaser;
- Primer;
- Brush;
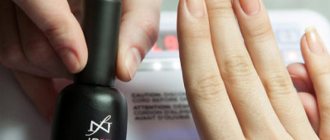
- Compositions for decorative coating – base, gel polish, top;
- Klinser;
- Lint-free wipes.
To dry the base, polymerization is required, so prepare an ultraviolet, LED or hybrid lamp. Make sure it is high power, because when working with gel base it is important that it sets immediately and does not start flowing.
All instruments are pre-treated with an antiseptic to prevent infection or dirt from accidentally damaging the sensitive periungual area.
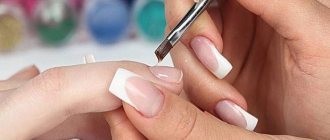
How to properly extend nails with gel on tips
The technique of gel nail extensions on this material requires special attention and the availability of tools. Extended nails are done in the following way:
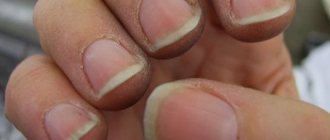
- It is necessary to check the plate for problems (cracks, suppuration, bruises) and disinfect it.
- Remove the cuticle with special means so that the gel does not peel off.
- Cut off excess length.
- Polish the nail plate until rough.
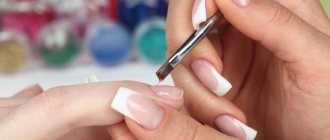
- Apply base gel.
- Blot the nail with a napkin, but do not wipe completely!
- Correctly attach the tips (false nails).
- Shape the length using gel and a gel brush.
- Reapply the gel to the affected area (increased fragility, layering), spread with a brush and let it spread a little.
- Dry under a lamp.
- Sand the surface and edges with a special file.
- Lubricate the cuticles with lavender oil.
- Admire the result and enjoy life!
Whatever one may say, it is best to contact a specialist, since he knows the correct sequence of nail extensions, has all the tools, and also has an equally important thing - experience.
The sequence itself is simple, but if you don’t know all the details, the nail plate can be damaged very easily.
Progress of build-up
Not all masters work using this technology. Most of them use older techniques of extensions using tips or forms. They can be used to create new wafers easier and faster, but this often comes at the expense of their quality. The video tutorial below will tell you how arched nail modeling is performed. This technology will be described step by step below.
- The free edge is filed. One and a half or two millimeters of the own nail length is left;
- The nail is polished until the natural shine disappears;
- The plates are degreased. This can be done using acetone-containing nail polish remover or alcohol;
- A primer is applied to nails that are dry from degreaser. After this, you also need to wait for the liquid to dry completely;
The thinnest first layer of gel is applied and dried under a UV lamp for the time specified in the instructions. Typically this period is about 180 seconds. It is very important that when applying the material does not get on the cuticle, skin, etc., since in this case it is from these places that the gel will begin to peel off. In addition, allergy sufferers are more likely to experience a reaction; The shape is cut so that it fits perfectly with the nail; The arch of the shape should exactly follow the line of the smile. The form should fit as tightly as possible to the nail, otherwise the gel will clog into the gaps. This will upset the balance and make the nail less resistant to breaking and cracking; A thin gel base is applied to the stressed area of the nail and dried in a lamp. After which the sticky dispersion layer is removed; Arched modeling, as in the photo, involves increasing the resistance of nails to breaking with the help of camouflage gel. They lay out the plate in such a way that the largest amount of gel falls on the stress zone of the nail. Droplets of material spread from this zone to the edges; The gel is dried in a lamp for 8 – 10 minutes;
The dispersion residue is removed. The smile line is filed down and the base material is laid out on the free edge in as thin a layer as possible. It polymerizes in a lamp for 60 seconds. The sticky residue is also removed from it; On the free edge, covered with the base, a French coat is formed with white gel. If the plate is being painted, then this step can be skipped; French manicure, if performed, polymerizes for two minutes under a lamp; Forms are deleted; The plates are fixed with a special vice, with the help of which the necessary silhouette of the nail is formed; Drying under a lamp for 4 – 6 minutes; Sawing and giving the plate proper and suitable shape; Applying the finishing layer of modeling material; Drying in a UV lamp for 100 - 120 seconds.
Although such nails are considered very strong, the first few days after extensions should not be subjected to heavy loads.
It is better to reduce the amount of work at the computer (in particular, typing, which puts a lot of pressure on the nails), and it is also better to fasten zippers and buttons carefully. To better preserve the gel coating and prevent it from becoming cloudy and dull, it is better to do all housework with rubber gloves, avoiding contact with chemicals from household chemicals on the nail.
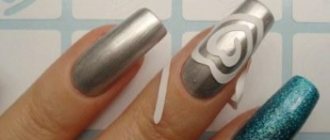
Design for extended nails
- Modeling of volumetric design . 3D drawings will not only serve as an excellent decoration, but will also add originality to the image.
- Aquarium design for extended nails . A very interesting and beautiful style that will help you stand out from the crowd.
- Bas-relief design . With the help of bright colors and rhinestones, you will make your extended nails irresistible.
- French . Practical, versatile and simple painting style will add femininity and style to any girl.
- Plain coating . Red, blue, black, brown, green, coral, yellow and other colors will look very good on extended nails and will give you a great mood.
How to perform arched nail modeling
The nail extension procedure consists of several stages. The first thing the master needs to do is file the nail down to 2 millimeters and remove the natural shine from each one.
Use a special product to remove natural oil from each nail and apply a layer of primer.
After drying the nails, apply a base polish, the main thing is not to touch the skin or cuticles. To do this, you need to retreat 1 millimeter from the cuticle area of the nail. After applying the base layer, the nails are dried in an ultraviolet lamp for 3 minutes.
Next, you should cut out a shape that completely matches the shape of the nail. The main thing is to accurately convey the curve of the nail and not allow any gap between the nail and the form.
After this, a thin layer of gel is applied to the mold and dried in ultraviolet light. Next you need to remove the dispersion layer
Next, a layer of gel, called camouflage, is laid out and zones of the nail are formed. The main thing in this process is to apply the largest amount of gel to the middle of the nail. There should be a very minimal amount of gel along the edges of the nails. After this, the nails are again placed in the lamp and dried for up to eight minutes.
After this, you need to remove the sticky layer of the gel. A base gel is applied to the layer of the mold that remains free, and a French coat is applied using a white gel. The nails take a few minutes to dry.
Next, you should remove the forms and press the nails to a shape that will closely resemble your natural nails. And with a nail file, those places that require correction are filed.
The final touch is to apply the finishing gel and dry the nails in ultraviolet light for up to two minutes.
When the gel is applied to the nail and its concentration is greater in the middle, this contributes to the formation of a center of gravity in order to prevent nail breaking.
Price for extended nails and care for them
Each artist has their own gel nail extension technique, developed through years of experience and improvement. How much does the procedure cost on average?
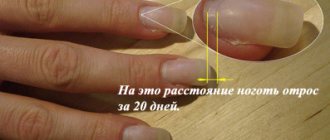
In order for such a manicure to last long and faithfully, it is better to turn to professionals. Their price for gel nail extensions varies from 1,500 to 2,000 rubles. At first glance it seems like a lot, right? But the result will be very pleasing. The gel will last from 2 to 4 weeks depending on how quickly your natural nails grow.
Of course, there are more economical options for extended nails. You don't have to go to a professional salon to get beautiful gel nails. It’s enough just to ask friends and acquaintances where and what the price is. You can find very low prices, like 150-200 rubles. There are masters who work for both 500 and 600 rubles. You just need to ask.
To maintain the beauty and smoothness of your nails, you need to follow some rules:
- Avoid mechanical damage.
- Correct the shape.
- Get a manicure.
- Visit the salon.
- Take care of the cuticle.
New nails extended with gel can easily break if you bite them, tap them on the table, or do not use gloves when cleaning.