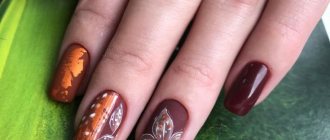
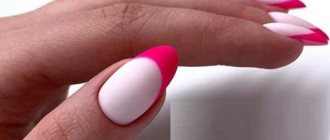
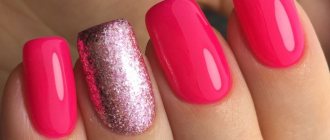
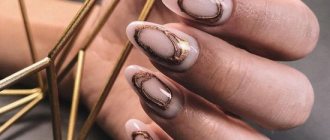
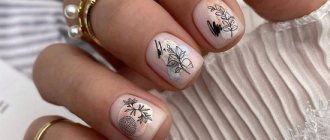
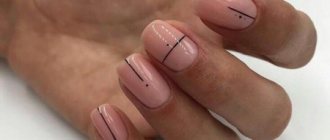
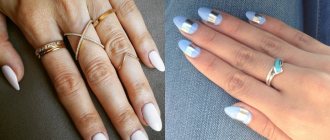
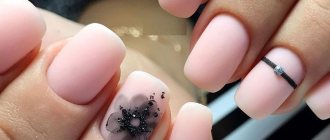
Today, patterns on nails are not just another decoration; modern nail art is filled with meaning. Design with inscriptions, portraits, slogans is a popular trend in recent seasons. Abundant floristry has been replaced by discreet nail art, decorated with minimalist patterns.
One of the popular trends in the nail industry is the theme of love. Girls do not miss the opportunity to convey their emotions and feelings with the help of manicure. Most often, simple phrases “Love”, “Kiss” and others are used. But a manicure with lips and kisses looks much more interesting and original.
Current shades for manicure with lips
Manicure with lips is a stylish and extraordinary solution. The design looks very bright and catchy, so be prepared for your nails to be the center of attention. Each color is characterized by a specific set of patterns. For example, flowers look beautiful on a pink background, blue is often used to create a marine design. A pattern with lips and kisses will look best with shades such as:
- red, burgundy and their many undertones are the traditional choice for depicting lips and kisses. In addition to rich burgundy, you can use salmon, rich pink, fuchsia and other shades.
- pink color is a great option for young girls who have no restrictions regarding nail decor. In their image, any manicure will look appropriate and stylish. Take a closer look at the many shades of pink: peach, barbie, Mexico, flamingo.
- pastel light shades will help in creating an everyday manicure, where the kiss and lips will look discreet and interesting. There is no need to choose a specific image for this nail art, since it visually merges with the main look and does not create bright accents.
Some bright ideas in the photo
Don't limit yourself to classic colors and monotonous patterns. When you start drawing, you will realize that it is not only easy, but also incredibly fun. Lips look interesting against any background, as long as the colors are sufficiently contrasting. You can add rhinestones, glitter, lettering, hearts and other artistic elements to your nail design to give it a distinct personality. In the meantime, we invite you to look at a few photos with a lot of great ideas. They will help you get inspiration and create your own, unique and beautiful manicure.
The photo shows only a small part of the nail art that can be created based on this simple drawing. Your imagination can suggest more interesting design options. In the meantime, while you are thinking about what kind of manicure you should get, we invite you to watch another video that will demonstrate step-by-step a very passionate and stylish nail art with lips.
How to create a manicure with lips: ways to create a pattern
Design with lips is a combination of bright and extraordinary shades, unusual decor, additional patterns in the form of inscriptions, strawberries, cherries, and sweets. Visually, a manicure with lips looks quite complicated, so when performing it, do not forget about minimalism and moderation.
There are several ways to depict lips and kisses on nails:
- artistic painting – lips and kisses are not at all difficult to draw, especially for a professional artist. Despite the fact that there are several other simple ways to depict lips on nails, many girls choose artistic painting. A pattern made with a manicure brush looks much more impressive and noble.
- Sliders are a simple solution for performing manicures of any complexity. Sliders with lips, kisses, candies, and inscriptions are presented in a wide variety. Girls only need to place them harmoniously on the nail plate.
- rhinestones are a chic solution for those who want to create a truly chic and spectacular nail design. Inlaying lips or kisses with rhinestones looks very interesting. This design will successfully fit into the look of a party or corporate event.
- Stamping is another easy way to create an interesting pattern on your nails. The difficulty is that not everyone has a stamping kit. A high-quality stamping set costs about $10, however, this purchase will quickly pay for itself and will give you stylish and effective patterns. If you want to see a manicure with a love theme on your nails, then purchase a special plate with these patterns.
- “sugar” - the material will help create a voluminous manicure and highlight individual zones on the nail. Use sugar to highlight lips and kiss on nails, to highlight the edge of the nail plate or the root zone. The variety of shades of “sugar” or acrylic powder is huge, from white for creating knitted decor to rich red and pink.
Sexy Red Lips Nail Art Design – Mobile Appointments
Description
Long red and white coffin nails featuring a sexy nail design with red lips, watercolor effects, gold glitter and Swarovski crystals. Both hands are slightly different, but they can be the same if you want. Email [email protected] if you'd like to discuss.
You can change the color, shape and design of your nails (if we can fit within the time frame) . Apply gel polish to natural nails or make your nails longer with nail extensions.
The cost for a full set or fill/resurface is the same. Gel polish removal is included in the price if you order a refill and your current set was done by me.
Repairing broken nails costs £5 per nail. If you need more than two repairs or would like to order any other additional services , go to the Add-ons section
To add a pedicure, visit the Pedicure Designs page
*If you are ordering a natural based gel polish manicure on your nails and a previous gel polish design, then you will also need to make an appointment for a gel polish removal.
Sexy Red Lips nail designs delivered straight to your door in London. Book your nail design appointment at your home, office or hotel .* Travel expenses are not included.
Click "Mobile Booking Fee" under the "Book" button to learn more. Serves all areas of London. You can also visit Triple N Home Salon in Tulse Hill.
Types of manicure
Gel polish on natural nails - choose this option if you are satisfied with the length and strength of natural nails.
Acrylic
— Ideal for creating very long nails. They are durable, but some customers find them too bulky.
Acrygel - If you need length but want to keep your nails thin and natural looking. Ideal for nail extensions from short to long. My preferred method of working; 90% of people choose Acrigel - also known as Polygel.
Hard gel - for applying nails to short/medium or natural nails. This method is popular in Eastern Europe and Russia.
For a more detailed description, please read my blog about extension types and which one to choose.
What is included?
Gel polish on natural nails:
The cuticles are pushed and cleaned using an electronic file. If necessary, they are trimmed. Nails are polished and profiled. The nail is prepared and gel polish is applied, followed by the design. Removing previous gel polish is not included in the base price and must be selected from additional options or additional options.
Extensions:
Whether you need a complete set or a filler , the price will be the same. The cost of filling includes removal of gel polish if the previous set was applied by me.
Cuticles are pushed and trimmed using an electronic nail file, nail forms are applied, acrylic/acrylic/hard gel extensions are applied in nude/pink or clear colors. Nails are given the desired shape. The design is made with gel polish. The manicure ends with finishing the nails to a mirror shine using a top coat of gel polish and applying cuticle oil.
Design changes
The design can be changed if it suits the level of complexity and takes time. For example, you can choose a combination of different colors, choose a design on different nails, change the shape of your nails, etc.
If you are not sure, please contact me.
Book an appointment at your home salon
I suggest making an appointment either by cell phone or in your home salon. Triple N Home Salon is located near Tulse Hill Station in the SW2 postcode area. Full address will be sent by email after booking.
#1 Red manicure with lips
Juicy red color is an excellent solution for creating a passionate and exciting manicure. It is on bright red that lips and kisses will look especially appropriate. Red manicure with lips most often has a light or white tint. It is against a light background that red lips and kisses should be placed. The combination of red and white looks very expressive and noticeable on the nails.
It is better to place lips and kisses on the ring finger. This is where the pattern will be especially noticeable. If desired, complement the manicure with black stripes, silver or gold glitter.
Methods for creating lip patterns on nails
In addition to the traditional technique of drawing an image by hand, manicurists offer to create a nail design with lips in the following ways:
- slider design. This is done using small stickers applied to the nails. “Kiss” pictures are widely circulated;
- inlay is a way to lay out the silhouette of a picture with small shiny stones, and, if desired, fill the space inside with rhinestones of a different color. Kristal Pixie from Swarovski are ideal for this manicure;
- deep design is a way of creating a manicure by highlighting a negative (unfilled) field on a plain background. In this case, the drawing turns out to be three-dimensional;
- stamping – manicure using special stamps. This method is a minimalist art, and it can be complemented with sparkles, rhinestones or other decorative elements without fear of overloading the image.
If the master has artistic abilities, it is better to give preference to a drawing made using hand-made techniques: such a picture will be unique and will not be found in anyone else.
#2 Black manicure with lips
Black color - noble and spectacular - will be the best complement to a pattern with lips and kisses. Black gel polish is rarely used in love-themed manicures, but despite this, it looks quite original and stylish.
Among the popular trends of the season are:
- combination of black and red – the trend is to alternately paint the nails with red and black and then decorate the nails with patterns with lips, kisses and inscriptions.
- gold or silver glitter – the combination of this material with black gel polish looks impressive and chic. A manicure that contains glitter visually looks lighter and more casual. Use glitter to highlight the pattern and create streaks in the root zone.
- cream, gray, flesh-colored, translucent - despite the restraint of these shades, they look very original in combination with a love theme.
Favorites include French
A red smile line on a nude nail is a classic version of a red jacket. 2022 brings new design ideas.
- The first is when French is combined with a matte finish.
- The second is a combination of several designs, when the base red coat is combined with a white jacket on several nails.
- The third idea is to use an unusual tandem of colors or swap them.
So, after the usual version, the base of the nail appears covered in white and the smile line is red. But the opposite option is also used: the base of the nail is covered with gel polish in red tones, and the smile line becomes soft white.
The French jacket is decorated with rhinestones, gold and silver glitter.
A tandem of French manicure and designs of hearts and flowers will add chic to your manicure. It's hard not to notice your nails under the matte topcoat. This is an option where a tandem glossy coating was used in the design on the tips of the nails, and a matte coating on the tips.
#3 Manicure with lips and other designs
Manicure with lips can be complemented with such patterns as:
- lips with tongue
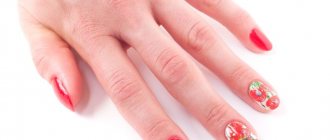
- cherries, berries, strawberries
- cupcakes, lollipops and other sweets
- lipstick
- inscriptions Love, Kiss, Onle you
To make these patterns, it is better to use ready-made stickers. On nails this pattern will look more detailed and brighter. Also remember about the harmonious arrangement of patterns on your nails. If the design is done on long nails, then you can experiment with several patterns on one nail. On short nails it is better to limit the decor to 1-2 fingers.
Manicure with lips is spectacular and stylish. It will add a touch of elegance and impeccable taste to your look. If you previously thought a manicure with lips was too provocative, then we offer a photo selection of design ideas with kisses. They will change your mind about this attractive and stunning nail design.
DIY | Kylie Jenner Lip Kit Nail Design
Get Kylie Jenner's popular lip kit...on your nails! If you can't afford to shell out a hefty amount of money on those luxurious liquid lipsticks from the Keeping Up With The Kardashians cosmetics line, then why not try this nail design instead?
It's a must-have makeup item, but not everyone can afford to buy younger Jenner's liquid lipsticks. However, there are other ways to enjoy it. Honor your love for the line with this Kylie Jenner Lip Kit nail art!
Kylie Jenner's lip kit is always a cult favorite liquid lipstick! Unfortunately, it also sells out almost seconds after the new shades are launched.
Despite the accusations against the Keeping Up With The Kardashians star's youngest makeup line, women are still clamoring for her lip kit and other beauty products! In fact, everything Kylie wears (from makeup to nails) is easily becoming a fashion trend for women all over the world!
If you can't get your hands on this must-have makeup, why not apply it to your nails?
What you'll need to create a Kylie Jenner inspired nail design:
Step 1: Nude Pink Base Color
Before you do anything, apply a base coat to your nails. This will not only help your polish adhere to your nails, but will also protect them from breakage.
Once completely dry, apply two or three coats of nude pink nail polish. Try to find a shade that is closest to the Kylie Jenner lip kit swatch.
If you prefer to use gel polish, be sure to remove any stains to prevent burns when you begin to treat your nails under the UV light.
Step 2: Drip Stamps
Select the dripping paint design from the stencil and apply black nail polish. Scrape off the excess polish to expose the drip and transfer it to the stamping tool.
Step 3: Complete the Droppers
Apply liquid latex to your nails and apply it to pink, nude nails. Use an acrylic brush to join the drops together to make them more realistic.
Step 4: Draw the Lips
Draw the outline of your lips on your ring finger, then gently apply the drops onto it. Try to recreate the lip kit logo as much as possible.
Fill the drops with black polish, then apply a very pale shade of pink to the remaining lip area.
Next paint silver on the inside of the mouth, then draw black lines on the inside of the mouth to make it look like teeth.
Step 5: Top Coat
Apply a quick dry top coat to seal this amazing design! It will surely make all your friends jealous! If you are using gel polish, you will have to cure the top coat for a couple of seconds.
See April Ryan's full guide below:
Wasn't that super fun? You can also try the other two designs in the video for your next manicure. Try experimenting with colors too. The Kylie Jenner Lip Kit has so many amazing colors to choose from! You can also get chrome nails as shown in the video above.
Try recreating the famous lip kit and show us in the comments section below! If you want to try other Kylie Jenner inspired designs? Try one of her many nail art designs with this tutorial!
Be sure to check out my Facebook, Instagram, Twitter, and Pinterest for the latest nail art trends!
Design creation techniques
Considering the different decoration possibilities, you can decorate your nails with an unusual design in three ways. The first of them involves manual drawing of lips, and sometimes an entire composition. Lips can be simple, in the form of prints, with a tongue or lollipops. Some depict them together with part of the face, others complement them with streaks, giving the appearance of a watercolor technique of painting on a wet background. Manual creation of a drawing is convenient because it does not limit the master in selecting the best design. Drawings are created in different ways: one master uses a thin brush for this, another prefers to work with dots, the third even uses special pens with acrylic gel dyes. Sometimes a modeling gel is also used in the design, creating a voluminous print with it.
Everyone chooses their own technique, while it will be easier for a beginner to work with a brush or pen. Those who want to decorate an accent nail quickly and professionally can purchase ready-made plates or stamps with an engraved pattern for the design. This method of decorating a manicure will allow you to create a high-quality pattern of thin lines in a matter of seconds, and most of these patterns can be colored as you wish. If there are no stamps, and drawing seems like an overwhelming task, you can also buy ready-made stickers with lips. Gluing them onto prepared nails is easy. This will take no more than a minute along with straightening the nail. After the final sealing, the nail will look as if it was done by a professional nail salon.
Useful tips
- Apply a generous amount of glitter powder onto pearlescent nails. This is how they will look most impressive.
- Do not use the rub together with a matte top coat. The last remedy will remove shine and shine from the surface of the nail.
- If you apply shimmering pollen with your fingers rather than with a brush, it is better to degrease them first. In this case, the secreted sebum will prevent the coating from being damaged and will make the nail art more durable.
- Before starting the process, it is best to thoroughly polish the nail plate. The shimmering powder will fit perfectly onto the prepared surface.
Step-by-step instruction
Even if you don’t know how to draw on nails and have never done a manicure with images, the option with lips will be an excellent basis for experimentation. Don't worry about possible failure - we'll tell you step by step how to draw this simple design on your nails. So, you need to arm yourself with white, red nail polish, top, base and a regular needle. If all this is already in front of you, then we begin to master the perky and seductive nail art with lips.
- As always, we start with the basic procedures - working on the appearance of our nails. Neat, well-groomed nails with carefully processed cuticles are already half of a successful manicure. Therefore, we carefully trim or push back the cuticle, file the free edge of the nails, giving them the desired shape, and polish the nail plate. Now you can apply a transparent base to make the surface perfectly smooth.
- Apply white polish evenly to the nails. For a more dense coating, use two layers. Take your time - be sure to wait until it dries completely!
- Now let's start drawing the lips. Paint the upper and lower lips with red nail polish using a brush. Each of them is formed from two droplets of varnish connected to each other. It is better to make the upper part of the lip a little more voluminous. Don't be alarmed by the fact that the image doesn't yet resemble what you wanted to depict - we've just started drawing.
- Now, without waiting for the varnish to dry, take a needle and, with gentle movements, begin to give the design a clearer outline, bringing out the natural folds. This will help make the image as similar to real lips as possible. The design can be made single or repeated on all nails. It depends on what kind of design you want.
- At the final stage, we cover the manicure with a top coat so that the picture will delight you with its beauty longer.
Believe me, such a manicure will not go unnoticed. Romantic nail art is perfect for warm summer days in combination with a dress or jeans . It can be made to lift your spirits - it turns out so bright and positive. The execution of the drawing is quite difficult to understand from words; it is better to watch the technique of applying it step by step on video. Therefore, we bring to your attention a visual master class.
