The article answers possible questions from those who are removing extended nails at home for the first time. Before you start removing gel or acrylic nails, you should find out what and how to do, evaluate the result, and analyze the pros and cons of existing methods.
IMPORTANT: Manicurists recommend removing artificial nails two to three weeks after extensions to avoid disrupting the natural process of nail growth.
Removing extended nails does not require special knowledge, skills, tools, or materials. The process is quite simple and does not require the participation of a specialist.
IMPORTANT : Before you start removing artificially extended nails, remember what material the master used. The removal methods for gel and acrylic are different!
Nail Remover Tools
To remove gel nails, you need the following tools:
• nail clippers or crankcase; • a rough nail file (abrasiveness (grit) - 80/80, 80/100) or a manicure cutter.
To remove acrylic mass from the nail plate you will need:
• manicure nail clippers or cutters; • acrylic remover or any acetone-based product (acetone); • cotton sponges; • aluminum foil, cut into squares 8x8 cm. Number of squares - 10 pcs; • pusher, orange stick or flosser.
How to remove gel nails yourself? Removal instructions
IMPORTANT : Gel overlays do not soften under the influence of solvents! They need to be cut down. It may take 5-10 minutes to treat one nail plate.
1. To reduce the area of cutting, nails must be shortened with nail clippers or a nail clipper. This must be done very carefully so that the gel does not crack or injure the natural nail plate.
IMPORTANT : When shortening artificial nails, be extremely careful. When removed, the free edges of artificial nails can shoot off, injuring the eyes. To protect yourself, place your hands in a clear plastic bag or use safety glasses.
If the gel layer is thick enough, first cut it down to the desired thickness as shown in the diagram.
2. Using a coarse file with large grain or a manicure router, file off the gel material from the nail.
IMPORTANT: To remove the gel, glass files, a metal tool with a notch, European stone, or a buff are not used.
IMPORTANT: When cutting, a lot of dust is generated. It is worth taking care to protect the respiratory tract.
Rules for filing the gel coating (for filing): • start with your left hand (for right-handers); • hold the nail file between your middle and thumb; • pressure on the file is applied with the index finger; • protect your fingers in contact with the file with adhesive tape. Fingers will not slip and get injured; • the finger from which the gel is cut off is held or fixed; • From time to time, the removal of the gel must be controlled so as not to damage the natural nail plate.
IMPORTANT: A 0.5 mm thick layer of gel should remain on the original nail plate.
3. After removing the nails, polish the nail plate with a buff or polishing file. Before starting sanding, it is recommended to apply olive oil to the nail.
IMPORTANT: While polishing the nail, move the tool in one direction so that the nail does not heat up.
4. At the end of the procedure, it is recommended to cover the nails with strengthening varnish.
How to remove acrylic nails without consequences? Removal instructions
Method I: Using nail remover or acetone-based product.
1. Remove the free edge of the base with nail clippers or a carpenter.
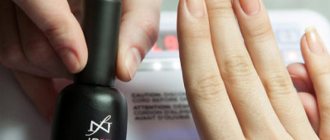
2. When adding extensions, acrylic overlays are coated with a special compound that needs to be cut off, otherwise it will prevent the base material from softening during the removal process.
3. Apply a sponge soaked in acrylic remover or acetone-based nail polish remover to each nail. The sponge can be cut to the size of your nail.
IMPORTANT: Before treating the nail with liquid, it is recommended to lubricate the cuticle with Vaseline.
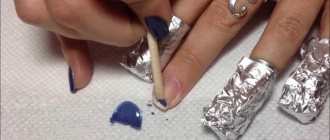
4. Secure the sponges to the nail plates by tightly wrapping them with foil. This prevents the liquid from evaporating and retains the heat necessary for the chemical reaction to begin.
5. Remove the foil with sponges after 30-40 minutes. If the acrylic continues to hold, repeat the procedure (10 min.)
6. Remove any remaining coating using a pusher or an orange stick.
7. Polish your nails with a polishing file or buff. Apply healing varnish.
Method II. Sawing off the acrylic layer.
The process is identical to removing gel nails.
Method III. Using dental floss.
1. Using a pusher or wooden stick, lift the entire lower edge of the acrylic plate (from the cuticle).
2. Place dental floss under the bottom edge of the nail.
3. Slowly and carefully advance the thread while slightly lifting the acrylic plate.
4. After removing the artificial coating, the natural nail plates are polished.
IMPORTANT: Regardless of the method of removing artificial nails, the natural nail plate requires close attention and care during the recovery period.
What is the difference between gel and acrylic?
When applying nail extensions, gel coating, unlike acrylic, cannot harden on its own: exposure to ultraviolet radiation is required. Therefore, the master uses a special lamp. The gel composition is easy to distribute and level on the surface of the nail using a brush. Acrylic must be cut out to obtain a perfectly even coating. If you need to achieve pronounced shine or transparency, it is better to use a gel. Acrylic does not give a similar effect: the nails will be more matte than shiny. The service life of gel and acrylic is the same. Corrections are made approximately once every 3-4 weeks.
The technologies for gel and acrylic extensions are somewhat different, which is why gel and acrylic nails are removed in different ways.
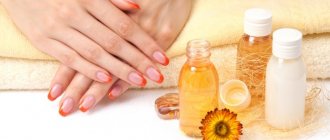
Cuticle oil: effect on nails
In the process of removing artificial coating, in addition to the native nail, the cuticle also suffers. The skin around the nail plate dries out and cracks.
Cuticle oil is a nourishing agent that • moisturizes, • saturates with vitamins, • prevents peeling of the skin around the nail, • activates the growth of the nail plate, • improves blood circulation.
Cuticle oil is used every evening until the nails are completely restored. The product is rubbed into each nail in turn. Remains on hands until completely absorbed. The nail restoration process takes several weeks.
You can make your own cuticle oil. The basis of any product for caring for the nail plate and surrounding skin is essential oils. To eliminate thinning and splitting of the nail plate, bergamot, patchouli, and ylang-ylang are used. General strengthening of nails will be ensured by the use of lemon, eucalyptus, chamomile, lavender, rosemary, thyme, and tea tree. An alternative to essential oils can be 5-6 drops of lemon juice.
Use essential oils in combination (2-3 types). This will speed up the recovery process.
Add a few drops of your favorite essential oils to vegetable oil (olive, hemp). The required amount of vegetable oil is 25-30 ml. Vegetable oils can be mixed, for example 15 ml of grape seed oil and 10 ml of jojoba.
It is advisable to add 1 capsule of vitamin E to the oil mixture.
Nail care after extensions
After extensions with gel or acrylic, proper care is necessary. For this it is recommended:
- correct extended nails in a timely manner;
- do not use super glue if the coating breaks;
- use cuticle oil regularly;
- do not perform spa treatments on the day of extension or correction;
- do not expose your hands to heavy loads;
- avoid sudden changes in temperature;
- use gloves while cleaning;
- do not abuse antibiotics and other medications.
After removing the extended nails, the condition of the nail plate worsens, so it is necessary to begin treatment and restoration in a timely manner. A woman should know not only how to remove the extensions herself, but also how to bring the nail plate back to normal. To do this, you can visit a salon that provides professional care. Its advantages are a large assortment of special nail care products, tools, experience and knowledge of the masters.
If it is not possible to visit a salon, then you can do oil treatments to strengthen and restore the nail plate at home. It is recommended to carry out hand baths 2-4 times a week, adding linseed or olive oil to warm water. Nails are damaged, so you can quickly and effectively return them to normal using oil treatments.
During the care bath, you can massage the area around the nail. These actions stimulate its growth. Frequent hand contact with oils, nourishing creams and other cosmetics does not allow the use of varnishes. An integral part of care is taking vitamins and proper nutrition. During this period, you can purchase special vitamin complexes or preparations in ampoules, which are intended for rubbing into the nail plate.
The diet must contain all the microelements necessary for the normal functioning of the body so that the recovery process proceeds faster. The duration of strengthening depends on the methods of hand care and diet, especially at the initial stage of treatment. After the procedure, the woman will have no questions about how to remove her nails on her own.
Removing nails: tips and reviews
Ekaterina, 25 years old, Rostov-on-Don
A friend uses foil with already fixed sponge squares to remove the acrylic coating. Very comfortably.
Anna, 30 years old, Moscow
At the dacha I had to remove the gel myself. The process is quite labor-intensive. Requires attention, strength, patience. But everything went well! If you can’t get to the master, you can work hard.
Anastasia, 22 years old, Pavlovsky Posad
I removed acrylic nails using an acetone bath (on the advice of a friend). Horror! The pungent smell of acetone and dry hand skin.
The next experiment was with sponges and foil. Simple and accessible. The main thing is not to forget to cut off the top coating from the acrylic.
The layers came off quickly, the nails practically did not need restoration.
An interesting method with dental floss - you have to try it!
Why remove acrylic nails at home?
To some, the topic of getting rid of acrylic nails on your own will seem wild - why reinvent the wheel? After all, you can go to a beauty salon, and in half an hour the master will not only get rid of your extended nails, but will also tidy up your own.
The first reason is the desire to save money. You can get rid of nails yourself for free, but in a beauty salon you have to pay: at least 400-500 rubles in Russia and more than 150 hryvnia in large cities of Ukraine.
The second reason is the inability to visit a beauty salon. Imagine that you are tired of extended nails, but every day is scheduled literally by the hour, and there is simply no room for a manicurist. In addition, these masters are also capricious - sometimes they don’t work, sometimes they have a lot of clients, sometimes they only accept them in the morning, at an inconvenient time for you. In order not to depend on someone, there must be a backup option.
And finally, the third option is the impossibility of contacting a specialist. Let’s say you come to relax in the forest or at the sea, and there are simply no beauty salons within the next hundred kilometers. If your nails have grown enough, then walking around with extensions is simply indecent, and you must remove them.