The manicure industry does not stand still, but constantly throws up new ideas related to materials, tools, and devices. But women always demand something new and it is necessary to keep up with their demands. However, they don’t disappoint us here, but offer truly amazing materials and technologies! This material is gel nail paste.
Gel paste for nails is a current new product in the nail service. It is a material that allows you to create a unique design, draw the smallest details and patterns, and also create three-dimensional elements.
What is gel paste
Gel paste for nails appeared relatively recently. It has a thick consistency, which, when applied to the nail, does not spread and does not form uneven coatings (bubbles, roughness, lumps, etc.), and its structure can resemble children's plasticine.
Why do you need gel paste:
- To create a uniform, even coating;
- For modeling the nail plate;
- For manicure with complex decor;
- For nail designs that require drawing small details.
Distinctive features of the gel paste are high plasticity and viscosity. Thanks to these properties, it can be used as a finishing coating, on the basis of which 3D drawings are created. The material perfectly holds the shape that the master gave it, so you don’t have to be afraid that the volumetric decorative elements will “creep” and lose their original appearance. In addition, at his discretion, the master can mix gel pastes of different colors with each other, selecting the ideal shade.
Due to the fact that the gel paste consists of acrylates and polymers, it can be combined with any acrylic and gel varnishes.
Design ideas
A flawless manicure can be achieved using the aeropuffing technique. This method allows you to apply a wide variety of patterns to your nails.
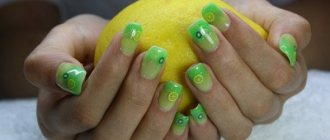
Designs are often created related to the theme of the changing seasons. And the 3D drawings also look impressive.
The most popular motif used using this technique is the image of outer space. It is on them that many masters film lessons.
Aeropuffing provides incredible depth to the image, creating the effect of infinity of space. You can add sparkles and rhinestones to imitate the sparkle of stars.
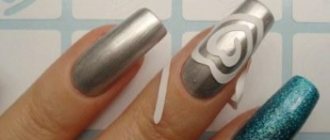
The second most popular design is ombre. You can not only make transitions from one color to another, but also make intricate patterns. To do this, they resort to the help of stencils that come in a set or make them yourself (but you need to have artistic skills).
Recently, patterns that resemble stained glass have become popular. Such images look very good when combined with long evening dresses.
Characteristics
Many people wonder how gel paste differs from other nail service materials, what are its characteristic features and advantages. If we compare it with the classic colored gel traditionally used for coating, a number of differences can be identified.
- Firstly, gel paste does not require any additional manipulations before use, unlike gel, which must be mixed before applying to the nails. This is done for the reason that the colored pigment included in the gel polish tends to settle to the bottom of the bubble.
- Secondly, the paste is very dense in consistency. When working with it, you don’t have to worry that it will flow behind the cuticle; you can easily use it for external design.
- Thirdly, the gel paste is pigmented, that is, when applied to the nail, you can get a bright and rich, even color in one layer.
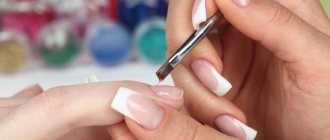
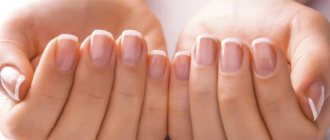
Gel pastes are good to use when performing French manicure. The dense texture allows you to create an even and neat white border.
- Fourthly, gel paste, due to its unpretentiousness and opacity, allows the master to save time spent on creating a manicure.
- In addition, it does not contain acetone, and therefore it is absolutely safe and does not have a specific pungent odor.
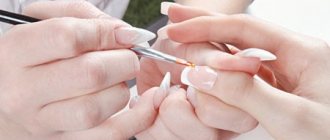
Execution technique
First you need to prepare the nail plate.
The usual manicure is done: the old polish is removed, the plate is leveled, the cuticles are trimmed, the nails are shaped, and then they are degreased.
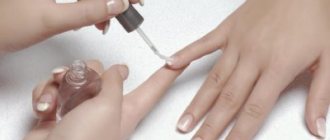
After this, the varnish chosen for the background is applied.
The main point to consider is the mandatory use of the matte topcoat from the kit after the varnish coating is completed.
This is due to the fact that aeropuffing is performed only on a matte base. On a smooth surface, the gel paste will not look so impressive due to the specific structure of the sponge (its porosity).
Using stencils
Once the base is prepared, you can start manicure using stencils.
For this you will need a palette. The selected colors are applied to it.
If desired, you can mix different shades of varnish on the palette to obtain a new interesting color.
The required stencil or a combination of them is placed on the nail. A sponge (rounded or elongated, depending on the purpose of the design) is dipped into the material, and the paint is applied to the nail over the stencil. This is done with light, slightly elastic movements.
After this, the nail is placed in a special lamp to fix the design.
Then the stencil is removed and the artist can move on to the next nail or continue working on the current one. After completing the work on the nail, you need to cover it with the glossy material from the kit.
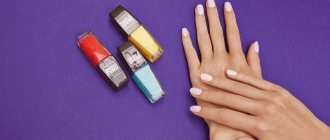
Gradient
What it is
A soft transition from one color to another in a manicure is called a gradient. Masters call it ombre.
This way of painting your nails never goes out of style. Soft colors, graceful and smooth transitions always look very beautiful and attract attention.
The ombre technique can be very different. The implementation of the conceived design is carried out taking into account the wishes of the client.
You can offer the following popular gradient options:
- horizontal;
- vertical;
- diagonal;
- smooth transition from one nail to another.
The most complex methods are those that use more than 4 colors.
How to do
To make a gradient using the aeropuffing technique, you need to prepare your nails. First, the old coating is removed, the manicure is done directly, and only then the base is applied to the nails.
After this, the nails are painted with the first layer of varnish (it is better that the color is darker - this will make it easier to start the gradient).
Next: gel paste of the desired colors is applied to the palette, a sponge is dipped into it and transferred to the nail with springy movements.
Each layer must be dried in a special lamp.
If a more saturated color is needed, the procedure can be repeated several times. After fixing, you need to cover the gradient with a glossy or matte top coat from the set.
Types of gel paste
Currently, two types of gel pastes are used in the nail industry - gel paste, which forms a sticky layer, and gel paste without forming a sticky layer. Each of them is used in different cases:
- Gel paste with a sticky layer is used for rubbing, when creating designs using rhinestones, decorative ornaments, broths, etc. It is more economical to use.
- A paste that does not have a sticky layer is harder and more durable. It can be used effectively when performing modeling elements. However, it also costs more.
Each master must choose the type of paste independently, based on his own practice. As a result, through trial and error, he will be able to find exactly the material that will completely suit him in terms of price and quality indicators.
Working with gel paste
Working with gel paste is not at all difficult; even a novice master can handle it. The most important thing is to figure out how to apply it correctly and acquire a list of necessary materials and tools.
To work with the paste you will need:
- Special brush for working on 3D gel;
- UV lamp;
- Nail buff;
- Degreaser;
- Primer;
- Base for manicure (base);
- Dots are a special device that allows you to create designs and patterns of any complexity on your nails;
- The final coating is top.
How to use 3D gel when sculpting?
The work includes 3 stages.
- Preparing the nail plate for work. At this stage, the master works on the nail with a buff, making it smooth and even, degreases it and applies a primer. Then alternately covers with base and top, bakes in a UV lamp.
- Working with dots. A small amount of gel is collected with the tool, which should then be rolled into a small pea. It is transferred to the nail plate, and further manipulations with it depend on the chosen design.
- After spreading the paste over the nail and creating a pattern, you need to fix the result, that is, bake the nails in a UV lamp.
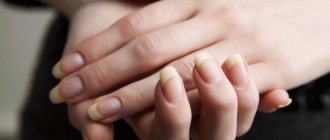
Sealing nails with gel polish
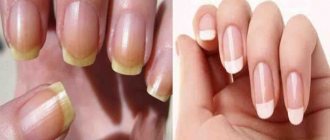
Gel polish can be not only beautiful, but also useful. Now on the market there are products from famous world brands designed specifically for strengthening nails. First of all, we are talking about biogels and the IBX care system.
Some types of gel polish not only decorate, but also restore nails
Biogels contain formaldehyde or other aggressive components. It is not possible to extend nails with biogel, as this can be done with permanent gel polish; the maximum extension length is only 2-4 mm.
This gel can be either transparent or colored. By the way, the dyes used by manufacturers are also natural.
Sealing nails with biogel
The IBX system is designed specifically to protect and restore nails. The set contains two bottles: IBX Repair restorer, for damaged areas, and IBX coating, the products contain avocado and jojoba oils, which are beneficial for nails. The IBX coating does not replace the base for a shellac manicure.
Video: IBX system application technique
Instructions for use
To use 3D gel correctly, you need to know everything about the technique of using it. So, gel paste (regardless of whether it has a sticky layer or not) needs polymerization, which takes from 1 to 2 minutes in an ultraviolet lamp and about 40 seconds in a standard LED lamp.
Step-by-step instructions for standard use of gel paste:
- Treat the nail plate by removing the cuticles and sanding the surface with a buff;
- Use a degreaser to clean the nail;
- Distribute the primer evenly;
- Cover the nail with base, bake in a lamp;
- Use the paste to create a pattern or design, creating a unique design;
- Fix the result with topcoat and dry it in a lamp for 2 minutes.
Using these instructions, you can make a uniform coating with paste, create designs and patterns, and make rubbings.
Gel paste increases the wear life of a manicure, since it is less susceptible to chipping and cracking than ordinary shellac.
Companies producing gel paste and reviews about them
Today you can purchase gel paste from various companies representing the nail niche.
The domestic company EMi, popular in nail services, offers its customers a wide range of gel pastes at low prices. Amy's paste differs from its foreign analogues in its high efficiency and low consumption. Customers leave exclusively positive reviews about it. Example: “Amy pasta is a real find! Only 500 rubles, and such uniform coverage and rich color!”
Products are also offered by a company such as TNL Professional. Their products can be purchased at relatively low prices, not exceeding 400 rubles. TNL paste is sold in 8 ml bottles; presented in a rich color palette. Example review: “A pasta that is perfect for a beginner. With her help, I learned how to make monograms and rubbings, I recommend it to everyone!”
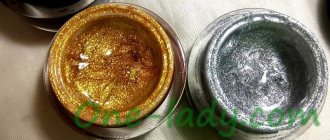
Vogue Nails offers gel pastes at record low prices - ranging from 150-450 rubles. The color palette is presented in such bright and brilliant shades that such a riot of colors does not require additional decorations in the form of rhinestones or sparkles. Sample review: “My dream has come true! With gold glitter vogue paste my nails always look luxurious. Moreover, I was pleasantly surprised by the price - 450 for a huge bottle.”
You can also purchase gel paste produced by IMPULS Art. Judging by the reviews, it is the densest and thickest, ideal for sculpting and creating complex three-dimensional designs. Example review: “I bought Art paste from Impulse and was pleasantly surprised. Very dense and thick texture, easy to work with, nothing smudges. The price is reasonable."
The best ideas for manicure
Gel pastes are created to bring to life the craziest and most unusual design ideas in the nail service. However, sometimes imagination is not enough, and then a list of the best manicure ideas using gel paste comes to the rescue:
- Classic hardware manicure with bright colored monograms. A video will help you do it
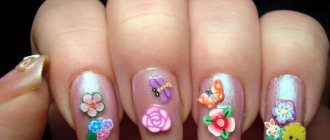
- A manicure with voluminous flowers is a very delicate and feminine option that will make you feel like a real princess. Instructions for its implementation can be found in the video.
Gel paste is a universal material that will allow you to make your manicure unusual and memorable. Don’t be afraid to work with it, because it is quite unpretentious and pliable even in the hands of a novice nail technician.
Step-by-step algorithm for applying gel paste
Using gel paste is, from a technical point of view, simple. What is important here is the artistic taste of the nail artist, the quality of the chosen material, experience and careful preparation of the nail plate.
- At the first stage, the master does a French or European manicure. In this case, the end of the nail is slightly blunted, which increases durability. The nail is degreased and a base coat is applied.
- The second step is to apply the primer. It removes excess moisture, improving paste application.
- The third step is re-application of the base and subsequent polymerization.
- The fourth point is applying gel polish or paste. There are no clear recommendations, everything is up to the choice of the master and the client.
- In the fifth step, the drawing is made directly with paste, dried and sealed with topcoat.