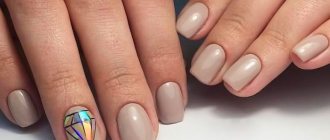
A beautiful manicure is the “calling card” of a well-groomed woman. Without neat, aesthetic nails, it is unthinkable to look elegant and chic.
But, alas, natural material is not always pleasing. For one reason or another, not every woman can boast of strong, strong nails that can be grown to give a fashionable shape. And if you want something special, for example, an edgy, fashionable shape with a long length? There’s really no choice here: only build-up.
But it may happen that you need to urgently remove your nails, but there is no time or opportunity to visit a specialist. In this case, all hope is only in your own skillful hands.
Is it possible to remove extended nails yourself correctly?
Before you figure out how to remove extended nails yourself, and whether this can be done at all, a few words about what materials they are made from.
Nail extensions are, in fact, “sculpting” them from special polymer materials: acrylic or gel.
Interesting!
Both acrylic and gel are acrylates - polymer materials. The difference is in appearance and features of working with these materials. Each of them has its own advantages and disadvantages, so you need to choose based on specific conditions.
The advantages of acrylic include:
- less dust during operation;
- strength;
- low shrinkage;
- possibility of repair;
- the ability to remove it using a special solvent;
- plastic.
It also has disadvantages:
- smell;
- dullness;
- tendency to yellowing.
In turn, the gel boasts the following advantages:
- aesthetic appearance;
- hypoallergenic;
- no odor;
- resistance to chemicals.
The disadvantages include the following:
- fragility;
- impossibility of repair;
- dust from working with materials;
- reaction to temperature changes (frost or bath).
So, we have found out the main differences between the two materials for nail extensions. Both of them are a plastic mass, which then polymerizes and thus hardens: acrylic - under the influence of heat, gel - under a UV lamp.
To remove nails, the master dissolves acrylic in a special liquid, but simply files off gel nails, because they do not enter into chemical reactions, which means there is no way to dissolve them.
Nail extension with gel on tips
This type of extension is more suitable for beginners, because unlike acrylic, the gel does not dry in the air, so modeling can be done slowly, and only after achieving the desired result, dry the nail. On the other hand, you need to accurately calculate the time your hand is under the lamp, otherwise you will not achieve strength. Set of tools for gel nail extension:
- glue;
- tips;
- primer or other degreaser;
- gel;
- tip cutter or nippers to remove excess length;
- UV lamp;
- special brushes used to apply gel and glue;
- set of nail files;
- cotton pads or lint-free wipes;
- a product used to soften cuticles and other manicure accessories - orange sticks and scissors;
- disinfectant;
- liquid for cleaning brushes from gel;
- sticky layer remover;
- cuticle oil.
Gel extension process
The procedure takes about 3-4 hours. If you follow all the steps according to the following instructions, it is easy to extend your nails with gel at home:
- Prepare your nails: do a hardware or manual manicure, and finally apply a primer to the surface.
- Glue the frames, then file them and give them the desired shape.
- Open the jar of base gel, take a little onto the brush.
- Drop the substance into the center of the nail, then spread it over the entire plate, slightly moving away from the cuticle.
- Dry in a lamp (3 minutes).
- Repeat steps 3, 4 with modeling gel.
- Remove the sticky layer with a special product.
- Form the arches of the artificial nail.
- Use a file to file the free edge, making it thinner.
- Clean the nail surface with a brush.
- Apply a finishing coat of gel.
- Polarize the nail plate for another 3 minutes under a UV lamp.
- Remove the sticky layer if there is any.
- Cover your nails with your desired color or draw a design.
- Treat your cuticles with oil.
Rules for self-removal of artificial nails
The main thing is to clearly understand that acrylic and gel nails are removed differently. In the first case, you need a solvent, in the second - special files.
You also need to stock up on time and patience and follow simple rules:
- read the detailed instructions on how to remove extended nails;
- prepare all the necessary materials and tools;
- take your time, be careful;
- be sure to carry out restoration measures after removing the extended nails.
Making and rubbing oils
Despite the fact that beauty salons use special essential oils, you can make do with the ones you find at home. Olive oil, grape oil or even sunflower oil are perfect. Take a sufficient amount of the product and heat it over low heat. After slightly oiling the plate, massage it gently. Many girls believe that it only helps to give their nails a healthier and more well-groomed look, but with its help you will also make them healthier. After this procedure they will not delaminate. Next, polish your nails using a special polisher. You can take a piece of regular suede.
Remember that it is very important to properly care for your nails after you remove your extensions. But you will get a greater effect if you take care constantly.
Preliminary stage - preparation
During the procedure, all necessary materials and tools must be at hand.
What you will need to remove acrylic nails:
- Special solvent for acrylic. Sometimes it is recommended to use nail polish remover with a large percentage of acetone, but I advise you to use this product only if you find yourself on a desert island, you desperately need to remove acrylic from your nails, and you have nothing on hand other than acetone. Still, acetone greatly dries and damages nails, and it is also a toxic and extremely volatile chemical compound that is not at all good for health.
- We will make some kind of “compresses” from the liquid, so we will need material support - cotton pads and foil. I recommend preparing pieces of foil in advance that are long and wide enough to wrap around your fingertips. Cut them generously.
- A rough saw to cut off the top layer of material.
What to stock up on to remove gel nails
The gel will have to be cut off first and then filed away, which means you will need nippers and files:
- For the top layer - highly abrasive (less than 180 grit).
- Further, as you approach the nail, you need gentler files.
There will be a lot of dust during the cutting process, so you will need glasses and a mask.
Removing gel nails
To remove gel nails, you will need files with different levels of abrasiveness. The top layer should be cut with a high-grade file (at least 180 grit). Next, use files with less abrasiveness. We warn you that the removal process will be long: on average, each nail takes 10 minutes.
© essie
Removing acrylic nails
So, the time has been booked, the materials and tools have been prepared, let’s begin!
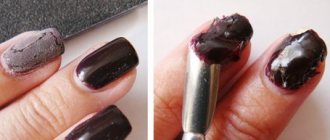
We begin the process of removing acrylic nails by cutting off the top layer with a coarse file. After the top layer is removed, the nails are no longer so strong, and you can begin to soften them.
Softening acrylic nails
To remove acrylic, you need to dissolve it with a special liquid, but this is not varnish; it cannot be removed in a couple of seconds.
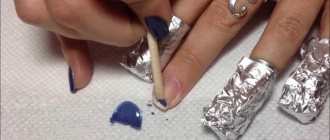
Therefore, we moisten a cotton pad with liquid, place it on the nail and wrap it with foil or put on clips. This is necessary to ensure that the liquid does not evaporate too quickly.
Let's start the procedure
So, how to remove acrylic nails at home? First, use pliers to cut off the overgrown piece of acrylic nail. Remember that this material is very hard and elastic. If you don't act carefully, you can end up with a piece of acrylic in your eyes. Do not rush, or better yet, wear clear glasses. The next part of the procedure is filing off the finish, that is, the top shiny coating on the nail. The master places this layer to fix the acrylic, and until it is removed, you will not dissolve the acrylic with anything. Slowly file off the finish from each nail; without this layer, the nail will look rough.
Once the finish is filed off, you can begin removing the nails. If you have a special solvent, then you simply wash off the acrylic from your nails. You'll have to tinker with acetone, and here's how to proceed:
- Wet the cut sponges generously with acetone.
- Apply the sponge to your nail and immediately wrap it with foil - without this trick, the acetone will evaporate very quickly.
- Leave your nails under acetone for 30 minutes. During this time, the acrylic will soften and turn into a jelly-like substance.
- Open each nail one by one and quickly, using a sharp nail file, pick up the softened acrylic, it will come off easily and quickly.
- If pieces of acrylic remain, wipe the nail with acetone and then sand it.
- Wash your hands and lubricate well with nourishing and moisturizing cream. This is a very important stage of the procedure. The salon technicians spend at least 10-15 minutes on it. There is no need to tell how acetone has a harmful effect on the structure of the nail, and therefore, after exposure to this aggressive substance, you need to not only polish your nails, but also lubricate them with cream or special oil. That's it, nails are off! You can get a new manicure or give your nails a rest.
How to remove gel nail extensions yourself at home
You will have to tinker with the gel. This material is solvent resistant, so it needs to be cut down.
Important!
Wear safety glasses before starting work. In the process of cutting off the free tip of the nail with tweezers, pieces of hard material will fly in different directions. It would be completely inappropriate if such a fragment flew into the eye.
After the nails are shortened, take a coarse file and file. We saw for a long time, patiently. It is better to stick an adhesive plaster on the fingers with which you hold the file, otherwise you will get calluses.
When a thin layer of material remains, wipe the surface with acetone to assess how much gel is left, then take a smaller nail file and buff the nail.
Important!
A thin layer of gel coating can and should be left on. By filing everything too hard, you risk damaging your nail, it will become thin, brittle, and you may even get injured.
Errors when removing the coating:
- Wrapping all fingers on both hands with solvent at once. If you don't have an assistant, it will be difficult.
- Failure to comply with the exposure time of the liquid to dissolve the acrylic.
- Using too rough files.
- Overzealous filing of the gel can damage the natural nail.
- Neglect of protective equipment when filing nails (masks, glasses).
- Lack of care after removing extended nails.
Removal with improvised means
In your search for an answer to the question of how to remove false nails, you will come across a variety of tips. And very often pseudo-experts recommend simply tearing them off. This practice is based on the fact that over time the nail plate will still grow back along with the damaged area. But using this method is strongly not recommended, despite the simplicity and speed of the procedure.
Another common tip remover is acetone. Essentially, the action will be the same as with a professional product, but it will cost you a little less.
There are several ways to peel off false nails using acetone:
- Dip your nails in nail polish remover and keep there for about 10 minutes. Try removing them. If it doesn’t work, then extend the time until the tip comes off freely.
- Apply a cotton swab soaked in acetone and leave it in this position for 20-40 minutes. To speed up the process, wrap the tips and cotton wool in foil.
- False nails can also be removed using warm water. To do this, immerse them in a container of water or simply take a hot bath. Often, the artificial nail falls off on its own, leaving no damage to the nail plate. This procedure can take quite a long time. In general, everything will depend on the glue itself and the quality of adhesion of the artificial material to the nail plate. Remains of adhesive can be removed using a highly abrasive nail file.
- And the last proven method is to remove the tips using a special tool. For this purpose, a special sanding file with low abrasiveness (up to 100 grit) is used, with which you will cut down artificial material. You need to be able to work with this tool to avoid damage to the natural nail.
Once you're finally done, give your natural nails some attention. Take a bath, apply nail and cuticle care product, or lubricate your hands with nourishing cream.
How to care for natural nails after removing extensions
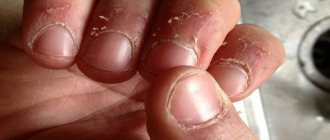
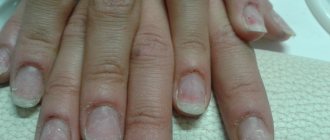
So we did it! The artificial material is removed, and here they are, our dear nails. True, they don’t look very good. The nail plate is thinned and rough. It's not surprising, because it's damaged. Nails may become brittle.
Interesting!
You must understand that the surface of the nail plate is already damaged, and it is impossible to return it to its “pre-acrylic” state. You will have to wait until the nail grows back completely, only then can it be considered restored.
What can we do while the nail is growing?
It is best to cover your nails with medicinal varnish, which will slightly strengthen the plate and prevent it from crumbling, and also improve its appearance. In the process of growing nails, you need to carefully care for the cuticle and rub special oil into it to make the nail grow stronger.
How to remove acrylic nails without consequences? Removal instructions
Method I: Using nail remover or acetone-based product.
1. Remove the free edge of the base with nail clippers or a carpenter.
2. When adding extensions, acrylic overlays are coated with a special compound that needs to be cut off, otherwise it will prevent the base material from softening during the removal process.
3. Apply a sponge soaked in acrylic remover or acetone-based nail polish remover to each nail. The sponge can be cut to the size of your nail.
IMPORTANT: Before treating the nail with liquid, it is recommended to lubricate the cuticle with Vaseline.
4. Secure the sponges to the nail plates by tightly wrapping them with foil. This prevents the liquid from evaporating and retains the heat necessary for the chemical reaction to begin.
5. Remove the foil with sponges after 30-40 minutes. If the acrylic continues to hold, repeat the procedure (10 min.)
6. Remove any remaining coating using a pusher or an orange stick.
7. Polish your nails with a polishing file or buff. Apply healing varnish.
Method II. Sawing off the acrylic layer.
The process is identical to removing gel nails.
Method III. Using dental floss.
1. Using a pusher or wooden stick, lift the entire lower edge of the acrylic plate (from the cuticle).
2. Place dental floss under the bottom edge of the nail.
3. Slowly and carefully advance the thread while slightly lifting the acrylic plate.
4. After removing the artificial coating, the natural nail plates are polished.
IMPORTANT: Regardless of the method of removing artificial nails, the natural nail plate requires close attention and care during the recovery period.
Recommendations
"Beauty requires sacrifice". And in the case of nail extensions, we make these sacrifices. What advice would you like to give:
- Don't overuse extensions. From time to time, remove the coating and allow your nails to rest and grow completely.
- In between extensions, take good care of your nails.
- If you decide to remove your nails yourself, be especially careful.
Have you ever gotten your nails done? Which material do you prefer and why?

