We all love gel polish for its durability, beauty and convenience. You came to the master, got a manicure and you walk around with beautiful nails for almost a whole month. But there is also a flip side to the coin; its persistence is also evident at the time of removal from the nails.
Today I’ll tell you in detail about nine ways you can remove old gel polish yourself, without the help of beauty salons and manicurists. How to restore your nails after unsuccessful removal of the old coating. I will describe the pros and cons of each of these nine methods. You will find out whether it is necessary to remove gel polish at all, and if so, after what period of time to do this, and many other interesting things.
Do I need to remove gel polish and when to do it?
Our nails grow and renew themselves, so it is necessary to monitor the appearance of your nails and regularly update your manicure. And this doesn’t have to be a trip to a manicure salon; you can do it at home yourself.
If you prefer to cover your nails with gel polish, then an important rule for you is not to leave the coating on for longer than 2-3 weeks. This is the average wear period for this coating, recommended by technologists.
Why exactly 2-3 weeks?
Because when the nail grows, with gel polish applied to it, the load on the tip of the nail increases. This can lead to tragic consequences: nail breakage, deformation, or, even worse, the entire nail detaching from its nail bed. Treatment of the latter is expensive, long, painful and extremely unpleasant.
Therefore, girls, try to monitor the wear time of your coating, and update your manicure on time.
How not to remove gel polish and what the consequences may be
It happens that gel polish begins to peel off from the nail. This can happen a few days or 2-3 weeks after the manicure.
There may be several problems:
- The first is in the gel polish itself.
- The second is that your master did not degrease or did not degrease the surface of the nail, and the gel polish began to peel off.
- And third, if the detachment occurred after 2-3 weeks, then this means that it’s simply time to update your manicure.
This detachment can cling to everything and cause you discomfort.
BUT, THE MAIN RULE IS YOU CAN’T TIP IT OFF FROM YOUR NAIL!
ELSE, YOU MAY GET:
- Thinning of the nail plate , since along with a piece of gel polish, the top layer of the nail, or even several layers, can be torn off. And so, time after time, the nails will become thinner and weaker. And the painful sensations when touching the nail plate become stronger and more unpleasant.
- Injury to the nail , since together with a piece of gel polish there is a risk of tearing the nail plate off from the bed completely or partially. For example, if the nail plate was already very thin. Treatment for this injury is expensive, painful and takes years.
WHAT TO DO IF THE GEL POLISH HAS DETACHED FROM THE NAIL:
- Cover this area with a band-aid and make an appointment with a manicure specialist.
- Or remove gel polish at home yourself
Read on to learn how you can remove gel polish at home and how to restore your nails afterward.
Tips for maintaining healthy and beautiful nails
Even with regular application of gel polish, you can keep your nails beautiful and healthy if you use simple recommendations:
- periodically it is necessary to give the nails the opportunity to recover and rest, taking a break for a month;
- Gel polish is applied only to healthy nail plates, so if there are cracks or fungus, you will have to postpone the cosmetic procedure;
- Manicures should only be done by trusted professionals who use reliable equipment and materials;
- Without experience and professional tools, it is not recommended to remove shellac yourself;
- special oils or other means to strengthen and restore are regularly applied to the nails.
Such simple tips allow you to keep your nails strong, shiny and beautiful for a long time.
You can remove gel polish at home or in a salon. To do this, various methods are used, represented by sawing, as well as the use of impregnated napkins, devices with a cutter or remover. It is not allowed to use mechanical force or aggressive chemicals. It is recommended to take breaks and use special oils to restore the plate.
Methods for removing gel polish
In order to properly remove the covering of the house, check with your master what materials he used in the work. Gel polishes are different. Some are very easy to remove, such as CND, IBD, Gelish, or single-phase gel polishes. Others are harder to remove, such as Diamant, Bluesky, TNL and Kodi.
The difficulty of removal may depend on the following factors:
- Number of layers of gel polish applied to the nail
- Density of gel polish (there are more liquid and thicker in density)
- Chemical composition of gel polish (the composition is dominated by a larger amount of gel or varnish)
Thus, the more layers of gel polish on the nail, the higher the density of the gel polish itself, and the more gel in its chemical composition, the harder it will be to remove it from the nail.
There are two main techniques for removing gel polish - sawing and soaking. And based on them, the following 9 methods of removing this coating have already been formed:
- filing gel polish using a nail file
- sawed off using a manicure machine
- soaking gel polish in a bath
- removal with vodka
- removal with alcohol
- removing gel polish using acetone and foil
- removal using clips (clothespins)
- removal with clear nail polish
- removal with special wipes
Let's talk about each of the methods more specifically and highlight for ourselves a more convenient and acceptable way to remove the old coating.
How to remove gel polish from nails with a manicure machine?
Removing gel with a device has its advantages and disadvantages. Of course, hardware removal is done much faster and does not cause pain.
- You can remove the gel with the device using a carbide and ceramic cutter. According to experts, it is much better to use the latter.
- So, if you decide to remove gel polish yourself using a device, then follow these recommendations:
- First of all, don't rush into anything. This procedure will take a minimum of time
- Your hand must be well fixed, otherwise you may accidentally jerk your hand and remove something unnecessary.
- There is no need to press the cutter on the nail. You should only lightly touch your nail with it.
- All movements are performed only in the direction of movement of the cutter
Removal by device
- To remove the gel, you only need to use a special cutter, that is, one that is designed for this
- After all the manipulations with the cutter, go over the nails with a buff.
- If the removal is done by an experienced technician, a professional in his field, then you will never feel any pain. This is something you should build on as well.
- When doing the removal yourself, monitor your sensations: if you are in pain, you feel a burning sensation, or there are any signs of damage to the nail, stop the procedure immediately and seek help from a specialist.
As you can see, there are a huge number of ways to remove gel polish at home without any outside help. All methods have their advantages and disadvantages, so the choice is, of course, up to you. However, now you know for sure that you can remove gel polish yourself easily and quickly.
If possible, choose the most gentle methods and means for the procedure and then your nails will not only remain healthy, but will also delight you with their beauty.
Sawing with a file
The first way to remove gel polish is to file off the old coating using a nail file.
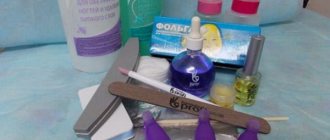
For this method we will need:
- Nailfile
The file for removing gel polish is chosen as follows: for strong and healthy nails, a file with a hardness of 180 grit is suitable; for soft nails, it is better to take a less hard file with a hardness of 240 grit.
- Polishing buff
- Cotton pads
Removal technology:
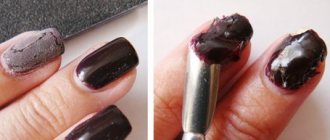
We take a file and start cutting off the old colored coating. We file carefully, without touching the skin around the nail, so as not to rub it. We only cut off the color. We try to remove the colored layer of gel polish from the nail evenly.
In the process of filing the gel polish off the nail, remove the resulting dust using a dry cotton pad.
Next we take a polishing buffer and use it to smooth the surface of the nail. As the nail grows, we will need to polish the gel polish step at the cuticle and smooth out any unevenness on the surface of the nail.
After leveling the nail plate is completed, you can wash your hands to remove any remaining dust and apply a nourishing cream.
The advantages of this method:
- One nail takes approximately 3 minutes
- This method does not require any special skills or knowledge
- No chemical effect on skin and nails
Disadvantages of this method:
- You can accidentally saw through your own nail
In this video you can see in more detail how to remove old gel polish using a nail file.
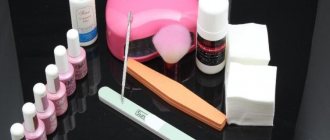
Required Tools
To get rid of gel polish yourself, you don’t need complex and expensive tools:
- Coating remover. The easiest way to remove gel polish is with a special liquid. Manufacturers produce not only gel polish kits, but also products for their removal. It is enough to find out from the specialist the brand of the products he works with and purchase a liquid for removing the same production. If there is no special product, then you can get by with regular acetone.
- Foil. The most ordinary confectionery foil can be used. If suddenly she wasn’t at home, then a plastic bag or cling film will help with the procedure. In highly specialized stores you can easily find so-called “clothespins”. Thanks to their use, cotton pads soaked in a special liquid adhere more tightly to the nails, which speeds up the process of removing gel polish.
- Orange sticks. As an option, you can use a special metal pusher. It will not only carefully remove the remains of gel polish, but will also last a long time.
- Sanding file.
- Cotton pads (cotton wool).
- Cuticle oil.
Sawing with a machine
The second way to remove old gel polish from nails is to file it off using a professional manicure machine with a special cutter attachment.
If you have never used such a device and have not completed special training courses on its use, it is better to skip this method. Since, due to inexperience, you can seriously injure the nail plate and even cause it to burn.
For this method we will need:
- Professional manicure machine
The power of the device should be at least 30-60 W.
- Cutter for removing gel polish coating
A cone-shaped ceramic cutter is best for removing gel polish.
Removal technology:
We insert the cutter into the machine and set it to maximum speed.
We remove the colored coating moving from the base of the nail to its edge, barely touching the coating with the cutter. Movements when removing the color coating from the surface of the nail should be uniform and continuous.
First, remove the gel polish in the center of the nail, then move on to the side areas.
The direction of movement of the cutter should coincide with the direction of movement of your hand.
After removing the gel polish is completed, you can wash your hands to remove any remaining dust and apply a nourishing cream.
The advantages of this method:
- Quick and painless removal of old gel polish
- No chemical effect on skin and nails
Disadvantages of this method:
- This method requires special skills and knowledge
- Due to inexperience, you can seriously injure the nail plate and even cause it to burn.
How to remove with a special device - cutting
This method is considered by experts to be the most gentle and fastest. For the procedure you will need a special apparatus and 2-4 files of varying hardness. The gel polish remover is similar to a small drill or sander. It comes complete with several attachments: from the hardest (metal) to soft.
Using hard attachments, remove the main part of the gel polish. Soft ones are used at the final stage of work - when polishing the nail, while processing the cuticle. At the preliminary stage, it is advisable to practice on plastic or false nails. Then you can get to work. Gel polish should be filed off carefully and without haste. You should start with the hardest bit.
You can remove gel polish using special attachments.
After cutting down the next layer, they move on to softer nozzles. Elbows should be in a fixed position. As an addition, you can use nail files, but then the procedure will take longer.
Soaking in a bath with a special liquid
The third method of removal is to soak the old gel polish in a bath filled with a special liquid that contains acetone and solvent.
This is, in my opinion, the most UNSAFE way to remove old gel polish - for nails, for the skin of the hands, for the respiratory system, and for health in general. Since, during this procedure, acetone vapor and other chemicals contained in this special liquid evaporate, which can lead to an allergic reaction and even respiratory diseases. Therefore, technologists strongly do not recommend using it.
A special liquid is a liquid that can be used to remove a durable polymerized gel polish coating. Such a liquid usually contains a solvent and acetone.
There are liquids without acetone, but they contain other no less, and in some cases even more toxic substances.
Therefore, it is better to give preference to a liquid containing acetone. In professional language, such a liquid is called a gel polish remover.
For this method we will need:
- Empty tub or shallow plastic bowl
- orange stick
- A special liquid containing acetone
- Nail file with hardness 180 – 240 grit
- Polishing buff
- Petrolatum
Removal technology:
Take a file and slightly file the top shiny layer of gel polish so that it becomes matte.
If you cut off the top layer of gel polish a little, the liquid will penetrate all its layers faster and the coating can be more easily removed from the nail.
Pour a liquid containing acetone into a bath or bowl so that it completely covers the nail plates.
Lubricate the skin around the nails with Vaseline to protect the skin from aggressive chemical exposure.
We dip all the nails into the bath and wait for about 10 to 20 minutes.
The exact holding time will be indicated on the bottle of liquid you choose. But, if you feel an unpleasant burning sensation or any other unpleasant sensations, the procedure must be stopped immediately, and your hands should be rinsed well with cold water and spread with a rich cream.
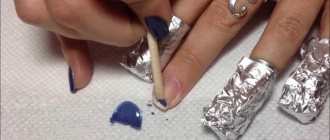
As soon as you see that the gel polish has begun to come off from the nails, take your hands out of the bath, wipe them with a napkin and begin to carefully scrape the soaked gel polish from the nails using an orange stick.
Then, if there are small pieces of gel polish left on the nails, take a polishing buffer and carefully remove them from the nails.
After the entire procedure for removing gel polish from nails is completed, wash your hands with soap and apply nourishing cream.
The advantages of this method:
- This method does not require special skills or knowledge
Disadvantages of this method:
- Strong chemical effects on the skin and nails, as a result of which they become very dry and difficult to restore
- Evaporation of acetone vapors and other chemicals contained in a special liquid for removing gel polish can lead to an allergic reaction or even respiratory diseases
Common mistakes when removing gel polish
In order not to spoil the nail plate, it is recommended not to make the following mistakes:
- Do not scrape or pick out the coating with various means or tools (except for a special apparatus). Many people try to get rid of the gel mechanically. As a result, severe damage to the nail occurs, especially if shellac is present.
- Do not apply acetone without oil or rich cream on the cuticle and skin around the nail. The substance dries out the skin greatly, which negatively affects its condition.
- Do not try to completely remove the coating using an ordinary file. In any case, it will damage the top layer of the nail.
- Do not scrape off the gel with an orange stick. It won't damage the nail too much, but it won't remove the coating either.
- Do not use pure acetone. It is better if it is a professional product or nail polish remover with acetone and the addition of various vitamins.
- There is no need to rush. If the polish does not separate from the nail, then you need to wrap your finger again and wait some more. The difference in exposure time depends on the type of varnish and primer.
After the gel removal procedure, it is recommended to trim thin and brittle nails. After this, you need to treat the nail plate with professional means to restore it or with natural products (lemon juice, sea salt baths, oils, iodine).
Compress of acetone and foil
The fourth method of removal is to soak the old gel polish using a compress with a special liquid that contains acetone, and wrap the nails in foil to create a thermal effect.
For this method we will need:
- A special liquid or gel (remover) containing acetone
I really liked the gel remover; it does not leak out from under the foil and is very convenient to use.
- Foil
- File hardness 180 – 240 grit
- Polishing buff
- Cotton pads
- orange stick
- Petrolatum
Removal technology:
Take a file and slightly file the top shiny layer of gel polish so that it becomes matte.
Then we take cotton pads and cut them first into four parts, and then cut each quarter in half.
The smaller the piece of cotton pad, the less acetone will get on the skin around the nails. The main thing is that this piece completely covers the nail plate.
Lubricate the skin around the nails with Vaseline to protect the skin from aggressive chemical exposure.
Take a liquid or gel remover and soak a piece of cotton pad with it. We apply this piece of the disk to the nail and wrap the finger on top with foil. We do this with all nails.
The foil has two sides - shiny and matte. It’s not just that, the glossy side retains heat, while the matte side lets it through. Therefore, you need to place the foil with the glossy side inward.
We wait approximately 10 to 20 minutes.
The exact exposure time will be indicated on the bottle of the liquid or gel remover you choose. But, if you feel an unpleasant burning sensation or any other unpleasant sensations, the procedure must be stopped immediately, and your hands should be rinsed well with cold water and spread with a rich cream.
We remove the foil from one finger and check, as soon as you see that the gel polish has begun to come away from the nail, take an orange stick and begin to carefully scrape off the soaked gel polish.
If the gel polish is difficult to remove from the nail, wrap the nail again in foil and wait another 3-5 minutes.
Then, if there are still small pieces of gel polish on the nails, take a polishing buffer and carefully remove them from the nails.
After the entire procedure for removing gel polish from nails is completed, wash your hands with soap and apply nourishing cream.
The advantages of this method:
- This method does not require special skills or knowledge
Disadvantages of this method:
- There is a chemical effect on the skin and nails, as a result of which they become very dry
- Chemicals contained in a special liquid or gel for removing gel polish can lead to allergies.
Tips and precautions
Precautionary measures:
- Chemical gel polish removers often cause an allergic reaction. When the first negative signs appear, you must stop using this or that product.
- The procedure must be carried out in a well-ventilated area. Due to the specific odor, the products can negatively affect the body as a whole.
- Before starting the process, you need to thoroughly wash your hands with soap and treat them with an antiseptic. This stage will eliminate the possibility of infection if the cuticle is suddenly injured.
- If possible, you should avoid using metal tools when removing gel polish. They interact chemically with various agents. It is best to use orange sticks or wooden spatulas.
- Experts recommend not using technical acetone. This leads to the formation of burrs.
- The nail plate must be handled very carefully during the removal procedure and immediately after. Due to chemical exposure, it becomes soft and easily injured.
Removing gel polish at home is a process in which there are a lot of nuances. If you take them into account, this will allow you to avoid wasting time and money on visiting a specialist.
Nuances:
- The main mistake made by those who remove gel polish at home is putting excessive pressure on the nail plate while removing the remaining coating. As a rule, this leads to damage to the nails. To avoid the need for this, just soak the cotton pad again with a special liquid and wrap it around your nail.
- If at home you not only undergo the removal procedure, but also apply gel polish to your nails, you can use a little trick. To avoid any difficulties when removing the varnish, before the first layer, apply a regular transparent varnish to the center of the nail.
- After removing gel polish at home, your nails should be provided with comprehensive care. Excellent cuticle oil. It will soften irritated skin and provide nails with intense nutrition.
Using clips (clothespins)
The fifth way to remove old gel polish is to soak the coating using a remover, fixing it on the nails with special clips.
For this method we will need:
- Remover containing acetone
- Retaining clips
Such clamps can be purchased at manicure stores or ordered on Aliexpress. They are also called clothespins or caps.
- File hardness 180 – 240 grit
- Polishing buff
- Cotton pads
- orange stick
- Petrolatum
Removal technology:
The technology for removing old gel polish coating is the same as in the previous method, only we fix pieces of cotton pads on the nails using clamps.
The advantages of this method:
- This method does not require special skills or knowledge
Disadvantages of this method:
- There is a chemical effect on the skin and nails, as a result of which they become very dry
- The chemicals contained in the remover may cause allergies.
Vodka or alcohol
The sixth and seventh methods of removing old coating from nails involve soaking it with vodka or alcohol.
For this method we will need:
- Vodka or alcohol solution
Before use, alcohol must be diluted with water 1:1. We use vodka in its pure, undiluted form.
- Foil or clips
- File hardness 180 – 240 grit
- Polishing buff
- Cotton pads
- orange stick
- Petrolatum
Removal technology:
The technology for removing old gel polish is the same as in the fourth and fifth methods, only we soak pieces of cotton pads generously with vodka or alcohol solution and fix them on the nails using foil or clips.
Let stand for 20-30 minutes.
If there are still large or small pieces of gel polish on the nails, take a file with a hardness of 240 grit or a polishing buffer and carefully file these residues off the nails.
After the entire procedure for removing gel polish from nails is completed, wash your hands with soap and apply nourishing cream.
The advantages of this method:
- This method does not require special skills or knowledge
Disadvantages of this method:
- Vodka and alcohol dissolve gel polish very weakly, so the exposure time increases greatly; in addition, you need to additionally help yourself with a file both before and after soaking
- Skin and nails dry out due to exposure to alcohol
Special napkins
The eighth way to remove old coating from nails is to soak this coating using special napkins.
For this method we will need:
- Special napkins
- File hardness 180 – 240 grit
- Polishing buff
- orange stick
- Vaseline or fatty cream
Special wipes for removing gel polish can be purchased at manicure stores, or ordered on Aliexpress. These are napkins soaked in a special liquid that contains acetone and solvent. They are very convenient to take with you on a trip or trip.
Removal technology:
Take a file and slightly file the top shiny layer of gel polish so that it becomes matte.
Lubricate the skin around the nails with Vaseline or fatty cream to protect the skin from aggressive chemical exposure.
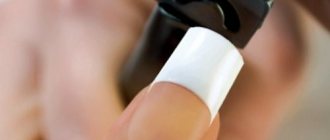
Take a napkin and carefully cut off the top edge of the bag in which it is located. We put this bag on the finger, applying the napkin strictly to the nail plate, and tightly wrap the finger with this bag. We do this with all nails.
The secret of this method is that the inside of the napkin bag consists of foil. Therefore, when wrapping your finger in this bag, a moist, warm environment is created, which promotes the rapid detachment of gel polish from the nail plate.
We wait about 15-20 minutes. But, if you feel an unpleasant burning sensation or any other unpleasant sensations, the procedure must be stopped immediately, and your hands should be rinsed well with cold water and spread with a rich cream.
The exact holding time will be indicated on the napkin you choose.
We remove the napkin from one finger and check, as soon as you see that the gel polish has begun to come away from the nail, take an orange stick and begin to carefully scrape off the soaked gel polish.
If the gel polish is difficult to remove from the nail, take a new napkin and wrap the nail in it again, wait another 10-15 minutes.
Then, if there are still small pieces of gel polish on the nails, take a polishing buffer and carefully remove them from the nails.
After the entire procedure for removing gel polish from nails is completed, wash your hands with soap and apply nourishing cream.
The advantages of this method:
- Convenient to use on a trip or travel
- This method does not require special skills or knowledge
Disadvantages of this method:
- Since the liquid on the napkins is in small quantities, the holding time and the number of napkins may increase significantly
- There is a chemical effect on the skin and nails, as a result of which they become very dry
- Chemicals contained in gel polish removal wipes can cause allergies
How to file off gel polish with a nail file yourself?
- First, you need to treat each nail plate with a polishing file. This way you can get rid of the glossy layer. This applies specifically to gel polish. If shellac was used, then a polisher is not needed.
- Then the nails are treated with soapy water. Make sure that it is at room temperature. After treatment, wipe your fingers with a napkin. Apply a thick layer of cream to the skin around the nails. This is important to protect the skin from the harmful effects of acetone.
- After all these steps, a cotton pad should be dipped in acetone and applied to the nail. Then the fingers are wrapped in ordinary food foil. What kind of foil is needed to remove gel polish? You can even use foil from a chocolate bar. The action of the composition is no more than seventeen minutes. When using any additional means, the exposure can be reduced to ten minutes.
- In order for the gel polish to soften as quickly as possible, you need to massage the nail plates with gentle movements. The foil is not removed.
- When the time comes to remove the foil, the softened coating can be easily removed. The final removal of gel polish is done with orange sticks. A pusher is also suitable. If the layer is too dense, then the coating will not come off as easily as it might seem.
- If the varnish coating cannot be removed using an orange stick or nail file, then you should repeat the procedure again with a cotton pad and foil. Under no circumstances is it recommended to pick at the gel coating in any way. There is a high probability that the nail plate will be damaged.
- After all the above steps, you need to start polishing your nails. Usually. This is done with a soft nail file. Then you should give the nail plates the desired shape. An ordinary nail file is suitable for this.
- And at the end of the procedure, you should use cuticle oil.
Clear nail polish
The ninth way to remove old coating from nails is to soak the gel polish using clear nail polish.
For this method we will need:
- Clear nail polish
- Wet wipes
Removal technology:
We take a transparent varnish and apply it liberally to the nail, wait 10-15 seconds, take a damp cloth and remove the transparent varnish in the direction from the root to the tip of the nail. We carry out this procedure with each nail in turn and repeat the application of colorless varnish as many times as necessary to completely remove the old coating from the nails.
If the old gel polish is not completely removed, take a polishing buffer or a file with a hardness of 240 grit and remove the remaining coating by soft sanding.
After removing the coating is completed, you can wash your hands and apply nourishing cream.
The advantages of this method:
- This method does not require any special skills or knowledge
- There is no strong chemical effect on the skin and nails
Disadvantages of this method:
- Takes a lot of time
- Not all types of gel polishes can be removed, it all depends on the density and composition of the gel polish
Advantages and disadvantages of home methods for removing shellac
The undoubted advantage of the first method is its low cost - you do not need to spend money on tools and materials, usually they can be found in every home. If you do have to spend money, they will be enough for several withdrawals. The advantages also include saving time - the procedure can be performed without waiting in line to make an appointment at the salon.
There are more disadvantages - some inconvenience is possible (when removing the coating on the right hand, the foil slips, when the nails of the first hand are wrapped in foil, it is difficult to prepare the other), an increase in the duration of the procedure up to an hour - when treating hands alternately, the risk of injury to the nail when using metal tools, or skin, exposure to a fairly aggressive liquid on the nails.
The advantage of soaking nails in nail polish remover or isopropyl alcohol is the speed of the procedure , the ability to observe the destruction of shellac and control the process. A significant disadvantage is the aggressive effect of the liquid on the skin and nail surface (drying), as well as possible injury to the nail surface when removing shellac with a metal pusher.
Cutting the shellac coating down to the base layer has its advantages - saving time, the ability to immediately apply a new coating. But with all this, you can touch or inadvertently cut off the entire top layer of the nail plate , thereby injuring and thinning it.
Removing shellac coating with a special liquid has more advantages than disadvantages. The first include the minimum time spent, the presence in such a product of components that can have a positive effect on the nail surface. The only disadvantages include possible inconvenience when removing the coating from nails yourself, and the risk of damage to the nail plate if you use the pusher carelessly.
How to make it easier to remove old gel polish
There are several ways to simplify the process of removing old coating from nails:
- Use a special peel-off base for gel polish instead of the usual one. This base is called Peel off Base Coat. Its name speaks for itself. But, there is one unpleasant moment. The coating does not last long, and after a few days it may begin to break off in pieces, especially after taking a bath or shower.
- Use nail oil before manicure. If you apply nail oil to your nails half an hour before your manicure, the gel polish will be removed from your nails much easier and faster. But the durability of your manicure is not guaranteed.
- Use lacquer square technology . It seems to me that this is the most effective method that will not affect the durability of your manicure in any way. Before applying the base to the nails, it is necessary to apply a layer of ordinary transparent varnish in the form of a square to clean nails one by one, retreating 2-3 mm from all edges of the nail plate, and let it dry.
How to restore nails after unsuccessful gel polish removal
So, if you unsuccessfully removed the old gel polish and damaged your nails a little, you need to take care of their speedy restoration.
This simple but very effective nail restoration complex will help us with this:
- For a week, every day, you need to apply nail oil to your nails or cover them with medicated varnish.
- Once a week, for example on weekends, you can take a strengthening bath with sea salt for 15-20 minutes.
- After the mask, it will be very good to apply cold paraffin to your hands for 20 minutes, wipe off the residue with a dry cloth.
If one week of using this restorative complex is not enough, you can repeat it again.
Restoring nail plates after shellac removal
Often, after removing the shellac coating, it is discovered that the nail plates have weakened and become thinner. This means that a break is necessary, during which the nails are not treated with wellness treatments. During such periods, it is better to give the nail plates a rest and avoid applying even ordinary varnishes.
There are a huge number of simple bath recipes for strengthening thin nails . Some of them:
Add 1 tbsp to 100 ml of warm water. l. sea salt and 5-6 drops of iodine. You need to keep your nails in this bath for about 20 minutes, then dry them and apply a rich cream.
Bath with essential oils . You will need 250 ml of warm water, sea salt - 1 tbsp. l., grapefruit, tea tree and cedar oil - 1 drop each. Mix all the components, keep the nails in the resulting liquid for 10-15 minutes, then dry them and use a cream to moisturize or nourish the skin.
In order to strengthen the nail plates, you can use oils: almond, lemon, eucalyptus, chamomile, rosemary, sandalwood, apricot. To restore the structure of nails, you need to use oils: geranium, rosehip, tangerine, avocado. To get rid of yellowish nail plates, using lemon oil is effective .
| General healing properties of essential oils for nails: help accelerate their growth, soften the cuticle, give them a uniform color and shine. |
Thus, to safely remove shellac at home, it is necessary to follow the technology for removing this coating and not carry out manipulations that could damage the nail plate. Don’t forget about periodic restorative procedures for nails.
