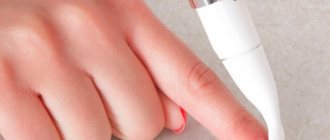
How to remove shellac from the skin around the nail?
But what should you do if, while applying shellac, it got on the cuticle, the varnish dried out and traces of it remained on the skin? How to remove gel polish from the skin around the nail after drying? There are several ways.
Cotton swab
You can remove the remnants of gel polish from the skin using a cotton swab - you need to moisten it with nail polish remover and remove the excess, absorbing it with a cotton swab.
Orange wood stick
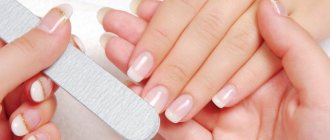
Such sticks can be purchased at a store that sells manicure products. This stick's job is usually to work on the cuticles, but it can also help when removing excess polish from the skin around the nail. To do this, moisten the sharp edge of the stick in nail polish remover, then dip the excess with a cotton swab and carefully move the stick over those areas of the skin where the polish was carelessly applied.
Toothpick with cotton wool
A toothpick with cotton wool wrapped around it is, in fact, an analogue of a cotton swab. But the toothpick is much smaller and thinner in size, which makes it easier to get to the colored areas of the skin, especially if the varnish gets into hard-to-reach places.
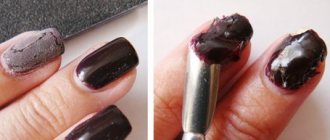
Old nail polish brush
For this method, you can use an old brush from decorative or medicinal nail polish, or an ordinary painting brush.
The technique for removing varnish using such tools is quite simple:
- Moisten the brush with nail polish remover and rub it a couple of times in those areas of the skin where traces of nail polish remain.
- If particularly necessary, you can hold the brush on one area so that the varnish is saturated with nail polish remover, then it will come off easily in the future.
Cream
All you need to do is just wash your hands with soap a couple of times and then lubricate them with cream. After a couple of hours, excess varnish will become much easier and faster to remove, using any method.
Reasons why gel polish runs dry
- Poorly performed cuticle processing, in particular, the pterygium was not completely removed
I think you already know that the beauty and ease of applying gel polish is largely determined by the pre-treatment of your nails. To apply gel polish as close to the cuticle as possible without streaking, you need to not only cut the cuticle evenly, but also lift it and clean the space underneath it.
Pterygium is a thin weave that fits quite tightly to the nail, so removing it is not always easy. The most convenient way to clean a pterygium is with a device, but when performing a classic or European manicure, this is a little more complicated.
- Remains of dust under the skin.
Usually, dust remains under the skin after processing the cuticle and pterygium using cutters during hardware manicure. It is removed by degreasing the nail plate. Therefore, to prevent it from remaining, do not forget to lift the skin at the cuticle and apply a degreaser there too.
- The brush is placed incorrectly at the cuticle
If you take a well-saturated brush from a bottle directly to the cuticle, you will inevitably get streaks. Start applying the gel polish, stepping back slightly so that most of the material remains on the nail, and a semi-dry brush approaches the cuticle.
In addition, with the first layer, it is better not to immediately try to apply gel polish under the cuticle - it is better to do this already on the second layer, or use a thin brush for this.
If you paint under the cuticle with a brush from a bottle, you need to press it so that it lies like a fan against the cuticle, and then push the gel polish as close to the cuticle as possible.
- Gel polish is too liquid
It will also be difficult to apply without streaking the skin. In this case, I can recommend making the layer thinner and applying it with an almost dry brush. The number of layers, of course, will have to be made more.
Pros and cons of applying gel polish under the cuticle
When performing a manicure on their own, most girls and, of course, nail technicians tend to apply gel polish under the cuticle, since the method allows:
- give your nails a more attractive look, make them visually longer and more elegant;
- Wear the design longer and it will seem fresh for at least 2-2.5 weeks;
- your nails will look beautiful and neat when they grow noticeably;
- save time and money on manicure.
It also has disadvantages:
- difficulties in implementation; not everyone immediately masters the technique even after the training course;
- the likelihood of streaks appearing, which are then difficult to correct;
- the need to perform high-quality hygienic manicure, which not everyone can do, especially at home;
- the danger of damaging the nails in the matrix area and deteriorating their appearance, causing further disease;
- the sloppy appearance of the hands as they grow back plates, if the coating was done poorly.
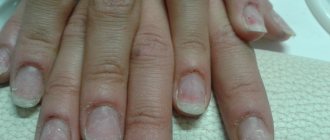
How to strengthen your nail after removing the coating
In any case, no matter how great the quality of the gel polish, your nails need to undergo SPA treatments in between coats.
- Make regular therapeutic salt baths for nails, and then massage with vitamins E and A. Mix them in equal quantities and rub into the nail plate.
- Rub a special fortified wax into the nail plate every day, which will fill all the cracks and dimples. After 3-4 sessions, you can forget about problems such as fragility and delamination.
- Prepare castor lotion. To do this, dissolve 3 capsules of vitamin E in 1 teaspoon of castor oil and add 5 drops of eucalyptus or tea tree oil. Rub this mixture with cotton pads every day at night into the nail plate and cuticle, allowing it to be completely absorbed. This lotion will have a restorative and anti-inflammatory effect.
Such procedures will make your nails more well-groomed and smooth.
- We recommend on the topic: how to care for your hands so that your skin remains young.
- How to use gelatin for brittle and peeling nails at home: recipes.
- How to choose a suitable manicure - important nuances.
Ways to extend the life of a manicure with gel polishes
Peeling of gel polish is not only visually unpleasant - it can also cause the proliferation of pathogenic microorganisms with subsequent infection. To ensure that the gel polish lasts as long as possible and does not come off as a film a few days after application, you should follow the nail care recommendations given by the master himself:
- do not wet your nails 2 hours before and after the procedure;
- try to avoid prolonged contact with the ground, dust or warm water;
- do not remove gel polish yourself;
- Use gloves when working with chemicals.
With regular (monthly) visits to nail salons or private nail specialists, it is worth strengthening the nail plates from time to time. You can renew your manicure no more often than once every 3 weeks. Sometimes you should take breaks. Even such simple actions will preserve the integrity and aesthetics of the varnish coating until the next session.
If you are confident in the health of your nails and proper manicure care, you should think about changing the master if the problem remains relevant.
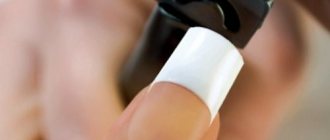
What is liquid tape for manicure used for?
Manicure film is needed to protect the cuticle and side rollers from paint coatings during the design process. The rough component found in any polymer can cause damage to delicate and sensitive skin. Use it when performing the next technique, which involves getting material on your fingers. It is better to cover the areas close to the plate with a protective film, thereby protecting the delicate epidermis and making it easier to remove excess dye from the skin.
The tape serves as an auxiliary material for design in the following directions:
- gradient;
- marble pattern;
- any airbrush work;
- a technique that involves direct contact of the skin with varnish.
Trim manicure when painting nails under the cuticle with gel polish
With a trim manicure, painting nails under the cuticle with gel polish turns out to be of better quality if you follow the procedure correctly:
- First, shape your nails using a nail file. You should not file them after soaking; this will lead to delamination and weakening of the plates.
- Place your fingertips in a bath of warm water so that your nails and cuticles are completely submerged. After a few minutes, take your hand out and blot it with a napkin.
- The previous stage can be replaced by using a remover. It is applied to the cuticle and side ridges, left for the time specified in the instructions and washed with a napkin.
- Push back and lift the cuticle with an orange stick or silicone “hoof”. They also need to clean the pterygium from the surfaces using movements without strong pressure on the plate.
- It is necessary to remove the cuticle before applying gel polish using scissors or nippers designed for this purpose. If possible, it is worth pulling it up during the process so that the removed part is not pressed against the plate again.
- When all the plates have been processed, wash your hands and dry with a towel. Nails and the skin around them are treated with an antiseptic.
- The surfaces of the plates are polished with a soft buff to remove roughness. Then they are wiped with a degreaser, and the base can be applied.
How and with what does a manicurist treat allergies?
First of all, you need to understand what exactly you are allergic to. After taking tests and identifying the allergen, during treatment and subsequently, it is necessary to avoid it (if it is animal hair, do not contact it, if it is gel polish, do not work with the product, etc.).
If the body’s reaction manifests itself in the form of contact dermatitis, treatment involves the use of:
- Antihistamine (Loratadine, Zyrtec, Claritin, Suprastin, Zodak, Tavegil, etc.). Since this group of medications has many side effects, they should be used in courses of no more than 10 days (depending on the doctor’s prescriptions).
- Ointments “Bepanten”, “Dexpanthenol” to moisturize the skin in case of peeling; "Fenistil" to relieve symptoms (itching, swelling, hyperemia); “Radevit”, “Atopra” - to restore the affected areas.
- Depending on the indications, ointments with corticosteroids “Afloderm”, “Advantan”, “Celestoderm”.
- Vitamins A, E, B for moisturizing and speedy regeneration of the dermis.
- Antibiotic ointments to prevent further infection (for cracks), as well as antifungal drugs, for example Triderm.
If you experience symptoms of a respiratory illness:
- It is necessary to take a course of the above antihistamines.
- To relieve symptoms, you can use Vibrocil, Sanorin-Analergin, Allergodil drops, but not more than 7 days.
In both cases, doctors recommend taking enterosorbents (“Polysorb”, “Activated carbon”) in order to quickly remove the allergen from the body, as well as a strict diet (exclude nuts, chocolate, citrus fruits, pomegranates, coffee, honey and alcohol, give preference to boiled, stewed and steamed low-fat foods).
How to remove gel polish without foil
Gel polish can be removed without foil. This removal method requires the following components:
- cotton pads;
- orange stick;
- liquid with acetone.
How to erase:
- First of all, the top coating is filed using a nail file. This is done easily, carefully and there is no need to press on the nail plate;
- Next, the cotton pads need to be cut into two parts and soaked in nail polish remover;
- The moistened halves of cotton pads are wrapped around the nails;
- We hold the discs for about 15 minutes, during which time the product should dissolve the gel polish;
- After this, remove the cotton pads and carefully pry off the coating with an orange stick. You may not be able to remove it the first time;
- If you can’t remove it the first time, you will have to apply cotton pads with solvent to your nails again.
This method is not very good and can harm your nails. After removal, it is best to treat the cuticles with oil and leave the nails without polish for several days.
Gel polish flows onto the cuticle: what to do
If the gel polish flows onto the cuticle, you need to do the following:
- Take an orange stick, a flat or thin brush, and a toothpick, dip them in degreaser and wipe off the stain. The choice of tool depends on the size and location of the problem.
- If the previous option does not help, it is better to erase the coating completely and then reapply. For the procedure you will need a lint-free cloth and a degreaser.
- If a streak appears after polymerization, you can try to remove it with a pusher and an orange stick. Sometimes cuticle nippers or scissors help. But you can’t use them often; the tools quickly become dull.
- You can cut out the streak with a hardware attachment. Use a diamond cutter with a thin tip.
- If the side rollers are stained with gel polish, the polymerized product is removed with a file with an abrasiveness of 180 grit. Then you need to go over the skin with a soft buff.
Painting under the cuticle with gel polish is not easy for those who have taken courses. But with experience and the use of different techniques, choosing the appropriate one, this skill comes. And if errors occur, there are many ways to eliminate them. The main thing to do is to perform a good hygienic manicure.
Do you always need to remove the sticky layer from the base?
The sticky layer from the base should always be removed for several reasons:
It makes it difficult to apply the flower bed evenly. The brush clings to the surface and gets stuck in one place. The gel polish clumps up in some areas, while in others it is impossible to paint over the nail with it. All this leads to uneven coverage.
It’s impossible to get the perfect highlight or control the thickness of the material. And this leads not only to detachment, but also to deformation of the nail plates, increasing the likelihood of breakage. For the same reasons, you need to remove the sticky layer before applying topcoat. This is the final part of the coating. The problems with a finish applied to a sticky layer will be the same, only they will be even more noticeable.
- It may cause material conflict. Often they use the base of one company, the flower bed from another manufacturer, and the finish from a third. The dispersion layer between them is an extra “gasket”. If the polymerized surfaces are neutral in relation to each other, then stickiness can cause rejection. And the coating will quickly fall off entirely or begin to peel off in pieces.
- It will prevent some types of decor from being fixed well. It is a myth that stickiness helps stickers and sliders stick. After all, after applying to the nail, they need to be smoothed with an orange stick so that there are no air gaps between the film and the base. Otherwise, the coating will not last long, because emptiness is a detachment.
And if the slider or foil tape were placed poorly, smoothing them out on a sticky surface will be problematic. The first is a thin film. And it will simply tear, after which everything will have to be redone. The same problem will occur with foil strips.
It will attract all the debris, invisible specks of dust, etc. Sometimes nails are covered only with a base, for example, camouflage or to level, shine, and give them thickness. The flower bed is not used, but a finishing agent is required. But it won’t be possible to apply it beautifully and efficiently to the sticky surface of the base.
Watch the video about what the sticky layer is for:
The sticky or dispersive layer of gel polish is what remains on the coating after polymerization. It can be easily detected by touching the surface of the painted nail with the pad of your finger. The leather will stick slightly and you can see the imprint on the coating. The sticky layer has no special purpose. It’s just that the composition of gel polishes and some bases and tops is such that, as a result of exposure to ultraviolet radiation, they harden, and an adhesive substance appears on top.
You can leave it only if you use transfer foil. The decor will be more clearly imprinted on the nail plate if its surface is sticky. But high-quality foil also adheres well to a smooth nail after removing the dispersion layer. To secure rhinestones and elements made of gel plasticine, the latter does not play any role; such stickiness is not enough. Volumetric decor must be planted on a damp base or special glue.
What is applied around the nail before painting?
In order not to suffer from the consequences of your own carelessness and not to invent ways to remove varnish from the skin, you can protect the skin from staining with varnishes and paints. This can be done in several ways
PVA glue
This is the simplest and most inexpensive option for protecting leather from varnish. Apply a small amount of product to the skin around the nail and let dry. After drying and painting the nail, the dried glue is easily removed in the form of a film. This method has its drawbacks - the glue is liquid, and the film breaks when torn off.
Fat cream
The cream is applied with a cotton swab to the areas that need to be protected from varnish. After a manicure, you must wash your hands with soap. The remaining varnish will be washed off along with the cream.
Petrolatum
It works like a rich cream: it covers the skin with a film that is easily removed from the nails. Must be applied in a thick layer.
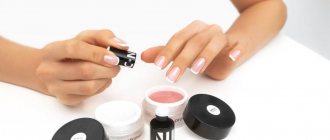
Special products based on rubber and polymers
There are special products on sale that are based on rubber and polymers. They are applied in a thin layer, and after drying they are easily removed from the skin. One of them is Skin Defender. In addition to Skin Defender, there are many other products for protecting cuticles from nail polish.
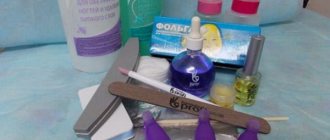
How to use special cuticle protection products:
- Almost all products are sold in bottles with brushes and are easy to apply.
- Moisten the brush in the product and work on the side rollers and cuticles.
- Try to put a lot of product on the brush so that it does not tear after removal.
- When the liquid dries completely, it will turn into a film.
- After this, calmly paint your nails and let the polish dry.
- Remove the product with one continuous film.
You may also be interested in the analytical review “How to start a nail business - is it profitable?”
Not everyone knows how to use gel nail polish!
Even now, not everyone knows what gel nail polish is and how to handle it correctly, although it appeared quite a long time ago. How to use gel polish so as not to harm your body?
Gel polish is used for both manicure and pedicure, for a single-color coating and for gel designs. How to use this miracle product correctly in order to fully experience all the ease of use?
Regardless of the date of manufacture, gel nail polish
Before each use it is necessary to mix with a spatula.
By applying one coat of gel polish, you can get a translucent finish and pastel colors, and by applying two coats, you can get a full, rich, opaque color. To use directly on the nail plate, it is advisable to take the materials in this order - first, a means for degreasing the nail plate and removing all types of moisture, then a primer or base for better contact of the gel polish material with the nail plate, and after all this, the gel polish itself to set the shine and final coat. High-quality materials do not require removal of residual stickiness and additional sawdust. In general, a natural nail and the methods of preparing it for the effects of gel polish are completely no different from preparing for artificial nail extensions. Apply a little primer gel to the prepared surface of the natural nail. The nail plate should become matte. If there is too much primer gel, this will most likely cause the gel polish to peel off later. Too much primer if after drying the nail is still shiny or worse, looks wet. Excess drug should be removed using a foam sponge. But there is no need to remove the dispersion layer after polymerization of the nail in a UV device. When gel polish needs to be applied over existing acrylic nails, a layer of strengthening gel before the procedure will also not be amiss. Using a thin brush to work with gel polish, apply it in a thin layer over the dispersion layer of gel primer. You need to be especially careful when applying the gel polish near the cuticle, and you should also cover the end of the edge of the nail. Gel that gets on the cuticle or loose skin around the nail will inevitably lead to rapid peeling of the artificial coating from the nail plate. You can remove excess gel from the surface of the cuticle or skin near the nail by using a special cuticle pusher. For better performance of the work, you should adhere to the following algorithm of actions - it is better to start work with the little finger of your right hand. While the little finger of the right hand is in the UV apparatus, the little finger on the left hand is processed, and the hands in the UV apparatus are swapped. By continuing to alternate application and polymerization, you can apply gel polish to all fingers much faster. This procedure also prevents the gel polish from flowing onto the cuticle and periungual area. This procedure is recommended by experienced craftsmen for those who are just starting to think about how to use gel polish
most accurately. Then a thin layer of a special ultra-fixing gel is applied to the nail. The thickness of the ultra-fixing gel along the edges of the nail and in the cuticle area should be minimal. Also, do not forget about sealing the nail with ultra-fixing gel by applying it to the sides and end of the free part of the nail. This will give the nail protection from mechanical stress. To fix the ultra-fixing layer, the hand is left in the UV device for one minute. It is best to remove excess gel from the cuticle and skin around the nail using a special cuticle pusher. In order to remove the sticky dispersion layer, it is best to use a foam sponge and special preparations for cleaning gel polish.
One foam sponge should not be used on more than three nails, otherwise the nail may become dull when dry. If all proportions and recommendations are followed correctly, the coating on all nails should be smooth and shiny.
How to avoid gel polish peeling?
Obviously, 90% of problems arise at the initial stage of manicure. To prevent this from happening, follow the technology consistently and accurately:
- carefully prepare the nail - remove the pterygium, moisture, grease, dust from sawdust from the surface, using special means and tools;
- choose a high-quality base that will ensure reliable adhesion of the nail to the materials, protect the plate from pigmentation, even out defects of the natural nail, and make the surface perfectly smooth;
- use a good topcoat to protect the coating from cracks, chips, peeling, give your manicure gloss and other effects;
- Apply gel polish no more than 3 layers, otherwise it will not last long, make sure that it does not get on the skin or flow under the cuticle;
- do not forget to seal the ends;
- polymerize in the lamp for the prescribed time - UV - 2 minutes, ICE - 60 seconds.
After drying the finish, do not rush to remove the sticky layer. Let the top cool for 30-40 seconds. To avoid peeling, after applying gel polish, it is advisable not to wet your hands for 2 hours. Although the coating has undergone polymerization, it is still “shrinking.”
Do not pick or try to rip off the detachment, so as not to damage the nail itself. If it is not possible to immediately get a new manicure, cover the gel polish with regular clear polish. This way you can go on for a few more days.
Hygienic care of manicure cutters according to salon rules
No matter how careful the manicure is, skin particles, nail dust, and grease remain on the instruments. This is an excellent breeding ground for bacteria and spores of causative agents of dermatological diseases. The longer dirty instruments are stored, the more luxuriantly the “infectious bouquet” blooms. This is why treatment of cutters is necessary immediately after a manicure.
Sanitary standards 2.1.2.1199-03 (approved by the Ministry of Health) allow the use of rotating and cutting instruments in salons after four-stage treatment according to the viral hepatitis regime. The process includes:
- treatment of cutters from biological dirt;
- disinfection;
- pre-sterilization cleansing;
- sterilization
After this, the cutters are sealed until next use. This is the order that salon masters follow. You should also adhere to it at home, especially if several people use the manicure set.