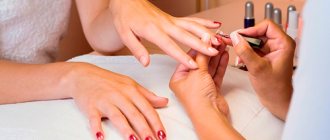
Gel polish coating has become so popular that it’s not superfluous to know how to apply and remove it yourself. In this material we will tell you how to remove gel polish at home: what tools and products are needed. We will also give useful tips to those who often use shellac in manicure.
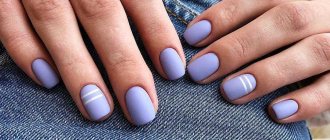
Are you tired of the usual manicure with a monochromatic finish? Then this test is for you! We will help you choose a fashionable nail design based on your beauty preferences.
Take the test
How to remove gel polish: tools
Don't have time to remove gel polish at the salon? Do it at home! But keep in mind that it will take at least an hour to remove the coating without damaging the nail plate. You also need to find something to remove the gel polish with. By the way, we discussed the question of whether shellac itself is harmful to nails in a separate article.
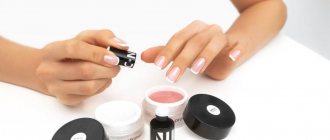
To remove shellac you will need:
- nail file;
- cotton pads;
- foil or special silicone caps;
- gel polish remover or gel polish remover containing acetone;
- metal pusher or orange sticks;
- a product to apply after removing nail polish, such as a nourishing cream or body oil.
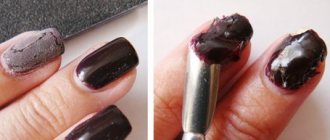
Sawing with a nail file
Despite the fact that gel polish can be removed fairly quickly using improvised means, the filing option is most often used at home. In order to carry out the procedure as safely as possible for the nails, it is necessary to prepare several files: for artificial coating, for natural nails and a soft four-sided buffer for polishing.
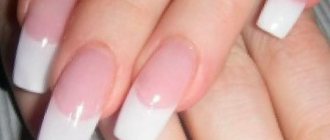
A 100/150 grit file does a good job of cutting off the top layer of gel polish. You need to work with the tool as carefully as possible so as not to touch the side skin ridges and cuticle. Movements should be uniform in the direction of growth of the nail plate (from the cuticle to the free edge). When the shiny layer is removed, it is recommended to replace the file with a softer one (180/200 grit). The colored layer is removed quite quickly, so working with the tool must be very careful. It is not worth removing the base (the lowest layer of gel polish) entirely. There is a risk of injuring or scratching the nail bed, which leads to the development of bacteria and nail diseases. In the salon, when removing the artificial material, the base is carefully polished with a soft buff in a circular motion, nothing more. The base peels off on its own over time without causing discomfort or harm. To keep your nails looking shiny, you can use regular clear polish or a nail strengthener.
How to remove gel polish at home: photo instructions
We have prepared detailed photo instructions for you on how to remove gel polish at home. By strictly following it, you will definitely not spoil the nail plate.
© essie
1
Remove the coating first from the fingers of one hand, and then from the other - it’s more convenient.
© Makeup.ru
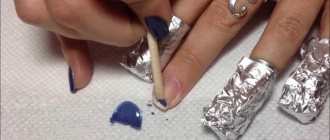
2
Cut the cotton pads in half (you will need five for both hands), soak each part in gel polish remover, and then apply it tightly to your nails and wrap the last phalanges of your fingers in foil. Leave for at least 25 minutes.
© Makeup.ru
© Makeup.ru
3
When the polish comes off the nail plate, carefully remove it with a metal pusher or an orange stick.
© Makeup.ru
4
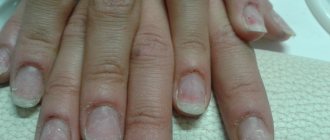
Most likely, after removing the gel polish, the surface of the nails will remain uneven. Gently sand it with a buff file. Ready!
© Makeup.ru
© Makeup.ru
Filing with a manicure machine
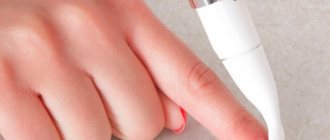
If you have a manicure machine in your home arsenal, then you can use it to quickly remove any artificial coating. Even if the machine is not professional, it can easily replace nail files and nail buffs. You will need two or three types of attachments (cutters) and cuticle oil.
Standard home manicure and pedicure machines usually have two rotation speeds. It is better to remove the top layer of gel polish at high speeds, since the top coat is the strongest. It is enough to remove all the shine with a hard cutter in order to proceed to the second stage. The colored layer is removed at lower speeds with a softer nozzle. You can determine the degree of hardness of a cutter by rubbing it against the pad of your thumb. The one that scratches the skin more strongly is harsher. It is dangerous to use this on a natural nail.
The final stage is processing with a soft cutter. It is moistened in cuticle oil, and then rubbed at low speeds into the nail and cuticle. This will give a natural shine, even if the base has not been completely removed.
Removing gel using professional means
Chemical products that are used in salons are called removers. These products have a more gentle effect, so salons practice re-coating with gel after removing the old layer. Similar products are also sold in nail art stores, and you can also use them at home yourself. If the kit does not come with special caps that are attached to the nails, then you can use the method described above using foil.
The main difference between the remover and acetone-containing liquids is that it acts in a shorter period of time - 10 minutes.
Afterwards, the remaining coating can also be removed with an orange stick. After the remover, the nails can also become dry; the easiest way to restore a healthy plate is to apply a nourishing cream to the nails every day.
Methods for removing gel polish
There are at least four ways to remove the gel coating. Some methods are more effective and allow you to remove varnish in the shortest possible time. Others are less effective.
First way
We suggest using cotton pads and foil. This is the most gentle method of removing gel. Its meaning is as follows. You soak cotton wool in gel polish softener, apply it to the nail, and then wrap it in foil. It is the foil that prevents the liquid from evaporating and the product does not lose its properties throughout the entire procedure.
Second way
An express method that can quickly dissolve gel polish, but it dries out the skin very much. To remove the coating in this way, you will need small containers that will need to be filled with gel remover. This could be alcohol, vodka, remover, etc. You dip your fingers there and wait until the varnish begins to peel off.
Third way
This method involves removing the nail polish with a machine. Manicurists most often have in their arsenal a device called a fraser or cutter.
Using special attachments, the gel coating is simply cut off. Many experts claim that this is the safest way to remove gel. But unfortunately, such equipment is quite expensive and not every woman can afford to buy it.
Fourth method
It allows you to remove gel polish without liquid. Let's say right away that this is an ineffective method that should be used last. Nevertheless, he has the right to life.
The removal procedure takes place in 3-4 stages. You need to take a regular clear polish, apply it to the nail with gel polish, and then wipe it off before the regular polish dries. The procedure must be repeated several times. After some time, the gel will soften and can be scraped off with an orange stick.
How not to remove gel polish
Gel nail polish adheres very well to nails. If you remove it incorrectly, you can seriously damage your nails. Now we will tell you how NOT to remove the gel.
- Never peel off shellac, even if it has peeled off from the nail. This way you can tear off the top layer of your nail.
- Do not file away the gel with a nail file. Using this method, you will definitely cut off part of the nail plate.
- Do not try to scrape off the gel polish with a pusher without first softening the gel. This will remove the polish along with the nail.
Women who use all the methods described above get rid of not only the varnish, but also part of the nail. As a result, they become very thin, brittle and constantly flake off.
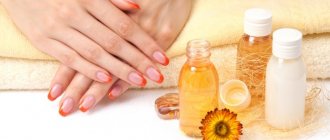
Nail care after removal
Recommendations:
- Balanced diet. To ensure that your nails remain strong and strong after the gel polish removal procedure, you need to adjust your diet. The daily menu should include a complex of vitamins, minerals and proteins. This diet helps restore metabolism.
- Olive oil baths. Olive oil will perfectly help strengthen and restore thin, damaged nails. Pour olive oil into a shallow container, heat it in the microwave to a comfortable temperature and place your hands in the bath. The duration of the procedure is 12-14 minutes. The result is noticeable within 6-8 days with daily use.
- Baths with sea salt. Sea salt helps to quickly strengthen nails and prevents them from splitting and brittleness. In a bowl with warm water you need to dilute 20-25 g of sea salt. Keep your fingertips in this solution for 10-12 minutes. At the end of the procedure, be sure to apply a caring cream to your fingers. Experts recommend using such baths once every 3-4 days.
- Berry mask. One of the most famous methods of strengthening nails after removing gel polish is a berry mask. Experts recommend choosing sour berries: red currants, cranberries. The berries must be crushed to obtain a homogeneous mixture, then apply the mixture to the nails, securing with polyethylene or cling film. After 17-20 minutes, rinse your hands with warm water. The acids contained in the berries will give your nails a healthy and shiny look.
- Lemon juice. Lemon juice is great for removing split nails. To do this, you just need to rub freshly squeezed lemon juice into the nail plates using your fingers or cotton pads. After 2-3 minutes, it is advisable to apply a nourishing cream to each nail to consolidate the result.
You just need to follow professional recommendations when removing gel polish at home, according to experts, and then you can save time and money on visiting the salon and keep your nails healthy.
Article design: Oksana Grivina
Don't make mistakes!
To begin with, I would like to draw attention to the common mistakes that women make when removing shellac on their own.
- Never use solvents such as acetone. This is a very strong product, not intended for these purposes, and its use will greatly injure the nail plate, worsen the condition of the cuticle and lead to its dryness.
- Never peel off the varnish, even if it comes off a little on its own and seems to be “asking” to be pulled and torn off. Even if it has partially come off, the rest of the nail is still firmly attached to the nail, and together with it you will remove the top layers of the nail plate.
The described actions will lead to fragility of the nails, they will become weak and require a long recovery. Therefore, do not rush, use reliable and proven methods.
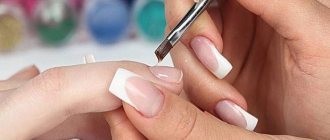
Removing gel polish with remover. Step-by-step instruction
To conduct a shellac removal session, prepare the remover itself, cotton pads or cotton wool, food foil and an orange stick or pusher.
- Divide the cotton pad into 4 parts.
- Tear the foil into small squares.
- Use a sanding file to cut off the top coat of gel. Your nails should become matte.
- Wash your hands with soap.
- Apply the cream to the skin around the nail plate.
- Soak ¼ of a cotton pad or cotton wool in the remover and place it on the nail.
- Wrap your finger in foil.
- After 7-15 minutes, remove the foil and cotton wool.
- Using an orange stick or pusher, try to carefully scrape off any loose gel.
- If the shellac cannot be completely removed, reapply the moistened cotton pad and secure the foil.
- You can try to carefully cut off the minimal remnants of the gel with a sanding file.
- Sand the nail plate.
- Treat the cuticles and skin around your nails with cream or oil.