Without a good polish there won't be a perfect manicure.
You can’t skimp on your beauty. Therefore, when you go for your next bottle of varnish, take its purchase seriously. We do not urge you to overpay for a well-known brand, because many good products are also in the budget category. However, you should definitely avoid buying cosmetics in passages, dubious stores and on trays in the middle of the street. The likelihood that you will be given a very low quality varnish is huge.
- The thick coating lays down unevenly, forming stripes
- The presence of small lumps in the varnish can ruin any manicure.
- If the varnish is expired or has lost its original appearance, feel free to throw it in the trash.
Remember that bad polish will not only leave uneven marks on your nails, but will also significantly deteriorate their condition.
Preparatory stage
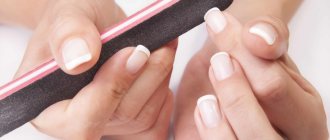
- Give your nails the desired shape using scissors and a nail file. Make sure all nails are the same length.
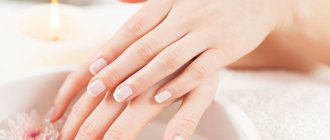
- Now it’s time to take care of the cuticle. We recommend steaming your hands in a warm bath with oil, and then pushing back the cuticles with an orange stick. It is better to do a trim manicure in a salon. If you don't get rid of the cuticle, the varnish will cover it and it will look terrible.
- Using a polishing block, thoroughly polish the surface of the nails.
- Degrease the surface of the nails with a soap solution or nail polish remover.
- Be sure to apply a base coat, because this is the key to an amazing manicure. The base heals nails, protects them from the effects of decorative varnishes and evens out the surface.
Don't forget to make masks for your nails to improve their health and bring them into proper shape.
Color selection
Fashion is fleeting. Almost every season the current palette changes from barely noticeable light shades to crazy neon tones or delicate pastels. In order for nail art to look harmonious and as impressive as possible, you should be guided not only by fashion trends, but also by your natural abilities.
Against the background of dark or tanned skin, golden, bronze tones, the entire palette of burgundy, rich red and deep dark green shades look good. Experiments with light colors are also acceptable: beige, cold blue, soft pink.
For girls with fair skin, the same light, unobtrusive shades are suitable: lilac, pale cornflower blue, pink mother-of-pearl, milky.
Perfect manicure at home: 8 tips
1 How to disinfect tools at home?
Tools can be treated with any antiseptic you have at home. An alcohol solution will also work.
It is important to do this every time before getting a manicure.
2 Is it necessary to apply the color coating in two layers?
Preferably. This will ensure color saturation and uniform coverage. But there are shades that look great on nails, even if applied in one layer. For example, varnish in the shade “Master” from the Essie collection gives flawless coverage in one or two layers.
3 How to speed up the drying process of nail polish?
You can use a special fixing coating. For example, a new product from Essie from the line of gel polishes with the Gel Couture effect. Simply apply top coat over one of the 18 polishes in the new collection and wait five minutes. We have already talked about other methods in this material.
4 What to do if you covered your nails with varnish before going to bed, but woke up with a damaged coating?
The fix is quite simple: apply a regular top coat over the damaged layer of varnish and wait until it dries completely - the top will even out the varnish and your nails will be pleasing to the eye again.
5 What hand creams should I use in the fall?
During the cold season, it is recommended to use a nourishing cream and apply it to your hands at least half an hour before going outside. If you can't afford to wait half an hour, be sure to wear gloves for double protection. Firstly, it will protect your bag and coat/jacket from greasy stains that may remain from contact with your hands if the cream is not completely absorbed. Secondly, your hands will not “attract” small lint from outer clothing and ordinary street dust.
6 How to get rid of peeling skin on your hands?
Any scrub will help exfoliate dead skin particles on your hands. At home, this can be ground coffee or coffee cake.
How to make a scrub at home yourself? Take a teaspoon of coffee and a tablespoon of any hand cream and mix. The result is a creamy mass with a pleasant coffee aroma, which must be applied to your hands with light massaging movements. The procedure will take no more than five minutes. Then rinse off the mixture with warm water and apply any nourishing cream to your hands.
Important: immediately after the procedure you should not apply nail polish, as it will not last long.
7 How to extend the durability of the coating while traveling?
Always take a topcoat with you when traveling, especially if you know that you won’t be able to resort to the services of a good specialist. Degrease the nail plate and apply a top coat that will give your nails a glossy shine.
If the coating holds up well, there are no chips on it, but the nail has grown and the unfilled space at the base of the nail has become noticeable, cover it with metallic varnish - gold or silver - or lay out a neat strip of rhinestones. You will get a lunar manicure.
8 What nail polish and shape should you choose this fall?
Classic - a monochromatic coating of a neutral color. This is an ideal option for all times. As for the shape, long nails with a sharp tip resembling a claw look fashionable this season. But everything, of course, is individual.
If you are just starting to master the intricacies of manicure, watch our detailed video tutorial for beginners.
Let's get to the main point
The preparatory work is over and we begin to create beauty on our hands.
First, let's apply the base. The base layer strengthens or vitaminizes the nails (depending on which one you use). In addition, it provides an even coating.
We begin to apply varnish. It's better to paint the nails of your dominant hand first. And that's why. If you are right-handed, then painting your right hand will be awkward. As a rule, in this case the layer turns out to be thick, and the color, accordingly, is more saturated. Starting with your dominant hand, you can adjust the layer thickness with your second. Thus, the manicure on both hands will not be different.
It is advisable to start painting your nails from the little finger. This way you won't smear the polish on the rest of your nails.
Finally, you must apply a sealing layer to your nails. In this case, the manicure will please you longer. And don't forget to apply cream and moisturizing cuticle oil to your hands.
How to beautifully paint your nails at home with a design?
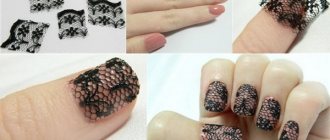
If you don't know how to paint on your nails, you can buy stickers. For example, these:
Small nail stickers imitate a hand-made design
There are also stickers that completely cover the nail plate.
Gel polish and nail stickers
And these bees are drawn by hand.
Nails with a pattern
Another design option that will suit young girls.
Nail design “Ladybugs”
Design ideas
Regular varnish allows you to not only carefully paint your nails at home, but also make an unusual design on them.
An interesting option is to use newspaper. First, the nails are covered with a base coat, then with white varnish. When it dries on the nails, pieces of newspaper with letters are soaked in alcohol for ten seconds and immediately applied tightly to the nail plates. The top is coated with clear varnish.
A toothpick can be used to easily create a design on painted nails. To do this, take a varnish that is contrasting to the main color and apply dots with a stick. You can distribute them over the surface in different ways. For example, make a lot of them at the very edge, gradually reducing the number towards the nail hole.
You can create the effect of transition from one color to another. To do this, several strips of varnish of different colors are applied in a row to an ordinary kitchen sponge. The skin around the fingers needs to be covered, for example, by covering it with PVA glue or wrapping it in cling film (you just have to make a hole in it for the nail). Now you can make fingerprints, then cover your nails with a transparent layer on top and remove the protective agents from your fingers.
For manicure design ideas with regular polish, see the following video.
Manicure ideas in different colors - photos
Modern fashion options
One of the latest trends is pop art manicure. It is ideal for creating manicures for different hands. Abstractions, logos of famous brands, drawings of lips, stylizations of children's drawings are in constant demand.
Ultraviolet color is considered one of the most fashionable in the 2021-2022 season. It goes well with pink, black, yellow, green. Purple and lilac will help create delicate images.
Youth style
Young girls prefer short nails. The drawing when creating a manicure should not take up much space. Zebra print, piercings, and stickers are very popular among young people.
A nude manicure with a voluminous texture (plasticine design, floral, knitted) will help create a unique look. Minimalism, doodling techniques, and abstraction are in constant demand. Designing bare nails with stamping takes minimal time. Acid nails of different colors on your fingers will help create a vibrant look.
How to paint your nails with shellac
After the appearance on the market of such manicure products as shellac and biogel, every representative of the fair sex has the opportunity to make a much more durable manicure at home, which lasts until the nails grow back. A manicure with this varnish can be done once every 2-3 weeks, it depends on the speed of nail growth. Moreover, it is not harmful at all.
We recommend using shellac, since it does not require cutting off the top layer of the nail and is much easier to remove than biogel. Everyone understands how fashionable it is to paint your nails with such means, but this is not only a tribute to fashion, but also concern for the health and beauty of your hands.
For the procedure you will need:
- UV lamp for manicure
- Basic shellac
- Colored shellac
- Top shellac coating
- Liquid for removing sticky layer
- Shellac remover
Kits for beginners are sold in specialized stores.
Here's what the process looks like step by step:
- A base coat is applied to your prepared or extended nails and kept in the lamp for 10 seconds.
- The first color layer is applied correctly, evenly, beautifully and kept in a UV lamp for 2 minutes
- A second color layer is applied and cured in a UV lamp again for 2 minutes.
- Apply the top coat and let it sit for about a minute.
- Nails are wiped with a cotton pad soaked in a special product to remove the sticky layer.
When using shellac, you need to remember to be especially careful. The viscous texture does not contribute to uniform application; it is somewhat unusual to paint with it.
It is recommended to paint your nails this way for 2 months. Then you need to take a break and paint with regular varnish.
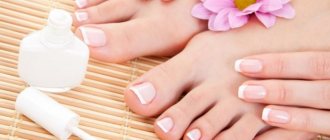
Preparing toenails for varnish
Before you start applying nail polish, you need to get a pedicure. After steaming your feet well in a warm bath, treat them with a pumice stone or a foot scraper. After this, you need to remove the cuticle and shape your nails. If necessary, the nails can be softened before cutting the legs. When all this is done, you should move on to the most enjoyable part of the pedicure: massage using any foot cream.
The key to a flawless manicure and pedicure is the lack of haste, because in order to paint your nails well with varnish and not spoil the result after applying it, you need a certain amount of time for it to dry.
How to paint your nails
How to quickly and beautifully paint your nails on short nails, photo?
Painting short nails is a little more difficult than long ones, because you need to accurately calculate the amount of polish that is applied to the brush. To make short nails look attractive, you can distract attention from their length with an interesting design. Some ideas for short nails are shown in the photo below.
Glitter polish on short nails
Painting your nails with glitter polish is as easy as regular nail polish. But they look more original. A manicure in which glitter is applied only to part of the nail also looks beautiful.
Pink glitter polish
Those who know how to paint on their nails can create even more interesting designs.
Glitter polish and pattern
Drawings made with tape look great on short nails. The technology for creating such a manicure was described above.
How to paint short nails with tape?
How to paint your nails to make them appear longer?
- Method 1: Paint your nails with dark polish, retreating 1-2 mm on the sides, and visually they will appear longer
- Method 2: Use vertical or diagonal lines
- Method 3: Do a French manicure and draw the free edge of the nail lower than it actually is. In the photo, if you look closely, you can see that the long free edge was simply drawn
Ways to make short nails appear longer
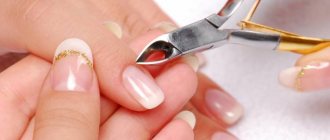
Cuticle removal
This stage always follows the bath while the cuticle is still soft. We push back the cuticle with a metal spatula or an orange stick and begin cutting. To cut it off, use tweezers or curved nail scissors. Remove any remaining skin from the surface of the nail plate with a spatula.
In the process of moving and cutting, try to ensure that your actions are as careful as possible. Otherwise, you may damage the skin or the base of the nail.
If you decide to do an unedged manicure, you won't need scissors or tweezers. Apply a special product to the cuticle and remove it with a stick.
What should be on hand
First of all, these are sharp manicure scissors and a nail file. No woman's cosmetic bag should be without them. Try to choose a glass or plastic file; they are less damaging to your nails.
For trim manicure, metal tweezers are simply necessary. With their help, we will subsequently remove the cuticle. When purchasing, be sure to pay attention to what material they are made of. Surgical steel will remain sharp for a long time.
How to choose a tool for manicure and pedicure
We will need a metal spatula Some people use an orange stick instead.
We will also need various bath products. Which ones specifically are up to you to decide. These can be various oils, sea salt and much more.
Choose nail polish remover without acetone. This way we will damage the nail plate less. You can add a little glycerin to a regular liquid containing acetone and save your nails from dehydration.
Cotton pads (balls, just cotton wool) are indispensable assistants when removing polish from the nail plate and around. For more “jewelry” work, you can use cotton swabs. In stores you can easily find a special correction pencil. It's a pleasure to use.
We will also need cuticle remover, cuticle oil, hand cream, base coat and nail polish fixer.
Color coating
A few words should be said about the colored varnish itself. In general, the rule works here: the fresher the varnish, the better the quality of the coating. Color varnish applies best when it is very liquid. In this case, the layer turns out to be quite thin and dries quickly, giving an even, smooth surface. To make it more liquid, you can put it in a glass of hot water for a few minutes before painting.
Also, in order to get an even color without gaps, you need to mix the varnish. The bottle should be held between your palms and slowly rotated. If you quickly rotate or shake it, bubbles will form in the varnish, which will ruin the entire manicure.
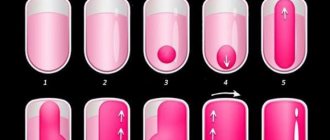
How should the color layer be applied? It's quite simple:
After dipping the brush into the varnish, you need to remove the excess on the neck of the bottle. There should be one drop left on the brush.
The brush is applied as close to the base of the nail as possible and a straight, wide strip is drawn down the center.
Next, the side parts of the nail are also painted over. To visually lengthen the nail a little, you can leave thin, unpainted stripes on the sides.
After applying the first layer of color, you need to let it dry. It is better not to touch the surface of the varnish with your fingers to check whether it has dried or not. Your finger will leave a greasy stain that will ruin the coating of the next layer. The varnish has dried if the smell has disappeared.
Next, a second layer of colored varnish is applied using the same scheme. It makes the color more saturated and covers the gaps in the first layer. You also need to give the varnish a few minutes to set and dry.
Now you need to coat it with a special fixing varnish, it will prevent scratches on the varnish and fix the coating. This product will allow you to preserve your manicure for as long as possible and make its appearance more attractive.
In order for the polish to be more evenly distributed over the nail, you can turn your hands over with your palms facing up. To make the varnish dry faster, apply a special drying agent. But it can only be applied to the last fixing layer. To make the polish dry faster, you can briefly put your hands in a cup of cold water. But you should absolutely not dry your nails with high temperatures (hairdryer, hot water, etc.) - the effect will be completely opposite.
When the entire procedure is completed and the varnish has already dried a little, you can use a special corrector to remove the varnish if there are places where the cuticle is dirty.
After a little practice in applying a single-colored varnish, you can start experimenting with drawings, rhinestones, stickers, magnetic varnishes, etc. It’s not at all difficult to draw dots and stripes on your nails, and it looks very elegant.
These are the little tricks and the right sequence of actions that will help you create a wonderful manicure. Your hands will look perfect and the woman will feel like a goddess.
In fact, deciding how to beautifully paint your nails yourself is not difficult, you just need to learn this skill. If you don’t succeed the first time, which is quite natural, then you should not be upset, but get better at it. After a short period of time, such efforts will not be in vain. Then you can easily and simply create a wonderful manicure, and do it quite quickly.
Now, knowing how to beautifully paint your nails at home, you can safely experiment and create real masterpieces on your nails. Those who go towards their cherished goal will definitely achieve it.
Manicure with gel polish for beginners: step-by-step lessons
Manicure with gel polish is a common occurrence, because ordinary varnishes are already fading into the background due to their impracticality. Gel polishes allow you to get a high-quality coating that can please the eye for 2-3 weeks. Of course, there were some downsides. After 2.5 weeks, the overgrown part of the nail catches the eye, which spoils the impression of the manicure done. It’s okay if you have the opportunity to visit a specialist, but there are situations when going to the salon is impossible for certain reasons. In this case, a manicure with gel polish under the cuticle will help.
This technique increases the wear time of gel polish. Within 2 weeks, your nails will look as if you just recently had a manicure. Of course, making it at home will be problematic. To get a good result you need to have certain skills.
The secret of applying gel polish under the cuticle First, with a standard brush, gel polish is applied to the nail as close to the cuticle as possible. Then the side ridges and cuticle are pushed back with a light finger pressure and gel polish is carefully applied to the unpainted area of the nail with a linear brush. The result is recorded in the lamp.
If you still want to try it, it is recommended that you first watch video tutorials that are dedicated to learning how to do a classic manicure with gel polish.
Video tutorial: How to carefully apply gel polish under the cuticle?
https://youtube.com/watch?v=HyH_qzbNDmA%3F
STEP-BY-STEP INSTRUCTIONS WITH PHOTO FOR APPLYING GEL POLISH
The first stage is preparing the nail plate.
Roughen the surface of the nail using a buff.
We remove dust and degrease the nail using a special product for degreasing and removing stickiness from nails. We carry out all manipulations using lint-free manicure napkins.
Apply primer.
The second stage is coating.
The first layer consists of the base (base coat). Dry in UV (2-3 minutes) or LED lamp (30-40 sec).
Next, a color coating is applied (gel polish in 1-3 layers depending on the consistency). Each layer is also polymerized in the lamp (the exposure time is similar).
At the end of the manicure, a finishing coat (top) is applied. Also dried in a lamp. If necessary, remove the sticky layer using a special product that was used to degrease nails during the preparation stage.
Thus, the minimum kit for a beginning manicurist looks like this:
To remove gel polish:
- Gel polish remover;
- Foil or special finger pads;
- Cotton pads;
- An orange stick, or a pusher, or a special cutter.
For a manicure:
- Manicure set with scissors, clippers, pusher, spatulas, etc.
- Orange sticks;
- Remover (cuticle softener);
- Cuticle oil;
- Files;
- Manicure machine (if you want to do hardware manicure at home).
To prepare your nails for applying gel polish:
- Buff;
- Lint-free wipes;
- Means for degreasing and removing stickiness;
- Primer.
To apply gel polish:
- UV or LED lamp;
- Standard set base top;
- Colored gel polish;
- A linear brush (for manicure under the cuticle) and a set of brushes for artistic manicure (if desired);
- Nail decor (if desired): foil, rhinestones, microbeads, acrylic powder, stickers, stamping kit and much more.
Painting your nails correctly
Now everything is ready, and the main question arises: how to beautifully paint your toenails with varnish, let's look at everything step by step?
For this you will need:
- base coat,
- varnish,
- fixative or drying,
- nail polish remover.
It is better to do a pedicure in a room with bright lighting and good ventilation, where odors will not bother you, this is especially important during pregnancy. Since nail polish vapors or nail polish removers can be extremely harmful to your health
Nail painting
Before painting your toenails, it is imperative to clean the nail plate from traces of old varnish, as well as cream or oil that was used during the pedicure. That is, nails should be degreased either with nail polish remover or with a special composition containing alcohol. This will make it possible to apply the varnish in an even layer, and will ensure that it will remain on the nails for a long time.
Next, you need to apply a base coat to your nails, which should be thinner than the polish itself, since this is the first layer, which should dry quickly and promote ideal bonding between the polish and the nail plate. The base coat should be applied with quick movements, as thinly as possible and close to the cuticle.
The base can be different: protective, if your nails turn yellow (when using dark-colored varnish); leveling if the nail plate has an uneven surface. You can use special pads to separate your toes, which will allow you to paint your nails more accurately.
If you have enough skill, you can paint your nails in different colors. If you are new to the art of manicure, and it is difficult for you to do it yourself, then limit yourself to two colors or one, as with a French manicure, the main thing is that everything is done carefully.
The methods for applying varnish to your toenails depend on many factors. The main thing is the condition of the nails, since our feet are susceptible to various damages, as a result of which they need very careful care. If you have problems with their health: they turn black, become uneven, the nail plate thickens, then before choosing the color of the varnish, you must consult a dermatologist; you may need treatment. Typically, colored varnishes, on the contrary, emphasize such problems, and no color can hide them.
Before applying the varnish, you need to roll the bottle in your hands for about 30 seconds. Then open it and remove excess polish from the brush. Do not shake it to avoid air getting in.
How to paint your nails with varnish in stages
Here are some tips on how to beautifully paint your fingernails and toenails at home:
- Apply varnish only when the base has dried thoroughly.
- It is better to cover your nails with varnish from the middle to the edge of the nail plate, without touching the cuticle, as well as the skin of the fingers along the edges. It is better to hold the brush with your index finger and thumb, the main thing is to make sure that your hand is not suspended.
- Varnish that has leaked beyond the nail can be removed after the varnish has completely dried using a toothpick or a special cleaning pencil.
- Do not forget that colored varnish is always applied in two layers, regardless of whether it is pastel or bright. Since only two coats provide an even, streak-free finish, the color of the polish will be able to fully develop and your pedicure will look perfect.
- After covering with the first layer, you should wait until the varnish dries well, and only then tint with the second layer in the same order. In order for the varnish to last a long time and look beautiful, you can apply a fixative over the colored varnish.
- There are times when there is no time to wait and the varnish needs to dry very quickly. In such situations, a special means for quick drying in the form of an aerosol can come to your aid.
- Wait until your nails are completely dry before you do your business. Shoes can be worn no earlier than an hour after varnishing.
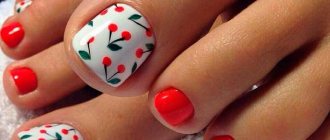
Clearly painted toenails are shown in the photo in the article, try to achieve the same effect. Having learned simple rules on how to paint your toenails at home, you can move on to mastering more complex techniques, for example, painting your nails according to Feng Shui. And if you purchase special equipment, you can even cover your nails with shellac or gel at home. Video on the topic: how to carefully paint your fingernails and toenails https://www.youtube.com/watch?v=HBNPEdH2o8UImportant publications on the topic:
Taking skin color into account
If nature has rewarded you with a beautiful dark skin tone, then you can give preference to dark shades of varnish - they will erase age-related changes.
Now the trend is delicious brown, elegant gold and noble burgundy. You can also use mint tones and shades of cotton candy. A great idea for chocolate skin would be a gold or dark brown manicure.
Interesting: Does light hair color make everyone look younger?
If you have a naturally light skin tone, you should maintain it with an appropriate manicure. Delicate translucent tones, as well as an exquisite pastel palette, are perfect. In your cosmetic arsenal it is worth having nail polishes with pink undertones and light blue shades.
A pronounced olive skin tone is an argument in favor of a nude nail polish collection. But be careful - too yellow or beige will not work. But a juicy or muted orange polish will be a great idea that will certainly lift your spirits.
If you have a warm golden skin tone, you can get a fashionable manicure in soft coral or orange to visually disguise age-related changes.
How to carefully paint your nails
For a perfect manicure, it’s not enough just to paint your nails evenly.
It is important to first prepare them correctly: treat the cuticles and side ridges, trim all the nails to the same length and only then take on the base, varnish and fixer
How to apply decorative coating correctly
How to paint your nails beautifully so that they are admired? Believe me, this can really be achieved without even visiting a salon. Let's look at the process step by step:
Stage 1. Apply base coat
You should not neglect the transparent base, because it not only makes the surface of the nail smoother, but also protects it from aggressive components of the varnish. As a base, you can use transparent varnish or products from the strengthening series.
Stage 2. Apply color coating
Before opening a bottle of varnish, prepare everything you may need in the process:
- cotton buds;
- cotton pads;
- nail polish remover.
Next, proceed to applying the first layer. In fact, not every girl knows how to paint her nails according to all the rules. Therefore, we will try to explain everything in as much detail as possible.
Start painting from the middle of the nail, slightly backing from the cuticle, to the very tip in one quick movement. Then make a few strokes along the edges to evenly paint the entire nail plate, as shown in the picture.
The second layer of varnish allows you to correct the errors of the first and truly conveys the full richness of the shade.
Be sure to apply the second color layer when the first one is completely dry. You can limit yourself to one layer only if the consistency of the varnish is very thick.
Main taboos
- If age-related changes are clearly visible on the skin of your hands, you will have to give up scarlet, coral and raspberry nail polish. This insidious palette expands the plate and gives the skin a reddish or pale tint.
- It is worth abandoning any gray colors, because they can insidiously emphasize wrinkles.
- Too bright and, especially, neon - this is the prerogative of young fashionistas. In adulthood, you should not attract such active attention to your hands; an elegant, discreet design will be a more advantageous solution and will tell about a lady’s good taste.
- Blue, green and brick colors are prohibited due to their ability to highlight the marks of time.
- Earthy tones can also play a trick on aging skin.
- As you age, you should forget about the matte texture. Not only does it visually expand the nail plate, the velvet top also draws attention to even small imperfections and wrinkles.
Interesting: How to look younger, tips from Evelina Khromchenko
Our photo selection showed you the latest manicure ideas that will make your hands look younger. Many women know firsthand that age-related changes usually primarily affect the skin of the hands. But proper care and a well-chosen manicure will give a stylish rebuff to age!
https://youtu.be/https://youtu.be/DtSLhwPUZhI
_