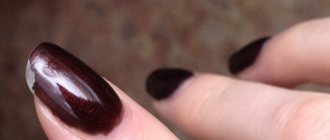
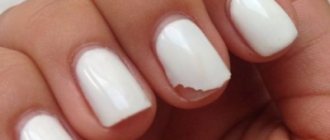
Why does gel polish on nails swell and wrinkle in the lamp?
There may be several reasons for this phenomenon.
The most important of them:
- This is insufficient defatting. Most likely, on the nails, in the place where the bubble appeared, there is a layer of fat that got in when applying hand cream, before applying the coating, or if the technique was not followed.
- Perhaps the surface of the nail is not completely degreased. Swollen areas appear after applying primer or touching lips, hair or facial skin with nails. This caused particles of fat to appear on the nails.
- The cause of blisters on nails is pigmented compounds. Typically, varnishes that contain a lot of pigment cannot dry in a lamp within a certain period of time. Such compositions must be applied in very thin layers, carefully listening one by one.
- Insufficient lamp power. This usually happens with ultraviolet devices in which the bulbs are not replaced in a timely manner. That is, if your lamps are dim and don’t shine well, then highly pigmented varnish can easily swell. The lamp power is simply not enough to dry the coating.
- Incorrect placement of the nail in the lamp. Most often this happens on the thumbs, when all five fingers dry out at the same time. This way, the thumb is at an angle, and at the beginning of drying, a drop of gel polish simply rolls into the area of the inclination. This results in a large accumulation of gel polish that simply does not have time to dry. As a result of this, swelling on the nails appears.
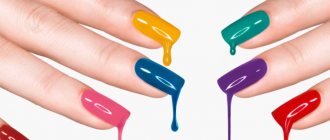
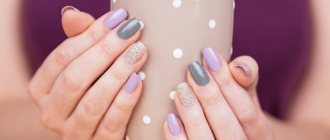
Beautiful coating
Incorrect application of the first base layer
When leveling the nail plate with a base, we apply it in two layers. The first one must be well distributed using “trampling” or “driving” movements with a brush, so that there are no air bubbles under it, and the adhesion of the material to the nail scales occurs evenly, tightly, along the entire perimeter of the plate.
To distribute and “trample” the base well, it is better to use a flat, medium oval brush. You can use it with less material than a regular one and distribute it well.
It is important to cure this first thin layer well in the lamp, as it serves as the basis for future leveling, ensuring adhesion.
Source
What to do if the gel polish is wrinkled?
How to fix the situation? There is no need to completely redo your manicure. It is enough to cover normal nails with a top coat to complete the design. And those nails on which bubbles and swellings have appeared must be treated and the lesions removed. This is best done with a pusher or file. Please note that the cutter may become clogged with this sticky substance.
Next, you need to remove any remaining dust with a brush and wipe the nail with a degreaser. After this, gel polish is applied. There is no need to re-prep the nail, apply primer, degreaser and base. Gel polish is immediately applied, and after drying it is covered with a layer of top coat.
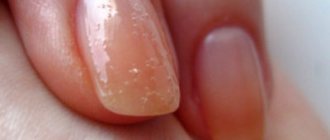
Why does gel polish peel off at the cuticle?
There are several reasons, they are the fault of the master and occur when the technique of applying gel polish is not followed.
Causes:
- Incomplete removal of pterygium from nails. That is, when the base is located on the pterygium, it gradually grows and a pocket or detachment is formed
- A little gel polish got on the cuticle. Thus, detachments cannot be avoided
- The shine was not removed from the nail using a file or router
- The nail was not degreased or primer was applied. Because of this, there is no normal adhesion between the nail and the artificial material, so it peels off
Gel polish did not dry out
Gel polish chips off the ends: what to do?
Causes:
- Chips in the end area appear as a result of improper processing or the use of low-quality materials.
- At the ends, chips appear if you did not seal the free edge, that is, you did not coat the cut with base, gel polish, and then top coat. At each stage it is necessary to coat this area, that is, seal it.
- Most often, chips and cracks at the end are formed due to the low ductility of the material and excessive softness of the nails. There are very soft nails on which gel polish does not last more than a week, but you can use high-quality, professional materials, following all the rules and techniques.
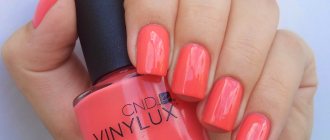
Chips at the ends
Strengthening with acrylic powder:
- This is due to the fact that the coating is not so plastic and does not adhere to the nails, it shrinks, and along with it, it chips. In this case, it is necessary to make the nail more rigid. Several options can be used for these purposes. This is strengthening with acrylic powder, acrygel or polygel.
- The fact is that the gel itself is a fairly soft material and mobile. That is, it can shrink along with the nail. Nothing will happen if the material is sufficiently plastic. If the plasticity is low, cracks and chips appear.
- To avoid this, it is necessary to carry out strengthening. The simplest method, suitable for use at home, is strengthening with acrylic powder. To do this, you need to prepare the nail, do a manicure, remove the pterygium, cuticle, and clean the area of the side ridges.
- After this, apply dehydrator, primer, bonder, base. Before placing it in the lamp, you need to sprinkle the undried base with acrylic powder without color, that is, transparent. After this, the nails are dried in a lamp, the remaining powder is removed with a brush and covered again with a base.
- This layer of acrylic powder is a reinforcing frame that will hold the gel polish on the nails and prevent cracks and chips. Of course, the quality of materials matters, so we recommend using products from well-known brands that have proven themselves well.
Strengthening nails with acrylic powder
Why does gel polish peel off at the base and cuticle: what to do?
It often happens that after applying gel polish, you end up with a beautiful manicure that is not particularly soft. But after a couple of days it peeled off from the base. The main reason is insufficient drying. Perhaps you did not withstand enough time or the lamp power was low. Therefore, when using pigmented coatings that are quite dense and viscous, we recommend using a 48 W hybrid lamp. This device dries absolutely all gels, gel polishes, shellacs, as well as substances that dry under UV rays.
Please note that some gel polishes do not dry well in ice lamps or, conversely, do not dry in ultraviolet devices. Therefore, you should carefully read the information on the packaging, you may have come across just such a product. If this happens and you feel empty inside when you press on the nail, this means that the material has peeled off from the base. This happened due to the fact that it did not dry out completely, and only the top layer of coating was baked.
Grown-out gel polish
The bottom layer remained sticky and not dry. In this case, it is necessary to soak the coating using a special product or remove it using a file or cutter. Once the coating is completely removed, it will be necessary to restore it again using all the technology. In order to prevent peeling next time, we recommend applying the product in very thin layers and drying it in a lamp for a longer period of time. Only then apply the next layer.
Another reason why gel polish may come off the nail plate after a few days is the use of very hot water. After visiting the salon for 24 hours, many masters recommend refraining from washing dishes, going to the bathhouse, or sauna. If you have a general cleaning the next day after you have done your manicure, you should wash and clean with gloves so as not to expose the gel polish coating to aggressive substances. Because it remains fixed on the nail within 24 hours.
Removing the sticky layer
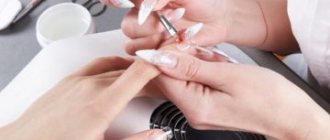
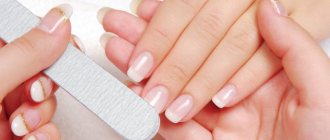
How to paint
The first stage of preparation for the procedure is quite traditional. You need to carefully push back the cuticle, remove excess skin, and clean the surface of the nail plate from traces of dirt and grease. If the nail is split, it must be carefully trimmed with a nail file. In this case, it is necessary to avoid wet manicure, since the absorbed moisture will subsequently lead to the appearance of blisters on the surface of the varnish coating.
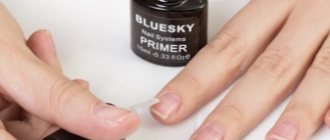
At the second stage, a special primer is applied, which serves to ensure more reliable adhesion of the varnish to the surface of the nail. The primer is safe for the nail plate and acts as a kind of primer that strengthens weak nails. It is also used to process the end of the nail plate.
The third stage requires special patience, since now you need to apply several layers and give each one time to dry. First, the master thinly applies a base gel, which ensures a strong bond between the keratin that makes up the nails and the synthetic gel. It prevents the coloring pigment from penetrating into the deeper layers of the nail plate.
Gel polish is applied on top of the base in two or three thin layers, very carefully, bypassing the side rollers and cuticle. The last layer applied is a special finishing gel.
When it is completely dry, the top dispersion layer is removed with a special product, which gives the manicure a salon shine and moisturizes the nail plate.
After application, each layer must dry completely. Ultraviolet or LED lamps are used for this procedure. Under the influence of light rays, the gel polish firmly adheres to the previous layer due to the polymerization process.
Professionals use special equipment that must match the brand of decorative coating. Most often used:
- UV lamps with a power of 36 W, which dry the coating in 40 seconds, however, due to its size, such equipment is more suitable for beauty salons;
- nine-watt UV lamps, which work slower, 1.5 - 3 minutes, but are less cumbersome and good for home use;
- LED lamps are more economical than ultraviolet lamps, but no less effective.
The first 2 layers of gel polish should be dried for at least 2-3 minutes under nine-watt UV lamps (40 seconds under LED or UV lamps at 36 W), the last, third layer - one and a half minutes (under a UV lamp at 9 W) or 40 sec. under LED or high-power UV lamps.
Professional lamps significantly speed up the drying process, and if all deadlines are met, your fresh varnish coating will not be afraid of contact with any objects.
Why does gel polish peel off at the side rollers, what should I do?
The main reason is that you did not prepare the nail plate correctly.
Reasons for the appearance of detachments on the side ridges:
- The base did not get into this area and part of the nail was left bare. Accordingly, when gel polish gets on this area, it simply peels off.
- The base got on the cuticle, so a detachment appeared due to the growth of the pterygium.
- The area near the side ridges was poorly treated during the manicure and the pterygium was not removed, so the base and gel polish fell directly on it.
- Incorrect selection of material. Please note that some manufacturers make base and gel polish, as well as top coat, specifically for artificial turf. That is, for acrylic and acrygel. This type of coating has an excellent mirror effect and creates beautiful highlights. But the coating is not very plastic, that is, hard, something like glass. This way, the coating will come off the nails during housework and cleaning. After all, the nail in these areas, due to its natural softness, becomes deformed and bends. But the material, due to lack of plasticity, does not move with the nail and chips off it. Therefore, choose the right varnishes for coating, and do not purchase a product for artificial nails.
- Insufficient drinking. Perhaps in this area you did not reach with a file and did not process it well, and did not remove the shine from the nail. In this case, there will definitely be detachments. Therefore, in the cuticle area, we recommend using a bullet or flame cutter, which does an excellent job of removing the cuticle, pterygium, as well as the upper shiny layer of the nail in the area of the side ridges. Where it is quite difficult to get to with a file.
The gel polish did not dry out and chipped.
To avoid peeling on the nails after applying gel polish, it is necessary to use high-quality materials, properly treat the nail, and apply the coating in thin layers. With a little practice, you can create the perfect manicure without chipping or peeling at home.
Correct application
The first thing you should pay attention to is applying the base. It should not get on the skin, but it should completely cover the area where the color will be. Otherwise, the gel polish may peel off.
There are often problems with the base “creeping” from the cuticle, side rollers and ends; this is due to the tendency of this polymer to shrink. To reduce this effect, you need to apply the base with a medium drop and dry one finger at a time in the lamp.
Having learned how to correctly diagnose the condition of a client’s nails and identify the causes of gel polish peeling, you will be able to do long-term manicures. This will allow you to expand your base of regular customers who will come to you.
Tatyana Sorokina master of manicure and pedicure
Source