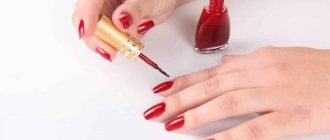
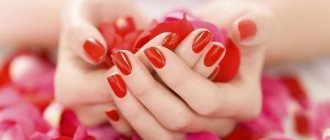
TOP professional liquids for removing gel polish from nails
A proven method is to keep the following solvents at home:
- Beautix. A liquid that easily and safely removes gel polish. It needs to be applied to a sponge, which in turn is pressed onto the nail and left for 10 minutes. During the specified time, the coating softens, and its remnants are easily removed with cotton swabs.
- TNL. A budget tool used in a similar way. It is better to hold the moistened sponge on the nail plate for 15 minutes instead of 10.
- Nano Professional. This is already a more expensive liquid. The price is justified by the gentle effect on the plate. The method of use is similar to the first.
- Masura. Another popular liquid product. In terms of application, it is no different from the previous ones, but the duration of softening can increase to 20 minutes.
- Severina. An affordable liquid that removes gel polish well and degreases nails. It is characterized by high efficiency, but at the same time increased impact.
Nail polish removers
When choosing a solvent, it is recommended to focus on the degree of harmlessness and level of effectiveness. Cheap liquids, as a rule, negatively affect the strength of the nail.
General information
Rubber nail gels are products consisting of elastic natural material. This base has a thick, dense consistency; when applied, it has a preventive effect, strengthening the nails, preventing brittleness and splitting.
The active components in the gels protect the plates from damage, allow you to grow your own nails under a layer of shellac, and enhance the tint characteristics of colored gel polish.
A rubber base for manicure differs from a universal base or top. Dense gels require careful preparation of the plate before application and compliance with all necessary recommendations.
Advantages
Advantages of an elastic base for shellac compared to other coatings:
- Creates a durable layer that is not damaged, cracks and chips do not form on it.
- Strengthens nails, preventing them from splitting and brittleness.
- Allows you to create a coating of any thickness due to its elastic consistency.
- Forms a smooth and stable surface. Due to the elastic fibers, gel polish fits well even on thin and damaged nails.
The benefit of rubber products is their durability.
Flaws
Rubber gel also has disadvantages:
- Due to the dense material, bubbles and swelling sometimes appear on the surface of the plate when dried in the lamp.
- After air enters the package, the gel thickens, and the material then does not fit well on the nail plate. A base that is not completely screwed in may become unusable.
- Gels must be applied with careful, precise movements, otherwise bumps and streaks will appear on the surface of the plate.
The main feature of elastic manicure bases is the obligatory sticky layer after applying the gel . This principle allows the layers of shellac to be firmly bonded.
The disadvantages of rubber products are minor, but for a high-quality result you need to have experience in applying such products.
How to remove shellac and Cody polish at home?
First, let's talk about removing shellac at home. The following equipment will help you cope with the task:
- Solvent liquid (buy specifically for removing shellac).
- Cotton sponges.
- Wooden sticks (preferably orange wood).
- Cuticle oil.
- Polishing file.
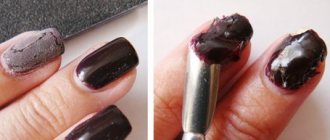
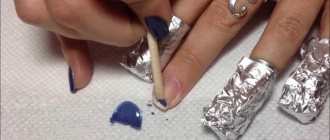
Removing nail polish with foil
As an option, it is permissible to replace the shellac dissolving agent with regular acetone. In this case, you will need additional equipment - foil. You can also find a replacement for orange sticks. Instead, it is permissible to use the pusher included with each manicure set. This tool is a small spatula for pushing back the cuticle.
The withdrawal procedure itself will proceed according to the following algorithm:
- Wash your hands thoroughly with soap (rub each nail). This is necessary to degrease the plate and allow the acetone to have its maximum effect.
- If you plan to use cotton wool rather than sponges, make the discs yourself. The sponge should be of medium thickness and cover the entire nail plate.
- Moisten cotton wool with acetone, press it to the nail and tightly wrap the “structure” with a strip of foil.
- Wrap each nail and let the product absorb (15-20 minutes).
- Remove the cotton wool and foil and evaluate the result (the varnish should soften).
- Remove shellac residues using a pusher or orange sticks (the coating is never completely removed with acetone). Use the pusher carefully and do not scratch the nail plate.
Removing nail polish with a pusher
After such manipulations, it is advisable to cover your nails with smart enamel, restoring oil, or at least hand care cream.
There is another method for removing shellac yourself. It is more harmful for nails, but takes less time. From the inventory you will need a container that will fit all 10 fingers, acetone, a pusher, a polishing file and a moisturizing hand cream. The removal process consists of the following steps:
- Using a polishing file (professional name - buff) we cut off the surface coating.
- Apply moisturizer to your fingers.
- Fill the container with acetone.
- Dip your fingertips into an acetone bath and hold for no more than 10 minutes.
- After time has passed, remove the softened varnish with a pusher or wooden sticks.
- We wash our hands thoroughly and apply cream again.
Now let's talk about Cody polish. There are no special differences from working with shellac. For removal, one of the solvents based on acetone is suitable. The main difference is the duration of the process. By the way, some specialists say that you can even remove Cody with an acetone-free product.
The algorithm of actions will be as follows:
- We wet the cotton wool in acetone liquid (for an experiment, first try the option without acetone). Apply the sponge to your nails and wrap it in foil.
- Leave the nails wrapped for at least 20 minutes (it is better to look at the condition).
- Take a spatula and, working from the cuticle to the top end of the nail, remove any remaining Kodi.
Under no circumstances should you file off or polish the remaining varnish; this will greatly damage the nail plate!
How to remove shellac
The main advantage of a rubber base is the ability to be easily removed. This coating is bonded with other means and removed in one piece. Beginners often have questions about how to remove shellac.
To do this, you need to use a solvent and follow the instructions:
- Cut off the top layer using a hard file.
- Apply shellac dissolving agent to a cotton pad, apply tightly to the gel surface, repeat the action with all fingers.
- Hold for 1 minute, wrap the areas of the fingers with the disks in foil.
- Wait 20 minutes, remove the coating using an orange stick.
When removing shellac, it is necessary to perform actions on each finger in turn: due to the entry of air, the gel polish can harden again and become dense.
To remove the coating, you need to use sticks or a file that can easily pry off the shellac.
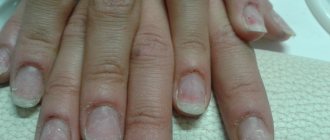
Tips for removing gel polish yourself
If you decide to remove the gel at home, it is recommended to do this armed with the advice of professionals. Otherwise, it is easy to harm the health of your nails. The most significant advice is to never use technical acetone. Yes, it will dissolve the varnish, but in addition it will injure the cuticle, and in the worst case, also the skin of the hands.
When the solvent has been on the plate for 10-20 minutes, remove the foil and soaked cotton wool in a circular motion. This will help in more thorough removal of the coating. Upon completion of the procedure, be sure to make a nourishing mask for your hands and nails, or at least use a cream. The manipulation will not pass without a trace, even if you use a gentle liquid.
It is advisable to apply a rich cream to the skin of the hands and fingers in the affected area. In this way, the aggressive effect of acetone will be minimized. Remember that products of this type greatly dry the cuticle, so it needs to be lubricated with oil after removing the nail polish. And lastly, if you have discovered an allergy to acetone or already know about its presence, contact a specialist. A specialist will select a liquid without acetone for the job.
How to remove gel polish at home without a special product?
It’s clear how the gel is removed using professional liquids. Sometimes the issue of a damaged manicure has to be resolved urgently. In this case, we offer a method that will help get rid of the problem without resorting to the use of solvents.
Removing nail polish at home
All you need for the procedure is a regular clear varnish. It is worth warning that you should not place high hopes on this method. The quality of removal is lower than when using previous methods. It will take much more time.
The steps are simple - coat your nails one by one with clear varnish and, without letting it dry, wipe with a damp cloth. If there is no effect, the process can be repeated several times. Stubborn residues are removed with acetone liquids.
Features of the application technique
Liquid rubber can be applied at home. There are recommendations that must be followed, otherwise the coating will be uneven and bubbles will appear.
How to do a manicure correctly:
- Before applying the gel, it is recommended to carefully prepare your hands and hold them in a special soap bath, then treat the cuticles and give your nails the desired shape.
- The surface of the nail must be degreased with a special product to better secure the base. If you don’t have a specialized product at hand, nail polish remover will do.
- After the plate is processed and filed, an acid primer is applied to its surface.
- You can start with the rubber gel. Correct application is based on the application of two layers: the first thin, the second dense and leveling. It should be smooth, without cracks or streaks. To avoid unevenness, you need to turn your hand palm up and hold it in this position for 5-7 seconds.
- Treated hands are placed in an LED lamp for 50 seconds. After drying, degreasing is not necessary; you can immediately proceed to colored gel polish.
In an ultraviolet lamp, the gel polish dries a little longer - about 2 minutes.
The base is also used to strengthen nails. To do this, it is applied in several layers to the nail plate, dried and degreased.
Rubber is also used for nail extensions. This technique makes the coating durable.
Is it possible to remove gel polish with alcohol?
Removing gel polish without a special liquid
The section “people say” suggests girls using alcohol to remove polish. It turns out that the proposal is not unreasonable. Alcohol can really cope with the gel base. To do this you need:
- Wash your hands thoroughly.
- Take or purchase isopropyl alcohol (this liquid is actively used in perfumes, cosmetics, household chemicals and even medicine).
- Soak cotton wool or a cotton pad in alcohol. Place the soaked sponges on your nails, press and wrap with foil. Leave them in this state for 15 minutes.
- Gently massage each nail to improve the result.
- At the end of 15 minutes, remove the cotton wool and foil.
Completion of the procedure is standard - the remaining pieces are removed with a spatula or wooden sticks. The effectiveness of the method is lower than when using professional means.
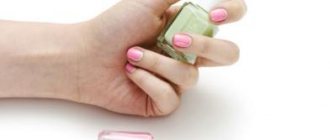
Removing gel polish without foil using caps
Removing gel polish with caps
Modern manicure tools are wide. To “fight” the gel, not only foil is used, but also special caps, clamps, clothespins or clips. The functions of the devices differ little. So, various kinds of clamps hold the cotton tightly, preventing it from falling out. The purpose of the caps is a little broader. They replace not only foil, but also cotton swabs. That is, nail polish remover is poured directly into the cap, after which it is put on the tip of the finger.
The product gains direct access to the nail plate, which means it begins to act faster. On average, the coating can be dealt with in 10-15 minutes. Moreover, you no longer have to work additionally as a pusher. When the procedure is completed, do not forget to clean the caps themselves. Next, pour cuticle oil into them and put them on again, leaving for 5 minutes. At the end of all actions, be sure to clean the caps.
The difference between a rubber base and a regular one
The base coat is necessary for tight adhesion of the layers of gel polish and top coat. Without it, the manicure will not last long and will be fragile. There are several types of foundations, each of them has features and disadvantages.
Rubber products have become popular in recent years. Manicurists prefer to work with just such coatings.
The elastic base differs from conventional products in the following qualities:
- The dense texture of the rubber gel allows you to create any nail shape and fix the thickness of the surface. Conventional bases have a more liquid consistency and do not have similar properties.
- The rubber base fits tightly onto the surface and does not spread, facilitating the process of creating a manicure.
- Gels with rubber contain active substances that protect the coating from staining, abrasions and cracks.
- Rubber provides dense coverage, while traditional bases apply in a thin layer.
- Rubber manicure products have a preventive effect, strengthening the surface of the nail; simple ones do not have this property.
- Products dry faster in a lamp - up to 1 minute. It takes about 5 minutes for a regular base to harden.
Gels with elastic components allow you to wear a manicure for up to 1 month without damaging the nail plate.
Acetone and other gel polish removers
It was previously said that ordinary acetone is suitable for removing shellac. The same product is appropriate to use for a gel surface. Moreover, the process of removing varnish is no different. The same sponges, foil, pusher and oils are used.
Therefore, there is no point in repeating the algorithm of actions, but it’s worth getting acquainted with additional recommendations:
- Do not remove the gel from the nail. Such an action will achieve nothing but damage to the plate.
- Remember not only your nails, but also the skin of your hands. Acetone products are harmful to the skin. To minimize harm, generously lubricate your fingers and hands with cream or Vaseline.
- Do not cut the cuticle, just gently push it back.
- If you sat with acetone on your nails for 15 minutes, but it still did not dissolve, extend the procedure. However, no more than 7 minutes. Do not try to remove poorly softened varnish with a pusher.
- Use strengthening vitamin masks and complexes after each procedure.
Popular means
Based on the results of surveys, a rating of the most popular rubber products was compiled.
Kodi
Kodi tops and bases are popular products for creating manicures. Regular users note the strength of the base, durability, and gentle effect on the nail plate.
This approach allows you to keep the product in a usable form for longer.
The Kodi base does not sag and has a thick consistency that allows you to smooth the surface of the nail.
The disadvantages of the product include the rather complicated process of removing the coating. Due to its dense consistency, shellac is difficult to dissolve.
Uno
Uno gels have a thinner consistency and can be removed using solvents. You can use the base on brittle, damaged nails; the product provides a durable and long-lasting coating.
TNL
The base and top from TNL have a medium density consistency. These products allow you to level the nail plate and protect it from brittleness.
TNL products have a specific smell and dry in a lamp for about 2 minutes.
How to remove gel polish using remover?
Removing nail polish with remover
Remover is a product created specifically for removing gel coatings. Experienced professionals advise buying a remover of the same brand as the varnish itself. Working with it follows the following steps:
- Use a nail file to remove the glossy surface of the varnish. If the manicure is decorated with rhinestones or stones, we also remove them with a file.
- Take a cotton pad and soak it with remover. Next, we follow the proven scheme - apply the sponge to the nail and wrap it in foil. Usually you don’t have to keep this thing going for more than 10 minutes.
- Remove the gel along with the sponge. If necessary, we carry out additional cleaning with a nail file.
Revumer has a more gentle effect than acetone liquids.
How to remove gel polish with a nail file??
Removing nail polish with a nail file
Of course, it is wiser to turn to the above methods. Filing the gel with a file can greatly damage the nail plate, so you need to act especially carefully. In salons, instead of a nail file, they use a milling machine. If you don’t have the skills to use it, it’s better to take a polishing file that is familiar to your hand.
Working with it is as follows:
- Without haste or force, remove the free edge of the nail. Alternatively, at this stage the file is replaced with tweezers.
- From the cuticle area to the edge, we begin to file away the gel. Again, without putting in extra effort.
- Dust will constantly form on the plate; it must be removed with a brush. Periodically wipe the entire nail with an alcohol-soaked cotton swab; this will degrease it and make it easier to remove any remaining gel.
- When the coating is removed, polish the nails with buff.
After all of the above steps, the nail plates are lubricated with oil or cream to strengthen. By the way, such manipulations require rest. It is not recommended to apply gel or even regular polish for the next week and a half. The recovery period is supplemented with baths and the use of vitamin complexes.
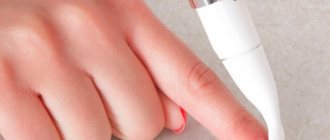
How to remove gel polish with a manicure machine?
Removing gel polish from extended nails
Of course, this has its advantages, but there are also a couple of unpleasant moments. The main advantage is the speed of the procedure and the absence of pain. To remove gel polish, a ceramic and carbide cutter is used. Experts insist on ceramic, considering its impact softer.
The device is used in the following sequence of actions:
- Hold the device firmly in your hand. If it slips, there is a chance of damaging your finger.
- Lightly touching the cutter to the nail plate, perform circular movements along its course. There is no need to put pressure on the device.
- When the removal is complete, it is advisable to go over the nails with a polishing file.
Please note that only a cutter suitable for removing gel should be used. If you notice pain during the process, then the actions are incorrect. When a master gets down to business, there are no unpleasant feelings. Remember this. At the first signs of nail damage or severe burning, it is better to contact the salon for help.
There are plenty of ways to remove gel polish, Kodi and shellac at home. You should resort to them with caution, preferring the most gentle options. Only then will you be able to keep your nails healthy!
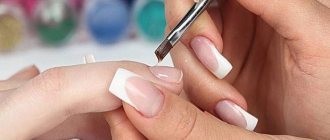
How to apply rubber base
I talked about the intricacies of applying and distributing a base with rubber above. And here I would like to talk about the preliminary manipulations to prepare the nail plate for gel polish coating.
They can be divided into stages:
- Using a file, we even out the shape and length of the nails.
- Soften, push back and remove the cuticle.
- We remove the natural shine from nails using a polisher,
- We use a degreaser or disinfectant.
- Apply the base for gel polish.
Well, then the nails are usually covered with gel polish, if desired, a drawing is made and covered with a top coat.
Next, I propose to consider all this in practice using the example of several rubber bases I have: UNO, In'garden and Premiere.