Special products based on rubber and polymers
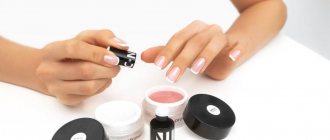
There are special products on sale that are based on rubber and polymers.
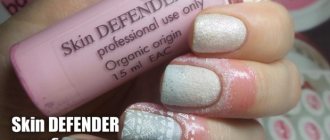
They are applied in a thin layer, and after drying they are easily removed from the skin. One of them is Skin Defender. In addition to Skin Defender, there are many other products for protecting cuticles from nail polish. How to use special cuticle protection products:
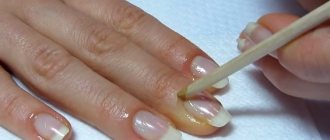
- Almost all products are sold in bottles with brushes and are easy to apply.
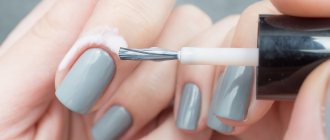
- Moisten the brush in the product and work on the side rollers and cuticles.
- Try to put a lot of product on the brush so that it does not tear after removal.
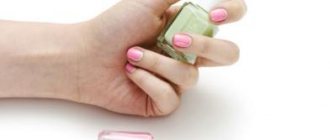
- When the liquid dries completely, it will turn into a film.
- After this, calmly paint your nails and let the polish dry.
- Remove the product with one continuous film.
Any young lady can get a neat manicure, even if you decide to apply shellac at home. The main thing here is endurance, perseverance, accuracy, and strict adherence to technology. Then there will be no problems with decorative nail design!
Fat cream
The most popular and used way to protect cuticles from unnecessary damage from nail polish is to use a rich cream. Thanks to the density that is inherent in it, a film that is already familiar and so necessary for protection is formed. Like Vaseline, carefully and carefully apply the cream to the surface of the skin and cuticle using a brush, removing it with a cotton swab at the end.
Keep in mind that this method will not work if you are doing an ombre manicure. It involves painting not only the nail, but also the skin nearby. In this case, you need to use special means.
What is the name of the manicure around the nail?
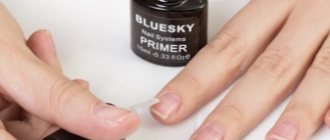
Nowadays, cosmetic companies produce many interesting products to improve the work of nail technicians. One of the breakthroughs can be considered Skin Defender. This is a rubber based liquid. It is natural and dries quickly. After drying, a thin film remains on the nail, which comes off with the remaining varnish.
We suggest you familiarize yourself with How you can eliminate the smell of urine
Instructions for using Skin Defender:
- Prepare the nail plate for painting
- Apply the product to the nail using a brush. It is necessary that the liquid does not get on the nail
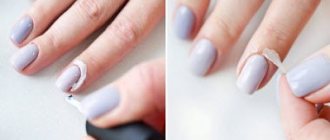
- After the first layer has dried, apply the second. Paint your nails with your base color. Using a sponge, apply transitions from one color to another
- After drying, coat your nails with a sealer.
- Remove the film from the nail
How to use a cuticle protector for shellac, water-based, gradient and ombre manicures?
In addition to Skin Defender, there are many other products for protecting cuticles from varnish. Here is the list:
- Dance legend Pure manicure. This is a cheap replacement for Skin Defender. The smell of the product is stronger and the color is different. But its effectiveness is not inferior to the most famous remedy. Sold in a bottle like regular nail polish with a bristle brush.
- Kasako Docai. This is a liquid of Korean origin that is white in color and very similar to PVA glue. Easy to apply and has a convenient applicator. It takes a very long time to dry, but is much cheaper than Skin Defender. Fulfills its purpose and is removed from the nail in a single strip
- El Corazon. This is also an inexpensive analogue. Available in pink and blue. It is not clear what is in the product, it smells like some kind of solvent. The price is low and much lower than Skin Defender. Fulfills its purpose, can be used for applying stepping and coloring in ombre style
How to use cuticle protectors:
- Almost all products are sold in bottles with brushes and apply well
- It is necessary to moisten the brush in the product and treat the side rollers and cuticle with it.
- Allow the substance to dry and turn into a thin film. Try to put a lot of product on the brush so that it does not tear after removal
- After this, paint your nails in the desired way and let the polish dry.
- Remove the product with one continuous film
As you can see, after dyeing ombre or stamping, it is not necessary to rub off traces of varnish for several minutes with a stick dipped in acetone. It is enough to use a special product, this will significantly reduce the time for a manicure.
Steps
Removing Wet Varnish
- Prepare your brush.
Use a new, clean eyeshadow brush or an old manicure brush that has been cleaned and disinfected. To clean your brush, dip it in 2-3 drops of nail polish remover in a plastic dish, then wipe it on a piece of cardboard. Repeat until the brush is clean.
- Nail polish remover is different from solvent. It is often used to restore old nail polish bottles to their original appearance.
- Use cardboard as other materials, such as napkins, may leave lint on the brush.
- Pour nail polish remover into a small saucer.
Do not use acetone as it will destroy the fibers of the brush. Instead, choose another nail polish remover of similar strength that will clean your fingers just as well.
Paint your nails.
Choose your favorite color. Apply a base coat and a color coat. Apply as many coats of colored varnish as needed to achieve the desired color.
Soak the brush.
Dip the tip of the brush into nail polish remover. This is important because, over time, nail polish remover can damage the adhesive and metal crimp. Wipe off excess product on the edge of the bottle.
- By not removing excess product from the brush, you risk eventually erasing your manicure along with the polish around your nails.
Gently brush along the edge of your nails. Make sure that the brush does not go into the nail, as this will ruin the entire manicure. Once you've finished cleaning your fingers, touch up your nail polish where necessary. Let the varnish dry and apply the top coat.
Finish applying your manicure.
Once the top layer is dry, soak a napkin in warm water and fold it in half. Use the folded side of the napkin to wipe away any remaining polish around your nails. Don't forget to wash your brushes so they're ready for next time!
Using warm water
- Apply nail polish.
Take your favorite nail polish and apply a base coat, color coat, and top coat. As a general rule, it is best to apply two coats of color. Inspect the bottle to see how many coats are recommended.
Let your nails dry completely.
Allow the polish to dry before removing any nail polish that gets on your fingers. Otherwise, you will only smear the color layer on your nails.
Get your hands wet.
Fill the sink with warm, soapy water. Use moisturizing soap to soften your hands. Once your nails are completely dry, place your fingers in the sink. Soak them in water for about 2-3 minutes. It doesn't matter whether you dangle them in the water or leave them motionless.
- If you applied water-based polish, soak your fingers for 5 minutes or more to allow the color layer to release from your nails.
If you don't have time to soak your nails, you can easily do this in the shower.
Take the cotton wool in your other hand and gently wipe the polish off the skin. If the polish is difficult to remove, try soaking your fingers for another minute and try again. After removing all the polish around your nails, dry your hands. If necessary, add another top coat to give the polish extra shine.
Using Elmer's Glue
Prepare everything you need.
Elmer's glue is best, but white PVA glue will work. In addition to glue, you will also need a brush and nail polish. You also need a small paper saucer or something to pour the glue into.
1. These tricks will help make the creation of regular and water manicure easier. Before painting your nails, apply Vaseline (using a cotton swab) to the skin around the nail beds. This will create a barrier between the polish and your skin, so that after your nails are painted, you can easily wipe off the Vaseline and any misapplications along with it.
Another way is to apply PVA glue to the skin around your nails and let it dry. After this, start painting your nails, when the varnish is dry, just remove the film of glue, the skin will be clean.
2. To prevent the polish on the tips of your nails from peeling off, cover the surface of your nails with 2 layers of base: apply the first layer only to the tips of the nails, and the second layer to the entire plate.
3. Use white nail polish as a base coat to make your nail color even brighter.
4. You can create homemade nail art stickers. First, apply 2 coats of nail polish, and then draw your chosen design on a plastic bag or cellophane. When the varnish has hardened, peel the resulting sticker from the cellophane and apply it to the nail that was just covered with topcoat or nail art glue.
5. Use a circle stencil to create the perfect moon manicure.
6. Use tape to create a geometric manicure. Before applying the tape to your nail, press it onto the skin a couple of times to remove excess stickiness.
7. Use the tip of a cosmetic eyeliner pencil to place tiny rhinestones on your nail. The rhinestones easily stick to the tip of the pencil and easily cling to the nail.
8. Create a French manicure with ease by stretching an elastic band over the tip of your finger.
9. Mix loose pigment (eyeshadow) with clear polish to make any polish color.
10. The polish will dry on your nails faster if you dip your fingers in ice water immediately after painting them.
Ways to prevent cuticle contamination when dyeing. Review of funds.
A gradient or water manicure is very difficult to do without staining the skin around the nail. Of course, it’s easy enough to remove such mistakes with a cotton swab dipped in nail polish remover, but this takes time. In addition, traces of black varnish are very difficult to remove.
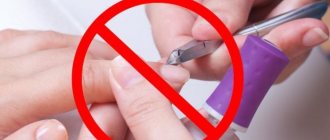
There are several options for protecting your skin from staining with varnishes and paints. Some girls cover the side rollers with tape, but this is ineffective in the summer heat and when performing a water manicure. When exposed to moisture, the tape comes off.
Skin protection options:
- PVA glue.
This is the simplest and most inexpensive option for protecting leather from varnish. It is necessary to apply a small amount of the product to the side rollers and cuticles and allow to dry. You must be careful not to let the glue get on the nail plate. After drying and painting the nail, the dried glue is easily removed in the form of a film. The disadvantage of glue is that it is liquid and the film breaks when it is torn off. - Fat cream.
Simply apply the product with a cotton swab to the areas that need to be protected from varnish. After a manicure, you must wash your hands with soap. The remaining varnish will be washed off along with the cream. The cream is useless when dyeing in the ombre style, since a lot of varnish can get on the skin, which is difficult to remove - Petrolatum.
It works like a rich cream. It covers the skin with a film that is easily removed from the nails. Must be applied in a thick layer. Maybe the varnish got on the skin when painting the gradient - Special products based on rubber and polymers.
They are applied in a thin layer, and after drying they are easily removed from the skin.
How to remove shellac?
Manicurists advise removing gel polish first on the fingers of one hand, and then on the other. A hand free from the procedure may be needed, for example, to massage the nail plates. You can remove gel polish at home with a removing liquid - either regular or specially created for working with the coating. For this:
- First, take a nail file and file off the glossy layer of varnish. Apply circular movements to all nails.
- We will need several cotton pads. Cut a cotton pad into quarters, soak it in shellac remover and wrap it around your finger.
- Each finger is wrapped in foil on top.
- Leave your hands like this for 15 minutes.
Important! If you use regular acetone-based nail polish remover, it may take longer.
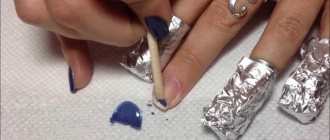
- Remove the foil caps from your fingers and use a wooden stick to carefully pry off the coating. It should peel off.
- Shellac sometimes remains in the folds of the skin, so the cuticles need to be thoroughly cleaned.
If you don’t have foil on hand and need to remove the coating, you can do without it. To do this, you should stock up on cotton pads, an orange stick, and liquid with acetone:
- Gently file the top layer with a nail file, but do not press too hard on the nail plate.
- Cut a cotton pad into 2 parts, soak it in shellac remover and divide it into two halves. Wrap each of these halves around the nail plate.
- Leave for at least 15 minutes, then remove the remaining cotton pad and pry off the coating with a wooden stick.
- If you are unable to completely remove the coating the first time, repeat the procedure.
We suggest you familiarize yourself with How to clean an electric hob
Important! To avoid damaging the skin around the nail, it is recommended to lubricate it with cuticle oil before the procedure. Also, if you had to go through multiple rounds to get rid of the shellac, you might want to let your nails rest for a few days before applying gel polish to them again.
How to remove polish from the skin around the nail
To remove the polish around the nail, different methods are used. According to the advice of the masters, it is convenient to use available tools and professional items. In salons you can watch specialists who carefully deal with excess and uneven gel application using a corrector pencil or an orange stick. At home, cotton swabs and toothpicks are most often used.
Pencil to remove polish around the nail
Corrector for manicure defects helps to quickly remove shellac from the skin. Cosmetic brands offer options for felt-tip pens with a beveled end for erasing smeared gel. The beveled edge in the form of a soft sponge absorbs the product and smoothly removes unevenness along the contour. In a situation where a lot of gel has been applied to the nail and streaks have formed on the cuticle, refill the felt-tip pen from the reverse side and, using gentle movements, lightly pressing, remove the excess. It is not always possible to refill the corrector correctly. If you exceed the volume, the liquid will flow, which will ruin the entire manicure.
Important! If you have difficulty refilling the pencil, you can pour the product into a small container and moisten it in it. The corrector comes with additional replacement refills of 2-3 pieces, which will last for a long time.
Orange stick
As an alternative to a soft felt-tip pen, use a wooden stick made from orange wood. According to experts, this is the most gentle removal method. Dip the instrument into the liquid and erase imperfections from the skin, wipe it on a napkin and repeat the procedure. In a short period of time the surface will be clean, even if the gel has been dried under a lamp. The stick, compared to a sponge corrector, is a hard material, so during the procedure they try not to touch the decorative manicure so as not to spoil it. A convenient tool is bought in a specialized store. If used correctly it will last quite a long time.
Cotton swab
If gel or varnish gets on the skin, a cotton swab will help out at home. This is a common handy product that is in every women's cosmetic bag. It is necessary for eliminating defects in makeup and correcting uneven skin. The disadvantages of applying decorative varnish are removed with a smooth movement with the cotton side. Cotton swabs can be changed as many times as necessary, it all depends on the area of elimination. Not everyone likes this method because of the fine hairs that need to be removed after the process.
toothpick
In manicure, polish often spreads along the edges and corners of the nail plate, which clogs the gaps and looks sloppy. To eliminate such a defect, a toothpick with a small piece of cotton wool is suitable. It should be moistened with liquid and the dried shellac should be washed off with slow movements so as not to get hurt. Thin sharpened edges easily remove unevenness in the most inconvenient places.
Brush
Home manicurists resort to another effective method. To do this, you need to choose a soft cosmetic or artistic brush. The first ones are thin brushes for applying eye shadow and blush. Pour the product into the container, dip the brush and remove the varnish from the cuticle area and periungual surface, wipe it on a napkin or cardboard, and repeat again. If you run out of decorative varnish, you can clean the brush in acetone and use it in the same way.
PVA glue
It would seem a very dubious method, but effective. Using a small brush, apply glue to the skin and cuticle. You need to be careful so that the glue does not leak under the nail. When the glue is exposed to air, it turns into a film that envelops the skin and does not allow the varnish to pass through. Material that gets onto the protective film can be removed using a cotton pad moistened with water.
The method is perfect for manicures done at home. It is accessible, convenient and does not require additional financial expenses.
First aid
Actions to provide first aid to a victim of a burn to the nail plate must be taken as quickly as possible. In this case, it is necessary to follow the recommendations of doctors, which will reduce the severity of the injuries received, speed up the healing process and avoid a number of complications.
The hand and fingers are cleaned of chemical residues. If the chemical was dry, shake it off and then wash it. In most cases, it is enough to hold your hand under running cold water for 20 minutes.
Water will wash away aggressive active components from the skin and cool the nail plate. A nail burn resulting from the action of acid is treated with a weak alkaline solution, for example, soda.
Alkaline components can be washed off with vinegar. Phosphorus particles that get on the skin cannot be washed off with water. They are removed manually or with tweezers. A lime burn is treated with sweetened water.
A sterile bandage is applied to the injured area. If pain is severe, you can take a painkiller and then go to the nearest medical facility for examination by a specialist. Next, the doctor determines the course of treatment.
Note! Some aggressive substances can remain on the skin for a long time and destroy it even after initial removal.
Sometimes a burn to the nail plate can be obtained during a fairly common procedure - manicure and nail coating. The nails become deformed and the surrounding skin turns red.
If, after placing your hand in an ultraviolet lamp for drying, pain or a burning sensation appears, then remove the fingers and allow them to cool. When the pain goes away, you can continue drying. This simple rule will help you avoid overheating and, as a result, getting a burn.
If the nails have already been burned by the lamp, the technician will completely remove any remaining polish. The hand is then placed under running cool water for about 15 minutes or more until the pain subsides.
Note! It is not advisable to use acetone-based solvents.
The injury is treated with an antiseptic. If the injury is minor, then a wound-healing ointment is applied, but for severe injuries it is recommended to go to the hospital for consultation.
Features of working with gel polish
Gel polish is a fashion trend of the last few seasons. Its advantage is that having all the necessary tools and equipment, you can do a manicure yourself, without wasting time and money on going to a salon. For many, this has become additional income. But in addition to desire and equipment, you also need to have special skills that will help you do everything perfectly.
There are methods that will help you get a perfect manicure without staining your skin and cuticles:
- apply Vaseline;
- we use PVA;
- apply rich cream;
- We use special means.
There is another method - sticking tape, but it is ineffective and will not be of any use. Let's look at them all in turn.
How to keep the skin around your nails clean?
Masters advise using several of the following secrets in the process of decorating nail plates:
- Apply Vaseline to the periungual skin.
- Use PVA glue.
- Before starting work, treat the skin around the nails with a rich cream.
- Use special means.
Cleaning the cuticle
It is recommended to apply any of the above products immediately before starting the artistic part of the work. If you apply Vaseline or glue while treating your nails with a buff or file, small shavings will clog the skin and cuticles, forcing the nail technician to clean the area. When applying petroleum jelly, greasy cream or PVA glue to the periungual surface, you must be careful to ensure that the product does not get on the nails. If a greasy composition gets on the plate, you must immediately remove the product by carefully wiping the surface with clean cotton pads.
Girls who create their own manicure at home note the ease of using PVA glue. It is applied a few minutes before the start of nail art. Apply a small layer of PVA to the periungual surface and wait for it to dry. The glue forms a thin film on the skin, which is easily removed in warm water. After waiting for the adhesive protection to dry, you can begin decorating the plates with gel polish.
Using an orange stick
Note that when performing an Ombre style manicure, it is recommended to use special products to remove excess gel polish after drying under a lamp. Since this technology involves painting the nails and part of the adjacent skin.
From the professional products that professionals use in salons, it is recommended to choose those that have protective properties. Emollient components not only make it easier to remove the sticky layer of gel polish, but also soften the skin and cuticles.
Applying PVA glue
Special protective equipment
Along with the advent of this type of manicure, gel polish, special products appeared that will help protect the cuticle. They have proven themselves well and are used by all manicure professionals. Their advantages are as follows.
- The composition contains natural rubber and the absence of harmful components.
- They smell nice. Their formula includes essential oils that have a positive effect on the skin.
- Dries quickly.
- The container is small in size and will fit anywhere.
- A small and neat brush ensures easy application and integrity of the nail surface.
- They have a long shelf life at low cost.
Orange wood stick
Such sticks can be purchased at a store that sells manicure products. This stick's job is usually to work on the cuticles, but it can also help when removing excess polish from the skin around the nail. To do this, moisten the sharp edge of the stick in nail polish remover, then dip the excess with a cotton swab and carefully move the stick over those areas of the skin where the polish was carelessly applied.
Important! If the varnish is reluctant to give up its position, then press the stick in this area for a short time and repeat the attempt to remove it.
Tools to help us
If it so happens that you missed the procedure for protecting your cuticle, then we will have to resort to using the following tools:
- Orange stick.
- Toothpick and cotton swab.
- Small flat brush.
Such methods are less relevant, since careless movement of an orange or cotton swab can damage an already created manicure, and the cotton wool will leave some lint on the surface of the undried varnish.
Using a pointed stick
A special orange wood stick can be found in any professional store. More often it is used to work with cuticles, but in a situation with dried varnish it will also be appropriate.
- First, wet the edge in nail polish remover and shake off the excess.
- Gently rub over areas of the skin, collecting spilled Shellac, and wipe on a napkin.
- We repeat the procedure, periodically moistening the orange stick in a special liquid until the excess varnish is completely eliminated.
Using a cotton swab
The easiest way is to use a regular cotton swab.
- Soak it in nail polish remover and gently wipe the skin.
- But this method will not be able to reach hard-to-reach places, since the cotton swab is quite large. Here an ordinary toothpick and a small piece of cotton wool will come to our aid.
- We wrap the toothpick, moisten it in liquid and similarly wipe the areas close to the nail plate.
- We work extremely carefully so as not to smear the wet Shellac.
- After eliminating the excess, we continue the manicure procedure.
Brush - assistant
In this case, any small brush will do. It can be a brush for artistic painting or an ordinary brush for used nail polish (be sure to wash it).
The principle of removing varnish is quite simple.
- Wet the brush in nail polish remover.
- Using gentle touches, we cleanse the skin where there is excess Shellac.
Try it, choose the most convenient ways to protect gel polish from running, and your manicure will be neat and well-groomed.
Applying a brush
We take the most ordinary brush of medium or small size.
The procedure is simple and straightforward:
- take the emulsion to remove varnish, dip a brush into it;
- We clean, as in the previous methods, until completely wiped.
Choose for yourself the most convenient and suitable way to remove unwanted product from your nails, or even better, use the protection methods given above. Experiment, be original, then your manicure will be your pride and highlight.
To learn how to carefully paint your nails with gel polish, see below.
We suggest you read How to freeze eggplants for the winter in the freezer
The most common methods
- The varnish from the nail plate can be removed using another varnish (any color, since this is not at all important). You need to apply a layer of varnish over the old one, wait a few seconds and remove everything with a cotton pad. Since the process is very messy, you need to stock up on cotton swabs and pads to immediately remove the polish from the skin.
- You can use hairspray. You should soak a cotton pad with varnish and try to remove everything from the nail very quickly. The process is far from safe, since hairspray dries very quickly and can get on the skin of your hands and damage it, causing an allergic reaction and general discomfort. If such undesirable consequences do occur, you should immediately wash off the hairspray from the skin of your hands.
- To remove nail polish, you can use regular deodorant by spraying it on a tissue or cotton pad. They should rub the nail vigorously until the polish disappears. This manipulation can also be considered unsafe, since it is harmful to both the skin and nails. And if you inhaled the smell of deodorant throughout the entire process, then the risk of mild poisoning from volatile vapors cannot be ruled out.
- You can erase old manicure using regular perfume . You need to wet a cotton swab with perfume and carefully remove the nail polish. Be patient, as this is quite a labor-intensive method.
- One of the old, classic ways to remove nail polish is to use alcohol . In the same way as in the previous version, you should moisten a cotton pad with alcohol and treat your nail with it until the varnish completely disappears. If you are afraid to use alcohol on your nails, then you can go to the previous option, it is a little safer.
- You can remove nail polish using sunflower oil . You need to apply a small amount of vegetable oil to the nail plate, wait about twenty minutes, and then remove the polish with a cotton swab.
- You can use improvised means such as vinegar and sparkling water . You need to mix the ingredients in a bowl and place your fingers there for a few minutes. After that, your hands should be washed and dried, and then carefully wipe off the nail polish with dry cotton wool.
- You can use one of the common products - lemon juice or citric acid . You need to moisten a cotton pad with lemon juice and wipe your nails with it, in a short time you will notice a result that will please you.
- Polish can be removed from the nail plate even during hand washing . If you hand wash things in hot soapy water, the polish will swell and separate from the nail. This method does not require any special effort or expense, but you will have to wash a lot of things by hand.
- You can remove nail polish with organic solvents such as turpentine, gasoline, white spirit . Such products are very effective, but have an adverse effect on the hands and nail structure. They can leave yellow spots on the skin.
- Hydrogen peroxide is quite suitable for removing unsuccessful or old manicure . It is necessary to moisten the cotton wool with it and rub the nail until the varnish comes off completely.
- Using toothpaste to remove nail polish is one of the safest and most effective methods. You need to take a large amount of toothpaste (preferably white, as it will cope with the colored pigment of the nail polish with a bang), apply it to a cotton pad and intensively process the nail until the nail polish disappears. The effect will increase if you add a small amount of baking soda to the toothpaste.
- Some women, in the fight against outdated varnish, resort to the use of alcoholic beverages. But this method is very risky for your nails. Alcohol damages the skin of your hands and nails. Recovery of nail plates after manipulation with alcohol is very long and difficult.
Using warm water
- Apply nail polish. Take your favorite nail polish and apply a base coat, color coat, and top coat. As a general rule, it is best to apply two coats of color. Inspect the bottle to see how many coats are recommended.
Let your nails dry completely. Allow the polish to dry before removing any nail polish that gets on your fingers. Otherwise, you will only smear the color layer on your nails.
Get your hands wet. Fill the sink with warm, soapy water. Use moisturizing soap to soften your hands. Once your nails are completely dry, place your fingers in the sink. Soak them in water for about 2-3 minutes. It doesn't matter whether you dangle them in the water or leave them motionless.
- If you applied water-based polish, soak your fingers for 5 minutes or more to allow the color layer to release from your nails.
If you don't have time to soak your nails, you can easily do this in the shower.
- Dry your nails gently. Take the cotton wool in your other hand and gently wipe the polish off the skin. If the polish is difficult to remove, try soaking your fingers for another minute and try again. After removing all the polish around your nails, dry your hands. If necessary, add another top coat to give the polish extra shine.
Using Elmer's glue
Prepare everything you need. Elmer's glue is best, but white PVA glue will work. In addition to glue, you will also need a brush and nail polish. You also need a small paper saucer or something to pour the glue into.
The peculiarities of modern manicure are such that only that work is considered “clean” when the coating used is applied exactly under the cuticle, but not all novice masters manage to achieve such an effect due to lack of experience and ignorance of certain subtleties and nuances.
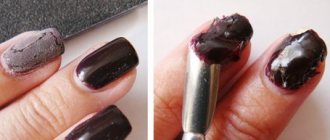
Meanwhile, there are several effective options for how to remove gel polish from skin, and each of them depends on the condition of the material. And first of all, it is advisable to describe how to remove gel polish from the skin if it has not yet dried, because this option is rightfully considered the most difficult to perform. Typically, such situations occur due to improper preparation of the nail plate for modeling (the cuticle is not completely pushed back, the adhesive acid-free base has flowed onto the skin, which is immediately filled with pigmented gel, awkward movements, etc.). However, such mistakes are made not only by inexperienced beginners, but also by qualified professionals, so today a whole range of measures has been developed to eliminate them efficiently. Thus, the easiest way to remove liquid coating from the skin of the periungual ridges is with a flat brush and solvent (you can even use ordinary nail polish remover).
The whole trick is to generously moisten the bristles of the brush in paint remover and carefully wash away any imperfections, each time wiping off the excess gel polish on a pre-prepared napkin. That is, it is necessary to wet the brush in solvent after each manipulation so that it does not remain dry. Naturally, such work is quite painstaking and requires patience and the most careful actions so that the lint of the tool does not get on the design itself. However, do not be afraid and rush to completely remove the coating from the nail plate, because in the vast majority of cases the correction is successful, mainly due to the flat cut of the brush, which is convenient not only to remove excess, but also to smooth out existing corners and irregularities. If the gel polish got on the cuticle, which was not completely moved away from the nail bed, then it is best to remove it using a regular pusher, most often used to eliminate pterygium. In this case, excess gel is removed by scraping movements, while simultaneously trying to push back the cuticle, which must subsequently be removed.
Many masters prefer to correct errors in nail design after drying it in a UV lamp, because then it is much easier to cope with the task, especially if you have a device with thin milling attachments on hand, designed for hardware manicure and pedicure. In this case, the excess gel paint is simply cut off along with the top layer of keratinized epithelium, after which the nail and the entire periungual area are wiped with a lint-free cloth soaked in a cleanser. Unfortunately, not every nail design lover can boast of such equipment, and in this case it is better to avoid getting the coating on the cuticles and fingers, especially since there are several methods for removing gel polish remnants from the skin by simply preparing it correctly. And most often we are talking about cosmetic oil, which is applied in advance to the skin around the nail, thereby facilitating easy detachment of accidentally trapped material, or about such a wonderful product as liquid tape.
The use of such a tape consists of applying it to the cuticle and skin of the fingers along the perimeter of the nail plate (this is done end-to-end), after which the nails are covered with gel polish and dried for one minute in a lamp. The next stage involves removing the tape along with excess gel, covering with a top coat (optional), final drying, which lasts about 2 minutes, and removing the resulting dispersion (relevant for materials with a sticky layer).
Shellac - pros and cons
First, let's look at the advantages of shellac:
- Allows you to grow your nails. Shellac is perfect for those with any nails, whether long or short. It solves several main problems at once: if your nails are thin and brittle, it strengthens them and makes it possible to grow them. After all, the nail under the coating does not delaminate or crack.
- Stays on nails for a long time. Shellac cannot be removed without special products, which means it is not afraid of household chemicals. You can safely wash dishes, cook and do other household chores without any damage to your nails. This varnish lasts up to 3 weeks.
- Gives a bright glossy shine. Shellac gives incredible shine to nails that does not fade over time.
- Pleases with the variety of palette. Today, many colors have been developed - from classic pink tones to bright, rich shades. The palette is constantly updated with fashionable seasonal colors.
- Shellac is harmless. Shellac does not contain dangerous substances such as formaldehyde. This means that pregnant girls can also get a shellac manicure. It will not cause harm to health, since gentle substances are used in its production. In this case, if desired, the coating can be removed independently.
Its disadvantages include:
- High price. Shellac is an expensive procedure, sometimes the cost is equal to standard extensions. In addition, such a coating also needs correction, which is quite expensive. If your nails grow quickly, then you will have to resort to correction quite often; it is unlikely that you can do it at home.
- Nail diseases. In appearance, the coating seems durable, however, it is susceptible to temperature conflicts. Our nail expands under the influence of heat and moisture, then contracts again, taking on a natural shape. Such deformation of the nail plate can cause invisible microcracks in the coating, through which dirt and water can get under the shellac layer, and these are excellent conditions for the growth of bacteria. As a result, we may end up with nail fungus or some other disease.
VIDEO: Painting ombre sol nails with a cuticle protector
A good manicure is an important component of a woman’s image. Sometimes it reflects her inner world and perception of reality. When creating a new nail design, we hope that it will last on the nails for a long time. But in practice it turns out that any manicure is doomed to a short, even bright, life. Constant contact with water, housework, cooking in the kitchen, playing sports, playing with children are not easy tests. Shellac technology helps solve all these problems - now you can not be afraid to zip up and cook in the kitchen. Due to its beauty and durability, shellac has become very popular. He gave all women well-groomed hands for 2 whole weeks. But if such varnish gets on the skin, and this can happen during a manicure, then what should you do to remove the varnish from the skin around the nail? First of all, let's look at its main advantages and identify its disadvantages.