What is biogel
No sooner had acrylic gained popularity in manicure than a new coating appeared - gel. The material raised many questions among users, especially regarding the technique of removing it. It is more difficult than regular soaking. All shortcomings were taken into account when developing a new product - biogel.
The main component of the composition is natural resins. They, together with additional substances, form a liquid consistency. After application to the plate under exposure to an ultraviolet lamp, a polymer layer is formed that remains flexible. This prevents the coating from cracking when wearing a manicure. Biogel is removed by soaking. The advantage is that this product is suitable for any nails.
In addition to resins, the following is used in production:
- keratin;
- vitamins E, A, etc.;
- silk proteins.
Additives of natural origin ensure the restoration of damaged nail structure. Nutrition and hydration promotes rapid growth of the plate. After applying the coating, the effect lasts about 2-3 weeks. You should not remove the protruding part of the nail above the base of the finger with a file. The end side must be sealed, otherwise cracks and peeling will soon form along the edges. It will not be possible to make the plate shorter before removing the material.
It is comfortable to wear a manicure with biogel, as well as with other coatings. This is facilitated by a thin layer, lightweight material that does not require adaptation. Allergic reactions to the product have been recorded in isolated cases.
Removing the gel: method 2
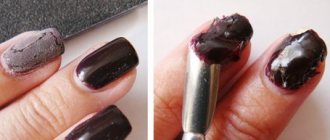
If the gel does not dissolve with the help of special liquids, then you need to act mechanically. Begin removal by removing the free edge. This must be done by sawing with a high abrasive file with a small amount of grit. However, you can speed up the process by simply biting off the edge with wire cutters. Do this carefully, because if the clippers are not sharp enough or you move them slowly, the gel may crack, and with it the natural plate.
Do not attempt to scrape off the gel or separate a layer of it by lifting. There is also no need to try to pull it off, even if significant detachments have already appeared under the coating. The adhesion of the plate to the gel is so strong that you would rather tear them together than be able to separate the gel.
As you can see from the video, removing gel nails is a fairly lengthy process. You can’t rush, as you risk damaging your nail. Start cutting the coating from the center of the plate to the edges. There is no need to try to completely clean your own plate in this way. It's better to leave a thin layer of gel on it. In order not to damage the nail, when filing, use a special hard brush, which periodically shake off dust from the plate.
Once sawing is complete, proceed to polishing. To do this, you no longer need a grinder, but a simple polisher. Start processing from the most abrasive surface. Then gradually move on to more delicate ones, as if you were working on completely natural nails. Move the polishers mostly in one direction. During the sawing and grinding process, careful attention must be paid to ensure that the plate is completely clean. If gel remains somewhere on it, this can lead to deformation of the nail as it grows.
Types of biogel for nails
Biogel is available in different types, which differ in their constituent substances and purpose.
Base
Available in the form of a transparent substance. Used to restore damaged plate structure. After application it is almost invisible, creates the effect of a natural shining nail.
Color
There are no fundamental differences with the base. Can be used as a base for manicure or in combination with a base. The purpose of the product is to create an interesting design.
Royal Sealer
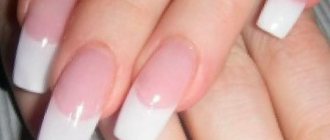
It is used primarily to create a top layer when designing a French manicure. The composition includes compounds that have a whitening effect. This helps eliminate yellowing on the plates. The transparent coating remains presentable for 2-3 weeks.
Sculptural
Shellac is used in the manufacture of the product. When mixed with resins, an opaque substance is formed. It spreads easily over the surface, forming a thin layer. Purpose – creating a manicure design, lining the protruding part of the nail above the base of the finger.
UV biogel
In composition and quality it is not much different from the transparent version. However, in the manufacture of biogel, substances are used that protect marigolds from the negative effects of ultraviolet radiation. Purpose – universal (base, finish).
Advantages and disadvantages
Among the large assortment of products for strengthening the nail plate, it is not easy to find durable material. Biogel occupies a more advantageous position compared to other coatings. This is due to the following advantages:
- restoration of the natural plate, leveling the surface;
- suitable for nails with any flaws (brittleness, thinness, damage, etc.);
- allows you to grow your nails to the desired length;
- corrects the shape of the plate;
- Can be used for manicure on legs;
- after application and polymerization, the natural appearance of the nail is obtained;
- absence of sharp and unpleasant odors;
- No dust is generated when working with the material.
Biogel allows you to create interesting designs. After the layer has polymerized, it is possible to apply regular varnish or more expensive coatings. A simple manicure only takes 15-20 minutes.
Before using biogel, it is recommended to take into account some nuances that may result in undesirable consequences. The risk of developing allergies is low, but it exists. Therefore, initial use should be carried out after testing the product.
When used on natural nails, special care is required when applying and wearing the material. Avoid prolonged contact of the coating with water or aggressive agents. Biogel softens with prolonged contact with alcohol-containing compounds.
Another disadvantage is the high price in salons for nail strengthening procedures. On average, you will have to contact a specialist twice per month, which will lead to increased costs. Other materials have a longer wearing period (up to 1 month). An alternative option that allows you to save money is to perform the procedure at home.
How is the ecogel application carried out?
- Initially, you need to carry out a standard manicure. File your nails to the desired length, give them the desired shape, push back or remove the cuticle. In this place, the cutting of the free edge of the nail itself will play an important role. Once you have the required length and shape, it is important to use a glass file to run several times along the edge of the nail in one direction. This will make it possible to completely remove scales, which can later raise the biogel system.
- It is necessary to carry out complete disinfection of hands. Here you can use a special drug that was purchased in advance. Less commonly used are tinctures using alcohol that were made at home. But they are best suited if you want to save money and not go to an expensive salon.
- It is necessary to remove the “gloss” from the nail plate. To do this, use a file for natural nails or a buff. There is a cut in the form of a herringbone on both sides of the nail. The main task is not to grind down the thickness of the nail plate, but to remove the fatty layer, which can interfere with the normal adhesion of the material to the nail. Next, you need to use a brush to brush away any remaining dust from the nail plate so that there are no protrusions and pimples after applying the system.
- Degrease the nail. This is achieved using a special lint-free cloth on which a degreaser is applied. Next you will apply the dehydrator to the nail. This will help remove moisture from the plate and prepare it for primer application.
- The primer, which can be acidic or gentle, is aimed at ensuring the highest quality adhesion of the nail to the gel. This will help extend the life of the ecogel several times and not worry about peeling or chipping at the most important moment.
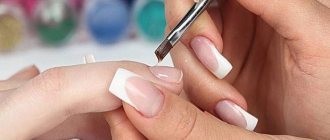
- Direct coating of nails with biogel. It will be worn from the tip of the nail to the cuticle. That is, there will be a constant overlay of one layer on another. If desired, you can make a little rubbing movements, which will allow you to better “adhere” to the nail. After the material has been applied, it is necessary to repaint the free tip of the nail, also called the end. This approach will help keep the gel on your nails for a longer time. After coating, place your hand under a lamp for two minutes to dry.
- Second layer of biogel application. It will help make the color more even and avoid visible recesses or unevenness on the nails. Can make the shade of the varnish more saturated. The marigolds will again be immersed in ultraviolet rays for two minutes.
- Finish coating must be applied. It is also used along the entire length of the nail, sealed at the end. It is very important here not to miss a single millimeter or strip, since it will stand out strongly after drying. The coating will make the nail smooth and beautiful, giving it gloss and shine. Additionally, it prevents the appearance of spots and potholes on the plate itself.
- It is necessary to remove the dispersive or sticky layer using a lint-free cloth, onto which nail polish remover without acetone will be applied.
This procedure may initially seem quite complicated, but the photo and video tutorials that are now available on the Internet will help you understand this process in a few minutes. Therefore, many girls combine the process with regular relaxation at home, and do not incur additional costs for a manicure.
Difference from other coatings
Biogel compares favorably with materials used to create nail art. Just look at the tabular data to appreciate its advantages. Gel polish and shellac are combined into one group, since their properties have much in common.
Comparative analysis of coatings | ||||
| Comparison criteria/coverage name | Biogel | Gel | Gel polish/shellac | Acrylic Powder |
| Compound | natural resins, herbal additives | polymer gel | gel with varnish | polymer powder |
| Consistency before polymerization | liquid | thick | liquid | loose |
| Consistency after polymerization | flexible | hard | flexible | hard |
| Type of packaging | jar 10-15 ml, bottle with brush | jar 10-15 ml | bottle with brush | jar 10-15 ml |
| Presence of odor | — | — | — | slight aroma |
| The need for a base coat | No | No | Necessarily | Necessarily |
| Removal technique | maceration | sawing down | soaking/filing | sawing down |
Strengthening natural nails with acrylic powder
This is the same acrylic, only in the form of powder. It is convenient for home use, which cannot be said about its liquid form. Before you start working with powder, you need to prepare the surface of the nail plate and periungual ridges. Remove cuticles, sand the surface of the nail and give it the desired shape. Then you need to apply liquid. This is a special base coat that makes the surface uniform. Next, sprinkle the nail generously with powder and dry it in a lamp. Then remove the excess. All that remains is to apply the base for the gel polish, and the shade of polish you have chosen.
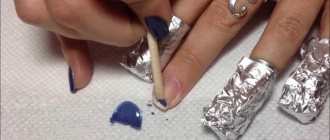
In order to remove acrylic you will need cotton pads, foil and a special solvent. Apply cotton pads soaked in solvent to your nails and wrap each nail in foil. Wait ten fifteen minutes. Remove the coating; if small particles remain, remove them with a wooden stick.
Step-by-step application instructions
There is no need to choose a special time for nail strengthening procedures. The properties of biogel do not depend on the season or menstrual cycle. These and other myths have no scientific proof. A durable coating can be obtained only if the technology for applying it to the plate is followed.
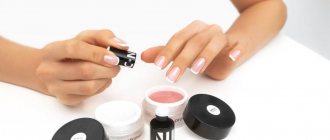
- Preparatory process. At this stage there is no need for baths. It is important to work on a dry surface. This ensures good adhesion of the material. First, the old coating is removed. Next, the cuticle is put in order (the pterygium is pushed back with an orange stick, and pruning is done with forceps). After shaping the free edge, the file is processed. Preparation is completed by washing hands with soap and drying thoroughly.
- The stage of strengthening nails with biogel begins with treating your hands with an antiseptic. For these purposes, use Miramistin or other agents with a similar effect (for example, Chlorhexidine).
- Grinding plates using a buff. You need to do the work without fanaticism, just remove the shine. Passages are carried out over the entire surface of the nails, including areas adjacent to the cuticle and tips.
- Use a cloth soaked in degreaser to treat each plate.
- Applying the base. This is not a necessary step; often you can do without a base layer. If it is used, drying is performed next.
- Distribute the biogel in a thin layer using a brush. The ends are sealed.
- Drying in a lamp.
- Applying the second layer.
- Drying in a lamp.
- If a color coating is to be used, now is the time to apply it.
- Drying.
- Using a top coat followed by drying under a lamp.
- Removing the sticky layer is done using a napkin and degreaser.
- The session ends with treating the cuticle with oil for intense hydration.
All layers must be applied in a thin ball so as not to disrupt the process and speed of polymerization.
The biogel lasts on natural plates for about two weeks. This is subject to proper application and careful wearing.
Advantages and disadvantages
Everything in the world has two sides to a coin. Biogel boasts the following advantages:
- This material is hypoallergenic.
- Tix tree resin strengthens the nail plate and prevents it from cracking. Thanks to the resin, the extended claws are very durable.
- Easy to apply/remove.
- Great for home do-it-yourself use.
- Has a natural natural look.
- This material allows the native nail to “breathe ,” which prevents subsequent brittleness, yellowing, and delamination.
- Artificial nails extended with this gel last a very long time and do not lose their original beauty. All that is required is a light touch-up once a month.
- The material allows you to turn any most daring type of manicure into reality , which does not fade over time.
- is available to the attention of the craftsmen .
- External factors, such as the effects of household chemicals and other things, do not affect manicure in any way. Biogel is also not afraid of mechanical damage, so women can safely do any household work.
- The material is economical to use.
In fact, the use of biogel has no contraindications. Those who have tried the effect of the gel on themselves confirm its strength, harmlessness and strengthening of their own nails, which also acquire a beautiful shine and smooth surface.
Possible disadvantages include the following factors:
- The biogel itself is absolutely harmless , but the same cannot be said about the means that need to be used to periodically remove it.
- The gel cannot claim to be 100% waterproof. If the contact of artificial nails with water is very long, then they begin to behave like natural ones. True, this problem can be easily eliminated by using rubber gloves for work.
- Do not remove varnish with a product containing acetone.
- The material has low resistance to solvents. You need to wear rubber gloves before coming into contact with acetone, methyl alcohol, or alkali cleaning household products.
- Depending on the level of personal income, the material cannot be called cheap.
Here are the main pros and cons of biogel.
Tools used
The coating polymerization process occurs when exposed to a special glow created by UV or LED lamps. There will be no questions regarding quality if you use a lamp with a power of 36 W or higher. Less powerful options require long drying. But their biggest drawback is that if time is delayed, the biogel may not harden.
When using a 48 W lamp, polymerization occurs within 30-40 seconds.
You will also need:
- degreaser;
- buff;
- primer;
- file;
- antiseptic;
- top;
- cuticle oil;
- brush.
The top is chosen from the same brand as the biogel. This will help avoid cutting off the coating when removing it.
Popular means
Deciding on the choice of coverage is sometimes difficult. The purchase will be useful if you pay attention to popular products.
Biogel Runail Bio Gel classic, 15 ml
Refers to modeling types of coatings. Main purpose:
- strengthening the plates;
- manicure design modeling.
Requires lamp drying:
- UV – 3 minutes;
- LED – 1 minute.
Cost – 258 rub.
Biogel ADRI COCO Bio Gel strengthening camouflage, 10 ml
The product belongs to the group of modeling coatings. It must be applied in two layers. The color of the product matches the natural shade of the nails, which indicates the camouflage properties of the biogel. Drying time:
- in a UV lamp – 2 minutes;
- in an LED lamp – 1 minute.
After drying, a sticky layer remains, which can be easily removed with a degreaser.
The main direction of use of the product:
- strengthening the plate;
- extension.
The peculiarity of the product is that it requires covering with a fixative.
The cost of two-phase coating is 190 rubles.
Set for extensions Irisk Professional with biogel
The main purpose of the product is nail extension. The set includes 8 items:
- primer-degreaser;
- corrective biogel;
- primer for gel;
- colored biogel;
- top;
- liquid that removes the sticky layer;
- brush;
- buff.
Each bottle must be used according to the extension technology. The process is described in detail in the accompanying instruction sheet.
Cost – 1290 rub.
Biogel Runail Bio Gel Builder modeling, 15 g
The product belongs to the group of modeling coatings. You need to apply it, creating three balls. Most often, biogel is used when decorating a free edge.
Drying time in a UV lamp is 120 seconds.
The cost of three-phase coverage is 260 rubles.
Biogel Cosmake Bio-gel professional single-phase, 15 g
The liquid composition falls into a uniform ball, covering the entire surface of the plate. No need to apply 2-3 layers. When using an ultraviolet lamp, drying takes 120 seconds; working with an LED lamp is faster (30 seconds). The product is suitable for those with sensitive skin. No cases of allergic reactions caused by the properties of the components of the composition were identified.
Coating feature: absence of hazardous chemical compounds.
Cost – 328 rubles.
How to shoot correctly
Coating removers:
- tweezers;
- orange stick;
- remover (can be replaced with alcohol);
- buff;
- cotton pads;
- scissors;
- a patch for fixing the compress (you can use tape);
- foil;
- nutritious cream.
Algorithm of actions:
- Cut the cotton pads into 2 or 3 parts and moisten them with alcohol.
- Place the blanks on your nails and secure them with adhesive tape or adhesive tape.
- Wrap strips of foil around each finger to stimulate the softening process of the biogel.
- After 10-15 minutes, remove the foil cover.
- Use an orange stick to carefully remove the softened coating.
- Grind the plate using a buffer.
- Wash your hands in a warm bath with herbal infusions and dry.
- Apply nourishing cream to the skin and nails of your hands.
It is not recommended to use undiluted alcohol. It dries out the plate, so it is mixed with water. It’s even better to remove the coating using a professional remover.
The effect of strengthening nails is noticeable only with regular application of biogel. The material makes the plates durable while maintaining natural flexibility, prevents delamination, and eliminates fragility. As the nails grow, corrections need to be made. Regularity occurs approximately once every 3-4 weeks. When replacing a manicure, complete removal of the biogel is required.
How to remove biogel from nails at home. Removal liquid - instructions for use
When removing biogel, the nail does not need to be filed. To completely remove the biogel, simply apply a special liquid to a cotton pad, wrap it around the nail and leave for 10 minutes under foil.
What is biogel for nails, how to apply it and how to remove it is described in this article
The biogel will completely dissolve and will not cause any trouble. The procedure is no different from removing gel polish. But it does not require sawdust, which is very convenient and saves time.
