In this article we will talk about how to properly remove shellac yourself, at home, without damaging your nails.
Shellac or gel polish is one of the most popular nail coatings. Its application requires a certain skill and, as a rule, it is done by masters. However, after some time the coating has to be removed because the nails grow back. And so many girls have a question about whether it is possible to do this on their own? Do you have to go to a salon to get this done? Let's find out.
How to easily remove shellac at home without damaging your nails: methods
Remove shellac yourself
Today, there are many ways to remove shellac yourself. And here are some of them:
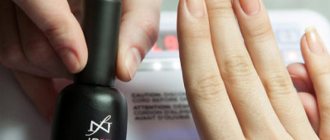
- Using a manicure machine . It really is possible. Thanks to the device, removal is painless and much faster. At the same time, you still have to learn how to use it.
- Acetone and foil . This is one of the most popular methods. It allows you to first soften the coating with acetone and then remove it with a spatula.
- File . And it may be useful in this matter. You just have to work with it carefully so as not to damage your own nails.
Let's look at each method in more detail.
Professional shellac remover
In the salon, the process of removing shellac takes an average of 15 minutes. The master rubs the top layer with an abrasive file and makes overlays moistened with special removers - solvents that quickly cope with the task and intensively soften the shellac. The next step is to carefully remove the remaining varnish with a wooden stick.
The effectiveness of the solvent depends on the composition. Not all tools cope with the task equally efficiently and quickly. On the list of favorites among professional nail artists: Match, Lafitel, Severina, Perfect.
Additional materials used by specialists: cotton pads, foil or silicone tips. One of the new products on the beauty market is remover wipes. To soften the shellac, just tear the edge of the bag and place your finger there. Inside is a cloth moistened with solvent. The film adheres tightly to the nail, which speeds up the softening process.
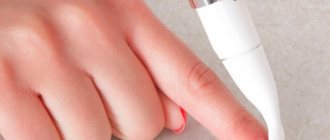
How to remove shellac with a manicure machine at home: tips
In fact, you can remove shellac yourself using almost the same device that is used in the salon. The only difference is that for the procedure the master usually uses several cutters, which he inserts into the device. They work on a fairly simple principle: the cutter rotates at high speed and thereby removes nail polish. The same can be done with a simple file. This method is used by some masters, but we must give credit to the device, because it does everything carefully when used correctly.
Which cutter to choose for removing shellac at home?
In order to remove shellac yourself, you can use just one cutter, but it is also important to choose it correctly. As a rule, a ceramic or carbide tool with a large notch is used to remove the coating.
Ceramic. They started making them not so long ago. Their advantage is that they are more durable and do not wear down so quickly. In addition, the material does not heat up during operation. Comparing this tool with others, it immediately becomes clear what the difference is. Ceramic works smoothly due to its greater cutting ability. Vibration during operation is not felt.
Ceramic cutter
As for the carbide cutter, it can rotate only in one direction, or in different directions. Such attachments form chips when removing the coating. In principle, they are no worse than ceramic ones. If you have gel, then choose tools with large notches. At the same time, carbide tools work quite quickly and do not heat up.
What is shellac
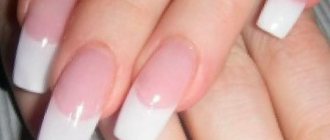
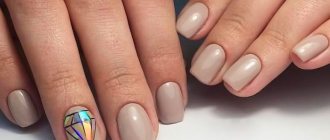
Shellac is essentially a cross between nail extensions, bio-gel and regular varnish. It has absorbed all the best from these coatings and now in our arsenal there is a universal Shellac product that meets all the requirements of a modern woman.
Here are the main advantages of Shellac:
- The coating lasts from two weeks to one month;
- Shellac looks as natural as possible;
- Shellac gel polish retains its color and shine throughout the entire wear period;
- Strengthens natural nails and prevents them from peeling and breaking;
- Makes it easy to grow long nails;
- Under shellac, nails can breathe (compared to using acrylic or gel);
- It does not require a strong “cut” of the top layer of the nail, therefore, it does not spoil it.
How to remove shellac with acetone and foil: instructions
If you decide to remove shellac yourself, you must understand that doing it without a professional will be much more difficult. The gel adheres to the nail so strongly that if it is removed in an inaccurate manner, part of the plate will also be removed. Of course, you won’t remove them completely, but you will do a lot of damage.
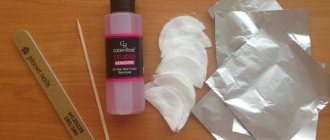
For the procedure, you will need to take a liquid with acetone, as well as cotton pads for impregnation. Moreover, you will have to directly remove the shellac with an orange stick. As an option, you can take a plastic one, but the first one is still better. Don't forget to take foil. It will be needed to create a thermal effect. In principle, any will do. Well, to complete the work you will need a sanding file.
The process itself includes several stages:
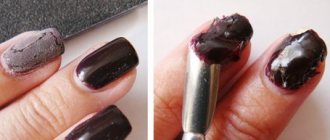
- Lubricate your hands with any high-fat cream. Acetone is aggressive to the skin and can harm it. So be sure to apply cream.
- Next, take the discs and wet them in acetone. Place it on each finger one by one and wrap it in foil on top.
- It is enough to hold the caps for about 10 minutes. Then they can be removed and you can start working on the coating itself. The procedure is carried out separately for each nail.
Remove the varnish sequentially. First do one nail, then the second. If you remove all the caps at once, the coating will harden again.
- When everything is removed, wash your hands and use a nail file to set the desired shape. If irregularities suddenly appear on the plates, treat them with a polishing file.
For best results, it is recommended to take an oil bath to soothe your nails.
What materials are needed to remove artificial material?
The safest and most proven product is a special remover, which you can buy in cosmetic stores. The remover contains a small amount of acetone, which dissolves gel polish, as well as auxiliary components, vitamin complexes and fragrance.
In addition to the remover, you will need:
- regular food foil in a roll - 10 pieces;
- cotton pads or cotton wool (to save money, one disc can be folded into 4 parts and cut - this is enough for 4 nails);
- a file with high abrasiveness and a buff for polishing nails;
- several orange sticks;
- rich cream and cuticle oil.
The branded remover can be replaced with regular acetone, but this aggressive product should be used carefully.
The negative consequences of this technology are dry skin around the nail plate, burns of the epithelium, thin and peeling nails. Therefore, you should strictly adhere to the soaking time and use a rich cream to protect the skin of your hands. Girls with less sensitive skin usually do not experience such consequences, but they may experience dry cuticles. It is easy to get rid of it with the help of nourishing oil.
Precautions when removing nail polish using foil:
- You cannot use a pusher; there is a risk of damaging the nail plate. Remove the material using gentle movements with an orange stick.
- Contact of remover or acetone with the skin should be minimal. Cut the cotton pad so that it follows the shape of the nail and does not go into the cuticle.
- Soaking time is on average 10–15 minutes. If the polish doesn't come off, re-soak it for a few minutes.
Some girls prefer to use isopropyl alcohol. This solution is highly concentrated, which is fraught with irritation, so experts recommend choosing special removers.
How long should you keep the foil on to remove the shellac?
Foil caps
To remove shellac yourself when using foil, you will have to hold it for about ten minutes. But this is only provided that you use a special liquid. If you took a simple nail polish remover, then it is better to increase the time by at least half. Then the varnish will come off the plate better.
Step-by-step instructions for removing the coating at home
The shellac removal procedure takes about 30 minutes. Prepare a place convenient for the process, where you will not be distracted or disturbed. Provide good lighting.
- Wash your hands thoroughly to remove the oily layer from your nails. But if you have sensitive skin, it will be safer to treat the skin around your nails with a rich cream to avoid allergies and irritation.
- Treat the nail plate with a soft file or buff. Do not overdo it. Only the top layer needs to be cut off.
- Generously soak appropriately sized pieces of sponges or napkins with remover and wrap each nail tightly with them. To ensure that it adheres well to the nail plate, secure the sponge tightly with a suitable piece of foil.
- We wait as long as the instructions on the remover require. If there is no such information, or you are using another product, then you need to wait 10–15 minutes.
- We begin to remove the cotton “caps” from the nails in order of priority. The shellac is softened and can be gently scraped off the nail with a stylus or nail polisher. We process one finger at a time. Only after removing the coating from one nail, unwind the next one. It may also be that on some nails the gel polish does not soften the first time. Then we repeat the procedure again.
- We cover the treated nails with a restorative agent or rub oil into the cuticle and nail plate.
Even if the shellac has begun to chip and is easily torn off from the nail plate, you should not remove the coating without soaking it. This can deprive you of healthy nails for a long time.
Removing shellac
If you have extended nails covered with shellac, then you will not be able to remove it without harming the artificial nails. Removal is carried out with the main material – acrylic or gel. The only option is to cut off the shellac.
Biogel is removed from nails in a similar way. The only difference is that it will get wet faster, since its structure is softer and does not eat into the nail plate so tightly.
The procedure for removing shellac from toenails is no different from manipulating fingernails.
Shellac remover caps
The absence of foil is not a reason to wear a sloppy manicure. Instead of foil, you can use tape or adhesive tape. Or professional tools will help: there are special clamps for removing shellac, clips, clothespins, and plastic caps. They differ little and will simplify the process with equal efficiency. Shellac remover liquid is poured into the caps, and then each cap is placed on a finger for 10 - 15 minutes.
After removing the shellac, use caps to restore your nails: pour a little cuticle oil into them and hold your nails there for a few minutes.
If it turns out that you don’t have any foil, sponges or napkins, you can use a bath with remover or other suitable liquid to remove the coating. As a bath, use any convenient container that is not intended for food products. It is enough to pour the liquid so that it completely covers the marigolds. Next we follow the standard instructions.
If you don’t have a remover or even nail polish remover at home, regular vodka or alcohol, which can be found in every first aid kit, will help.
How to remove gel using alcohol (vodka):
- Dilute alcohol with water in a one to one ratio. Vodka can be used without dilution.
- Soak cotton pads in the liquid and wrap them around your nails in order. Next, follow the instructions for removing shellac using a special liquid.
How to remove shellac at home without foil?
You don't have to use foil to remove shellac yourself. Just keep in mind that the method is very aggressive. If you use it once, when you really need it, then nothing bad will happen. But it’s better not to resort to it regularly.
So, you will need any nail polish remover with acetone. Please note that you cannot use pure solvent. You will also need a bowl to soak your fingers, as well as an orange stick and heavy cream.
- So, pour some nail polish remover into a bowl.
- Prepare your nails for the procedure by smearing them with a rich cream
- After this, dip your nails into the bowl and wait. The time is determined by the quality of the coating and the amount of acetone in the selected product. Check periodically to see if the varnish has become loose
- When you see that the varnish has softened, start removing the loose layers
Be sure to wash your hands with soap after completing removal and, ideally, also take a recovery bath. As an option, you can make a caring hand mask and then apply cream.
Please note that if you have any wounds on your hands, then this method will not suit you, because it will greatly harm the damaged areas.
Home Remedies
It is not always possible to buy a special product designed to remove gel polish. Because of this, you should pay attention to home options on how to remove the decorative coating without harming the natural manicure.
Removing shellac using foil
Foil is a universal material used in most recipes for removing shellac from nails. However, keep in mind that it reflects the absorbed light, which can affect the condition of the periungual area.
Features of using foil to remove manicure:
- First you need to fold the material 2-3 times to reduce its permeability;
- You need to wrap the tip of the finger not only in the area where the plate is located, but the entire last phalanx;
- To completely remove gel polish, apply a cotton pad under the foil to the entire nail, including its end.
If you remove shellac with foil, the surface of the nails will remain slightly rough and quite thin, so after this procedure it is recommended to take a break for 2-3 weeks, during which you will not apply gel polish.
How to remove nail polish using acetone
Acetone is an aggressive component that is often used by girls at home to remove strong pigment. However, it must be used carefully, preventing damage to the delicate skin of the hands.
The method involves performing a softening bath, so there is no need for foil or fingertips:
- Pour acetone into a small container.
- Treat the skin around your nails with a rich cream.
- Place your fingers in the solution for 5 minutes.
- Remove your hands from the bath and use a pusher or orange stick to remove any remaining pigment.
If the shellac is difficult to remove, you can re-immerse your fingers in the liquid for another 2-3 minutes to increase the effectiveness of the acetone.
Removing shellac with alcohol
Rubbing alcohol is a more gentle solution than acetone, but it also helps remove decorative coatings in a few minutes without resorting to the use of a remover.
The technology involves making a typical compress consisting of cotton pads treated with alcohol and several layers of foil. After 20 minutes of exposure, you can remove the pigment using an orange stick or a metal pusher. Do not press too hard to avoid damaging the plate.
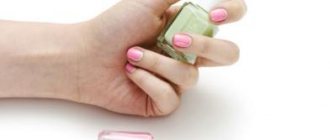
Is it possible to remove shellac with a file?
Remove shellac with a file
Often girls ask, is it possible to remove shellac themselves with a file? Of course you can. This is approximately the same method as with the device, but you just have to do everything manually. Just choose the file correctly. Its abrasiveness should be 150 grit, that is, medium hardness. The file is rough and this makes it possible to quickly remove the coating. Again, remember to be careful not to damage your nails.
To file, it is important to move along the nail correctly. The pressure should be medium and soft around the cuticle.
Remover for removing Shellac
Removing shellac with a remover is the safest and easiest. This product is specially created not only for removing coatings, but also for additional nail care. It moisturizes and nourishes the nail plate and does not dry out the skin around the nail.
- Cut the foil into 10 pieces, approximately 7 by 5 centimeters in size.
- Divide the cotton pad in half (in the middle), then into 10 pieces, approximately equal to the area of your nails.
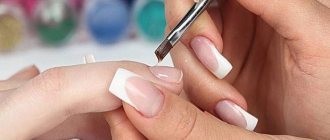
- Using light file movements, remove the top shiny layer of shellac coating. Be careful not to damage the cuticle and do not file too hard.
- Soak a cotton pad in Remover and place it on the first nail.
- “Wrap” the nail and fingertip with foil on top, the shiny side facing the nail.
- Repeat the procedure with the next four nails on one hand.
- Wait 10-15 minutes (the time depends on the chosen product and the manufacturer of the applied shellac).
- Remove the foil and cotton wool from one nail. The shellac coating should “crack” and come away from the nail in several places. If this does not happen, leave the product on for a few more minutes.
- Release your fingers one at a time, removing the shellac coating from each with a stick. Do not put pressure on the nail plate or make rough movements.
- Buff each nail.
- Apply cuticle oil.
Try to use only this method of removing shellac at home. This is what all Shellac gel polish manufacturers recommend, as it allows you to keep your nails healthy and beautiful.
How to remove shellac from extended nails: instructions
Extended nails
Despite the fact that today there is a more gentle procedure in the form of shellac, some still resort to extensions. At the same time, extended nails are also covered with shellac. And the question often arises - how to remove shellac yourself from extended nails?
- In general, extended nails are not much different from regular ones. But not when you need to remove shellac. The fact is that you can remove not only the coating, but also dissolve the nails themselves.
- So acetone is contraindicated in this case . It not only spoils, but also dissolves the nails themselves. And if you take liquid without acetone, then, as we have already said, there will be no effect.
- You can, of course, use a cutter to remove it. It will be very fast, but again quite dangerous. If you have no experience working with tips, then you shouldn’t even start. Although, you can use the same cutters as for simple nails. At the same time, it is not at all necessary to be gentle with your extended nails, because you simply won’t be able to cut them off completely. Even with an ordinary nail, you still have to try to do this.
- The gel polish is filed away from the cuticle to the free edge. You have to be careful because the cutter needs to slide across the nail. There is no need to apply too much pressure. Imagine as if you are writing with a simple pen. If burning or burning is felt, then we increase the speed of the cutter, and, on the contrary, reduce the pressure force. You need to operate the device until the material is completely removed.
- If necessary, you can remove the gel polish with a file. It is also important to consider abrasiveness here. For such nails, a product of 100-180 will be just right. The operating principle is essentially the same. Only here you can work up to the base if you then do a manicure without correction. At the very end, polish your nails and you can safely paint them.
In general, of course, it is believed that regular nail polish remains on extended nails for several weeks. So whether it’s worth using the gel is up to you to decide.
Step-by-step instruction
The preparatory stage is cutting off the glossy layer using a highly abrasive file. This layer protects the color pigment from moisture and household chemicals, extending the wear life of the material to two weeks. It is very durable, so if you skip the cutting step, soaking it simply will not bring the desired effect.
The next procedure is as follows:
- Brush off the dust from your fingers with a brush, generously lubricate the cuticles with oil or rich cream.
- Soak a piece of cotton wool or a cotton pad in the remover, apply it to the nail and wrap it in foil. It is desirable that the glossy side is on the outside.
- Repeat the manipulations with all fingers on one hand. Alternately removing gel polish or extended nails using this scheme will take a little more time, but it will be convenient for you to work with.
- Remove the foil after 10-15 minutes. The gel polish should dissolve slightly and soften so that it can be easily removed with an orange stick. Remove material with light movements from the cuticle to the edge.
- Polish the plate with a soft buff, apply nourishing cream to your hands. The surface of the nails after the procedure will be rough, the buff will return their shine.
The procedure for removing gel or acrylic nail extensions is identical to removing regular gel polish. But since the layer of material in this case is thicker, the exposure time of the remover will have to be increased.
How long does it take to remove shellac?
Shellac - when to remove?
Another very good question: how long does it take to remove shellac yourself? In this case, you need to take into account that natural nails grow, and therefore the coating gradually moves towards the center of the nail. As a result, shellac must be removed and reapplied.
As a rule, this happens within 3-4 weeks, and therefore you can walk with the coating safely for a month.
Extreme
Before removing Shellac “nails” in this way, carefully weigh the pros and cons. This is very traumatic, harmful and dangerous advice:
- Prepare a bath with acetone;
- Apply any rich cream to the skin around the nail and fingers;
- Dip your fingertips in acetone and wait 15 minutes.
Attention, if you feel a burning or tingling sensation, immediately remove your hands and wash them with soap. This means that this method is absolutely not suitable for you.
- Remove the shellac coating with a plastic spatula or wooden stick;
- Wash your hands thoroughly with soap and dry;
- Polish the nail plate and treat your hands with cream.
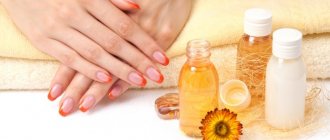
How to restore nails after shellac removal?
As a rule, after the shellac coating is removed, the nails become noticeably weak and thin. This means that it is important not only to remove shellac at home, but also to restore the plates.
So, you need to give your nails a rest so that they return to normal and recover. Moreover, you can safely make various baths for strengthening:
Baths for strengthening
So, in order to remove shellac yourself safely, you need to follow simple instructions and not do anything that could seriously harm your nail. Remember about the need for restorative procedures.
Nail restoration after shellac
The most important stage on which the beautiful and healthy appearance of your hands depends is care after removing the manicure. Especially if chemical solvents were used. What professional nail technicians recommend:
- Firstly, do not forget about creams and oils when removing shellac. We treat the skin around the nails and cuticles with fatty creams, and make nourishing restorative masks.
- Secondly, we include baths with sea salt and oils in the complex of procedures. Pour warm water into the bowl, dissolve the salt and pour in a tablespoon of oil (olive, almond, peach, etc.). Make sure you are not allergic to any of the ingredients.
- Thirdly, masks with massage rubbing. Nail technicians use restorative compositions with avocado, shea butter, and lavender.
- And fourthly, sealing with wax. The procedure is multi-step, but effective. A special api paste is applied to the nails, which is rubbed into the plate with a soft suede cloth. Then - a layer of powder, which creates a protective film. This method restores the damaged nail structure well, strengthens the plate, moisturizes and nourishes the skin.
Don't ignore skincare routines. Beauty = health.
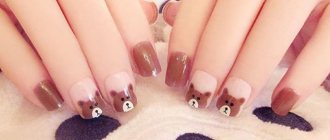
Remove shellac at home: photo after the procedure
If you decide to remove shellac yourself, then you will be interested to know how girls’ nails look after the procedure:
Photo 1
Photo 2
Photo 3
Photo 4
Photo 5
How to remove shellac from nails at home: reviews
Reviews
Plus, on the forums you can also find a lot of information on how to remove shellac yourself. It is important to understand that not all of it is equally useful. Take this into account and choose only what you think will not cause harm. Most girls advise using the option with acetone and foil, as it is the simplest and most convenient. It is easiest to do at home and is less traumatic.
What is the difference between salon and home cutting?
The most significant difference is professionalism. A beginner at home may not feel the boundary between the base coat and the nail plate. This leads to injury to the nail and thinning of its structure. High-quality cutting comes from experience. Therefore, if you are not confident in your abilities, give preference to the method using a remover.
Did you get your hand cut and are you sure you won’t harm your nail? Prepare the necessary tools and begin the procedure. What you will need to cut shellac:
- Option 1 - special cutter. The nozzle is placed on the manicure device. The varnish is removed quickly, efficiently and without damage. The cutter does a great job. Your task is to guide the machine and control the process.
- Option 2 - files. To remove the top layers, professionals use grain files, which are good at removing protective topcoat and colored varnish. To remove the base coat, it is better to use fine-grained files of 150 grit and buff. The risks of touching the nail plate are minimized.
In the case of files, it is better to use disposable ones with a thick cardboard or plastic base.