A perfect manicure is every girl’s dream, which can sometimes be very difficult to achieve. Lack of time and effort, the high cost of the procedure (especially if we are talking about metropolitan cities like Moscow or St. Petersburg), the difficulty of finding a good specialist - all these are factors that force girls to abandon the classic varnish and gel coating in favor of more affordable and multifunctional ones alternatives.
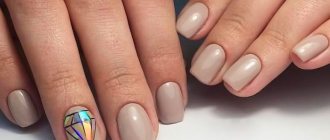
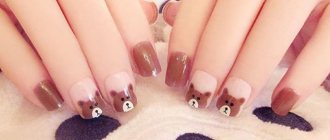
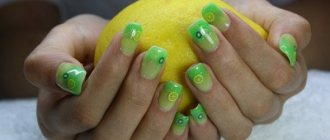
The most popular of them are long false nails. From the information presented below you will learn about the features of home extensions, get acquainted with current designs and design options.
How to do
Overlay plates are most relevant for those girls who do not have enough free time. Instead of sitting in the cabin, you can do what you love and sit at home with your family.
Glued-on nails are much easier to remove than extended nails. The latter specialists will dissolve in a special liquid or cut off, which depends on the applied material. But removing tips is much easier.
If extensions are not cheap, then overhead tips are very cheap. Many people share the opinion that plastic jewelry lasts only a few days on nails. However, if properly applied, they will last 2-3 weeks.
Gel nail extension
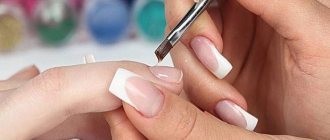
Gel nails have become especially popular and in demand among girls. This type of extension looks very neat and natural. The components included in the gel are non-toxic and harmless to health than those in acrylic. But the extension technique is more painstaking and requires an ultraviolet lamp, which costs a lot of money. All the materials that you purchase for gel extensions will pay for themselves quickly and will serve you for a very long time.
So, what do we need for gel nail extensions:
- First of all, purchase an ultraviolet lamp for drying;
- extension forms;
- gel;
- nail files, polishing buffer, nail scissors, nippers, pusher;
- primer;
- bonder for strong adhesion of gel and nail;
- dehydrator for drying the nail and removing unnecessary fat;
- disinfectant;
- gel brushes;
- clinser;
- moisturizing cuticle oil;
- gel polishes, rhinestones and various decorations.
We disinfect hands and tools. We do a classic manicure - remove cuticles, file nails, polish the surface of the nail plate. Glue the extension form under the natural nail. Now you can start applying the gel. First, apply the gel to the natural nail, not reaching the cuticle, and stretch it onto the form to the desired length. We hold the nail under an ultraviolet lamp for a couple of minutes. Apply a second layer of gel and dry.
Carefully remove the stencils without damaging the extended nail. Using a clinser, remove the sticky layer and shine from the nails. We file, sand and give the desired shape. All you have to do is paint your nails with your favorite gel polish color, decorate them with rhinestones, sparkles or foil. Your charming manicure is ready!
How to make false nails at home
Gluing plastic tips is very simple. Materials for this are in every cosmetic bag. For this manicure you need to have:
- several packs of false nails;
- nail file;
- small scissors for cutting tips;
- wooden sticks;
- nails glue;
- materials for removing cuticles;
- glue dissolving agent.
To work comfortably, you need a lot of light. To do this, you need to place a lamp in front of you for illumination.
Useful DIYs
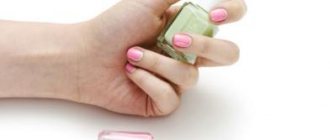
How to quickly make inexpensive and beautiful false nails.
Believe it or not, some jars have really cool designs that look amazing on your fingers.
And the best part: you only need a jar, scissors and half an hour to make it! INCREDIBLE BOTTLE NAILS. Manicure ideas. Checked out LIFE HACKS from TIK TOK
What to make from
Now run to the corner store and buy a cute jar. Now jars for every taste and color are sold. I especially like the checkered ones. You can see the real nail design at the link. In this example, I used a can of Heineken that I had in the fridge... they also have a nice texture. (Remember to empty the jar and rinse it with water)
Additionally, you may need a wallpaper knife, but in general it is very easy to cut an aluminum can; even nail scissors will do.
Cutting strips from a can
Be careful with this step, the jar may be sharp and you may cut yourself. Cut off the top and bottom of the can, then cut it lengthwise to create a strip of aluminum, then level the sheet of aluminum by rubbing it several times on the corner of the table.. this is not necessary, but I find it easier to work with a flat sheet. You can then cut it into thinner strips.
Choose your design
Decide how much you can put on your nails. I find it easier to cut a strip wide enough to fit the length of the finished nail and then cut it into small pieces that fit the width of my nail. You don't have to cut it into big strips, you can pick a random pretty part and make a nail out of it. Just make sure it's big enough to fit your nail. Next, bend it slightly on the corner of the table to give it a natural shape.
Create the desired shape and size
Shape the invoice to match yours. First remove the sharp corners. Cut a little at a time and constantly check if it fits.
The final stage
Now do the same with the rest of your nails. With each nail the result will get better, and you will do it faster each time.
False nails are ready
Use special false nail glue to glue them together and you're done! PS. You can coat them with clear nail polish to protect them from scratches.
More interesting DIY videos:
- Restoring damaged floor screed with your own...
- Cases made of plastic pipes
- Homemade antenna
- Cleaning the brush after painting
- Homemade wooden clothes hanger
- How to tie straps on a backpack
Subscribe
0 Comment
Intertextual Reviews
View all comments
How to remove tips
Over time, the tips must be removed to strengthen the real nail. This is a simple process, but many women simply do not know how to do this without damaging the natural nail plate.
First of all, you should turn to professional products from cosmetics stores. They are inexpensive and easy to use. You just need to apply it on top of the tip and wait until the plastic dissolves. However, this procedure is not very beneficial for nails, so to strengthen them, you should immediately rub in nourishing oil.
This is not the only way. If you don’t have the time or desire to go to a cosmetic store, you can use home methods.
Some “experts” recommend simply tearing off the tips. This opinion is based on the fact that soon the damaged part of the nail plate will grow back anyway. However, using such advice is strictly prohibited - this can lead to problems with the health of your nails.
The most common method is to use acetone. Its effect is the same as that of specialists, but the cost is slightly less.
There are several ways to remove false nails using acetone:
- Soak your nails in the liquid for 10 minutes. If after this the plates do not come off freely, the holding time in acetone should be extended.
- Soak cotton wool in acetone and place it on the nail for 20-30 minutes. To be able to do this procedure with all your nails at the same time, you can wrap cotton wool around your finger with foil.
- Tips can also be removed using plain warm water. For these purposes, you can immerse your fingers in a container of water or take a hot bath. Very often, the fake plate will fall off on its own without damaging the finger. However, this procedure takes a very long time. It all depends on the quality of the glue and the adhesion strength of the material to the nail plate. If there is any glue left, it can be removed with a nail file.
- To remove tips, you can use a special tool - a file, the abrasiveness of which does not exceed 100 grit. Using a nail file, you will need to gradually file down the plastic nail. This is a difficult method, since you need to know how to use this nail file.
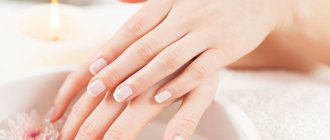
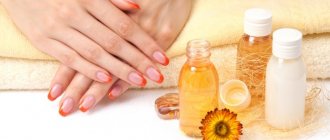
After removing the plate, you should pay special attention to your damaged nails. After this procedure they will need care. Be sure to apply nourishing cream, oils and other skin and cuticle products.
About false nails
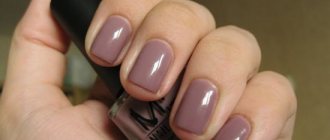
What are false nails? These are decorative elements made of plastic or polyflex that imitate a natural nail plate. They can be called implants, since the function of decoration is to visually replace a person’s nails for some time. The overlays are fixed on natural nail plates. They reliably hide nails without manicure. Visually, such overlays look impressive and catchy.
False nails for children
Nail implants can be glued for various cases and reasons, for example:
- The girl does not want to spend money and time on extensions. The extension process is long – it takes more than 120 minutes. The cost of the procedure starts from 1000 rubles .
- A woman leads an active lifestyle and cannot afford long nails, sometimes she really wants it.
Note! A similar situation applies to girls who are raising a child. Taking care of a baby with long nails is problematic.
- There is a significant event ahead, and you want to look perfect; there is no time to go to the salon.
- Your nails are in poor condition and extensions cannot be done on them.
The decor is suitable for those who do not want to spend time and money on extensions
Benefits of overlays
- Spectacular manicure without visiting a beauty salon.
- The price is affordable. You can actually buy false nails for 100-500 rubles.
- This decor is sold in many stores, for example, in fixed price.
- Gluing the accessory is not difficult. Even with little experience, gluing will take 10-15 minutes.
- It is possible to purchase overlays with stylish designs.
- Colorless, transparent tips are available for sale, onto which any design can be applied.
- High-quality overlays last up to 3 days.
Flaws
Like any beauty invention, false nails have their drawbacks. Among the main ones:
- If you look closely, you can see the artificiality of the plates.
- The decor can fail at the most inopportune moment, for example, on a romantic date.
- Any washing products that are used to treat hands help soften the adhesive composition. After water procedures, the pads may fall off.
How to glue - step by step instructions
Gluing nails occurs in several stages:
- Choosing false nails. It is preferable to buy several packages at once so that you have something to choose from. To check whether the tip is suitable in size and shape, you should attach one piece from the package to your finger. Overlay plates in most cases have a rectangular shape, but it can be adjusted. The material of the nails is of great importance - the higher its quality, the better they will look.
- Nail preparation. Before gluing, you should do a manicure. Because of this, you need to spend extra time, but the result will be worth it - without a manicure, false nails will not look beautiful. Before the procedure, you need to wash your hands well and dry them. Place false nails in front of you and prepare glue.
- Each of the nails on the reverse side should be well lubricated with glue and applied to the nail plate. Then press firmly and hold for more than 10 seconds until the glue dries. The same procedure is repeated with all other nails.
- The manicure ends with nail polish. If the purchased nails already have a design, it is not necessary to apply varnish.
If you want your nails to last as long as possible, you should choose a medium nail length. To prevent them from becoming too long, they need to be filed once a week. In case of irritation from glue, jewelry should be removed immediately.
Plastic manicure
Are you concerned about the environment and don't know what to do with your used plastic? Combine business with pleasure! After all, with the right approach, even an ordinary soda bottle can turn into an effective tool for creating a manicure.
Step-by-step instructions on how to make false nails from a plastic bottle with your own hands:
- Check if the cover is screwed on. If not, fix it.
- Remove any existing labels.
- Pierce the bottle somewhere in the center with a knife, cut out an even strip (about two to three centimeters wide).
- Make a stencil of the nail plate - attach a sheet of thin paper to the nail, trace the contours.
- Create improvised tips based on the stencil.
- Treat the nail surface with buff, polishing it.
- Degrease your nails.
- Proceed to gluing the cut tips.
The last step is coating with colored varnish. You will learn more about the features of this procedure from the video.
What can false nails be made from? In addition to plastic bottles and cardboard, adhesive tape, adhesive tape and polymer clay are excellent for this purpose.
How to glue without glue
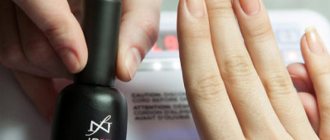
As a rule, a special glue comes with the tips. It is not recommended to use a substance for this purpose that is not intended for this purpose. It is best to buy glue in a special store. If you forgot to buy it, you can use clear varnish. Before applying it, the nail must be degreased. Then apply a thin layer of varnish with a brush, onto which the artificial plate is applied.
To prevent the tip from moving, you need to hold the nail for a few minutes. However, this method is not very reliable, since with any manipulation the plate may simply fall off. The advantages include the safety of the procedure, since the natural tissues of the finger in this case will not be harmed at all.
Some people try to glue tips with simple glue. To prevent toxic substances from getting into the nail plate, cotton wool is placed under the false nail. If the decoration is stuck in this way, it should be removed after a few hours to avoid health problems.
To avoid using glue, you can buy glue-based tips. To apply them, you should thoroughly wash your hands and remove excess oil from your nails (you can use alcohol or acetone). Afterwards, remove the film from the tip and glue it to your finger. This is a convenient and safe method, however, pieces of plastic glued using this method will not last long.
Tape manicure using glue
Are your own nail plates too short and fragile? No problem! If you have thick cardboard on hand, you can create a stylish manicure without any problems.
Step-by-step instructions on how to properly glue false nails at home with your own hands:
- Take thick cardboard and cut out a tip plate that fits the original nail shape.
- Start gluing the cut out templates onto each nail one by one using special glue (you can buy it at any store that sells products for nail art artists).
- Treat the surface of the tip with cosmetic varnish on both sides.
Important! It is not enough to follow the standard algorithm that tells you how to make nails out of cardboard. If you want your manicure to be wearable, you first need to treat the nail plate.
Reading: Ingrown toenail: causes, treatment features, consequences
Popular Russian nail artist Nina Rusanova talks about the features of the treatment procedure: “The first step is steaming the skin and trimming the cuticle. This is followed by the filing and sanding phase. For these purposes, it is good to use thick buffs. Remember that tips should be removed with extreme caution!”
How to glue them so they don’t fall off
When you do everything at home yourself, make sure that the process itself proceeds calmly and gradually. Only pros can create a unique and beautiful manicure in 15 minutes. If you are not doing this professionally, you will need at least an hour of your time to make everything look aesthetically attractive.
What should you always remember when gluing your nails?
- There should be no distance or air bubbles between the natural surface and the overlay. Otherwise, all this will look ugly.
- If it didn’t work out beautifully the first time, there’s no need to despair and try to fix something. You just need to redo the work to make it look more attractive
- There should not be too much glue, otherwise all the beauty and visual appeal of the hands will be lost.
When we have made an attractive and truly interesting version of the plate design, we move on to a new stage.
How to shorten
If the plastic tip does not fit in size, it can be trimmed. It is recommended to use sharp scissors for this. To ensure that its configuration matches the shape of a natural nail, you can round the top of the tip. You can also cut a piece along the whole length if the plates are too wide.
To reduce the length, cut off a few millimeters at a time until the nail matches the shape of the finger. Then it will look more natural.
If you want to give the decoration a more natural look, you should trim the white part of the artificial plate to half. The white part can be no more than 5-7 millimeters in size. After this, you should round the corners if they turn out to be very straight or sharp.
In order to give the tips the required shape, you should process the edges of the plate with a nail file.
Each of these procedures should be carried out very carefully, since the strength of false nails depends on the material from which they are made. Poor quality material may crack during cutting or filing. That is why you should use only high-quality tools.
Applying false nails is quite simple. It will not take much time and will not require a large investment of money.
Review of self-adhesive nails from Fix Price in the following video:
Noticed a mistake? Select it and press Ctrl+Enter to let us know.
How to make your nails beautiful
After attaching the plates to your nails, you should pay attention to their appearance. In the simplest way, you can simply coat them with varnish. Painting artificial nails is many times easier than natural ones. The varnish is distributed evenly, and the shade becomes more natural.
If you plan to use additional decor, you can choose prints, patterns, sparkles, paper stickers or rhinestones. Flowers and all kinds of ornaments also look good on nails. Everything will depend on your abilities and imagination. When the design is completed, the appearance will be close to natural nails.
Please note that the shorter the overlay, the more natural it looks and the longer it will last. Do not buy tips that are too large; it is also not recommended to choose options that already have a design applied, because they look artificial, and the cost is an order of magnitude higher. It will be much easier and more economical to do everything yourself.
How to properly stick invoices
After the natural nails have been fully prepared, it is also necessary to check the readiness of the artificial plates. Most likely, they will need to be pre-filed and processed in other ways to achieve the greatest similarity in shape. At the same time, it is not recommended to reduce their length too much; it is better to immediately choose the most suitable option when making a purchase, since this will negatively affect the service life and preservation of the achieved result.
A step-by-step description of the gluing procedure itself is given below:
- Hands are disinfected
, and then the nail plates are degreased, which is carried out using a special product. - The first layer is applied
- a base varnish that does not have any color. You will need to let it dry completely before moving on to the next step. - Artificial plates
will most likely need to be kept in a container filled with hot water for some time. This will slightly soften their structure, which will provide a better and easier fit.
Apply one drop of glue to the inner surface Only the product that was sold with them is used, or an exclusively decorative variety intended for manicure manipulations.- The false nail is placed
on top of its own plate, after which it is instantly pressed against it with a finger. If the first time it was not possible to lay it out quite evenly, then this must be quickly corrected, since soon the glue will dry out and this will no longer be possible. - Any excess adhesive
that has escaped beyond the overlay plate must be immediately wiped off with a cloth before it dries. - The remaining plates must be
glued much more carefully so as not to accidentally touch them or move them to the side, which could ruin the result. - In most cases,
there is a transition between the natural and false nails, which is distinguished by its uneven structure. You can get rid of it by treating this surface with a suitable file; liquid acrylic can be used as an alternative method.