Choosing safe nail polish
An incorrectly selected varnish will lead to overdrying of the nail plate. The result is brittle, peeling nails, skin irritation and allergic reactions. To avoid this, carefully study the composition of the product. We are looking for varnishes with a safe formula marked “5-free” on the label. They do not contain potentially harmful substances - formaldehyde, formaldehyde resin, toluene, phthalates, camphor.
https://youtu.be/https://www.youtube.com/watch?v=9gBrR4YuPDY
_
Procedure for applying regular varnish
How to do a manicure with regular polish? You need to perform a couple of simple manipulations:
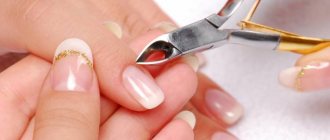
- Prepare the nail surface for the procedure: remove the previous coating, prepare the cuticle, carefully trim off dead skin, file the end of the nail plate, remove burrs;
- Apply base coat. It will make your nail smooth and allow you to hide defects in the nail plate (deformations, mechanical damage).
- Starting from the middle of the nail plate, apply polish, carefully moving towards the edges. After completing the procedure, seal the end of the nail plate with a simple varnish.
- Apply top coat. The “top” coating will protect the base from fading and mechanical damage.
Seasoned Tips: For a more thorough application, apply two or three coats of base coat. This way your manicure will last even longer.
After completing the procedure, you need to wait some time for the varnish to completely harden. Until complete drying, it is necessary to avoid any contact with other surfaces and liquids.
If you do everything correctly, then a manicure with regular varnish at home will turn out no worse than a salon one in just a few ten minutes.
Applying base before and after
Don't skip the steps of applying the base coat. Why is this so important? A high-quality nourishing base coat simultaneously cares for, protects and evens out the nail plate. Stronger adhesion of the varnish to the nail surface means only one thing - the manicure is less likely to be damaged and will retain its original appearance longer. The final stage is also a base layer. Important: since it is the tips of the nails that are susceptible to chipping, we treat them with two additional layers of base.
Lunar manicure
You can repeat this stylish option in 2 counts using a brush and a stencil.
- Apply the base color to your nails and let it dry.
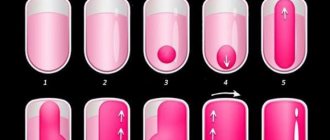
- If you decide to recreate this manicure with a brush, you will need some drawing skills and precision. Alternately, draw semicircles at the base on each nail. They can also be drawn using a special stencil.
- To ensure that the result pleases you for as long as possible, do not forget to secure it.
Technique for performing lunar manicure using a stencil
https://youtu.be/https://youtu.be/fB0NS87sV6I
_
Don't use too much varnish
Many people think that it is better to apply a lot of varnish at once and wait for it to dry. However, a miracle does not happen - after an hour the varnish is still smudged, and there is no even coating. The most common mistake is too much polish at once. For those who want to achieve a rich, trendy shade, there is a simple but effective application technique: we cover the nails in several layers as thinly as possible. Before each layer, be sure to wait one or two minutes so that the solvent in the varnish has time to evaporate, otherwise we will damage the nails and will not achieve a long-lasting manicure.
You need to follow these simple rules
Daria Merenkova Manicurist
- Before the procedure, you should not use creams, oils or other cosmetics on your hands.
- For the first two hours after a manicure, you should avoid contact with water and avoid baths or saunas. This rule applies to both gel polish and regular coating.
- We do household chores only with rubber gloves.
- We remove any dirt from under the nails with a special orange stick.
Quick-drying polish is the enemy of a good manicure
While standing in the store, you don’t need to choose quick-drying varnishes, since they cannot be used to create a long-lasting manicure. As practice shows, a polish that dries in 60 seconds peels off the nail plate just as quickly. There is a simple explanation for this: this product contains a special solvent, due to which the coating begins to chip some time after drying.
Women's jeans: before you buy them, you need to pay attention to one detail
If there is little snow, there will be no harvest: December 16 is Ivan the Silent Day
Why French children behave well: eight ways to raise them
In addition, quick-drying varnishes have a more pronounced negative effect on the nail plate than regular ones, so it is still better to spend time drying.
You should avoid buying cheap nail polishes - they, as a rule, do not last long on the plate and, moreover, deteriorate its appearance over time.
Drying your nails correctly
So, the well-known life hack “submerge your fingertips in ice water for a couple of minutes to make the polish dry faster” does not work. At first glance, the varnish actually dries, but this is just an illusion. In fact, this method only changes the consistency of the varnish, which does not prolong the life of the manicure. The advice to “blow on your nails” also turned out to be a myth. Technically, only the top layer dries, but not the entire coating. In addition, tiny drops of saliva may get on your nails, causing small blisters to form. The correct way to dry quickly is to use special products because they are designed to oxidize the varnish from the inside.
The coating needs to be updated regularly
A couple of days after manicure and nail coloring, you should renew your top coat. This ensures not only the durability of the coating, but also its glossy shine.
It is important to ensure that the top is fresh and sufficiently liquid. If it thickens even a little, then the varnish, on the contrary, will peel off faster, since the overall layer will be too thick. In addition, the applied thick varnish does not look very aesthetically pleasing, since it is distributed unevenly over the surface.
Found a violation? Report content
We take care of nails and cuticles daily
For a long-lasting manicure, hand and nail care should be more regular than once a week. The main part of care is moisturizing the nails and cuticles with special oils or fatty creams. For deep restoration of dry and cracked cuticles, shea butter, jojoba or almond butter with the addition of proteins, vitamins C and E are suitable. It is best to rub in care products using massage movements for more than one minute. This simple procedure will relieve unpleasant dryness and irritation, which will help prevent the formation of chips.
Each layer of varnish must dry well
In the process of painting nails, the varnish is applied, as a rule, in two colored layers. At the same time, it is worth making sure that each of them dries well - this allows you to make the manicure as long as possible.
Rare shot: Viktoria Isakova showed her grown-up daughter from Yuri Moroz (new photo)
A student at the Vietnam Police Academy shared how she takes care of her facial skin.
The money tree pleases with lush flowering: my secret is in caring for the leaves
In beauty salons, where specialists use special lamps to dry varnish, it is possible to apply layers one after another. This is impossible at home - you will have to spend much more time in order to get a decent result - the break between coating should be at least 10 minutes.
By the way, a properly made coating consists of four layers: a base, two colored ones, and a fixative (top). Only if the manicure was done according to this scheme will it be durable. By the way, coloring done with a more expensive base and top coat will last much longer on your nails - you should never skimp on these elements.
Nail art black and beige
If the reader likes the design proposed in the photo, you should prepare varnishes of the desired shades, a thin brush, rhinestones, and glue. Then perform simple manipulations:
- Paint all nails, except the one on the little finger, in a light shade. Cover it with black varnish.
- Wait for the base to dry completely and add a black arch to the nail on the ring finger.
- Dry the result.
- Then glue the rhinestones.
- And dry your nails with regular polish in a convenient way.
How to maintain a manicure for a long time - the secrets of well-groomed women
To make your manicure look neat, long and beautiful, you need to know some secrets of applying varnish.
- If the varnish has thickened, it can be applied in one layer. If the polish has thickened so much that you can’t paint your nails evenly, pour a special liquid into it.
- Before painting your nails, shake the bottle of polish and warm it in your palms. This way it will become uniform and cover your nails evenly.
- Nails begin to be painted from the little finger. Place your fingers on a flat surface (palm should hang down). The light on the nails should fall from the left and from above.
- Dip the brush completely into the bottle of varnish. Afterwards, remove excess varnish by wiping one side of the brush on the edge of the bottle.
- Mentally divide the nail into 3 parts. Step back 1 part from the cuticle so as not to stain it. With confident and quick movements, sweep the brush from the middle of the nail to the tip. Paint the edges of the nail. If there is not enough varnish on the brush, dip it into a bottle of varnish.
- Paint the rest of your nails in the same way.
- Leave your painted nails to dry.
Getting the right manicure isn't all that difficult—you just need to devote enough time to it. A quick manicure is unlikely to turn out neat and long.
Take care of your nails and hands, and then your look will always be complete and stylish.
