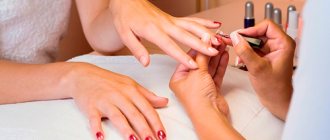
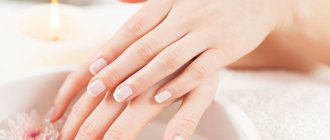
A flawless manicure is the key to the beauty of your hands. Some girls prefer not to experiment with nail coating themselves, but turn to an experienced nail technician, but many fashionistas are not afraid of difficulties and do their own manicure. There is nothing difficult about painting your nails with gel polish yourself. To do this, you will need a base, top and color coating and a lamp for drying gel polish. And our recommendations will help you do a smooth and beautiful manicure with gel polish at home.
Impeccable DIY manicure
Varnish selection
The second secret to a successful manicure is choosing the right coating. Today, stores offer gel polishes for every taste and budget, so you should choose carefully. A good gel polish should be of medium thickness and flow from the brush in a uniform, viscous stream. A varnish that is too thin creates streaks, while a varnish that is too thick creates lumps.
Choosing a varnish
When purchasing, it is better to give preference to gel polishes from trusted manufacturers specializing in products for professional nail design: CND, Gelish Harmony, Kodi Professional, OPI. These gel polishes are of high quality: they apply perfectly, are worn for a long time and do not spoil the nails. Their only drawback is the cost. So, shellac CND or gel polish Gelish or OPI will cost you about 1000 rubles. Kodi gel polishes are a little cheaper - a small bottle of this polish costs, on average, 600 rubles.
CND varnish
Chinese and Russian gel polishes are inferior in quality to their European and overseas counterparts, but due to their affordable price, they are also in demand. Among the gel polishes in the middle price segment, we can highlight the products Bluesky, Cristina, RuNail, Lianail. They are less convenient to use, but when used skillfully, they look and wear no worse than gel polishes from professional brands.
Bluesky varnish
When choosing gel polish, pay attention to the brush: it should be elastic, with even hairs of the same length. As for the width of the brush, this is a matter of individual preference: for some it is more convenient to use a brush, which paints the nail in two strokes, while others choose a thin brush, which can be used to carefully paint delicate areas near the cuticle and side ridges.
Don’t forget about the auxiliary coatings – base and top.
Manicure with gel polish is done in stages:
- base coat;
- one or two layers of colored varnish;
- finishing coating.
Final varnish coating
By purchasing a high-quality base and top coat, you can adjust the surface of the nail and the uniformity of the color coating. Some gel polishes have the ability to self-level, so if your nails have texture, a layer of base will help level the plate, preparing it for the application of colored polish.
Interesting ideas for manicure with regular polish
Newspaper manicure
When performing such a manicure, first you need to apply a transparent varnish to the plates, then white, after which you can also distribute holographic varnish, it will add shine to the nails. When the layers have dried, apply small newspaper clippings soaked in alcohol (10 seconds) to the nail. The paper must be pressed tightly, and then apply a transparent varnish or topcoat to the nail.
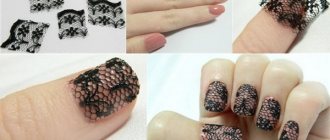
Lace manicure
For this you will need an orange stick, a brush, nail polish remover and varnishes. Apply two layers of the product to the plates and wait 7-10 minutes. Then use an orange stick to create drawings; this is especially easy to do with glitter. You need to draw designs on glossy varnish with a regular brush dipped in nail polish remover and an orange stick. Then the nails are covered with top. This way you get a beautiful nail design with regular polish.
Manicure with a pattern
For it you will need a thin needle and varnishes of different colors.
The first option: you need to apply three red vertical stripes on a layer of white varnish, after which you need to make a pattern with a needle using gentle movements, moving it from one side roller to the other, gradually moving towards the free edge of the nail.
Second option: on a nail covered with dark varnish, you need to apply three white drops so that they are located on the same line, then draw a needle along this line from the edge of the plate to the base.
Third option: place a few drops of pink on a white polish, and a smaller drop of white on them, then use a needle to connect the circles in a chaotic manner.
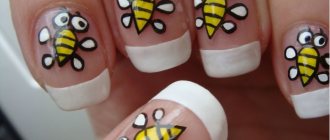
Volume manicure
Manicure for short nails can be voluminous. After waiting for the varnish layer to dry completely, you can begin creating a knitted manicure. It is necessary to mix white varnish and the one that was already used to cover the plate, and use a brush to create a pattern as in the image.
Gel polish application techniques
Every professional manicurist develops a technique that allows him to apply gel polish evenly and beautifully to his clients’ nails. Let's look at the most popular of these techniques. Following the advice of professionals, you can paint your nails at home no worse than in a beauty salon.
Necessary tools for manicure
Varieties of nail painting methods
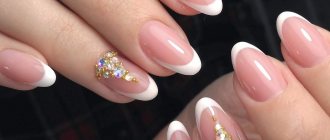
Sometimes the monotony of the same tones gets boring and you want something new and bright. This is where variations of French manicure will come to the rescue. In fact, this is covering your nails with two colors of varnish. One goes as a base - it covers the entire nail. And the second (brighter) one is to paint the tip of the nail plate with stripes. The stripe at the end of the nail can be either straight or oblique. The closer summer is, the brighter your version of French manicure can be.
If with such a clear transition from color to color everything is quite clear and understandable, then how to make a smooth transition is not very good. So, let's figure it out:
– First, you should choose two varnishes that will be combined with each other - a base and a secondary tone. It is necessary to cover the entire length of the nail with the main varnish;
– Using a toothpick, mix two varnishes on any surface, in the order in which they should go;
Editor's choice: Manicure in green tones: a review of trendy designs
– It is necessary to lubricate the entire skin adjacent to the nail with a rich cream;
– Next, the mixture of varnishes is applied to the nail using a sponge. It is first blotted in mixed varnishes, and then the color scheme is transferred to the nail with light touches;
– Use nail polish remover to remove excess nail polish from the skin;
– All that remains is to apply the top coat.
Repeat nail shape
This is a simple and convenient way to carefully paint your nails without getting your fingers dirty:
- Place the brush as close to the cuticle as possible and use two even strokes to fill the sides of the nail with color, following their contour. Then paint over the central part and dry the gel polish in a lamp.
- Paint your nails with another layer and dry.
- Apply topcoat.
This technique allows you to paint your nails quickly and accurately.
How to carefully paint your nails
Long nail plates
It is easier to paint medium and long nails than short ones. And absolutely any shade will suit here. We do everything as described above, but completely immerse the varnish in the bottle, and carefully run one side along the wall in order to remove the excess. It turns out that on one side of the brush there will be almost no varnish, but on the other there will be plenty of it - this side should be painted. Before painting each subsequent nail, you should renew the varnish on the brush.
Editor's choice: How to make salt baths for nails?
The varnish is applied to extended nails in exactly the same way as to long nails. The main thing to remember is that you should not use acetone on gel nails, as it destroys it.
Using a fine brush
This technique is preferred by those for whom jewelry painting of nails in the most inaccessible areas is important.
- Apply a drop of gel polish to the palette (you can use any smooth surface).
- Use a thin brush to pick up some varnish.
- Carefully paint the area near the cuticle and side ridges.
- Paint the rest of the nail surface with a regular brush and dry under a lamp.
- Gradually apply another layer of colored varnish and top coat, drying each layer under a lamp.
Using a thin manicure brush
Little tricks
First of all, you need to apply a base coat to the nail - a clear or strengthening varnish. This is necessary to level the surface of the nail. This measure also prevents the penetration of aggressive components of colored varnish into the nail plate.
When applying nail polish, it is important to follow a few simple rules:
1.Before applying, it is recommended to warm the bottle of varnish in your hands. This will help the solution acquire a more uniform consistency.
2. It is best to start painting your nails from your little finger. In this case, the hand should hang from the table, and the elbow should be motionless. It is necessary that the light falls from the top on the left side. These small nuances will help you apply the polish more accurately and without bubbles.
3. During the painting process, do not touch the cuticle. It is better to leave a distance of 1 mm from it to the place where the varnish is applied.
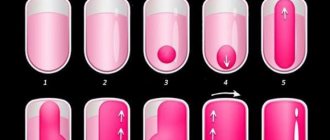
4. Nail polish should be applied in two layers. The first layer should begin to be applied from the middle of the nail (slightly retreating from the cuticle) and continue to its end. Then the side stripes are painted over with two quick strokes. The second layer is applied only after the first has completely dried, otherwise everything will be smeared. It will help remove all the flaws made in the first layer. It will also convey all the beauty of the chosen shade, making the color rich and bright.
Editor's choice: Nails 2022: fashion ideas of the season with photos
The correct application diagram is shown in the photo below:
5.Finally, a top coat is applied to the nails. It is necessary to add shine and to ensure that the nail polish lasts a long time.
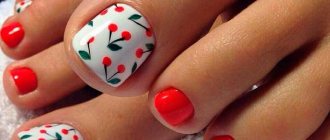
All these principles are suitable for applying varnish to fingernails and toenails. The only addition is that on your feet you need to separate your toes with a special separator. This is done so that during the painting process they do not touch each other and blur the result.
Application under the cuticle
This is a complex method of applying gel polish that requires skill.
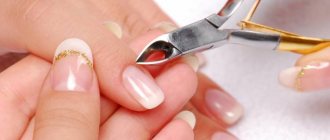
- Treat your nails thoroughly.
- Use an orange stick or pusher to push back and lift the cuticle as much as possible.
- Using a thin brush, paint over the vacated space and paint over the rest of the nail.
The method of applying varnish under the cuticle will prolong the freshness of the manicure, since as the nail grows, the boundary between the coating and the natural surface will become noticeable later.
other methods
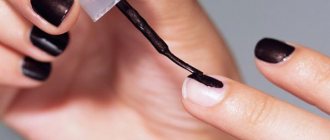
There are a number of other tricks with which you can carefully paint your nails with gel polish. Among them is the use of manicure or masking tape. Prepare thin strips of tape in advance, stick them on your fingers as close to your nails as possible (pictured) and apply the coating. When the polish is dry, remove the tape.
You can also use regular PVA glue. Before applying the polish, take the glue and spread it around the area around the nail. After the glue has dried, paint your nails and remove the adhesive film.
With these simple techniques, you can paint your nails correctly and beautifully, and your manicure will be as good as a salon one. And to get a visual idea of the intricacies of applying gel polish, watch this interesting training video.
How to apply polish evenly on short/long nails?
When it comes to short nails, covering them with polish is not so easy. It is very important that it is not thickened, because this will stain the skin around the nail plate. Too saturated shades on short nails look untidy; it is better to use translucent, pastel colors.
To accurately and evenly paint short nail plates, you need to apply a little varnish, creating a decorative layer, starting from the central part, smoothly moving to the sides. By the way, if you leave the edges a little unpainted, your fingers will appear longer. It is very important not to touch the cuticle while dyeing, because eliminating this effect will be problematic.
Are you thinking about how to beautifully paint your nails yourself? If they are long, then this will be much easier to do, and the varnish coating on them looks excellent. Before you begin, you need to warm the bottle of varnish with your hands. Painting your nails starts with your little finger; it is better to position yourself so that the light source is in the upper left corner of the room (this is if you do everything with your right hand). You need to completely dip the brush into the bottle, and then wipe it on the edge of the tube (the polish should remain on one side). The principle of applying paint does not differ from that indicated above; excess is removed with a brush.
If you want to learn how to carefully paint your nails with gel polish, remember that each applied layer is “dried” under a UV lamp; a maximum of 2 minutes is enough for the coating to completely undergo the polymerization process and bond to the surface.