Tips
Every girl wants to have beautiful nails. They, together with hairstyle, outfit and makeup, form the desired image. But beauty requires free time and material resources, which, unfortunately, are sometimes not enough.
In such a situation, compromise is inevitable. For example, tips can be great for creating the perfect manicure. With them you can easily give your nails a chic look. It is not difficult to master this technology, and extensions with its help are possible even at home.
Preparation
Before you begin the procedure of gluing false nails, you should
Glue for tips
prepare all the necessary materials. These include:
- Tips. They are selected according to the shape of the nail plate.
- Wooden sticks. Preferably orange, as it has antiseptic properties.
- Files with varying degrees of abrasiveness. This is explained by the fact that it may be necessary to treat both the nail itself and its synthetic extension.
- Small forceps. With their help, it is easier to give the tips the required shape.
- Cleansing wipes.
- Varnish for forming the base.
- Glue
It can be acrylic or gel based. This circumstance is especially important when choosing the correct solvent.
Experts advise paying attention to companies that develop professional product lines (Irisk Professional). Most often, of course, it is used in salons, but when creating a manicure at home, it will not interfere with correctly gluing tips.
We must not forget that such extension technology can be carried out only with healthy nails. The presence of any damage is a contraindication for gluing tips. Ignoring this warning may result in infection of the nail plate.
What are the advantages and disadvantages of false nails?
If you are tired of often spending money on extensions or correcting a beautiful manicure, then false tips are what you need. You will no longer need to think about how much money to save for nail salons, which Moscow is rich in. However, before you decide whether false nails are really worth it, you need to understand the pros and cons of this manicure accessory.
To read: How to quickly cure nail fungus with Kerosene?
Artificial manicure has the following advantages:
- Unlike a natural nail plate, you still need to try to break the tips.
- To create a beautiful design, you can choose any color, pattern and even ornament. Gel polish on false nails is also one of the popular options.
- The components that are involved in their production not only make the varnish and other coating for nails more colorful, but also do not cause any harm to the health, in general, and the nail plate as a whole.
- They are able to hide all the imperfections of natural nails.
As for the shortcomings:
- In some cases, components of the adhesive may cause an allergic reaction.
- It is advisable to have nails applied and removed with glue by a professional manicurist, at least for the first time, otherwise there is a risk of damaging natural nails.
- Occasionally, you can become infected with fungus while working with plastic.
Step-by-step instruction
Nail treatment
The first step is nail treatment. To do this, you will need a file with a coarse or medium coating, the latter is most likely for weak and thin nail plates. The surface to be treated should only be cut lightly. It is not recommended to remove too much layer, as this will cause pain. After the process is completed, the nail plate should be degreased. It is impossible to glue artificial nails without carrying out the indicated manipulations.
At the second stage, you will need pre-selected tips, base varnish and glue. To the prepared
Gluing and cutting tips
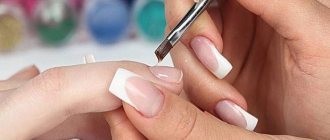
base varnish is applied to the nail plate. Its use reduces the risk of fungus, which is confirmed by numerous reviews. Next, glue is applied to the tip and the treated surface (if necessary), and this must be done in a thin layer. Then you need to combine them, avoiding the formation of air bubbles, and press as hard as possible.
The third stage includes:
- Drying. Its expiration date is usually indicated on the glue package, and should not be neglected.
- Removing glue residues. This is done with a damp cloth.
- Form adjustment. A tip cutter (tongs) will help you arrange it correctly. Feedback on the application is positive.
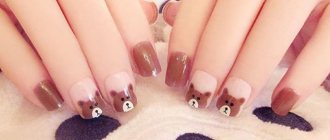
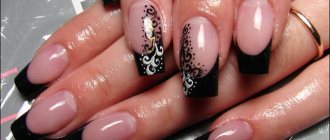
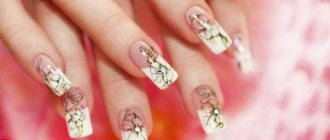
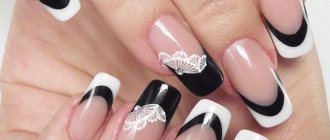
The fourth stage can be considered design. Tips can easily be painted with varnish, decorated with rhinestones or painted with various patterns using special devices such as a brush and a needle. An example is shown in the photo. If everything is done correctly, the result will be a wonderful manicure. The entire extension process is captured on video.
What the pros advise
If you decide to turn your own home into a manicure studio, you need to take into account the advice of experts:
- The main rule that you should not forget about is not to wear glued nails for more than two weeks. This can seriously damage your own nails.
- If you want to glue your nails so that they last a long time, you must use only special glue for gluing tips. Under no circumstances use household or industrial glue for these purposes. Nails coated with such adhesives will be severely damaged.
- During the day, you should press the tips onto the surface of the nail plate more often to achieve better adhesion and a longer service life.
- The glue used to glue the tips does not have moisture-repellent properties. Therefore, after each contact of moisture on your hands, you need to wipe them dry.
- If the tips suddenly fall behind, you can try blowing them with a hairdryer. The hot air will help glue them to the natural nail.
To read: 5 rules for combining colors in manicure
Removing the cover plates
If you lack experience, it is recommended to remove tips only with the help of a specialist. But if you decide to carry out this procedure yourself, you should take into account all the nuances and thereby avoid unpleasant consequences.
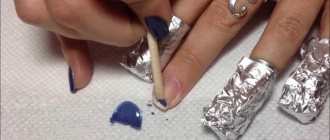
To remove overlay plates, a solvent containing acetone is usually used. Kits from Irisk Professional must contain the specified liquid. With its help, the synthetic plate and glue are softened.
The wrong choice of the latter can significantly complicate the process. The fact is that glue can have different intensity of action. If a product is chosen that is too strong, it will take a lot of time to weaken it, which can lead to unintentional damage to the nail. It is strictly forbidden to use Moment. It and similar chemicals are not intended for gluing tips.
It should be noted that for overly sensitive nail plates, you need to choose a special glue with weak fixation. And, of course, in this case you need to use tips as rarely as possible.
There are several other ways to soften artificial nails, but they should not be used without a valid reason.
- Bath with acetone. It should last no more than 15 minutes. Before soaking the tips, you need to smear the nail and the skin around it with a rich, nourishing cream.
- Lotions with nail polish remover. This option is safer. With its help you can easily dissolve the glue for extension tips.
How is the gluing process carried out?
Gluing tips at home for the first time will probably be quite difficult. It makes sense to do this at least for the first time with the help of a specialist, so that he can show you how to properly glue false nails, find out all the details and know which adhesive base is best to give preference to.
To stick it correctly, you need to follow a certain sequence of actions. The instructions are:
- The plate must be thoroughly polished using a soft file. This action will remove a layer of fat from the surface, as well as smooth out roughness. If there was varnish, all its remnants must be carefully removed. This will ensure proper grip.
- First, the base is applied, and only after that the adhesive base is applied. This will help prevent the formation of fungi. As soon as the varnish base is completely dry, you need to add a couple of drops of special. glue for artificial nails.
- The overlay plates are carefully glued.
- Excess glue is removed using wet wipes.
- Tips can be coated with colored varnishes for painting, gel varnishes, and decorative stickers can be used.
- The finished work must be coated with a fixing varnish.
It must be remembered that gluing false nails with weak or damaged nail plates is very dangerous, because this can provoke various hand diseases.
Women often ask what glue to use to glue false nails if they don’t have a special one on hand.
To read: The nail has peeled off. What is this?
Today, progress does not stand still, and tips have already been invented, with an adhesive composition already applied to them. Gluing occurs by pressing the material onto the native nail. Special glue can only be replaced with a similar composition and of the same high quality in order to avoid problems in the future.
Using glue to repair natural or artificial nails
Very often at home you have to repair damage to a natural or artificial nail. For repair you will need:
- glue;
- degreasing agent;
- adhesive fabric or silk;
- powder;
- buff for polishing.
To return the nail to its original state, you must:
- Wash your hands thoroughly with soap.
- Sand the nail with a buff, moving from the cuticle to the free edge.
- Degrease them.
- Place silk or fabric with an adhesive surface on the plate, covering the scrap.
- Apply a drop of glue to the damage line.
- If it gets on the skin, remove any remaining glue with a scraper or curette after drying.
- Dip your nail into the powder.
- After 5 minutes, remove the powder with a brush and apply glue again.
- After drying, polish the surface until perfectly smooth.
See also
The best way to seal the seam of a fishing overalls, choice of compositions and instructions
Main varieties
The question of how to make false nails torments all representatives of the fair sex, whose plates are prone to brittleness, peeling, and bending. Special overhead tips help solve this problem. We'll talk about what it is below.
Today, the nail art industry is experiencing a new round of development, regularly updated with a variety of new products. Among them, tips deserve special attention - artificial overlays attached to the nail surface. Easy to use, they allow you to create a beautiful and neat manicure literally on the go.
Conventionally, all manicure tips can be divided into two large groups:
- classic plastic,
- attached with glue or hard varnish (more modern).
The first ones are durable and affordable, they last from one and a half to two weeks. The latter are a kind of author's creation. In other words, they are created independently using scrap materials - cardboard paper, plastic bottles, etc. Below are step-by-step instructions on how to make artificial nails.
Nail extensions
In the nail extension procedure, it is important to correctly cut out rectangles from toilet paper with a width equal to the width of the nail. This can only be done approximately, so cut a rectangle, try it on the desired nail and cut off the extra strip of paper. Prepare five such rectangles for each finger of each hand.
- Apply glue to one side of the rectangle and stick it to the surface of the nail, making sure that the paper fits tightly and does not form air bubbles.
- Apply glue to the entire surface of the nail along with a piece of toilet paper on it and place a pile of starch on the nail.
- Smooth a pile of starch over the entire surface of the nail. Some of the starch will soak into the glue and dry, forming a new nail plate.
- Then apply a little more glue, smooth it over the surface and add another pile of starch. While you spread the starch on the nail plate, the paper, along with the starch, becomes saturated with glue and becomes hard as bone.
- Apply glue to the inside of the toilet paper, which already looks so much like a natural nail. Distribute the starch now under the nail.
- Repeat this procedure again on the top of the nail plate.
- Trim the nail and give it the shape you like using a file, at the same time making the nail smooth, removing any unevenness and roughness.
Now the paper and the nail form a single whole, and you can treat it like a real nail. Hone your new nail as long as necessary to shape it.
Degrease it again by applying acetone to the surface. Wipe with a damp cloth and wait until it dries.
You can paint your new nails any color, file them, trim them, and do any procedures to them that you do to your natural nails. They will delight you until your natural nail plate grows back. Then the procedure will have to be repeated.
Found a violation? Report content
