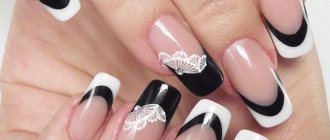
Benefits of Foil Design
Rhinestones are rapidly losing their relevance, and they are inconvenient to wear: they can come off at any moment. The same cannot be said about foil. It holds tightly to the nail plate and allows the master to create a variety of patterns.
It also has other advantages:
- low cost;
- large selection of shades;
- ease of use;
- availability;
- durability.
Even beginners can use nail foil. The main thing is to take into account the recommendations of specialists, because each type of film should be glued differently. So, only transfer and sheet foil are suitable for casting, and for minx manicure you will have to use a hairdryer.
Advice It is advisable to use materials from the same manufacturer to ensure high-quality grip.
Advice from the experts
A manicure with a metallic sheen will look fresh for 2 weeks. A completely glossy coating takes on a less presentable appearance after just 1 week.
To keep the surface smooth and shiny for a longer period, craftsmen recommend protecting your hands with gloves when washing dishes and other household work. It is undesirable to allow nails to come into contact with cleaning products, as well as abrasives (powders, salts).
Foil can be replaced with other types of decorations:
- glitter;
- pigmented varnish;
- gel polish with glitter (liquid foil);
- decorative mica;
- powder with a mirror effect (rubbed in).
You can combine foil with any of the listed alternatives. The main thing is that the shades of the sparkles match the color of the foil and the varnish base.
Nail designs using foil can be done at home. All materials and tools necessary for the work should be at hand. Step-by-step instructions will help you create a beautiful manicure that will last a long time.
Types of foil
If earlier a design with foil was an expensive, salon-style design, today any girl can do a mirror manicure at home. There are many types of foil available, to suit every taste and every idea.
Transferable
For beginners, this option is the most optimal, since the choice of patterns is huge and the price is minimal. Transfer foil is produced in rolls, packaged in a miniature plastic bottle. It can be applied to both gel and regular polish.
Where can I buy:
- You will find a large selection of transfer films on the official Kodi Professional website,
- Don’t neglect the famous AliExpress.
Stickers
Stickers are the second best option for beginners, because this foil has a sticky back side, which makes it easy to attach it anywhere. Difficulties arise only when working with self-adhesive strips. Firstly, it is quite difficult to glue them evenly, and secondly, they tend to peel off at the edges. To properly attach the water stickers you will have to tinker a little longer.
Leafy
Sheet film does not have a sticky side and is produced in the form of small plates, for which you should purchase special glue. The sheets are cut and used to create patterns, imitate broken glass, and even for casting.
The casting looks different depending on what you are printing the foil onto. A pattern drawn with glue will look like a shiny design, and to create voluminous monograms, use gel paint (E.Mi Black Tulip paint has proven itself to be the best).
Thermofoil
Glittery manicures have gained popularity thanks to celebrities such as Lady Gaga and Rihanna, and can be achieved using minx film, better known as thermofoil. It was patented back in 2006, but appeared in Russian stores only recently. The peculiarity is that before use it should be heated with a hairdryer or lamp. Thermofoil does not cause allergies and is absolutely safe for human health; its only drawback is its fragility.
Zhataya
Crumpled foil is sold in small plastic jars in a compressed form; it looks like gold leaf. It looks best in combination with an aquarium design.
Liquid
Essentially, it is a gel polish with a lot of glitter and pigments. Such gels can be dried in any lamp and are thick and durable, so working with them is a pleasure.
Peculiarities
As already mentioned, casting is a type of nail art that requires foil to create. This technique has its own subtleties, and without clear instructions it cannot be implemented, because fixing the foil on the nail is not so easy.
The cast design looks much more impressive on long nails, so it is often used on extended nails or tips. The impressive shine of foil has made it possible to use it in many designs and discover new styles.
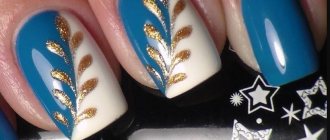
Gold foil has become the most popular; it is often used in combination with colored gel polishes. A real sensation was created by such shades as purple, black, red, emerald - they all go perfectly with gold casting. Using this combination, you can create a festive manicure with a spectacular pattern. Thanks to the foil, the nail is decorated with an intricate image of various curls and geometric lines.
Choosing glue
You can do without glue only by working with stickers and thermofoil. All other types require preliminary fixation, which is why it is so important to choose the right adhesive.
Star Glue
The glue comes in a bottle with a convenient long brush. It is easily removed from the skin, dries quickly, and is suitable for mirror manicure and attaching rhinestones. The average cost is 160 rubles.
Global Fashion
It comes with both a thin and thick brush, making it convenient to use for casting. The volume of the bottles is 10-12 ml. Drying time from 2 to 5 minutes. Approximate price 120 rubles.
Rio Profi
The price of Rio Profi is about 200 rubles, but it is worth it, because it provides lasting results and guarantees a long-lasting effect. Thanks to its water-repellent properties and quick drying (1 minute), it is loved by many nail technicians throughout the CIS.
Gradient and “liquid foil”
Fashionable gradient, Baby boomer and ombre allow you to combine several shades in a manicure. For a delicate manicure, you can choose pastel colors, for an intriguing one, dark ones. When decorating your nails in this way, you can highlight one or two nails using foil to match or choose an accent option.
How to glue foil on nails
Foil is distinguished by a variety of colors and textures, so the design using it is unique and effective. Having purchased everything you need, you can start creating a design, but you will have to work with each type of foil differently. Therefore, we will consider all options.
Thermofoil
Without additional coating, this design will last a week, but only with very careful wear. The foil coated with the finishing gel will last a little longer, but the dishes will still have to be washed with gloves.
Features:
- You cannot wet your nails before using thermal film, so do a dry or hardware manicure.
- Degrease the nail plate and treat it with a primer coating (ultrabond). This product improves the adhesion of the material to the nail and helps avoid detachments, but apply it only under gel polish. If you are getting nail extensions, use an acid primer instead.
- Apply base and 2 layers of gel polish (remember to dry your nails thoroughly after each coat).
- Remove stickiness with a special napkin.
- Before attaching the film, run a soft buff over the nail on which the design will be placed (this is done for better attachment).
- Use a hair dryer to heat the thermofoil for 10 seconds. When the film becomes soft, start gluing it, moving from the cuticle to the tip. This will be easy to do, since it comes in cut form and follows the nail plate.
- Flatten the foil with an orange stick and carefully cut off any excess if there is any.
- Apply top, paying special attention to the ends.
Advice It is better to use minx film for special occasions, since it is the most short-lived of all types. The owner of a mirror manicure should avoid contact with hot water and refuse to visit the sauna or solarium.
Liquid foil
Instructions:
- Treat your nails with primer and apply base.
- Roll the bottle in your hands and only then apply the foil.
- Drying time in a UV lamp is 2 minutes; in an LED device, 60 seconds is enough.
- To make the coating brighter, add 1-2 more layers.
- Then apply the finish and seal the end.
If you wish, you can complement this manicure with stickers or painting.
Advice: Never shake a bottle of gel polish, otherwise bubbles will form in it.
Transfer foil over regular and gel polish
How to glue correctly:
- Get your nails done.
- Cover your nails with polish and wait for it to dry. Remember that the design looks brighter in dark shades.
- Apply the selected glue and let it sit for 2-3 minutes (the white color will become transparent after drying).
- Place the transfer foil with the matte side on your nails, smooth out any creases and press.
- Tear it off with a sharp movement. If the design is not completely printed, repeat the procedure without touching the already printed design. Otherwise, the foil will become smeared or cracked.
- Wait a few minutes and apply the sealer. Some varnishes make the foil less shiny; to avoid this, experiment on tips first.
If you want to print foil onto gel polish, proceed the same way, just don’t forget about the sequence: degreasing, base, gel polish, foil and finish. Dry each layer thoroughly. Also, if you are designing your own, hold off on applying the topcoat as the foil may wrinkle.
TipFoil adhesive has a milky white tint, but becomes transparent after drying. It is at this moment that the design can be imprinted, and if you apply it to wet glue, the design will not transfer.
Sheet foil casting
How to proceed:
- Prepare your nails and shape them.
- Apply base and selected shade of gel polish.
- Dry the gel, remove the sticky layer and sand the surface where the design will be.
- Using a thin paint brush, create the desired pattern using casting gel paint and dry it under a lamp for 2 minutes.
- Place the foil with the wrong side to the monograms and press it along all the contours.
- Quickly remove the foil and apply the finish.
- Dry it and wipe off the stickiness with a lint-free cloth.
This design will look even more impressive if you complement it with rhinestones, liquid stones or acrylic modeling.
Water stickers
How to use:
- Paint your nails with polish and dry it.
- Prepare a container with warm water and immerse the sticker in it.
- Peel the film from the base and stamp the design on your nails.
- Secure the design with a top coat.
In this way you can create lace, mirror, geometric and watercolor designs.
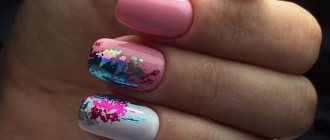
Crinkled foil
This design is applied to a wet gel with a sticky layer. Clear varnish can also be used, but in this case the foil will stick much less well.
How to glue correctly:
- Prepare your nails according to the already known pattern.
- Tear the crinkled foil into small pieces of varying sizes.
- Once the final coat of your chosen shade has been applied, dry the gel polish but do not remove the tack.
- Dot the foil randomly, creating a crackle effect, and then press it with your fingers.
- Cover the design with topcoat (prefer a thick texture, like Nail Best) and dry it.
Crinkled foil provides a beautiful abstract and distressed effect, but it can be tricky to design with because it sticks quickly and can stick in the wrong place.
Necessary tools and materials for work
To create a beautiful manicure with gel polish and foil, you will need the following tools and materials:
- ultraviolet or LED lamp;
- gel polish (shellac can be used);
- top coating;
- base coat;
- any type of foil;
- shovel-pusher;
- buff for polishing;
- wooden stick for smoothing foil.
Foil for nail design (it is not recommended to use foil without a finish, otherwise it will quickly “slip” off the nail) with a sticky layer is applied quickly and lasts a long time. For other types of foil you need good glue. It can be purchased in beauty stores, salons, or ordered through an online store. Before purchasing, it is advisable to read reviews from other mothers.
In the table you can see the names of trusted foil adhesive manufacturers, as well as read a brief description of the material and find out its approximate cost.
| Name | Description | average cost |
| Jina | Available in tubes with a brush. It is easy to apply the glue. The consumption is economical. No additional tools are required to dry the dryer. The foil holds securely and retains its original appearance for a long time. The glue should be applied to the base coat of varnish. When it reaches the desired consistency, it will change color. If you glue the foil earlier, it may not stick or may only partially stick to the nail. | 110 rub. |
| HONGYI | The glue is created not only for attaching foil, but also for fixing rhinestones. Available in small jars. Application brush included. 1 jar has a volume of 16 ml. The glue hardens completely in 4-5 minutes. Excess glue is easily wiped off the skin. Additional drying under a lamp is not required. | 180 rub. |
| Rio Profi | Sold in opaque containers of 10 ml. You can buy 1 bottle, or you can buy a set of 4 containers. The glue is viscous and spreads evenly over the nail. Dries in less than 3 minutes. No lamp drying required. | 167 rub. |
| Global Fashion | Sold in 15 ml tubes. The set includes a thin or thick brush (you can choose). The glue is quick-drying. Hardens in 4-5 minutes. The glue is white, but after hardening it changes color and becomes transparent. Using this glue and foil you can create beautiful patterns. | 170-200 rub. |
It is not recommended to wipe off excess glue with cotton pads and swabs. Small fibers will stick to the nail and ruin the appearance of the design. It is better to wipe off the glue from the skin with thick, damp paper wipes.
How to apply foil without glue?
It happens that you want to create a festive design when there is no glue at hand. It is possible to solve this problem:
- Apply the base and gel polish in the same way as in the instructions above, but once you reach the last layer, do not remove the tack.
- Press the foil onto your nail and then quickly tear it off.
- Cover your nails with top coat and dry it.
This method will allow the foil to last for about 7-10 days, but if you want to enjoy your manicure for 3-4 weeks, then use glue.
A manicure with foil looks so chic that it is even called “Hollywood” and indeed, every girl will feel like a star with such a brilliant design, which, thanks to imagination and foil, can be done without leaving home.
Types of nail designs casting
The simplest cast manicure is abstract designs that the master applies to the nails. It can also be dots and various stripes. Beginning craftsmen often cover the entire nail with foil. A design that uses white French manicure and gold will look beautiful. Or French can be combined with gold varnish.
Liquid stones add a special luxury to your nails. Essentially, these are polymers that harden in a special UV lamp, which is used for gel polish. The stones not only imitate precious ones: rubies, emeralds, sapphires and even semi-precious ones - malachite, but also reproduce their natural shape.
Stained glass and mosaic patterns will look beautiful on nails. It is not possible to apply such a pattern right away; it requires skill. The black and red design looks very bright and eccentric.

