Reads: 1,143
Reading time: 5 min.
no comments
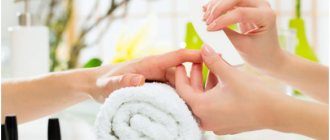
Manicure is an important component of a woman’s image, so girls pay close attention to the design of their nails. Many representatives of the fair sex prefer the classics in the form of a French jacket or a plain coat, but most fashionistas still like to experiment.
New products regularly appear in the field of nail design, one of them is fimo sticks. You can use fimo for nail design at home, and real needlewomen can even make their own sticks from polymer clay.
What it is
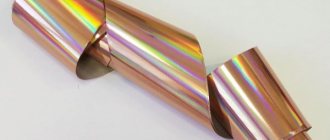
Fimo for nails is polymer clay made in the shape of a small stick. It reaches 5-7 centimeters in length and has a diameter of about 5 mm. The material has high plastic properties; it quickly hardens in air and during polymerization in a lamp.
There is a special design inside the tube. In order to create an unusual design, you need to thinly cut the clay and attach the resulting small pieces to your nails. Fimo clay simplifies the creation of a manicure, because you don’t have to sit and draw small details on the nail plate for hours. Just cut off a piece and the design is ready. Juicy fruits and berries are made so realistically that you want to try them all.
If you don’t want to do the cutting yourself, then the manufacturers have thought of everything for their customers. For your convenience, the straws are sold immediately pre-packaged, cut into small pieces. You can buy fimo sets at a cosmetic store or order online. The price for one stick starts from 10 rubles.
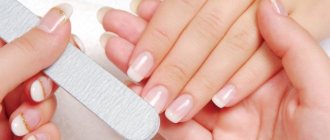
There is a special knife for cutting fimo polymer clay. It is a small sharp blade with a handle. Its cost starts from 50 rubles. It will be quite difficult for beginners to learn how to cut thin slices for the first time. Remember that the stick should be cut into pieces that are almost translucent. They should lie on the nails in a thin layer and not weigh down the coating.
From one block 5-7 cm long, approximately 150-180 fimo pieces are obtained.
Varieties
There are a huge number of images inside fimo sausages. We have collected the best and most popular options for you:
| Varieties | Application |
| fruits | Most often you can find tubes with the following fruits:
All these and other fimo can be used in summer nail design. Pieces of ripe fruit will add freshness to your manicure. |
| berries | Strawberries, raspberries, watermelon, currants, blackberries. It is recommended to combine juicy berries with bright tropical fruits. |
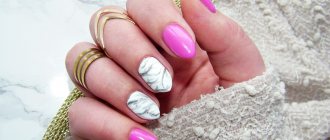
| flowers and leaves | A variety of wildflower buds, roses, daisies, hydrangeas and graceful leaves will help bring tenderness to the design. You can decorate your entire hand or just 1-2 fingers with floral accents. |
| animals and emoticons | All kinds of chickens, ducklings, cats, dogs, bear cubs, fawns and hares are more suitable for manicure for girls. You can add such unusual elements to the coating when creating a New Year's manicure. |
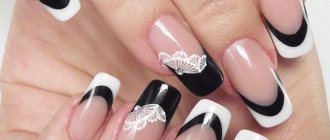
| insects | Cute butterflies, ladybugs or dragonflies that land on your nails look elegant in a summer manicure. |
| figurines | Girls love to decorate their fingers with hearts when creating a manicure for February 14th. You can glue crowns, stars and any shapes onto your nails to create a geometric manicure. |
Features of application
Some tips will help you create a unique and perfect coating:
- for multi-colored Fimo sausages, transparency is needed; a transparent gel is best for design, but acrylic should be abandoned;
- Fimo can be placed in a chaotic order, close to each other, or layered one on top of the other, filling the free edge or the entire nail;
- the figures can be cut in half or into quarters;
- the best substrates for fimo are white and transparent;
- in the design it is allowed to use colored substrates of a contrasting shade;
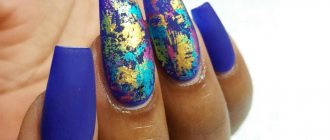
- You can diversify the design with fimo with all kinds of patterns, glitter and other decorative elements.
With regular varnishes
As in the previous case, your nails need to be prepared.
Apply 1 layer of any base coat to strengthen your nails. While the varnish is still wet and has not yet dried, we make fimo sticks. Our base coat will serve as both a healer for lifeless and peeling nails, and a glue that will retain its beauty.
Apply any top coat over the application to extend the manicure for up to 10 days. It will keep your manicure for almost 2 weeks and give it a glossy shine.
The use of rhinestones and confetti is optional.
Basic technique for working with fimo
Working with fimo for nails is quite simple. After all, these are the most unpretentious decorations for manicure that can be. It is only important to know some nuances and remember the most important rules. You can get acquainted with them and other techniques in this section.
How to use
You need to get the hang of cutting a tube of polymer clay. It is important that all the pieces are thin, about 1-2 mm. If you cut it too thick, such bars can injure the skin and significantly make the design heavier. If you have a small sausage lying around somewhere and you don’t know how to use fimo for nail design, then try experimenting. You can create a floral arrangement on your nails and create a delicate and feminine design. Treat your kids to a butterfly manicure or create a tropical fruit design for yourself.
How to attach
There are several ways to glue fimo. They are suitable for both natural nails and designs with regular polish or gel polish, as well as for extended nails.
- There is a special glue for polymer clay that can be used to fix the pieces. But the price is quite expensive and starts from 250 rubles.
- Expensive glue can be replaced with analogues, use glue for rhinestones or for tips.
- If you use regular varnish to create the coating, then fimo can be fixed with a transparent varnish or topcoat, pressing it tightly to the nail plate.
- If your manicure is done using gel polish, then you should use something thick with a sticky layer. Extension gel, a drop of acrylic or top coat will do. But in this case, the layer must be very thin so that the fimo does not drown in the thick liquid.
- If you choose the option with extended nails, then fimo are easily attached to transparent gel or acrylic, and then dried in a lamp.
Manicure ideas using fimo
Fimo decor is varied, but figures of fruits, berries and flowers predominate. This manicure is especially relevant in the summer. Moreover, you can create it with notes of femininity or carefree pranks.
You can place fimo fruits only on the tips of your nails, and then you will get a kind of French manicure. Or paint an unusual striped jacket in bright colors and add a little fruity juiciness.
Some people prefer to leave the French area free and place fimo decor higher, almost on the entire remaining surface of the nail. Or make a smooth transition from the French area towards the cuticle.
By placing the figures at a considerable distance from each other, you can fill the free space with other decorative elements. Rhinestones, sparkles or colored sand are best suited here. By the way, when using colored sand, you can powder the fimo with it and make a smooth transition to the rest of the nail.
In general, there are a lot of possibilities here, you can “get creative” to your heart’s content.
Design ideas with fimo
Fimo for nails will help diversify your design. Feel free to experiment with small stripes, circles and figures. All plates can be easily combined with each other and create an unusual composition on the nails.
Fruit glade
You can attach clay to the natural nail plate using the most ordinary varnish without using special glue. But it may take a little longer.
What you will need:
- clear nail polish;
- fimo;
- top
How to make nail designs with fimo:
- Apply clear varnish point by point to the natural nail where the pieces will be attached.
- Carefully place them in that place and press a little with your fingers.
- Wait until the regular varnish dries.
- Place other pieces on your nails.
- Apply clear varnish, add glitter if desired.
- Secure the design with a top.
You can see how to create a fresh design with fimo for nails in the video.
Stained glass design
Slices of polymer clay are real helpers in aquarium design. They go well with volumetric equipment and other shiny elements. In this design, the clay is attached to a clear gel.
What you will need:
- manicure files;
- degreaser;
- buff;
- forms;
- primer;
- gel base;
- transparent gel;
- camouflage gel;
- brush for laying out gel;
- liquid for removing sticky layer;
- lint-free wipes;
- fimo;
- orange stick or toothpick;
- glitter, mica, broken glass;
- finish (can be replaced with clear varnish).
How to do:
- Prepare your nails for work: degrease the nail, remove excess length and remove gloss.
- Place the marked forms on your nails and secure them firmly to your fingers.
- Apply primer and coat your nails with a thin layer of base.
- Make a backing of the free edge using a brush from a thin layer of gel. Shape the length and shape of the nail.
- Carefully remove the form and fill the stressed area with a thin layer of camouflage gel to give the nail a natural color.
- Place small pieces of mica, glitter or “shards” of broken glass on your nails.
- Place fimo pieces on your nails using a toothpick.
- Apply a small layer of gel to fix the fimo on your nails.
- Send the design to cure in a lamp.
- If desired, add a few more decorative embellishments to the design.
- After drying, cover the design with a finishing topcoat.
- Dry all layers in a lamp and remove the sticky layer.
- File your nails and give them a beautiful shape.
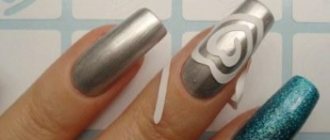
Fimo for nails look especially elegant using the aquarium design technique, where only the free edge is filled, an example can be seen in the photo.
What tools are needed for design using fimo?
To begin with, you should acquire the necessary equipment. For this manicure design you will need:
- Special blade for cutting polymer sticks.
- Special glue for fixing the record on the jacket. It will ensure long-term use of the manicure.
- Dots are devices for easy application. They come in plastic, wood and iron.
- Orange sticks are an item for decorating and cleansing and for removing and pushing back cuticles. When decorating, they are simply irreplaceable. Orange sticks are convenient for applying and gluing elements onto the jacket.
- Fixer is a product for covering the nail after fixing the elements. It will add shine to the nail and protect the manicure from external influences.
Not a single manicurist can do without these devices when designing.
Both masters and amateurs can find all these devices, including polymer clay sticks, in any manicure store.
We make fimo ourselves
Did you know that you can make fimo for nails yourself at home? If you didn’t find clay in your store or there wasn’t the option you needed, then you can make the sausage yourself, coloring it as you wish.
Strawberry nail sausage
A juicy and ripe polymer clay tube can be used not only in nail art, but also for various decorations. You can choose the size yourself, starting from the smallest. This recipe yields an average of about 10 sausages, which will last you a long time. Polymer clay can be found in office supplies. Its cost starts from 100 rubles.
What you will need:
- red polymer clay;
- white polymer clay;
- knife;
- rolling pin
How to make fimo:
- Roll out 2 balls of clay and make 2 small right triangles with an acute angle of 30 degrees.
- Connect the triangles to form a rectangle.
- Roll out with a rolling pin and cut it into several strips of the same width.
- Roll each strip into a ball.
- Knead each ball thoroughly until the color is uniform. The result should be a color palette from bright red to white and pink.
- Roll the strips into sausages and place them together next to each other.
- Roll out the sausages with a rolling pin to create a smooth color transition from light to dark. Cut the layer clearly according to color.
- Take a small piece and roll it into a white cylinder about 1 cm high.
- Wrap the cylinder with the prepared strips. Each strip should be enough for a full turn. If it’s not enough, you can tighten it up.
- Form a triangle, cut it on the sides and place a thin layer of white plate there, which will help imitate the streaks of strawberries.
- Press down the clay and wrap the resulting berry in a red layer of clay.
- Press the sausage until you get the desired volume. If the sausage is too long, then it needs to be cut off by 5-7 cm.
What is fimo
The word “fimo” itself is the name of the company that was the first to produce a similar product. Now fimo is a common noun; it is one of the types of decorative elements used in manicure. A fimo stick is made of polymer clay, the diameter of the stick is about half a centimeter.
To use a stick as a design element, you need to cut it into thin slices. When making sticks, clay of different shades is used. By folding the material in a special way, the master shapes the stick so that when cut, drawings are obtained.
Thin fimo circles are subsequently glued to the nail plate in the same way as rhinestones, pieces of foil and other decorative elements. If you do not have a special knife at your disposal or are not sure that you can cut the stick thinly enough, look for ready-made circles on sale, that is, already cut fimo.
The second option for using with conventional varnishes
The first layer is any colored, but matte varnish. He can no longer serve us as both a healer and glue, he is just a colored background. You need to purchase additional glue for attaching rhinestones or false nails. We will put our fimo things on it.
On top of the application is a glossy topcoat.
Third way
. The method is suitable for lovers of false nails. To do this, unpack the box of nails, try them on, and leave the ones you will use. Now, using tweezers, glue, fimo sticks, varnishes, gels, acrylics, we make the applique and let it dry. Glue the finished nails to your nails.