Features of the material
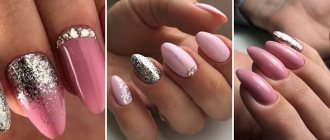
Velvet sand gradient
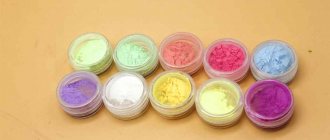
Velvet sand is a medium to coarse powder.
Compared to acrylic powder, sand consists of larger fractions. It looks like dense powder, semolina or very fine sugar.
Where can a novice craftsman get sand powder? The technology is very popular, and the material can be purchased at any professional store online and offline. If the material is not at hand, it can be replaced with acrylic powder or scrapbooking powder.
Which velvet sand is better? Experienced craftsmen recommend using medium-grain material and light shades for decoration. Transparent white is best. This is a universal solution, since velvet sand, when covered, takes on the shade of the colored base on which it is poured.
There are several varieties of velvet sand:
- White translucent . Takes on the shade of the coating it is applied to.
- Colored . Can replace gel polish and is applied immediately to the base.
- With sparkles . Used for both fine decoration and full nail coverage.
The velvety texture does not need to be covered with a top or finishing layer. Sand dusting can be used to strengthen nail plates, just like acrylic powder. It reinforces and creates a durable layer.
The coating lasts 10-21 days, just like gel polish. The texture does not crumble and does not form bald spots during wear.
Hands with this design can be actively washed with soap and do any housework as usual. The coating does not react to alcohol solvents.
To remove a design with a velor texture, you will need 15 minutes, foil and a gel polish remover on which the material is attached.
What is the difference between acrylic powder and velvet sand?
Both of these materials are polymer powder. Only their composition is different. In addition to acrylic powder of a special coarser grind, the composition includes microparticles and fibers that add velvety to the material.
Although the products are identical, acrylic powder lasts longer than sand, but does not look as voluminous on the nails. But judging by the reviews of the girls, this manicure solution is very durable and convenient in everyday life.
To create a sand manicure, you can use acrylic powder. To get a sparkling design, you can add glitter of different sizes to it.
The velvet product itself is a patented material and its cost is significantly higher than that of acrylic powder. Each girl decides for herself which product to choose from these two.
How to apply on gel polish
Sand can be poured onto regular varnish, gel paint, gel polish or topcoat as a base. Also, for the base under it, you can take the UV gel of the finishing layer from the three-component gel system for extensions.
Let's look at the procedure for applying velvet sand to gel polish. It consists of the following stages:
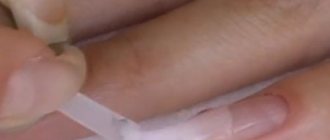
- A manicure is performed using the desired technique, the nails are shaped, and the cuticles are processed.
- Nails need to be buffed to remove their natural shine and improve adhesion to the decorative coating.
- Degrease nails and remove dust.
- Cover with gel polish base.
- We paint our nails in two layers of gel polish or gel paint, dry each layer in a lamp for the recommended time.
- Apply topcoat or topcoat to the nail.
- We don’t dry it in a lamp, but immediately pour sand onto the sticky layer. It is necessary to pour from 5 to 10 layers so that it is well saturated.
- You need to wait a minute for the material to “settle” on the nail in an even, dense layer.
- Dry the layer in a lamp. It is recommended to double the drying time from the usual so that the material lasts well from 10 to 21 days.
- Brush off any remaining sprinkles with a soft bristle brush or broom.
Some craftsmen apply sand powder immediately to the second layer of gel polish, without topcoat, and dry it in a lamp for double the time. This method also provides reliable coverage, but only if the nail plate is completely covered with sandy decor.
It is convenient to pour the sprinkles onto the nail over a jar with a wide edge or over a sheet of foil or paper. Scattered residues can be returned to the container with the material and used next time.
Sand can be applied with a fan brush, a pusher, or even an inverted training tip on a holder.
You can mix sand with glitter of different shades yourself, creating a new color of the desired intensity.
Rubbing: what it is, how to use it and all application methods with step-by-step instructions
Velvet sand - how to use the material
Sand manicure ideas
Today, nail design with sand is certainly relevant. Therefore, you should clearly familiarize yourself with the trendy options for volumetric manicure, so that you can decorate your hands in a fashionable and modern way.
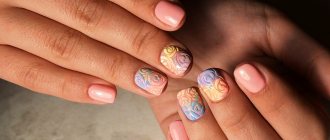
French with sand
Even a classic white jacket can be made fashionable and stylish if it is diluted with a matching velvet covering. For example, one nail plate can be completely sprinkled, and on the other a voluminous floral motif can be made, as in the photo below:
This nail design, like colored French sand, looks gentle and unusual. Some craftsmen succinctly add a floral motif, rhinestones or sparkles.
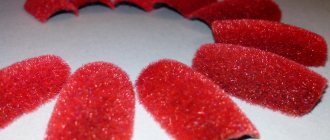
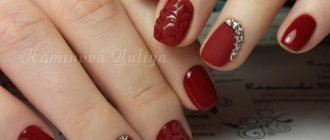
Red nails with sprinkles
It is possible to dampen the aggressiveness of a red manicure using sprinkles. The velvet coating is applied either to all nail plates, or only to a few. This scarlet design looks feminine, gentle and elegant.
Matte manicure with sand
The matte finish can be elegantly decorated with sprinkles. In this case, several techniques are used: covering the nail completely, applying three-dimensional patterns and geometric shapes. With proper alternation, this combined approach allows you to create a harmonious manicure.
Manicure with colored sand
Sand manicure can be done in any color scheme. And some girls cover each nail plate with different shades of velvet. This design looks bright, stylish and playful.
Manicure with golden sand
To add luxury, craftsmen use voluminous gold plating. To prevent glitter from being too noticeable to others, sand for nails is combined with calm shades. But for a festive manicure, you can completely cover your nail plates with gold. This simple solution will suit any evening outfit.
Manicure with sand and rhinestones
A festive manicure with sprinkles on your nails can be decorated with rhinestones. But you should not place them on the surface in large quantities: it is enough to highlight the hole with pebbles in an arc or triangle. This option will be very harmonious.
Velvet varnish application technology
Sand varnish
An alternative to velvet sand is a new product, velvet nail polish.
This is a type of regular varnish with the addition of tiny acrylic powder, creating the effect of suede or light grain.
With its help, even beginners can quickly create a uniform velor coating.
The varnish dries in air in 2-3 minutes. It must be applied in two layers and covered with the second only after the first has completely dried, so that there are no grooves or screeds. You can use a fixative, but then the suede texture will disappear, leaving only a matte effect. Velvet varnish can be found from the following manufacturers: Dance Legend, OPI, ZOYA, NUBAR. The coating lasts 2-4 days, and then chips and comes off like regular varnish.
The best polishes for sugar manicure
To perform a sugar manicure, you need to purchase only high-quality products so as not to damage the nail and admire the result for a long time.
Jerden "Color Sugar"
The most popular remedy for obtaining the effect of granulated sugar.
Its features:
- many shades;
- drying the coating will take 3-5 minutes;
- the ability to decorate a chip;
- durability.
When using this varnish, the coating lasts for more than a month.
Dance Legend "Sahara Crystal"
A professional series of varnishes, which is distinguished by a good choice of colors and durability.
Among the features is that it is necessary to treat the nail plate with a protective layer before applying a decorative coating.
Golden Rose "Holiday"
A budget-friendly product that can be used to frequently change the color of your sugar manicure.
The palette is varied, and the quality of the material is not inferior to expensive analogues. The product has a more liquid structure, which is why it is necessary to apply the varnish in several layers.
Powder top, cashmere-effect finish for gel polish
The effect of a velor, velvety surface can also be achieved using a matte top with the declared texture. It does not contain a sticky layer; it is applied, like a regular top coat, on top of two layers of gel polish, and dried in a lamp according to the recommended time.
The top with a cashmere effect has a dense texture and remains flexible after polymerization, making the nails even more durable and resistant to chipping and damage.
Jelly beans
Sugar manicure with gel polish is very versatile and suitable for any season. During the cold season, on the eve of the New Year holidays, your nails can be decorated with multi-colored confetti. For spring and summer designs, choosing light yoghurt shades, curly melange sparkles will flaunt on your nails, reminiscent of sweet ice cream. In any weather, the manicure will look stylish and gentle.
Melange is a special material with a multi-color effect of small particles that helps create a sweet design.
- Melange can be poured onto a colored base or a regular base.
- The top is applied in a thick layer so that the glitter adheres well.
- The glitter should cover the nail on all sides. You need to wait a minute so that they are well fixed in the top.
- Do not forget to organize the melange at the end, removing excess and protruding pieces so that it does not catch hair and clothes.
- You need to dry it 2 times longer than usual. Afterwards, brush off excess glitter with a fan brush.
You can also rub in melange and get a completely different effect. With this design, your nails will be smooth and will not cling to clothes.
Velvet Sand Nail Design Ideas
The most popular design directions with this texture are:
- Full Coverage
- Velvet sand painting
- Small drawings
- Ombre, gradient
- Wedding manicure
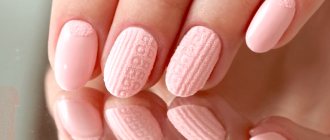
- Sweater design
- French
When applying any designs under the topping, the nail is first sealed with topcoat and the dispersion layer is removed.
Red manicure with design 2022: current nail design ideas
To complement the red color, you can choose the following options:
- rhinestones, stones, broths - a plain red manicure in combination with rhinestones looks mega-stylish and noble. This nail design is considered universal.
- geometry - such a restrained color as red and its many shades need strict and laconic patterns. Geometry in white, black and other shades will be the best complement to scarlet, burgundy, and cherry manicure.
- the theme of love - hearts, kisses, balloons, declarations of love - all this can show off on a red background
- glitter – silver glitter is preferable for everyday looks, gold glitter for special occasions
- floristry - a chic design with roses, peonies, dark twigs, etc. is done in red.
- lace - the pattern undoubtedly looks amazing, however, in recent seasons it is being performed less and less by fashionistas. There may be a slight lace pattern on the nails, only as a complement to the main design.
Full Coverage
Can be performed on one nail or on all fingers. Allows you to strengthen the nail plates, which is important for square shapes with increased load on the corners. Sand is poured onto regular varnish, gel polish or gel paint after coating with topcoat. The transparent material takes on the same shade as the colored background underneath. Please note that the bright colors of a manicure with a velvety surface do fade over time. By the end of the first week, the color may lose a little brightness, but the coating will remain durable.
How to remove nail polish
Remember two rules:
- Do not hurry!
- Don't rub your nail when trying to remove sand polish! You will damage the nail plate.
So:
- Soak swabs or cotton pads in nail polish remover;
- Wrap each nail with them;
- Wait at least 3 minutes;
- Gently wipe your nails without pressing. If the coating is not completely removed, wet the new discs and leave for a couple more minutes;
- Apply a nourishing cream or product to protect the nail plate.
Velvet sand painting
The technique allows you to combine several decoration options in one composition. Painting is done with gel paint, top coat or gel polish. The technology is as follows:
- After applying the main color of the gel polish, seal it with a top coat.
- Remove the dispersion layer.
- Using gel paint, gel polish of the selected shade, or just a transparent top coat, we draw monograms using a thin brush.
- Sprinkle the drawing with velvet sand.
- Dry it in the lamp for double the time.
- Brush off any remaining sprinkles with a brush.
The monograms of the painting must contain a sufficient amount of liquid and be “fat” in order to “take” the sprinkles. Otherwise, the drawing will have bald spots and will be uneven.
Review of manufacturers
Artex
- shimmering powder "Glitter" . Finely ground with added glitter. The main color is white. The manufacturer recommends drying the nails again after brushing off the excess coating;
- shimmering powder "stardust" . Fine powder with glitter. Glitter creates a rich shimmer effect and can be used as part of decoration or as an independent nail coating.
Patrisa Nail
- semolina for design No. M. Multi-colored, coarsely ground, with grains of sand in yellow, blue, green and pink. Due to the size of the particles, it is suitable for creating “candied nails”;
- semolina for design No. M Grains of sand are predominantly yellow, interspersed with pink, blue and green.
IRISK
Decor “Velvet Sand”:
- №10. Small, light purple in color. Suitable for creating a velvety surface without pronounced grains;
- №11. Rich crimson color.
InGarden
Velvet sand:
- white . Used to create a three-dimensional design and takes on the tone of gel polish or gel paint;
- white with sparkles . Adds an unobtrusive shine to your manicure.
UNO, Velvet sand with shimmer
Coarse sprinkles with microscopic glitter. Due to the presence of shiny particles, after drying the sand creates a holographic effect, unobtrusively playing in the light. The manufacturer offers several colors - pink, lilac, lime.
Sweater design
The trendy design of the autumn-winter season would not be so impressive without its voluminous velor texture. It can also be done with acrylic powder or flock. The design is applied with paint or gel polish onto the top without a dispersion layer, sprinkled with powder material, and then dried in a lamp. With sprinkles, the design becomes durable and expressive. You can choose different braid patterns for sweater designs. Read more about knitted design technology.
Sugar candies
Nowadays, many products have appeared on the nail design market, thanks to which you can achieve the effect of sugar on your nails. You can choose any colors: plain, neon or melange.
You can create a sweet surface using acrylic powder with small glitter.
- Each nail needs to be covered with a base, two layers of colored varnish and polymerized in a lamp.
- Apply a thin layer of top.
- Immediately, gently sprinkle acrylic dust using a pusher over the entire surface of the nail.
- Dry in a lamp and remove all excess with a brush.
To prevent excess powder from spilling, it is recommended to hold the nail over the jar and sprinkle glitter on top.
Technique for performing manicure with granulated sugar.
Ombre
An effective gradient with sand sprinkles is applied to a ready-made gradient with gel polish. The varnish transfers its color, and a smooth, beautiful transition is obtained. In detail about the technique of performing a gradient.
The second option is to use two or three shades of sprinkles in a horizontal or vertical transition. Due to the fine-grained texture of the material, the gradient is smooth and delicate.
How to choose the right varnish yourself
An unsuccessful varnish can highlight the poor condition of the skin on your hands, its dryness or a large number of wrinkles. The color of the skin may not match the shade of the nail covering and worsen the overall perception. In order for a manicure to look great, you need to adhere to certain rules when choosing it:
- Consider your color type. Golden skin and olive-colored veins slightly visible through it are best combined with orange, pink-coral, fashionable shades of burgundy, marsala and sangria, dark green, and nude.
- Light pink skin and bluish veins are complemented by cool-toned varnishes that will make your hands even whiter and softer. Gray, blue, metallic and berry colors are the best choice in this case.
- For skin of a neutral shade, on which it is difficult to distinguish even small wreaths, you can use polishes of any color.
These principles are also true for lipsticks, because quite often women very scrupulously try to choose their shades so that they completely match the color of the manicure. Sugar gel polishes are produced by many brands. They vary in price and quality. In the Jerden Color Sugar series, the color palette consists of 15 colors, which are quite unusual. They dry quickly, and with proper hand care they can remain on the nails for a long time. Dans Legend offered its fans the Sahara Cristal series. The colors of the polishes are quite interesting, but in the bottles they are slightly different from the colors and shades that are obtained when applied to the nails. This group requires a quality base or a good clear coat. Holiday from Golden Rose is, first of all, an inexpensive, budget option that allows you to get a high-quality manicure with a granulated sugar effect for a low price. The result of its use will please even the most fastidious beauties, whose nails will not only be original, but will also cause sincere admiration from others.
Wedding manicure
Sand with mirror or rainbow sand sparkles is indispensable in a wedding manicure. It adds a subtle shine to the base design. The classic white color acquires volume and a fascinating texture. This manicure is worthy of being included in a wedding album photo.
Wedding manicure ideas - from classic to avant-garde
Sand effect varnish
“Sugar manicure” polish has become a real find for lovers of home design. It contains small silicone particles of different sizes, which create the roughness effect. For a subtle shimmer, small sparkles are added to the varnish.
Using this varnish is as easy and simple as using a regular glossy finish. This varnish should not be applied without a base; it always protects the nail very well from chemical exposure. Before using sugar varnish, you should shake it very well so that all the grains of sand are mixed.
To make the design look very bright and rich, apply the varnish in two layers, and to smooth out the roughness of the surface, cover the manicure with a fixing varnish.
French
The powder texture is applied only to the tips of the nails, painted with a French line. This allows you to further strengthen the nails in this area. When using colored or shiny sand, the design becomes even more original.
Design options for a French jacket - a selection of ideas
Velvet sand for nails does not require special skills in mastering the technology and provides a wide field for experimentation both for masters and when performed at home. At the start, purchase a translucent material to strengthen your skills in working with texture.
What is sand for nails called?
Sand for nails is called velvet, since the coating with this material is fleecy and feels like the fabric of the same name. The idea of creation belongs to Ekaterina Miroshnichenko, who proposed grinding acrylic to very small particles. Therefore, the main component is specially ground powder, and it is complemented by viscose fibers. The resulting powder visually resembles shiny velvet dust.
Depending on the size of the granules, the powder is divided into:
- flock is the smallest particles;
- medium size - most often used by masters in nail art;
- large in the form of multifaceted particles, used to decorate holiday manicures.
Pros and cons of plush nails
Let's take a look at the positive and negative qualities of velvet nail coating. Once you know these aspects, you will clearly decide whether to resort to this type of manicure.
pros
- Velor manicure is ideal for those occasions when you want to be the center of attention.
- The procedure for applying a velvet coating only takes half an hour and does not require special skills.
- If you did velvet nails not on your own, but in a salon, then this coating will last as long as 20 days, without requiring special attention and care.
- This coating has no analogues; it is unique and stylish.
- Small pieces of flock can not only create a seamless coating, but also help create an interesting pattern even with small details.
Minuses
- The considerable cost of the procedure when going to the salon and materials for use at home. This is explained by the fact that this product is new on the nail market.
- If you created velvet nails at home, then be prepared for the fact that your suede coating will only last a couple of days.
Performing a manicure at home
There are several techniques for performing such a manicure; it is worth familiarizing yourself with them all first, so that you can then choose the one that suits you best. The first method consists of the following algorithm of actions.
- Having done the simplest trimmed manicure, you should steam your hands in a herbal bath, push back and trim the cuticle, give your nails the desired shape and thoroughly dry each nail with a towel.
- Time for a protective base. When the base has completely dried, a little varnish is applied to the nail (or UV gel if the manicure is performed using a lamp). Preference is given to soft shades: cream, pink, sand, but sometimes they choose something completely opposite.
- Before the varnish dries, you need to carefully cover it with a thin layer of granulated sugar, waiting until it sets on the surface.
- Using a special brush, brush off excess particles; if necessary, you can also use this brush to form a pattern.
The second method is suitable when using gel polish and a special ultraviolet lamp.
- Paint your nails with the desired color and draw the chosen pattern. In the future it will be made sand.
- Carefully, sprinkle sand on the ornament in a thin stream using a bamboo stick, and correct any grains that do not fall on the intended parts.
- Then the nails are dried in a lamp, paying special attention to the thumbs, where the gel usually takes the longest to dry.
- Complete the manicure with a few touches of a professional topcoat to seal in any small particles.
If the classic version of sugar manicure already seems boring, manicurists suggest trying the following several options.
- It is proposed to fix the grains of sand not over the entire surface of the nail, but to highlight only the hole or apply it to the tip. There is no need to be afraid of additional decorations when choosing a manicure design.
- There is no need to save material, as the result will clearly not please you. When choosing a velvet manicure, it is worth remembering that it is better not to skimp on grains of sand in order to get a coating that will be as close as possible to the desired one. There is no need to be afraid that your fingers will get dirty - they instantly fall off from the skin of your hands.
- You can also experiment with “sugar” patterns and monograms made in several color options.
Ardent opponents of nail gels, who believe that they spoil the nail structure, will be pleased with a nail polish called “sand”. It is ideal for creating a “sugar manicure”, as it contains small silicone particles of various sizes. Due to them, a “sand effect” is created on the surface of the nail. Often the composition contains sparkles, making the manicure festive and shining.
Before using this varnish, you need to shake the bottle well so that the particles then lie evenly on the nail. For a more textured and rich manicure, apply the polish in two layers. And in order to smooth the surface, if it seems excessively rough, the nails can be coated with a finishing fixer, thereby also strengthening all the necessary shiny elements in their places.
How to apply sand varnish?
Sugar manicure is no different from the simplest glossy manicure. To create it you will need a base varnish and sand or sugar varnish itself.
1. Apply base coat to your nails.
2. Paint your nails with sugar polish, after shaking the bottle. The grains of sand should be distributed throughout the varnish. Sometimes even one layer is enough for a uniform and rich shade. Two coats will give your sandy nail polish even more richness and texture. It is not necessary to use a fixative varnish, but it will help to slightly smooth out the bumpiness of the manicure.
Sand varnish dries quickly and lasts quite a long time. As the layer dries, the grains of sand appear.
Velvet manicure options
There are a huge number of options for decorating nails with velvet sand, for example:
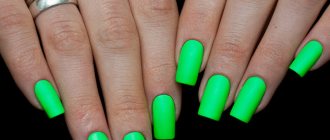
Winter patterns - will help attract the attention of others and delight you with bright colors; Sand together with red varnish - even the most modest girl can become a cancer beauty. This manicure uses red gel polish, and by decorating your nails with sand, the manicure will become unusually bright;
Sand with colored varnish
Do you like to attract people's attention and please yourself with bright colors? Then this manicure option is definitely for you. Using colored varnish in combination with sand, it will turn out very beautiful;
Manicure for a wedding - masters often receive requests for drawings of flowers and various patterns (using white varnish). All this can be sprinkled with sand, thereby easily emphasizing some patterns.
There is an opinion that such a manicure is completely inconvenient in everyday life, but believe me, this is not the case. And if you correctly follow all the step-by-step application steps, it will last for a very long time.
A stylish, stunning designer manicure of your nails with sand will delight you and those around you.
You can remove his sand manicure in the same way as any other - with a regular liquid that removes gel polish.
Good luck and beauty to you, dear women!
Preparing nails and applying “Velvet” decor. Watch video instructions:
Learn how to properly do “Velvet Design” nails from the following video:
Secrets and tips for the perfect “Velvet” manicure. Find out from this useful video: