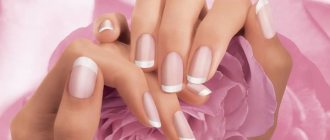
Features of the technology
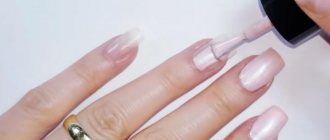
Tip extensions on natural nails are a completely safe and painless procedure. Anyone can do it on their own, just knowing some rules and having instructions in front of you, which you can find below.
To extend a nail using tips you don’t need many tools, and the first time will only take a couple of hours. But the result obtained with acrylic or gel extensions with tips will exceed all positive expectations!
@viki_nail_chelyabin
@super_nails_mk
@alina_rosenails
@belotskaya_nail
@luyba1210
@tatyana_bogacheva_nails
Also, for nail extensions on tips, special glue can be used, and the products themselves are disposable.
This technique is used when extensions on natural plates using forms are impossible or very problematic.
This happens in such cases:
- severely bitten nails, without a free edge;
- breaking off the natural tips of the nails;
- uncomfortable sides on the nail plates.
@zuhra_nail_beauty
@m_a_n_i_c_u_r_e
@nails.ageeva
@reneo.manicure
What are tips
Tips are a synthetic material shaped like a nail. It is elastic, wears for a long time, lengthens the nail plate. The shape and length are selected individually.
The procedure for gluing tips takes much less time than nail extensions and costs much less. Therefore, many women prefer this procedure, which can still be performed independently at home.
This process also has a number of advantages:
- The nail does not become heavier.
- With a short length of natural coating, you can achieve the desired result.
- When used correctly, it does not harm its own coatings.
- Hides imperfections of the nail surfaces.
- No special work skills required.
- Long-lasting wear that does not require special care.
- The varnish base applies easily.
- Can be removed at home.
There are also negative aspects of this procedure that need to be studied before gluing false nails:
- The material is not breathable, so long wearing is not allowed. It is recommended to rest your fingers to avoid thinning, brittleness and yellowing of your nails.
- If you choose bad glue, the pad can come off at any time, which will not be very pleasant in the midst of a party.
- Also, many people do not like the material because of the thickened end.
- If the shape does not fit, the fitting process will take some time.
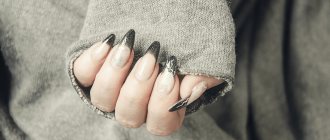
Types of tips and which ones to choose
Types of tips are divided into several categories:
- By appointment. It all depends on what kind of manicure you are going to do. For example, for a classic French style, thicker tips are chosen; for building up and covering the plates with colored gel, transparent tips are chosen; if you are going to decorate the tips only with a design, you choose colored ones or use ready-made solutions that just need to be covered with clear varnish.
- According to the form. The difference in tip shape is important, and the choice depends on your preferences and the individual characteristics of natural marigolds. The classic version of tips is most similar in appearance to natural nails. Other tips for modeling nail plates are non-contact, tapered, “American” and for almond-shaped nails.
Tips of different shapes
- By color. The color range of products is very wide. There are transparent options, nude, colored - matte, glossy, with a pattern, with a design, French tips to create a smile.
Multi-colored tips for extensions
- Based on manufacturing materials. In production, when producing tips, three materials are usually used. These are polyflex, ABS plastic and nylon.
Tips made of different materials
When choosing and purchasing tips, pay attention to the following points and details:
- Products must be intact, without nicks, chips, rough surfaces or scratches.
- Consider what shape and thickness the blanks should be so that the design on artificial nails looks natural.
- Choose high-quality tips so that they are strong. Even though the purchase will cost you a little more, the item will be much more reliable.
- When choosing template sizes, try to guess the size. It’s okay if they are a little larger than the nail, so the shape will fit better on the manicure.
- If you are going to do your own manicure with tips all the time, buy sets that will definitely have templates that are ideal for you.
@rimma.nails.vbg
@tvoy_maniikur
@jusi_nailart
The most common types of tips:
Tips-tips
These are disposable products that are attached to the edge of a natural nail using a special glue that comes with them.
Most often, one set of such templates includes products of different sizes, so that you can choose the shape individually for your manicure.
The technology of extensions using tip tips is very simple, the template does not reach the cuticle area, so you do not have to struggle with glue for a long time, trying to adapt the tips to the cuticle.
Tips for extensions
Upper forms
These are special reusable forms of different sizes. The material is laid out inside the product, pressed against the nail, under the cuticle, and dried in a lamp. Holding the tips of the plates, the tips are removed and the nails are given the correct shape with a file.
Liquid tips
These forms are also reusable, but unlike the upper forms, here you give the future nails an outline, a base layer. Then, after drying in a lamp, the liquid tip is removed and the nail is laid out in layers of gel, drying each layer.
Classic tips
These are disposable products on which glue is applied. It is easiest to grow your nails with classic tips; this action does not require you to have any specific skills in nail design. You just need to select the tips of the correct shape, apply glue and firmly fix the shape on the nails. The excess length is cut off with a regular nail file. To apply the glue, use the brush that comes with the kit.
Types of gels for nail extensions
Before considering the types of gels, we note that the extension can be single-phase, two-phase or three-phase.
- Single-phase thin coating. Contains three layers and has a liquid consistency. Great for beginners.
- Three-phase material. On the contrary, it is used by professionals. Includes base, sculpting and protective layers.
- Camouflage polymer. Used to hide imperfections of the nail plate.
- Gel chewing gum. Similar to plasticine, it is used to lengthen its own plate, as well as to create a colored stained glass manicure.
The result depends on the quality of the material, so approach this issue responsibly. The choice of extension gels is very wide.
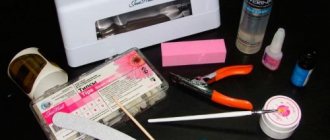
Required tools and materials
Of course, for nail extensions using tips, you will need the tips themselves that you choose.
You will also need:
- lamp for drying nails;
- glue for gluing tips;
- a manicure machine or several nail files with different abrasives;
- tip cutter, which removes the excess length of the tip;
- buff for filing artificial ends;
- pusher for moving away contact areas (cuticles and side ridges);
- brush for applying gel (acrylic, biogel, etc.);
- lint-free wipes that will not leave small lint on artificial plates;
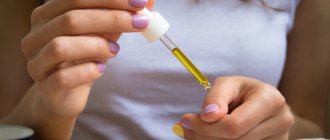
- degreasing liquid;
- acidic or acid-free primer;
- base, to create durable nails;
- a topcoat used on artificial plates to give a shine or matte finish.
Before applying the top, you can use a colored gel coating, so that later you can proudly show off your perfect manicure, saying, “Wow, how good I am at doing my own nails!”
Tools for nail extension with tips
@kashlanskaya_nail
@nail.art.studio_kovrov
How to quickly fill a chamomile palette
The most common shape for nail polish samples is chamomile. Beginners sometimes have difficulty applying gel to it. But there is an easy way to apply gel polish to a chamomile palette.
Due to the fact that this palette is round, you will have to apply the gel polish in parts. You can paint one “petal” at a time, then it will turn out neat, but it will take a long time. Therefore, we apply gel polish to four petals and send them to the lamp. If you paint more, the gel will flow down, and the coating will become transparent in the center and with streaks on the sides of the petals.
So, four petals each, paint the entire circle in one layer. Then the second layer is repeated, after which it is covered with top. Here's how to properly apply gel polish to your palette.
Preparation
Before you add nail extensions, you need to do a regular manicure. For this:
- Remove cuticles, remove pterygium, trim nails.
- Using a file with a fine abrasive or buff, remove the top shine of natural nails and remove dust from the nails.
- Coat your fingers with a degreaser.
- Apply primer to the plates and wait for it to dry in the open air. For gel and acrylic coatings, applying a primer is mandatory.
- Apply the base and then dry it in a lamp. Regardless of whether you are inclined towards gel or acrylic extensions, the sticky layer of the base does not need to be removed.
The next stage will be the actual nail extension using tips.
@yulianikolaychik9780
@nail.art.studio_kovrov
Polymerization in a lamp
Before applying gel polish to the palette, you should take care of its placement in the lamp. A drop of gel polish may end up on the base of the manicure lamp and stick to it. To avoid this, you can use a small plastic cutting board for your palette.
If during the polymerization process a drop from the palette sticks to it, at least you won’t have to remove and clean the tray. The stuck drop can be cut off from the plastic with a scraper, and then the end can be cleaned with an old file.
Extension technology step by step
The presented instructions tell you how to do nail extensions using classic (disposable) tips:
- Select templates of the required size and, for convenience, lay them out in front of you in the order of gluing.
- Glue the tips onto your nails using special glue and pressing the shape firmly, holding it from above and below.
- Using a tip cutter, cut off the excess length of the nails and file down the free edges.
- Apply camouflage on top, model the natural tubercle and shape of the nails, dry them under the lamp. To apply gel (or acrylic), use a special brush.
- Remove the sticky layer from the gel.
- On false nails, the camouflage lays flat, but you still need to trim it, removing thickness and length if necessary.
- Apply topcoat and colored varnish with decor as you wish.
Your manicure on tips is ready!
@seeyour.nails
Applying gel polish to the substrate
To properly apply gel polish to the palette, you should determine the degree of its transparency. Opaque coatings are applied in two layers, translucent ones in three. Cover the top with top. If the gel polish is translucent - a haze for a jacket or berry, then make a base: the first layer is painted with a dense nude shade, similar to the color of a natural nail.
You can make several options for this coating for beige, peach, and pink substrates. Each color can be warm or cool, which increases the number of options. With such a palette it will be easy to determine the natural color of the client’s nails and show her how gel polishes will look on her hands.
If the gel polish is neon, a white base is made for it - the same as for nails. Then it will be bright. For gel polishes of the “cat’s eye” series and for mirror rubbing, a black base is made.
Care Tips
To ensure that your manicure pleases you and those around you for as long as possible, follow these tips:
- Regularly apply cream to the skin of your hands, thoroughly rubbing it into the cuticle area.
- Always use gloves when handling household chemicals.
- Avoid steaming your palms too often.
- During the cold season, do not go outside without gloves.
- Do not hit your nails on hard surfaces or try to pick anything out with them.
These are the basic tips for caring for extended manicure, which every self-respecting girl should adhere to.
@seeyour.nails
@nails_sanam
@nails_rokcsi
Instructions on how to properly glue tips on nails
To do extensions at home, you will need the following equipment:
- tips;
- file for grinding;
- orange wood stick;
- degreasing agent;
- glue;
- napkin;
- brush for shaking off small particles;
- type cutter (cutter).
This procedure must be done according to all the rules. If you follow a clear algorithm of actions, then building up will not be difficult.
- The old coating (if any) is removed from the nails, the surface is cleaned, the shape is corrected, and polished with files.
- The cuticles are pushed back with an orange stick.
- The surface is degreased.
- Choose a model to cover the entire nail plate.
- Glue for tips is applied to the inside of the pad.
- Apply the plate to the prepared nail and press for fifteen seconds.
- Protruding residues of the composition are wiped off with napkins.
- Use a tip cutter to adjust the length by cutting.
- Dust from sawing is brushed off with a brush.
This concludes the procedure. The period of wearing such nails is approximately three weeks, and depends on the rate of growth of the nail plates.
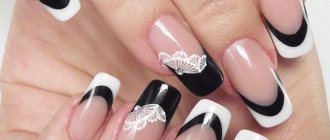
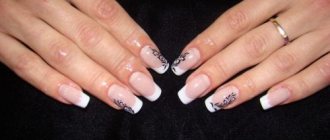
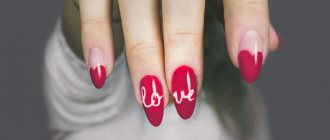
Photo ideas
Manicure with tips is a very reasonable choice for girls who value their time. This design turns out no less beautiful than extensions using forms, and much less time is spent on its creation.
Below you will find the best photo ideas for manicures made using tips, as well as beautiful photo examples of manicures using ready-made tips.
@nails_rokcsi
@nails_rokcsi
@anastasia_bekhter
@chuunaills
@anushv_nails
@nailstudio_laranovsk
@ideas_____manicure