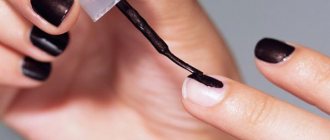
Gel polish on the legs is performed using a primer, liquid base, flower bed and top. But first, the nails are prepared for the procedure - excess length is removed and shaped, the cuticle is pushed back and adhered skin particles are removed from the base of the plates.
Unlike manicure, leveling with a base is not performed; other products are also applied as thinly as possible. But any design can be made, including with rhinestones, sparkles, kamifubuki, drawings, and foil. In the salon, a pedicure costs from 700 rubles. up to 5000 rub.
Features of gel polish on legs
Gel polish on the legs is done and worn a little differently than a manicure:
- nails cannot be long, they are cut and filed, if not to “zero”, then still quite short;
- decor is used more modestly than for hands, since there is a higher chance that it will get in the way and come off faster;
- leveling with a base is not done during pedicure;
- over-wearing the coating is even more dangerous than with a manicure, especially during the season of closed shoes;
- design can be varied;
- Finger separators should be used when applying the coating, otherwise it may smear.
Material advantages
A pedicure with a polymerizing coating has several advantages:
- the design can be made much more interesting than with regular varnish;
- it lasts longer, maintaining pristine freshness;
- it is not hampered by exposure to sea water or chlorine in the pool;
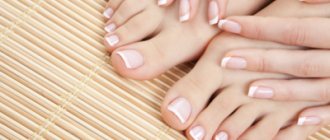
- feet look well-groomed for 2-3 weeks without additional effort.
How to do a pedicure with gel polish
Pedicure with gel polish is performed in a certain sequence:
- Treat feet with antiseptic.
- Nails are prepared for coating.
- Put on finger separators.
- Wipe the nail plates and the skin around them with a degreaser.
- Apply primer and let it air dry for a minute.
- Use a thin layer of liquid base for each nail.
- Dry it in a lamp, placing your foot there so that your toes are exposed to the radiation.
- Remove the sticky layer, if any.
- Apply gel polish of the selected shade, including coating the end parts with it.
- Dry the layer of the flower bed in a lamp, remove the stickiness.
- The finish is applied and polymerized.
Preparation for coating
The coating will lie flat and will look aesthetically pleasing only on prepared nails:
- The cuticle is pushed back with a pusher.
- The pterygium is thoroughly cleaned.
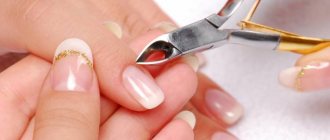
- If the cuticle is wide, it is cut with special scissors or nippers or tweeters.
- The nails need to be shaped, but so that the corners are not too cut and then grow ingrown.
- The ends are processed with a file so that they become smooth, without burrs.
- The plates are wiped with a degreaser to remove dust and excess moisture.
Watch the video on how to properly do a pedicure and treat your feet:
At the preparation stage, attention should also be paid to the feet, since neatly painted nails look discordant with rough, unkempt heels. They can be steamed in water or treated with a keratolytic agent. The softened skin is polished with a hardware attachment to remove excess stratum corneum.
Pedicure secrets
To make your pedicure look perfect, you need to know the following nuances:
- The varnish will fit perfectly only on a completely degreased nail plate. This can be done using special means or ordinary alcohol, acetone;
- Don’t forget to wear special pads that are attached between your fingers; they will prevent the varnish from getting on your skin;
- To make the coating stick better, it would be a good idea to use a base;
- The bottle of varnish must be new (no more than six months). Otherwise, cracks and chips will appear within 1-2 days; no one needs this. Remember, you cannot dilute the coating with acetone or any other product. It is more profitable to buy a new one;
- Apply varnish from the middle of the nail plate to the bottom and top, so you make several strokes;
- If you use a bright palette, make sure that the varnish does not end up on the skin, it looks very ugly. Use special acetone pencils for removal;
- The coating must be applied in 2 layers, you will get a rich and deep color.
Use these tips and the pedicure procedure will turn into a pleasant experience.
How long does a pedicure with gel polish last, and how often is correction needed?
A pedicure coated with gel polish should be worn for no more than 2-3 weeks, although toenails grow more slowly than fingernails.
But a longer absence of correction in this case is more dangerous. The slightly grown edge rests on the shoe. And this leads to increased stress on the nails. They may begin to peel, and your fingers may hurt. There is a danger of nails detaching from the bed, deformation, and onycholysis. Therefore, correction should be carried out every 2-3 weeks. It depends on the growth rate of the plates, everything is individual.
Fashion trends
It would seem that nothing could be simpler than choosing a palette of toenail polishes. It turns out that there are pitfalls here too. Make the wrong choice, and the entire image, so carefully created, can be ruined. How to prevent such mistakes? Choose those shades that are always at the peak of popularity. Among them are:
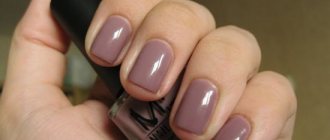
- Pastel shades
. These include beige, sand, flesh shades. Say that they are boring and not bright, that’s how they are. But there is a huge plus, a similar color of varnish can hide absolutely all the shortcomings: an uneven nail plate, not an ideal shape. In this case, the emphasis is not on the legs; - Options for summer
. In fact, there are many of them. Pedicurists suggest not to be shy and use bright colors. Believe me, on the beach you should stand out and arouse the envy of others. Choose a popular palette: mint, yellow, metallic, fuchsia, dark blue. These shades harmonize perfectly with many colors. In principle, with regards to the beach, this is not necessary. Completely different aesthetic laws apply here; - The next option comes to us from the corners of Paris. This is the famous French manicure. Its simplicity and unusualness attracts. Not so long ago, a combination of white and beige was fashionable. But over time, everything changed. Nowadays, colored French pedicure is in trend. Choose the right palette, the shades should be in harmony with each other. You should not give preference to black tones, they make your nails rough;
- neon
back in fashion? The answer is probably more yes than no. But you need to be extremely careful with this varnish. He attracts, but at the same time repels. We settled on this palette, choose accessories to match (bag, jewelry, scarf). Don’t even think about purchasing shoes of the same color; the ensemble looks very awkward, even childish; - Unusual prints
. If using varnish seems boring and uninteresting to you, try making an unusual design. If you don’t have artistic skills, stamping or special translations will help; - And of course, for those girls who love chic and sparkle, there is still somewhere to “roam around”. Rhinestones, stones, feathers are back in fashion.
Decorate your nails and you will look like a real princess. Pedicures must be done at least once a month. Recently it has become practical and convenient to coat the plate with shellac or gel.
How safe is it for nails?
A nail pedicure is as safe as a manicure if certain conditions are met:
- coat only healthy plates;
- when preparing them, work carefully, do not press too hard with a cutter or hand tools, and do not go deep under the cuticle;
- use high-quality products - varnishes, bases, tops, etc.;
- sterilize instruments or buy disposable ones;
- Do not wear tight shoes, and if you have problem feet and nails, leave the design with gel polish until summer.
There is another important nuance - when performing a pedicure, they do not use a base for leveling. Otherwise, there will be too much material on the nail plates, which will lead to damage. Masters often use single-phase gel polishes for pedicures so that the layer on the nails is thinner. You should also not overload them with an abundance of other components - powder, gels, tops.
It is better to attach voluminous decor (rhinestones, modeling) closer to the base rather than to the ends. Otherwise it will quickly fall off. In the meantime, it will be worn and may cause discomfort.
Interesting designs with gel polish on legs
Fashionable design options for gel polish on legs are:
- French. The classic one with a white free edge is popular. But the main color is opaque pink. Basic blue gel polish and white for a “smile” are also in fashion when doing French.
- Bright monochromatic. They use a matte or glossy finish, both of which look very beautiful. The rich color is complemented with rhinestones. But they are not glued to the most noticeable thumbnail, but to the one nearby, and along the cuticle.
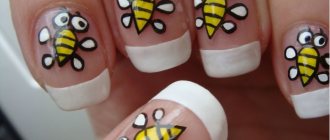
- With drawings. Hand painting is done on the largest nail. If it is a slider, it is glued there. The latest trend for summer is whole fruit or slices. Funny silhouettes are also in fashion - black foot prints or cat paw prints. You can make different designs on the right and left legs.
- Gradient. The classic vertical one is done on the thumb. And the rest of the nails are painted in the same colors, but entirely. For example, if lilac and yellow are used for the thumb, then on the next finger the plate is covered only with the first, then with the second, etc.
- With sparkles. They decorate the entire nail of the second finger. For the rest, use a bright color and a matte top. You can highlight the holes with sparkles.
- A combination of three shades of gel polish, one of them is light. They cover the nail on the thumb. And the second and third colors are used to make the design - leaves, twigs, flowers, etc.
- Stripes. They are made of different lengths, vertical or horizontal and drawn on the thumb in three or four similar shades (pink, lemon, beige or red, fuchsia, burgundy). For the remaining nails, use one of the same colors, covering the plates completely.
- In white. They make a monochromatic manicure or an ornament from small details. In the second case, you can draw it not only on the thumb. Or they make drawings of insects (ladybugs, flies, multi-colored butterflies) on a snow-white background.
- With kamifubuki. For the thumb, you can take different sizes and shapes. For the rest - small stars and circles. The background can be made pastel or bright - as desired.
- With negative space. It can be played up in different ways - with silver sparkles and a cool shade of the base color, with foil stripes, with bright colors of gel polish.
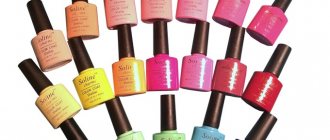
Which gel polish lasts best on toenails?
For toenails, nail technicians prefer CND gel polish. It applies thinly but does not smear. There are different colors, quite dense, the pigment in which is distributed evenly. Vogue, PNB, UNO, TNL products are also suitable for pedicure.
The pigmentation of gel polishes is a particularly important property when performing a pedicure. If the color is dense, you can apply it in one layer, which is a big plus for toenails. It’s good when the product is of medium thickness.
A texture that is too steep can cause the gel polish to apply thickly or unevenly. And it is physically difficult to apply it to small toenails. And too liquid gel polish spreads, and in one layer it can become bald.
Application instructions
The color coating must be distributed thinly over the nails, preferably in two layers. Don't forget to seal the end. Depending on the lamp, each layer is dried for one or two minutes. With the help of a second layer, the color density usually increases, in addition, the strength of the coating is also supplemented.
To keep the coating on your feet as long as possible without losing its gloss, you need to use a top coat. It is distributed in a thicker layer. In this case, it is imperative to cover the entire nail surface that was covered with previous layers. Don't forget to seal the end. Drying of the top layer is carried out as standard.
Removal of the sticky layer is carried out only from the last - top coat, after the gel component has been polymerized. It's quite simple. Use a lint-free cloth and degreasing liquid for removal.
Only after this step can we consider that the pedicure is complete and the nails can now be touched. Before this, any touching is strictly prohibited, since human skin contains fat, which is one of the main enemies of gel polish.
When selecting a base, top and color coating, as well as a special degreasing liquid, it is best to give preference to products from the same company, as they are designed to be ideally combined with each other. However, a number of gel polish manufacturers offer to use their products with products from third-party manufacturers.
Most often, a pedicure for which gel polish was used takes one and a half to two hours. The total time will, of course, depend on the condition of your nails. At the same time, such a coating will provide a number of advantages.
Firstly, shellac is highly resistant to mechanical damage, which means it will remain on your nails until you decide to remove it. It is worth considering that the growth rate of nails on the feet is much lower, so shellac lasts for up to a month, and for some, longer.
Secondly, saturation allows you to make shellac of even the most unusual shades. Moreover, after a while, you will not be the owner of a pedicure that has lost its shine or original appearance.
Thirdly, gel polish is considered a more harmless product than a regular decorative coating. The fact is that manufacturers do not include a number of substances in the composition, for example, formaldehyde, which are very dangerous. Due to this, we can talk about the safety of this pedicure for girls.
What to consider when deciding to do it at home
It is better to do a pedicure at home without a device if you do not have clear knowledge and skills in working with it. In addition, using the device on yourself is physically difficult and inconvenient, so there is a high risk of injury. The cuticle should not be removed either. On the toes it is thin, barely visible, there is a danger of cutting off excess skin and getting hurt. It is enough to move it aside and remove the pterygium with an orange stick.
Gel polish will lie smoothly and beautifully if you remove streaks before polymerization. For this, toothpicks, orange sticks, degreaser or cleanser are useful. In addition to them, you should prepare the necessary tools and accessories in advance.
The coating is also removed without a device by soaking. Use gel polish remover, foil or silicone caps.
What material is needed
To perform a pedicure yourself, you should prepare the following tools and accessories:
- nail clippers or scissors, because on the legs they are denser and thicker than on the hands;
- metal pusher or tool with a silicone tip;
- several orange sticks;
- cuticle scissors;
- a nail file, maybe an inexpensive and simple metal one;
- lint-free wipes;
- degreaser;
- primer;
- liquid consistency base;
- gel polish;
- finishing agent;
- ultraviolet or LED lamp for polymerization of the coating.
This is a mandatory set of items, without which a quality pedicure is impossible. Lovers of intricate designs will also need decor.
Procedure
Pedicures at home are done almost the same way as in a salon, but they do without a device, and you don’t have to cut the cuticle. It’s not worth working with cutters without having learned how to do this with your toenails. Without knowledge and experience, it’s easy to get hurt, and instead of a pedicure, you end up with lameness until the wound heals. And physically performing a hardware pedicure on yourself is very inconvenient.
The same can be said about working with cuticles. It is enough to push it away with a pusher and clean the pterygium to make the coating smooth and aesthetic. In general, the procedure consists of the following steps:
- Nail preparation, which includes cutting off excess length, smoothing the edges with a file, pushing back the cuticles with a pusher and dry cleaning the pterygium with an orange stick.
- Treating the plates and skin with a lint-free cloth soaked in a degreaser to remove dust and moisture.
- Using a primer to improve the adhesion of the material to surfaces.
- Application of the base product and its polymerization in the lamp.
- Coating with gel polish, performing a complex design (this stage may consist of several intermediate steps, interspersed with drying in a lamp).
- Polymerize the flower bed and remove the sticky layer after a couple of minutes.
- Using the top, drying it in a lamp.
For the convenience of applying the base, flower bed and top, finger separators are put on, and in the absence of a device, cotton pads rolled into a tube are used. You can steam your heels in hot water or soften rough skin with a keratolytic. Then it is cleaned off with a foot grater. When the pedicure is completely ready, apply oil to the skin around the nails and cream to the heels.
How to remove
It is better to remove the coating at home by soaking:
- File off the top with a hard file.
- Apply gel polish remover to pieces of cotton pad.
- Attach them to each nail and put foil or silicone caps on top.
- Leave for 15-20 minutes.
- Remove the foil and cotton wool, and use an orange stick to clean off the sodden coating.
- Wipe your nails with gel polish remover again.
- Make a foot bath to wash away any remaining solvent.
Preparing nails for coloring: where to start?
Before you learn how to paint your nails beautifully, you need to understand how to prepare them for painting. Preparing the nail plates is a fairly important procedure that contributes not only to the perfect application of varnish, but also to the overall impression of the manicure. The preparation process includes:
- processing of side rollers;
- cuticle trimming;
- alignment of nails to the same length;
- removing burrs around the plates;
- nail polishing;
- giving the nails the desired shape.
Processing side rollers
Cuticle trimming
Nail polishing
Nail shape
To paint nails at home, you may need a toothpick, a cotton swab, cotton pads, and nail polish remover (alcohol, acetone) as improvised preparations. They will come in handy if the manicure is done poorly, with marks. Even experienced and skilled nail technicians use this “first aid” kit, because no one is immune from mistakes and blunders. Also, if you get quick-drying polish on your skin, you need to remove it as soon as possible - otherwise, wiping it off later will be a big task.
Price for services in the salon
The cost of a pedicure in a salon ranges from 800-1000 rubles. up to 5000 rub. This depends on many factors:
- establishment level;
- the chosen design, the more complex it is, the higher the price;
- Is it necessary to remove the old coating from another master;
- Is there a need to correct the shape of the nails by extending the corners?
In any case, this is usually a more expensive procedure than a manicure, unless the latter is accompanied by complex actions (increasing length, strengthening with gel, etc.).
A pedicure adds completeness and well-groomedness to your look. And you don’t have to do it to match your manicure. On the contrary, on the legs the gel polish can be brighter and the design more explosive.
Using a shellac base
The most popular way to treat the nail plate when performing a combined manicure is to level it with a gel polish base. Experienced professionals have proven their success with such products as Kodi, NeoNail, Komilfo, Adore Professional, etc. These rubber-based products have a thick structure and effectively form a smooth surface, removing all unevenness.
Leveling the nail plate with a gel polish base is carried out in several stages:
Stage 1: Preparation
The nails are given the correct neat shape, then they are degreased with any suitable means.
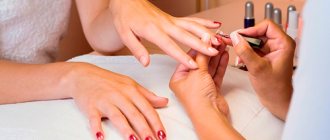
Stage 2: Applying base
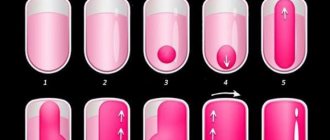
Having picked up a drop of the base composition with a brush, you need to apply it as close to the cuticle as possible and distribute it evenly - first in the center, and then on the right and left as shown in the photo.
Stage 3: Sealing
Having turned the nail, seal the end with a brush, and then allow the base to dry thoroughly.
When shaping the architecture of the nail plate, you don’t need to worry about the product laying down in a thin layer – the brush included with the base is very soft, so uniform application is guaranteed.
After application and drying, gel polish is applied.